

The following provides detailed steps for configuring UEFI secure boot on Colorful motherboards, including importing the Youngzsoft certificate v2 and setting secure boot options.
Bios configuration
- Before starting to configure the BIOS, prepare the USB for Secure Boot (copy Youngzsoftv2.cer to a FAT32 USB).
- Enter Bios by pressing Del. On EZ Mode set LAN to Enable and PXE to UEFI. (Figure 1)
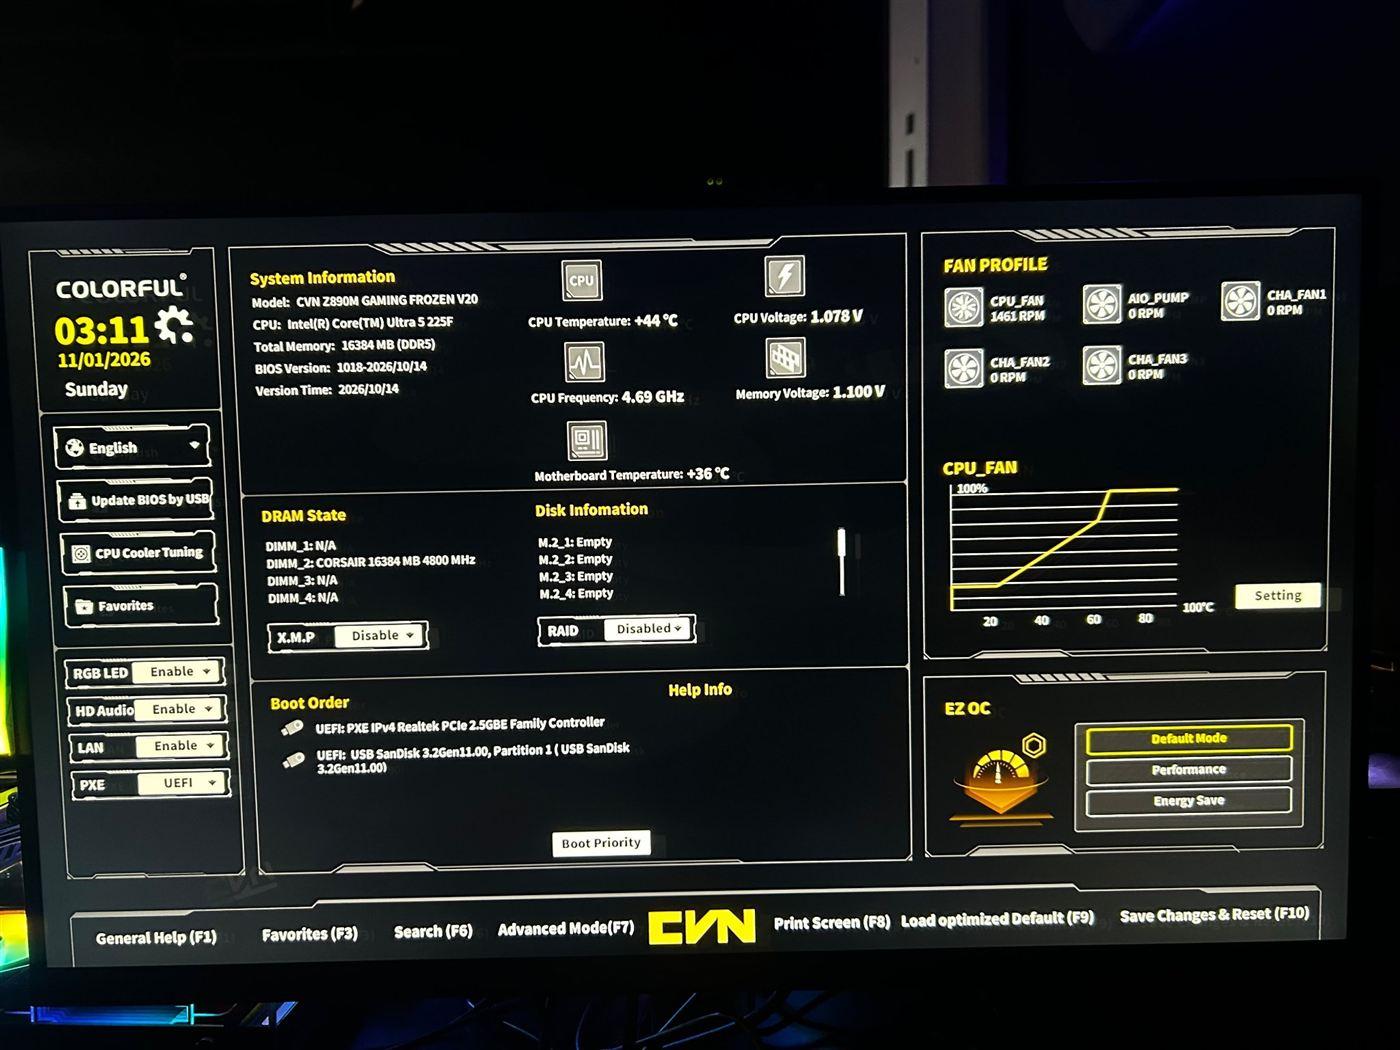
Figure 1
- Press F7 to switch to advanced mode. If the Advanced tab has the CSM Configuration option, make sure the Launch CSM option is disabled.
- Next press F10 to save the settings, the PC will automatically reboot.
Enable secure boot
- Navigate to “Boot”, set Boot Option #1 to “UEFI: PXE IPv4” and click on the Secure Boot. (Figure 2)
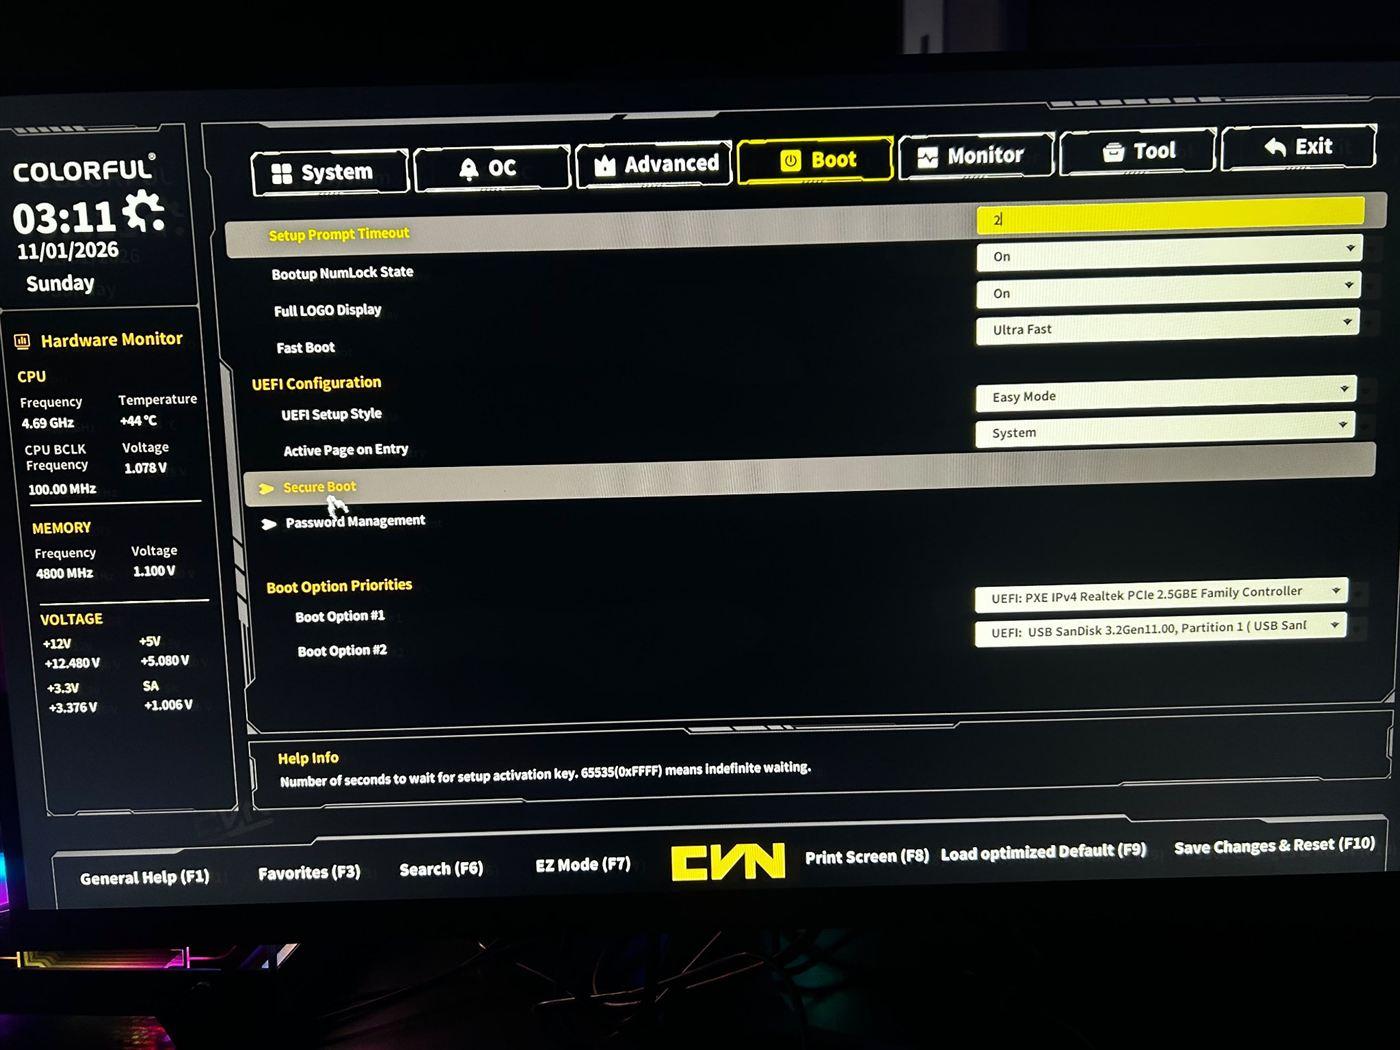
Figure 2
- Set Attempt Secure Boot to “Enabled”. (Figure 3)
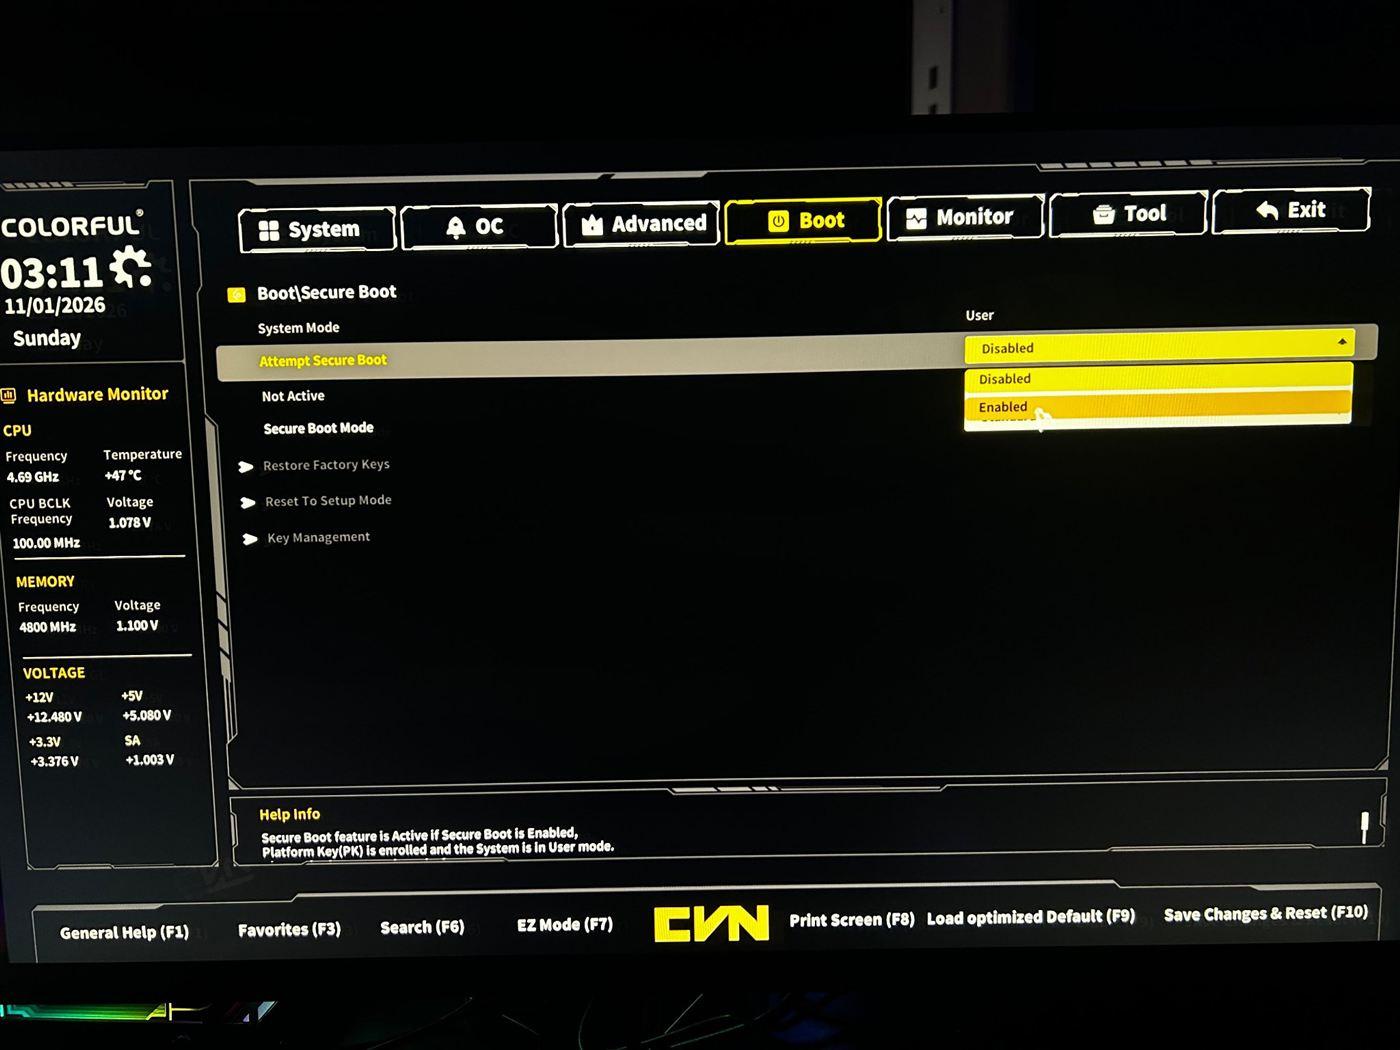
Figure 3
- Set Secure Boot Mode to “Custom” and then click on the Key Management. (Figure 4)
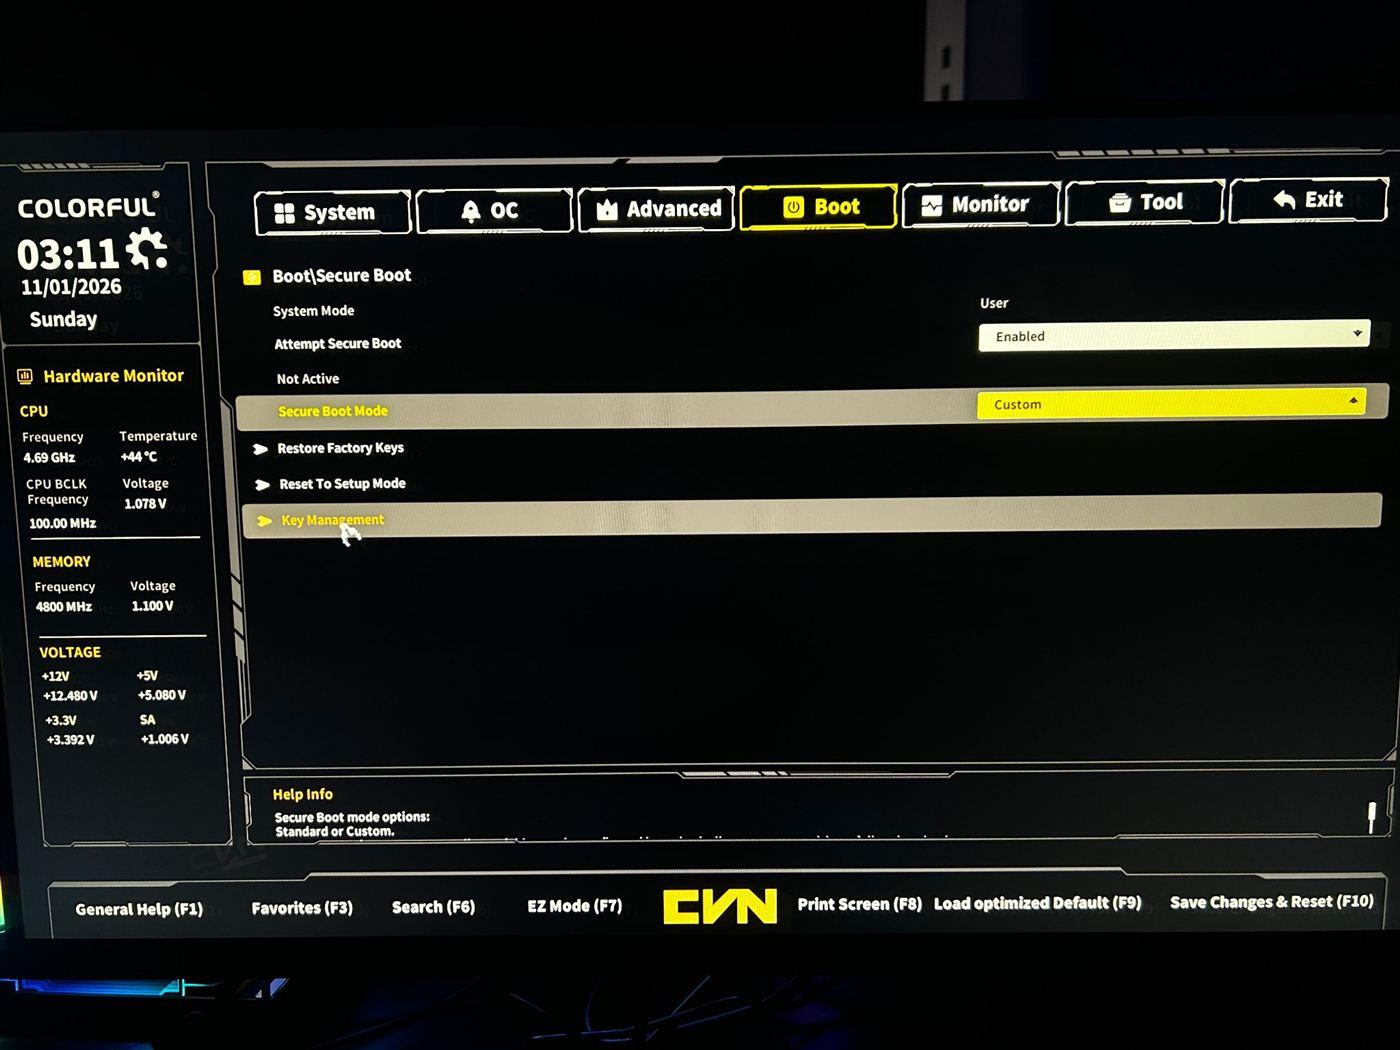
Figure 4
- Click on “Authorized Signatures (db)” and select Append. (Figure 5)
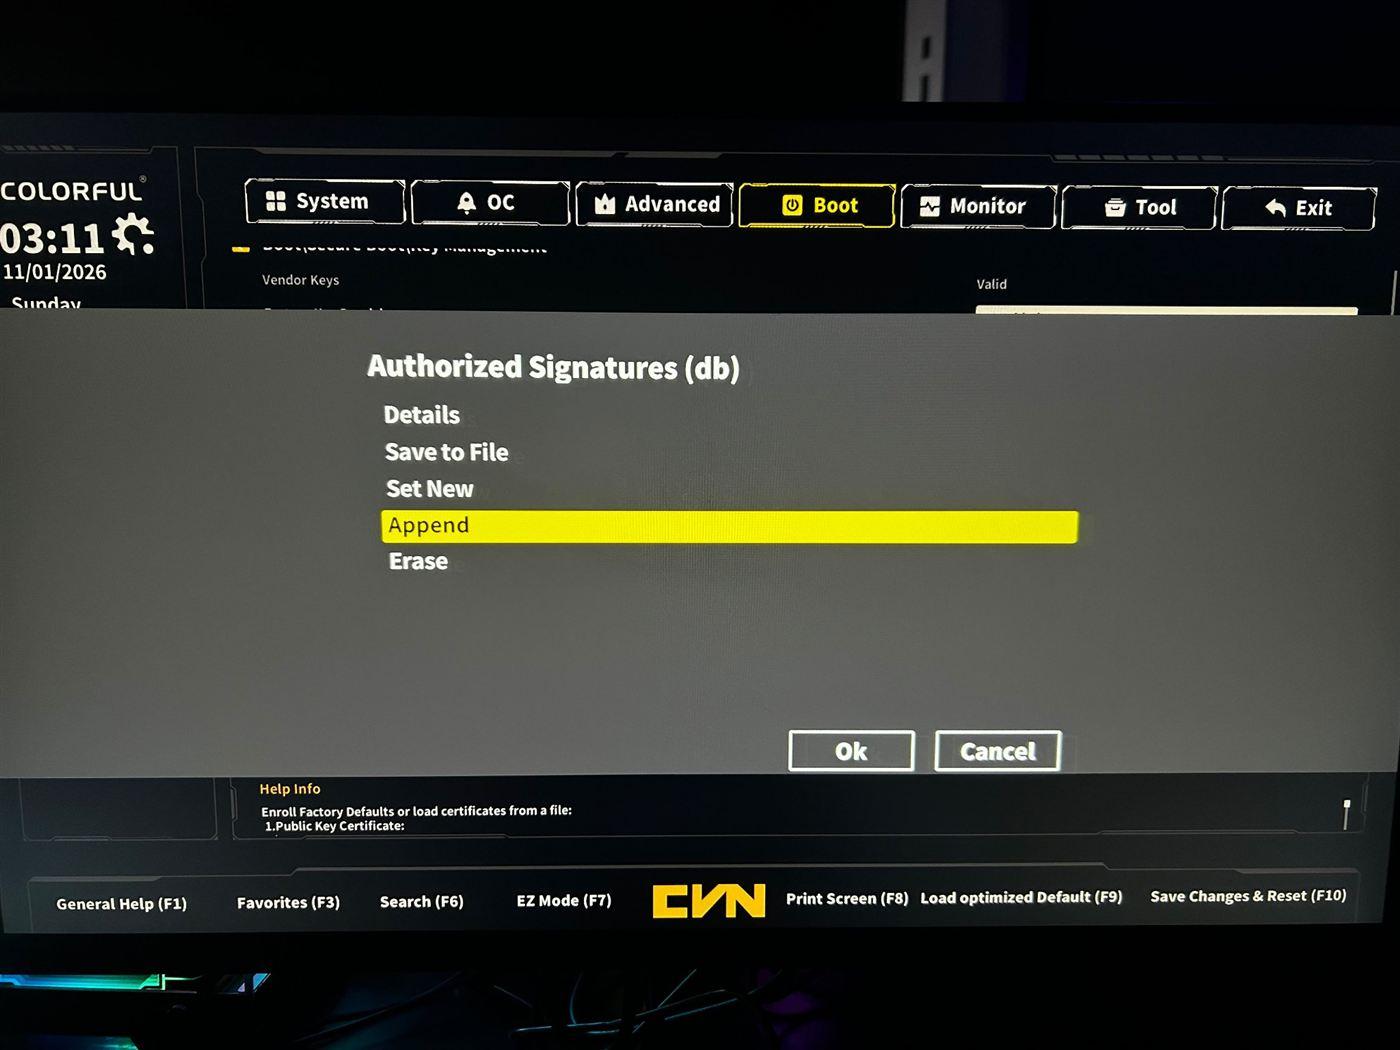
Figure 5
- The Append will ask to load factory default db, select No. (Figure 6)
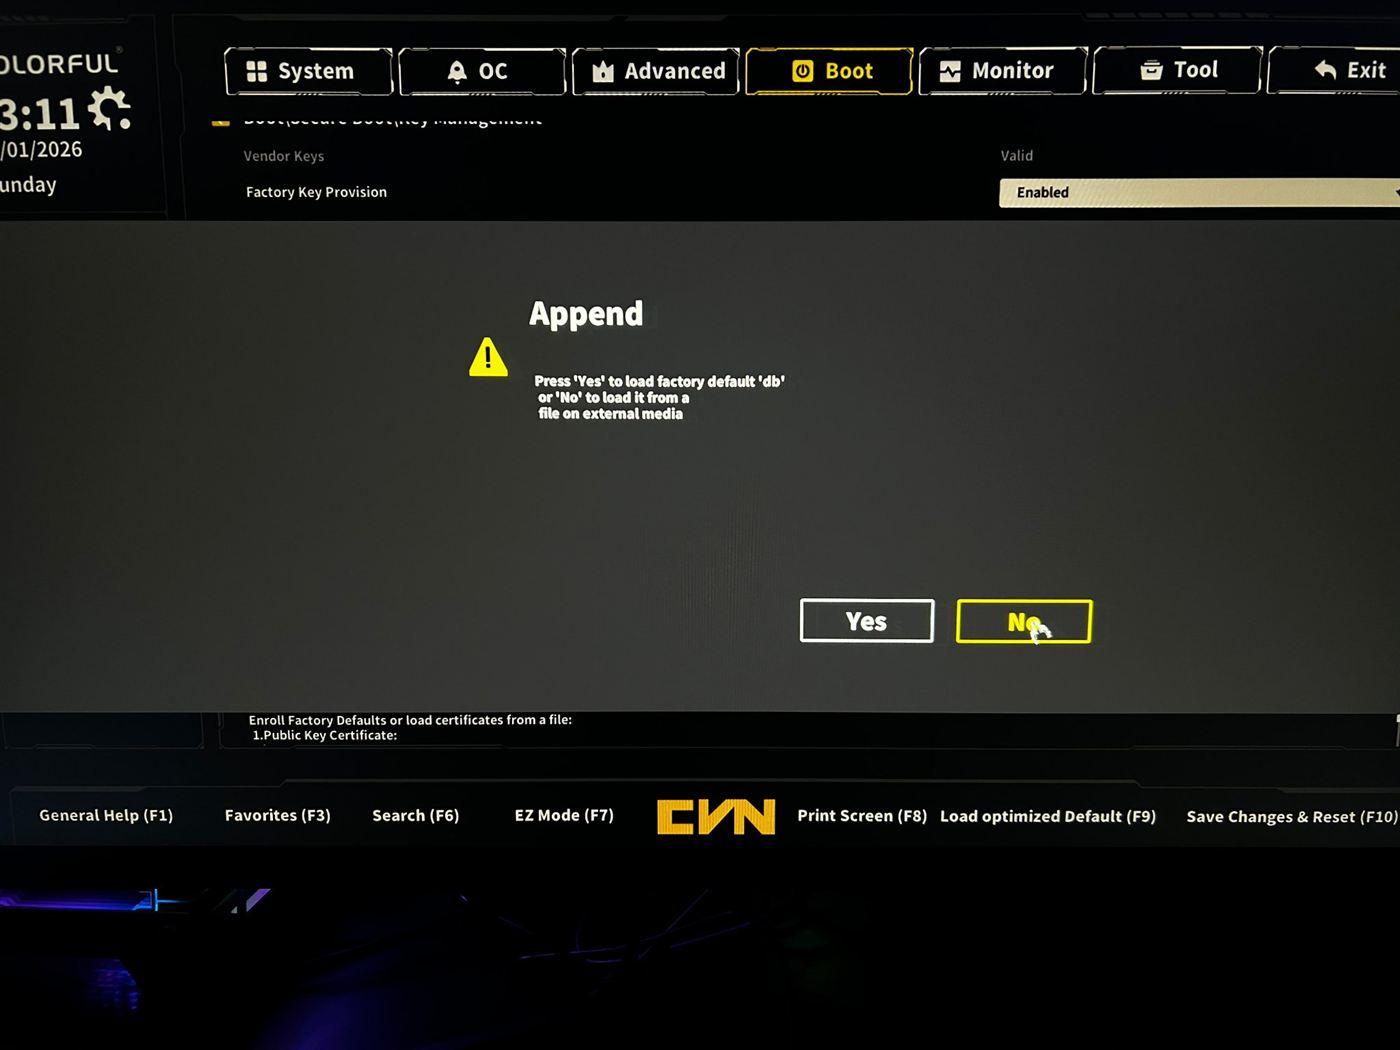
Figure 6
- Next select the USB you prepared earlier as requested on the start of the manual. (Figure 7)
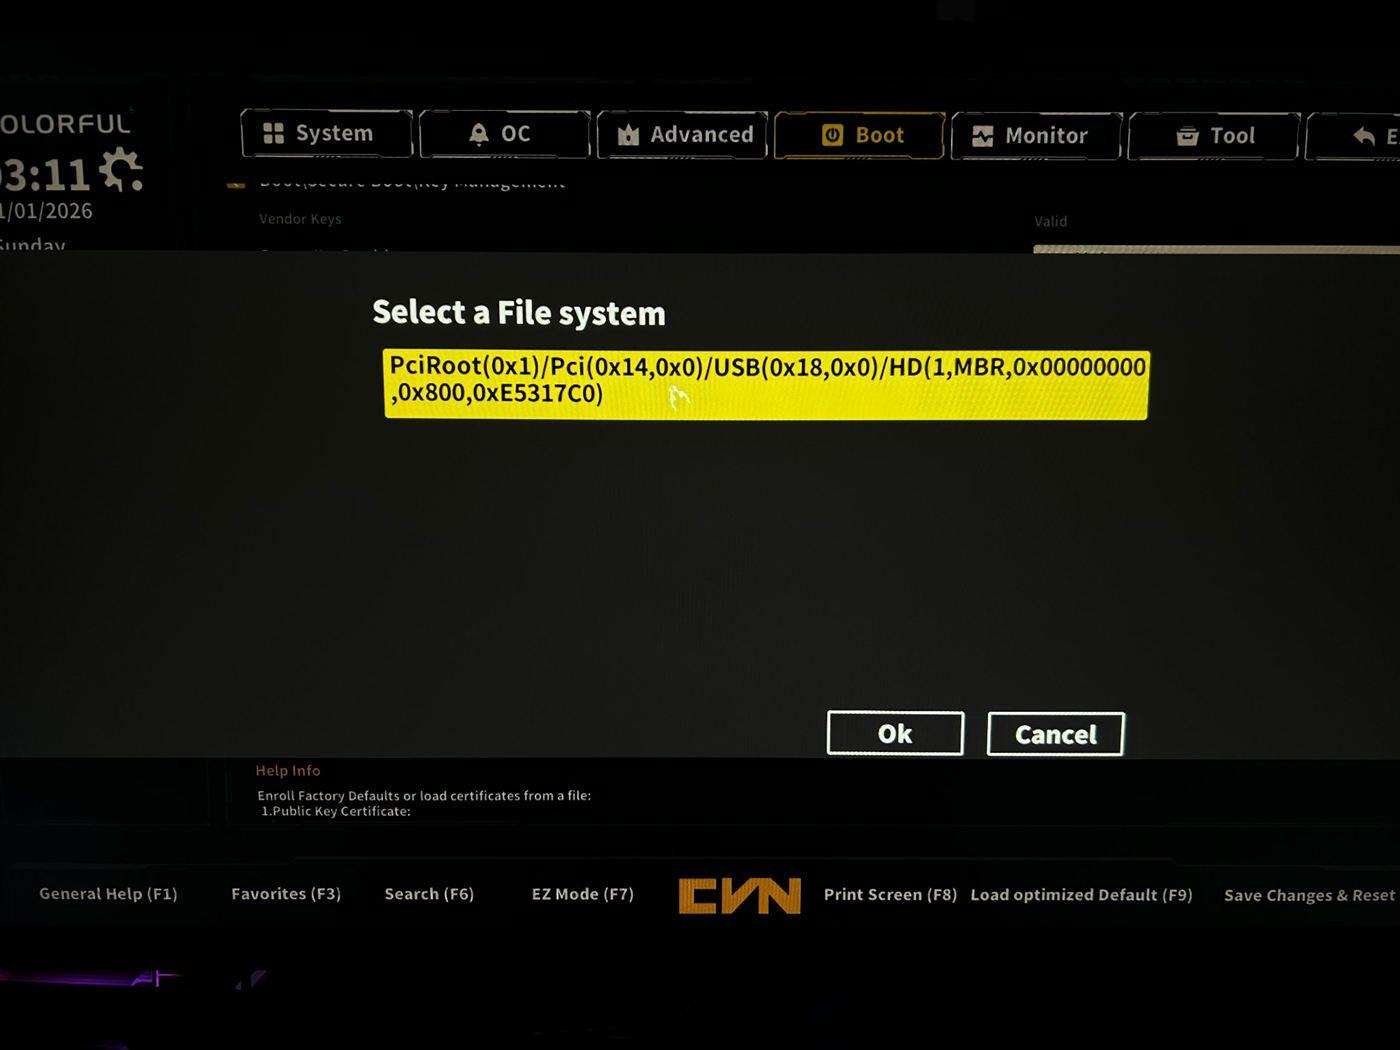
Figure 7
- Next select the Youngzsoft certificate v2 file (Youngzsoftv2.cer). (Figure 8)
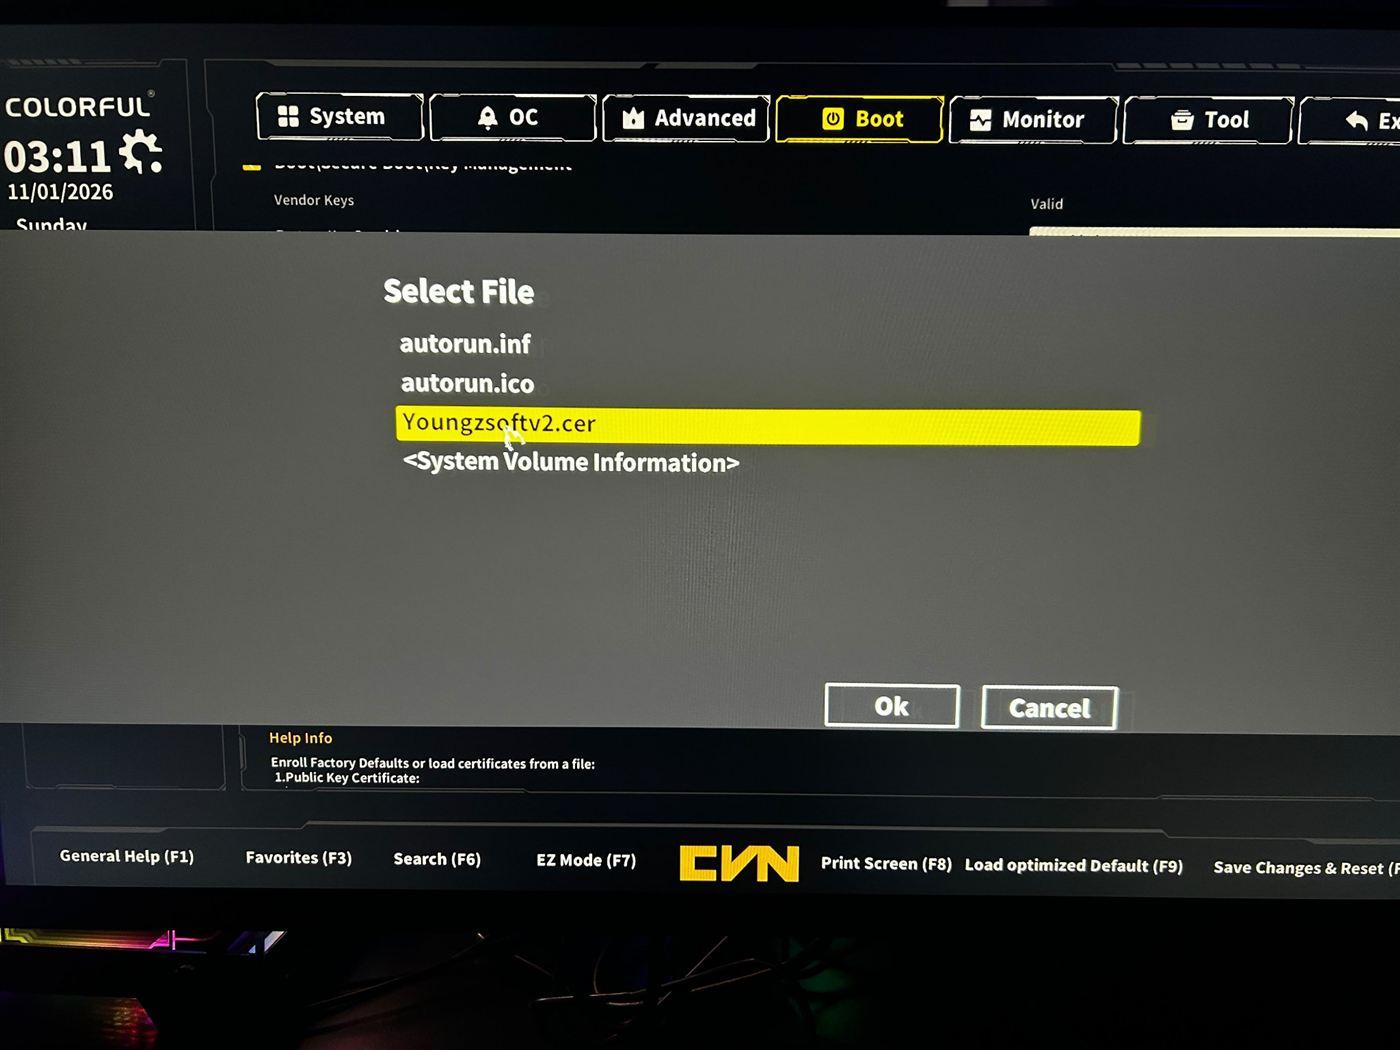
Figure 8
- On input file format select “Public Key Certificate”. (Figure 9)
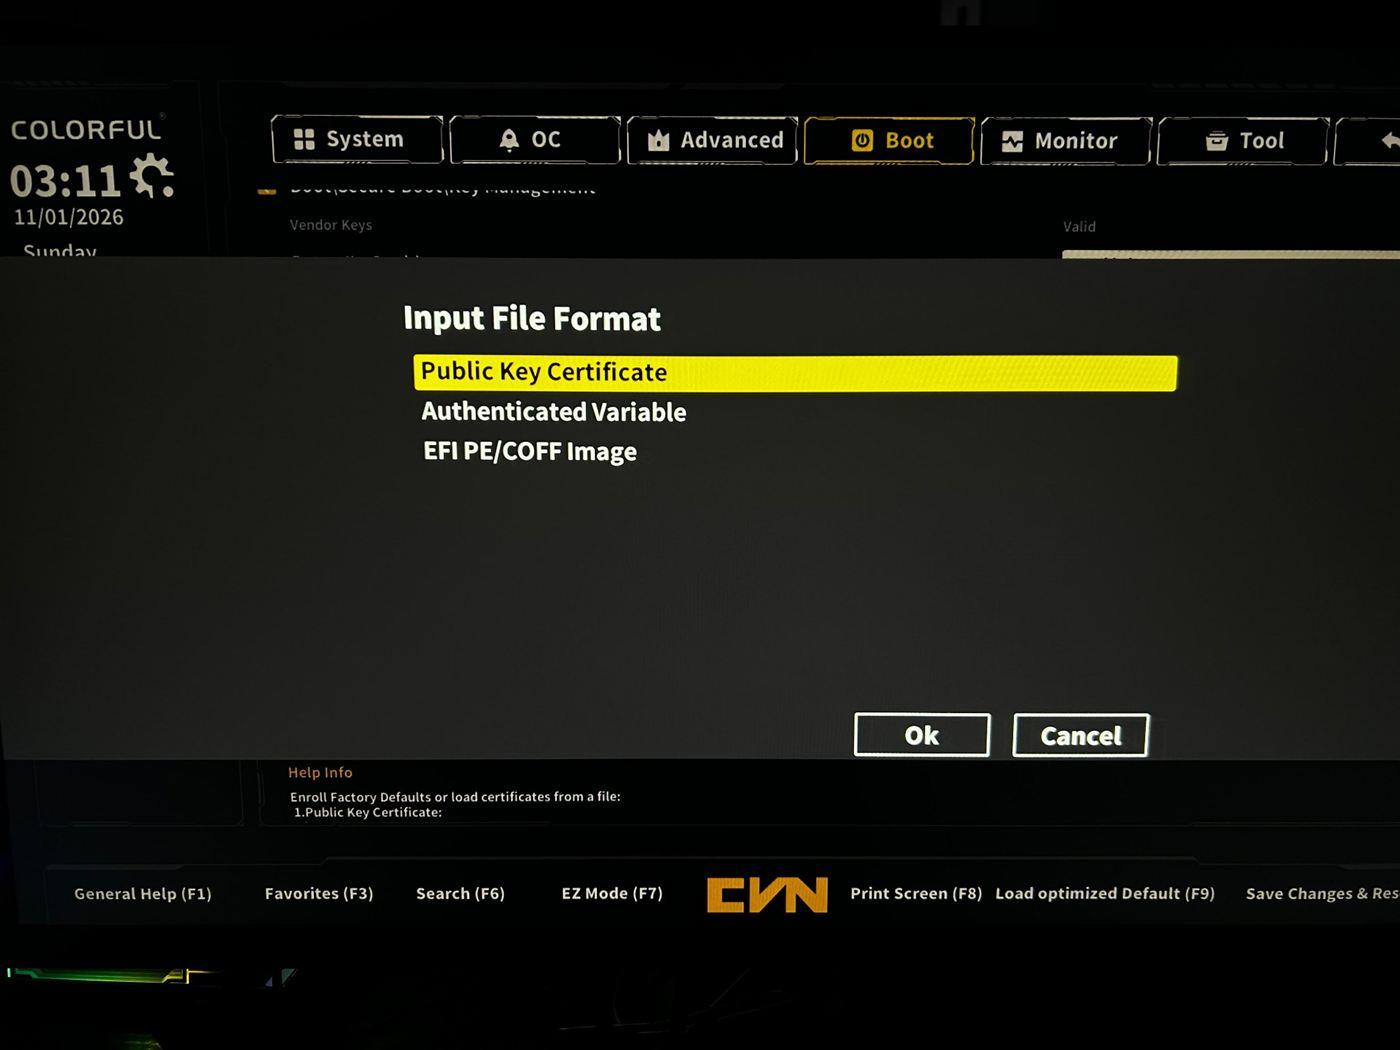
Figure 9
- Leave the Certificate Owner GUID as default and click Ok. (Figure 10)
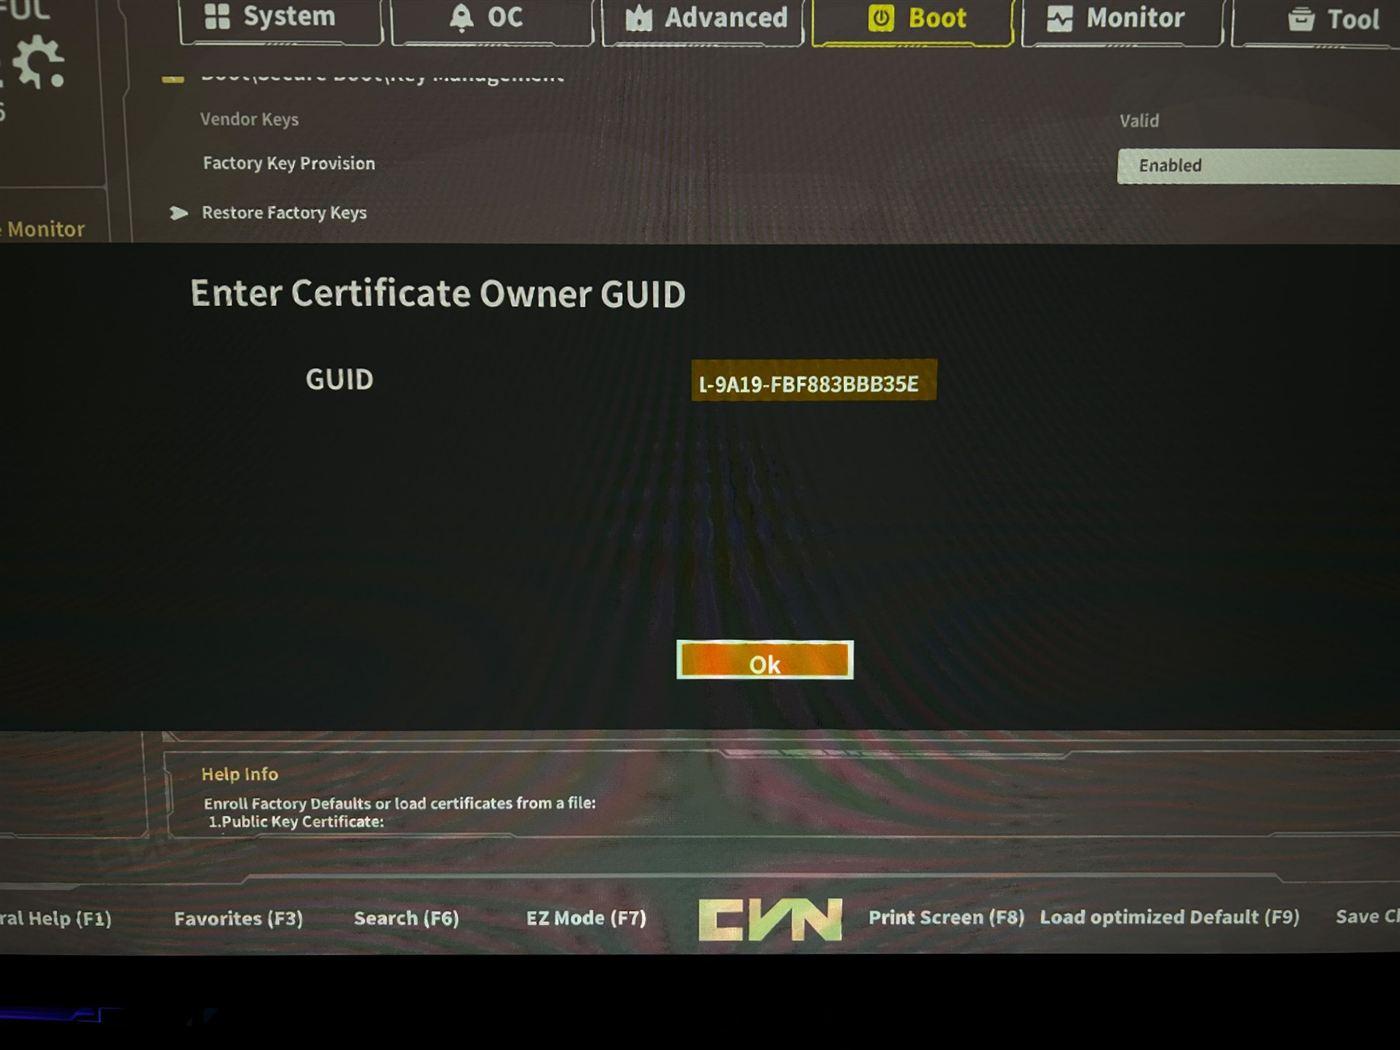
Figure 10
- The Append will show Success, click Ok. (Figure 11)

Figure 11
- Press F10 to save and exit changes. After reboot, Secure Boot will show as Active.
Admin panel configuration
- Once the image is ready on the iCafeCloud admin panel in the Boot section, edit the client PC and select ipxe2026.pxe(UEFI) on the PXE field. (Figure 12)
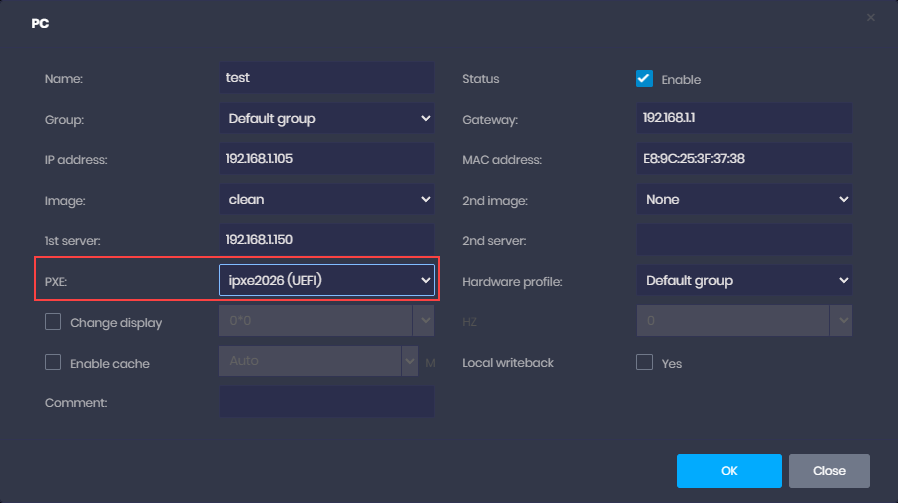
Figure 12