2026-03-20
gpu, pnp, drivers, reset
The following explains how to uninstall the NVIDIA GPU driver when using GPU PNP.
- go to the Image settings, click Edit, and unselect GPU PNP (Figure 1).
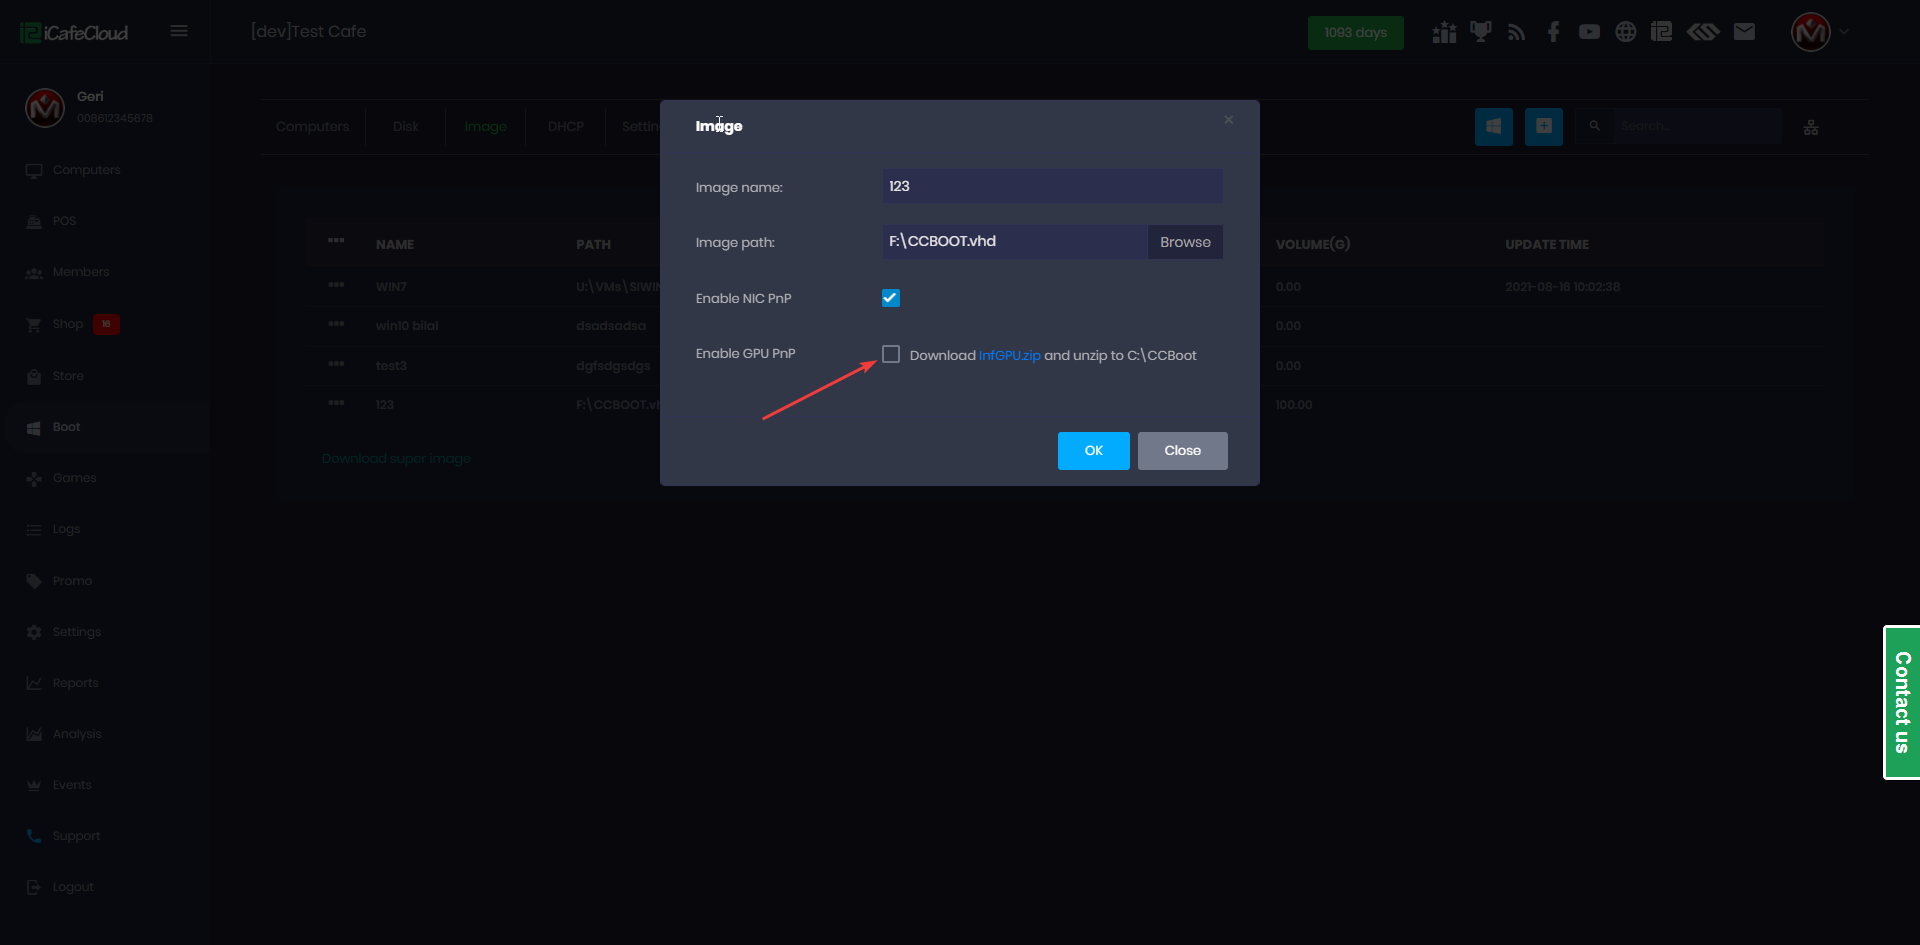
Figure 1
- Boot the client PC in Super Client Mode.
- Open Registry Editor (regedit) and navigate to:
Computer\HKEY_LOCAL_MACHINE\A_SYSTEM\CCBootPnP\ - Locate the GPU driver entry, typically named like:
VEN_10DE&DEV_XXXX, or VEN_10DE&DEV_1C82&REV_A1 (Figure 2)
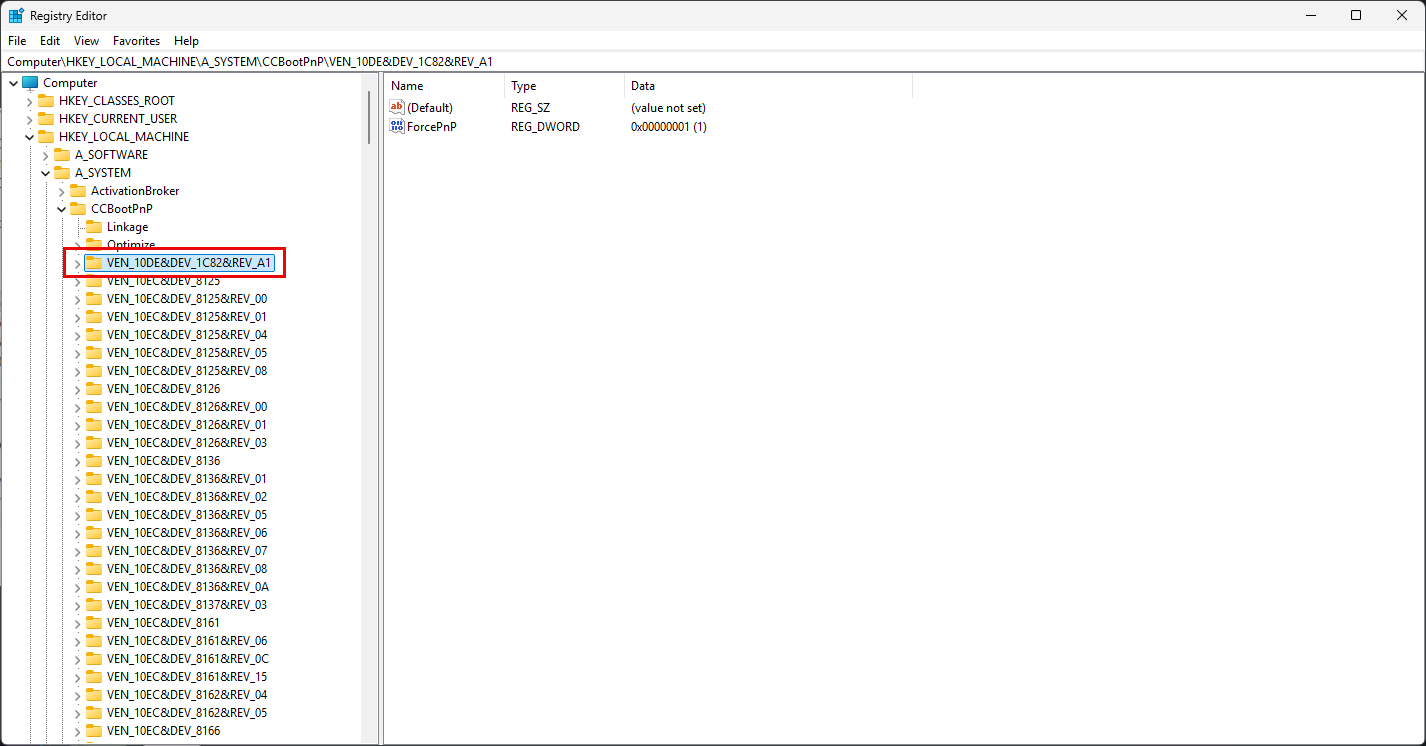
Figure 2
- Delete the corresponding entry, then close Registry Editor.
- Use DDU (Display Driver Uninstaller) to completely remove the NVIDIA driver from the system.
- If multiple Windows user accounts exist, ensure you are logged in as Administrator when running DDU.
- Once the uninstall process is complete, reboot the PC.
- After reboot, the system should show that no GPU driver is installed.
- Shut down the PC.
- Disable Super Client Mode and save the changes.
- Next you can install GPU drivers.