2025-11-09
diskless, boot, gigabyte, uefi, secure boot
The following provides detailed steps for configuring Bios and UEFI secure boot on Gigabyte motherboards enabling VBS, VT-d (Vistualization), including importing the Youngzsoft certificate v2 and setting secure boot options.
- Bios Configuration
- Enable Virtualization
- Secure boot & certificate
- Admin panel configuration
- Possible problems
Bios Configuration G
- Enter the BIOS by pressing one of the following keys during startup typically Del, F2, F1, F10, F12, or Esc.
- Once inside, switch to Advanced Mode to access detailed configuration options. (Figure 1)
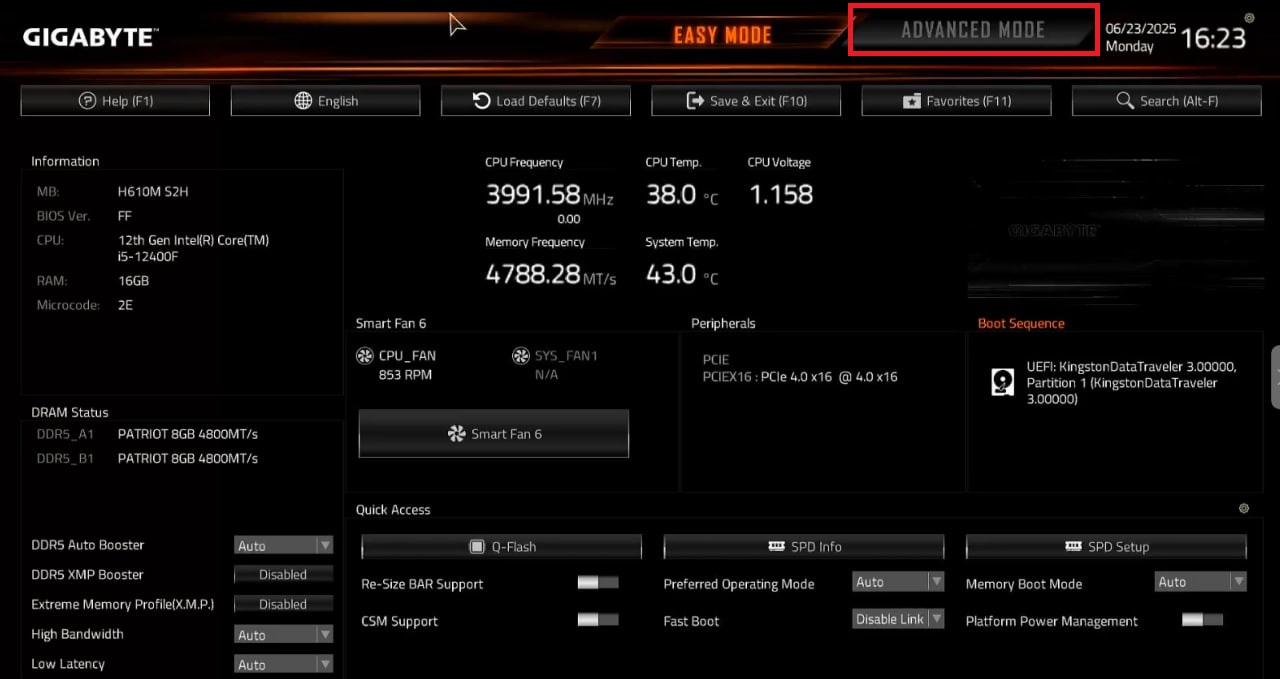
Figure 1
- Then go to Settings and select IO Ports(Figure 2)
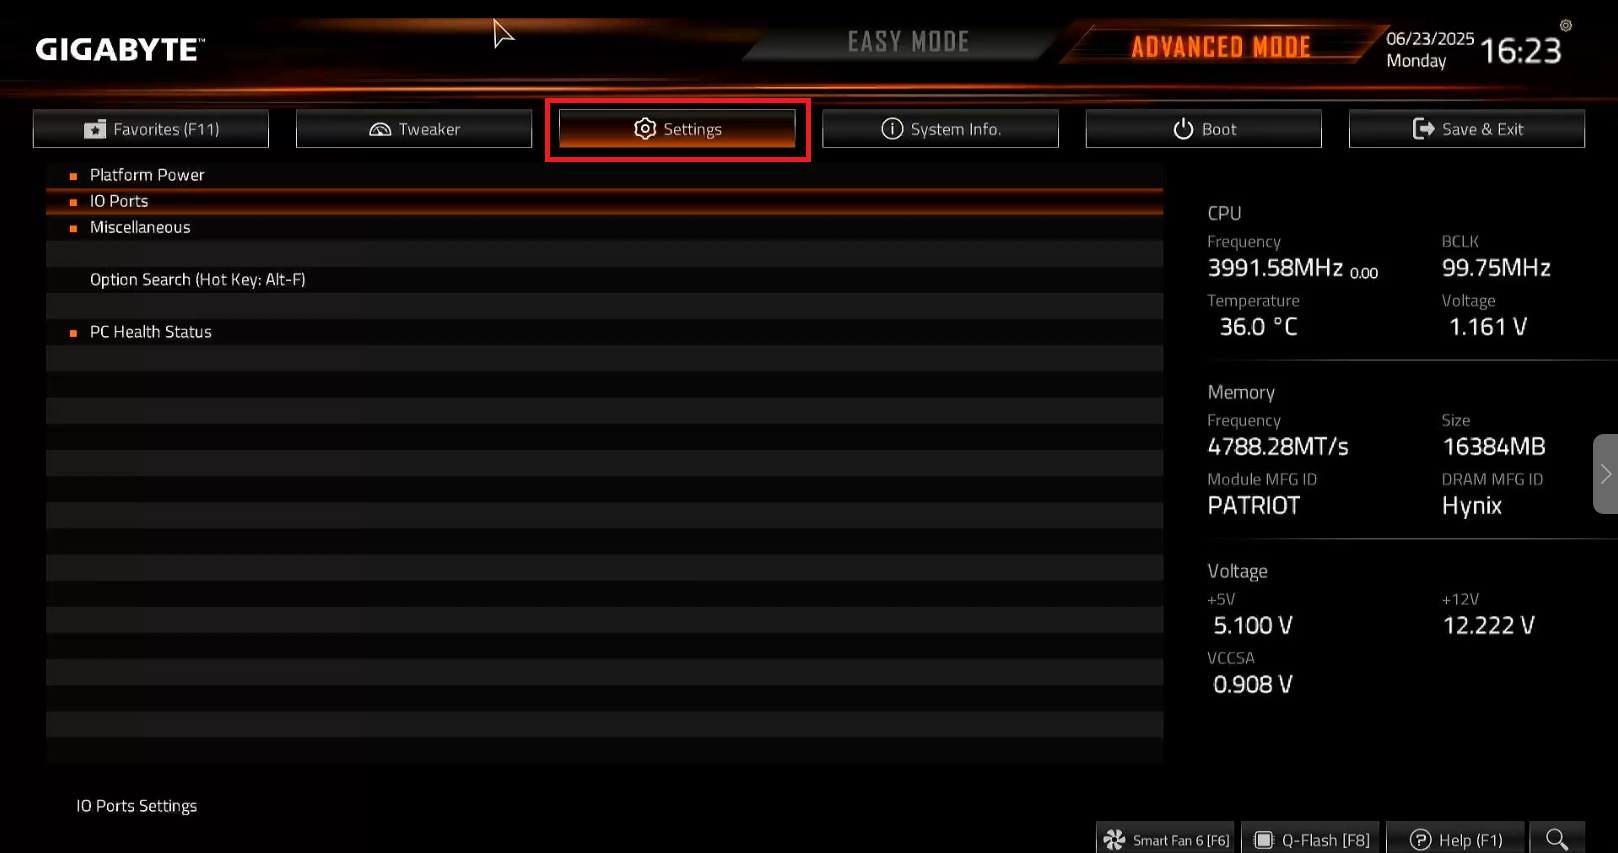
Figure 2
- Click on Network Stack Configuration (Figure 3)
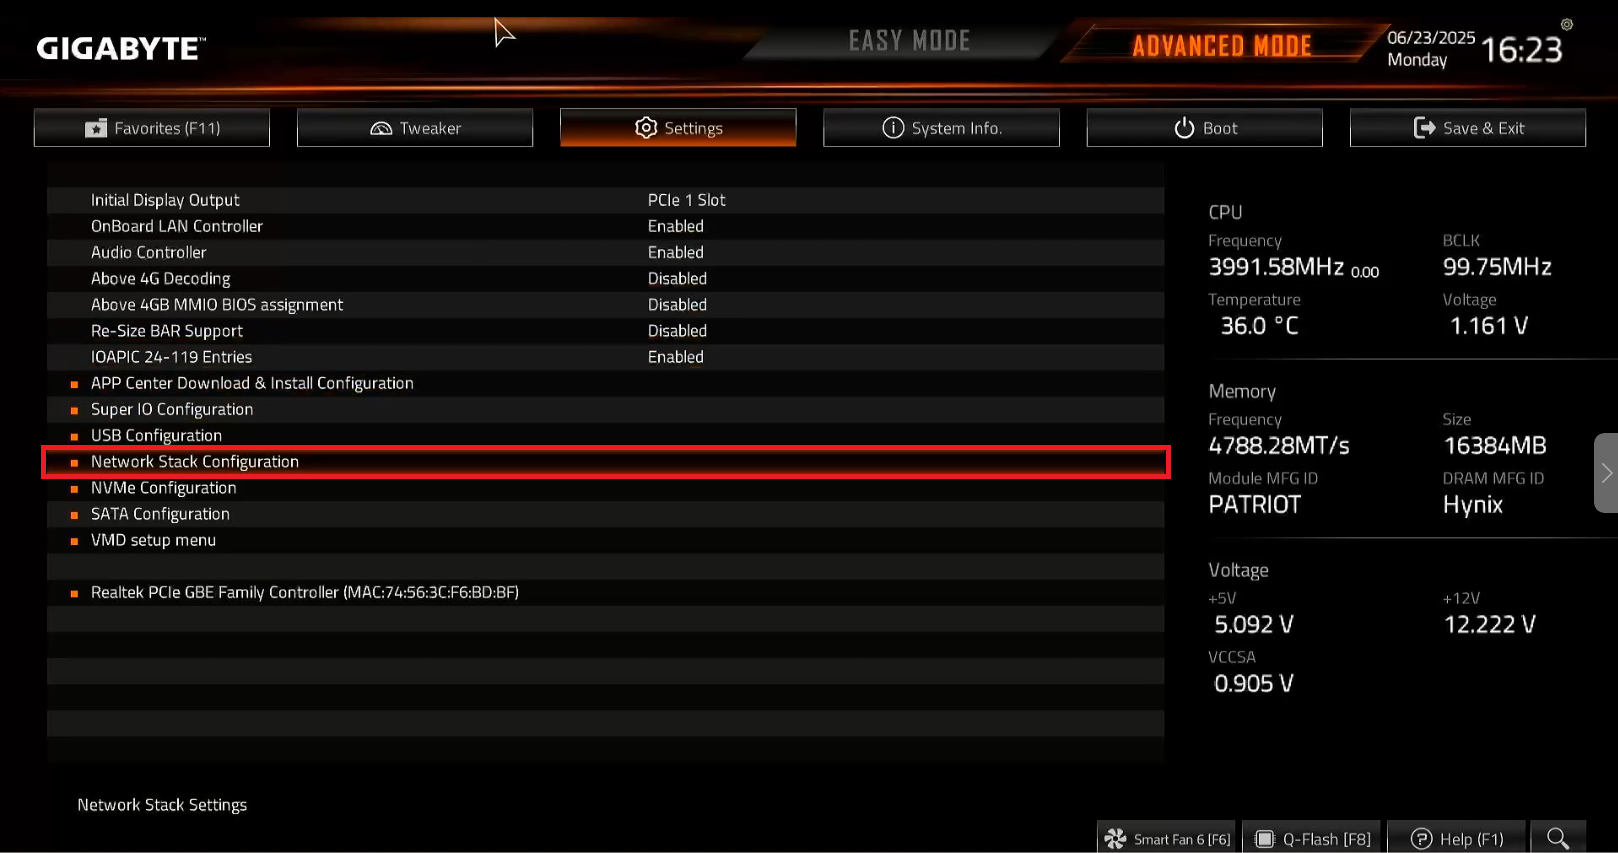
Figure 3
- Enable Network Stack if it is currently disabled once enabled, additional configuration options such as PXE boot settings will appear.(Figure 4).
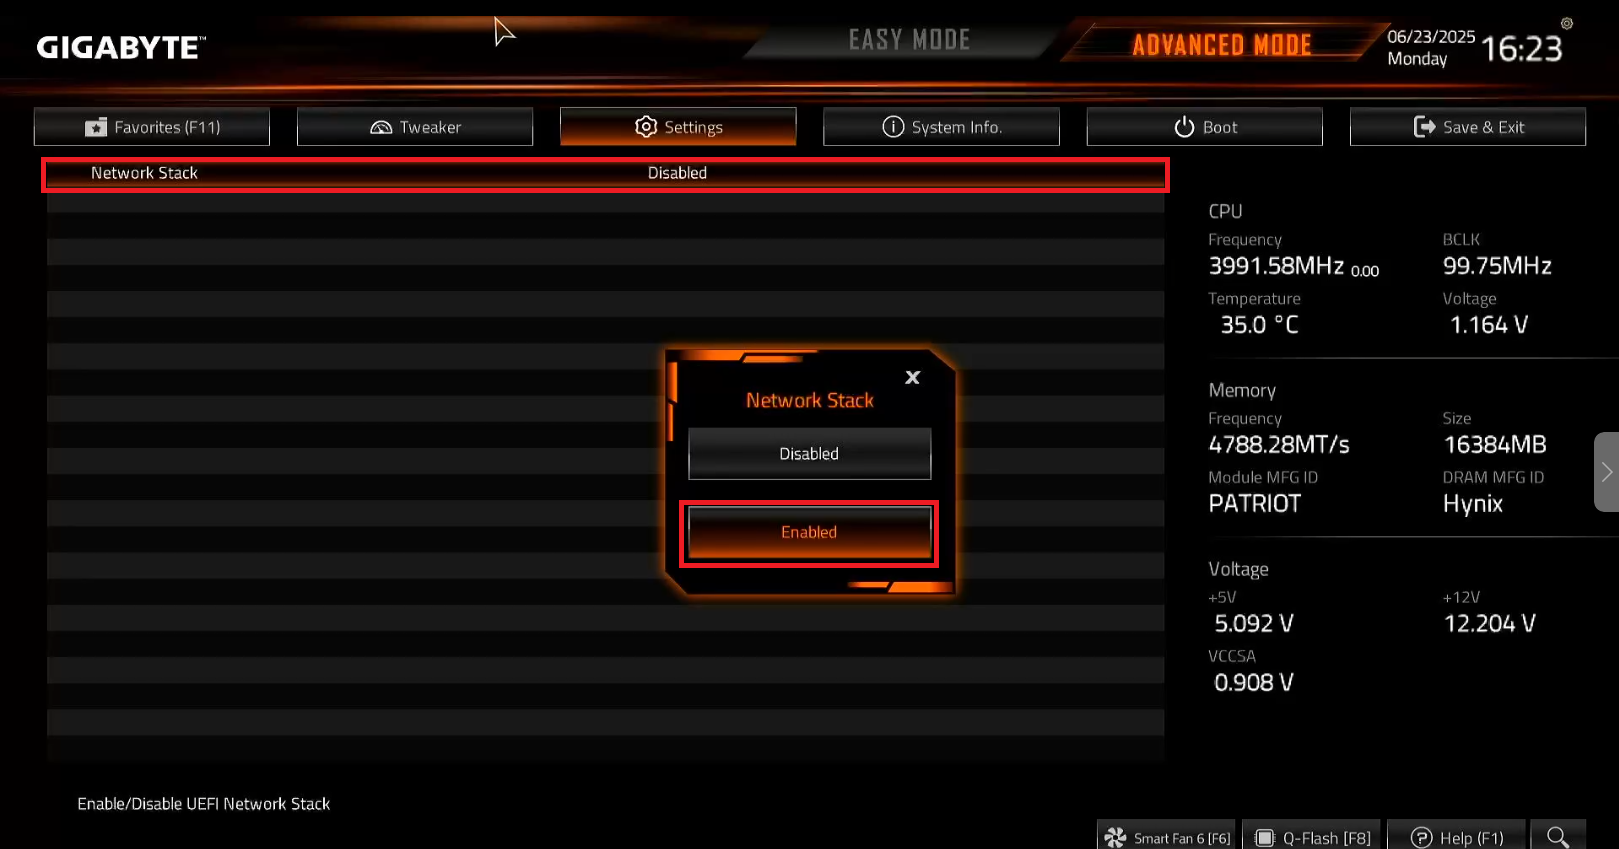
Figure 4
- In the additional settings list, locate IPv4 PXE Support and change it to Enabled. (Figure 5)
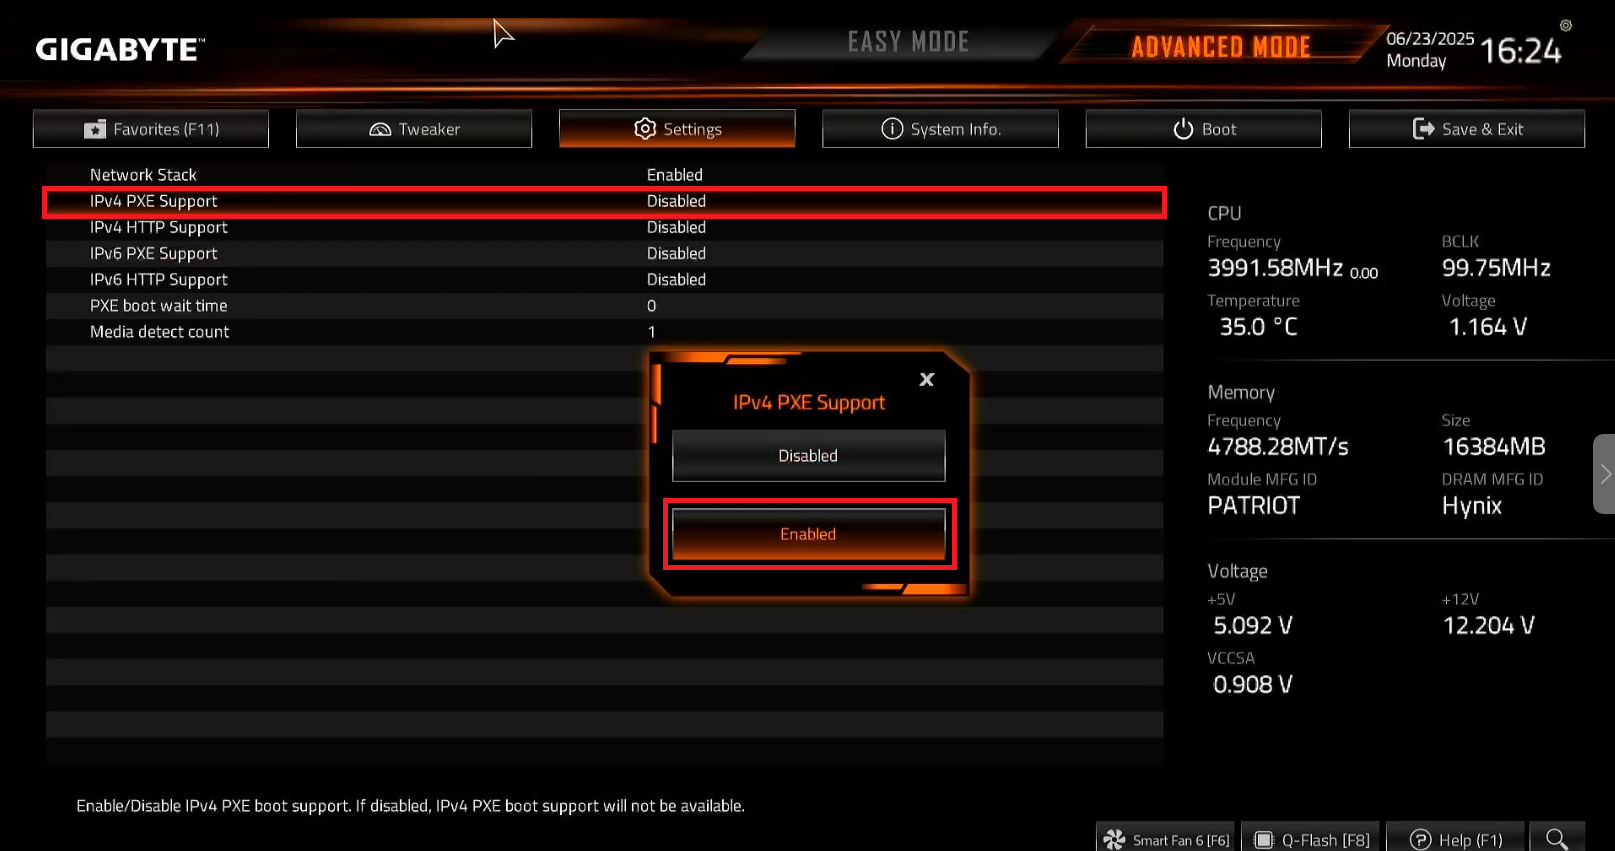
Figure 5
- Next click at save & exit setup to save the changed done the PC will reboot (You can use F10 to save directly) (Figure 6)
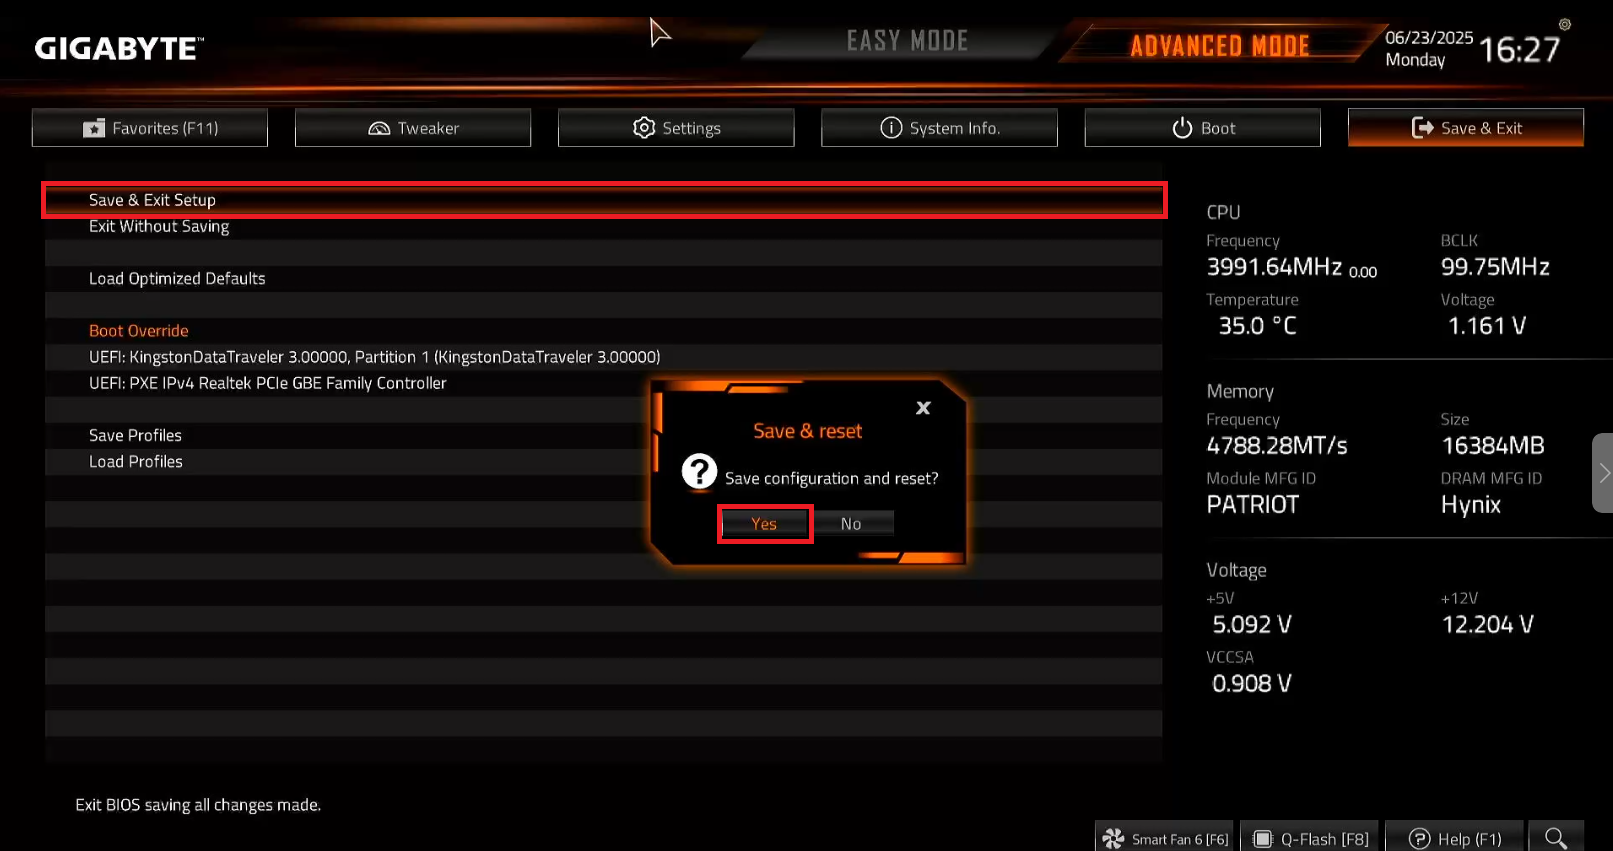
Figure 6
Enable Virtualization G
- Once the PC booted again , start bios and go in settings tab and then Open Miscellaneous settings (Figure 7)
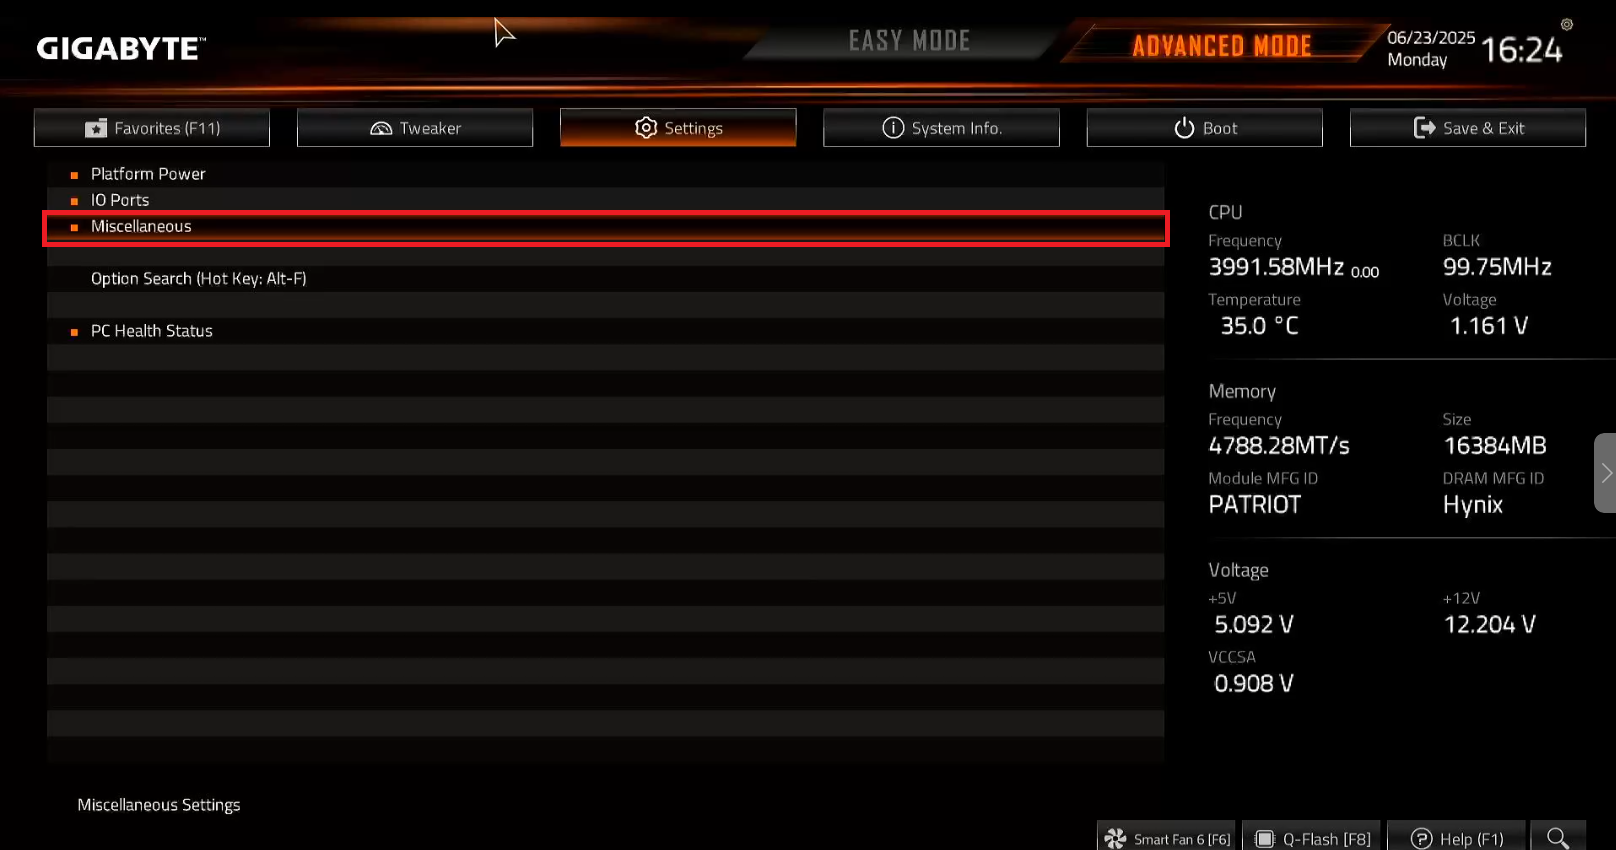
Figure 7
- Find the VT-d (Virtualization) option and enable it (Figure 8)
Figure 8
- Next click at save & exit setup to save the changed done the PC will reboot (You can use F10 to save directly)(Figure 9)
Figure 9
Secure boot & certificate G
- After reboot, navigate to the Boot tab, scroll down to the bottom, and click on Secure Boot. (Figure 10)
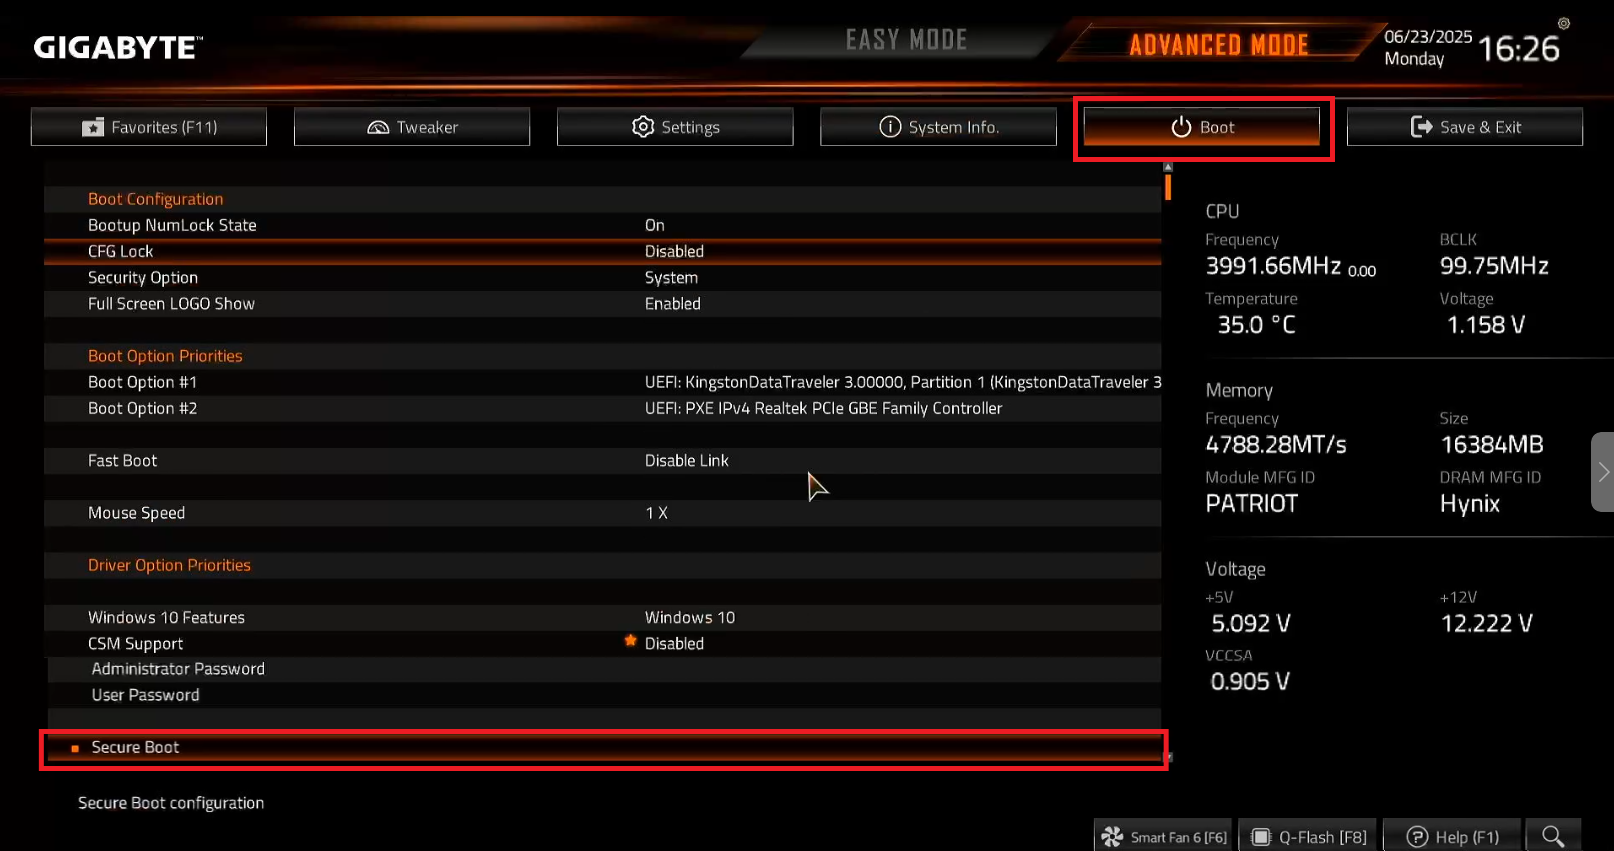
Figure 10
- Enable Secure boot option.(Figure 11)
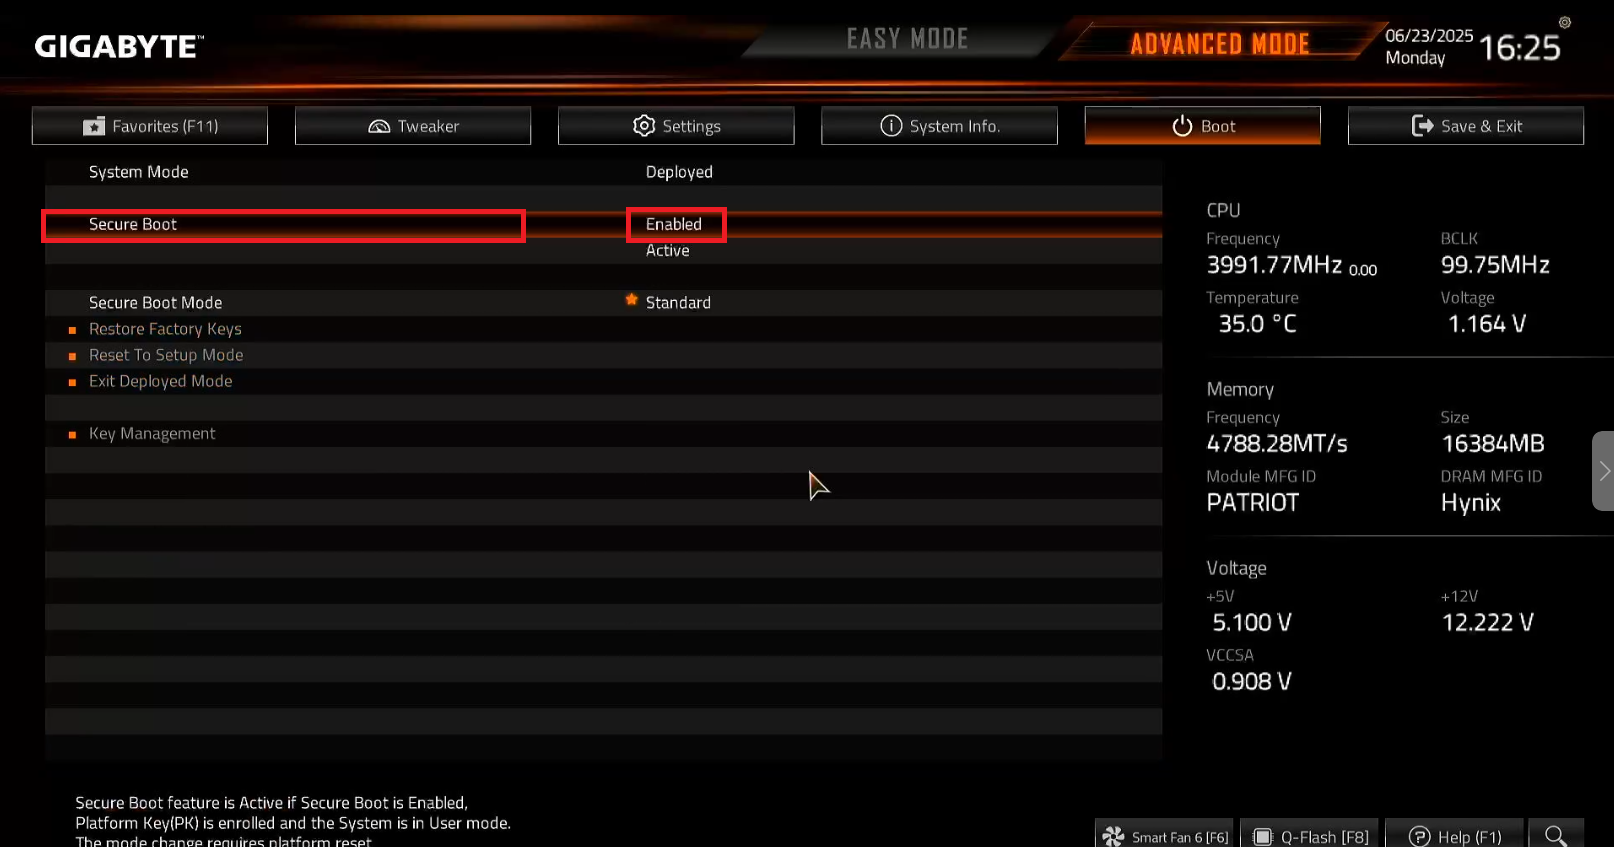
Figure 11
- Change the Secure Boot Mode setting to Custom. (Figure 12)
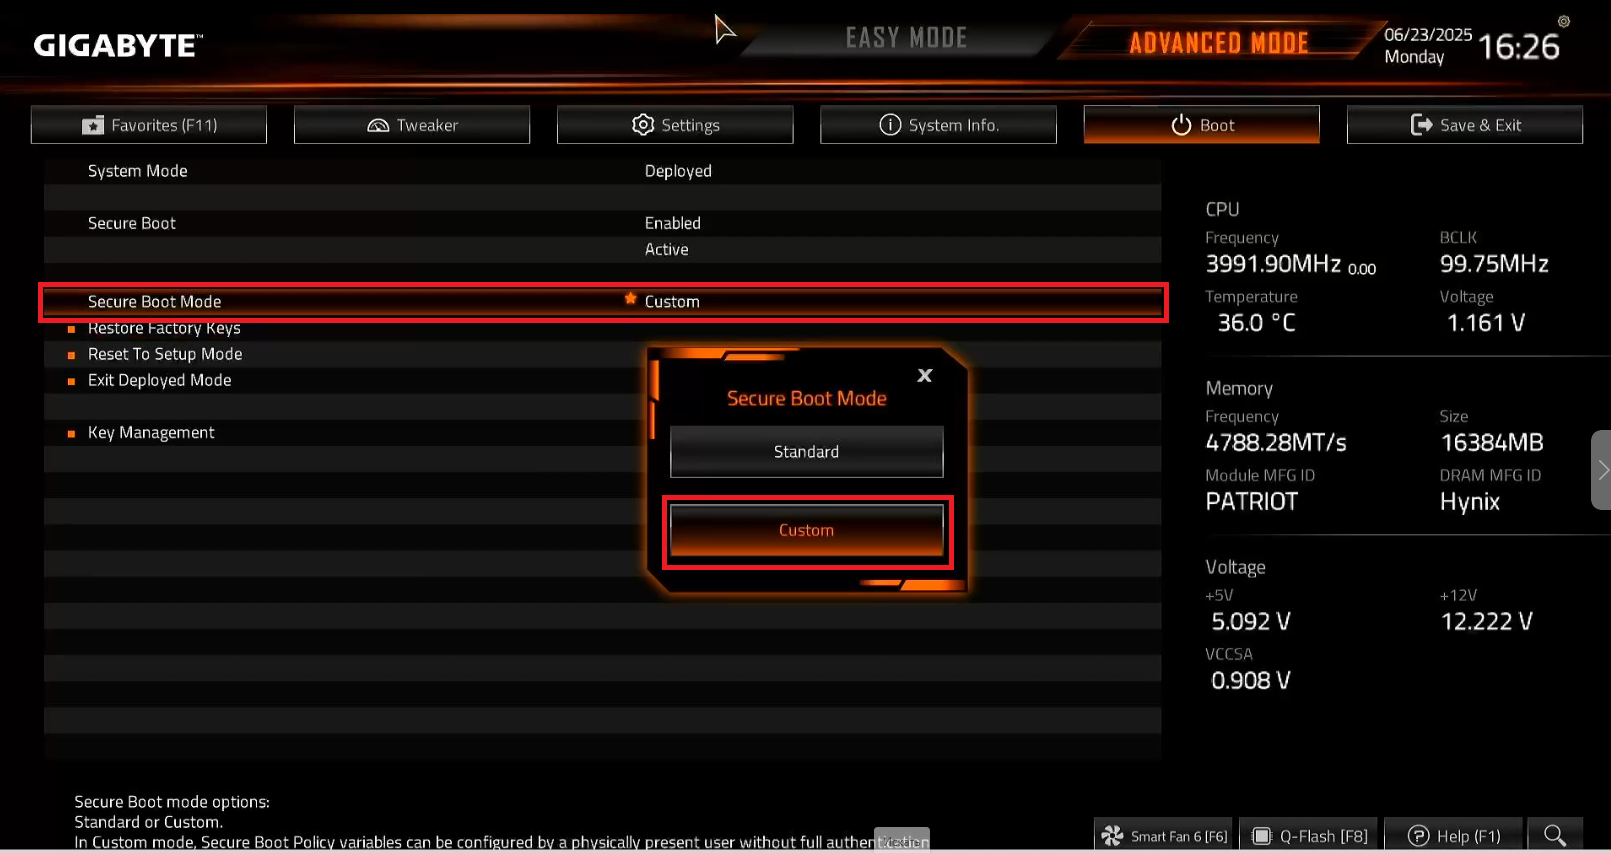
Figure 12
- Open the Key Management option. (Figure 13)
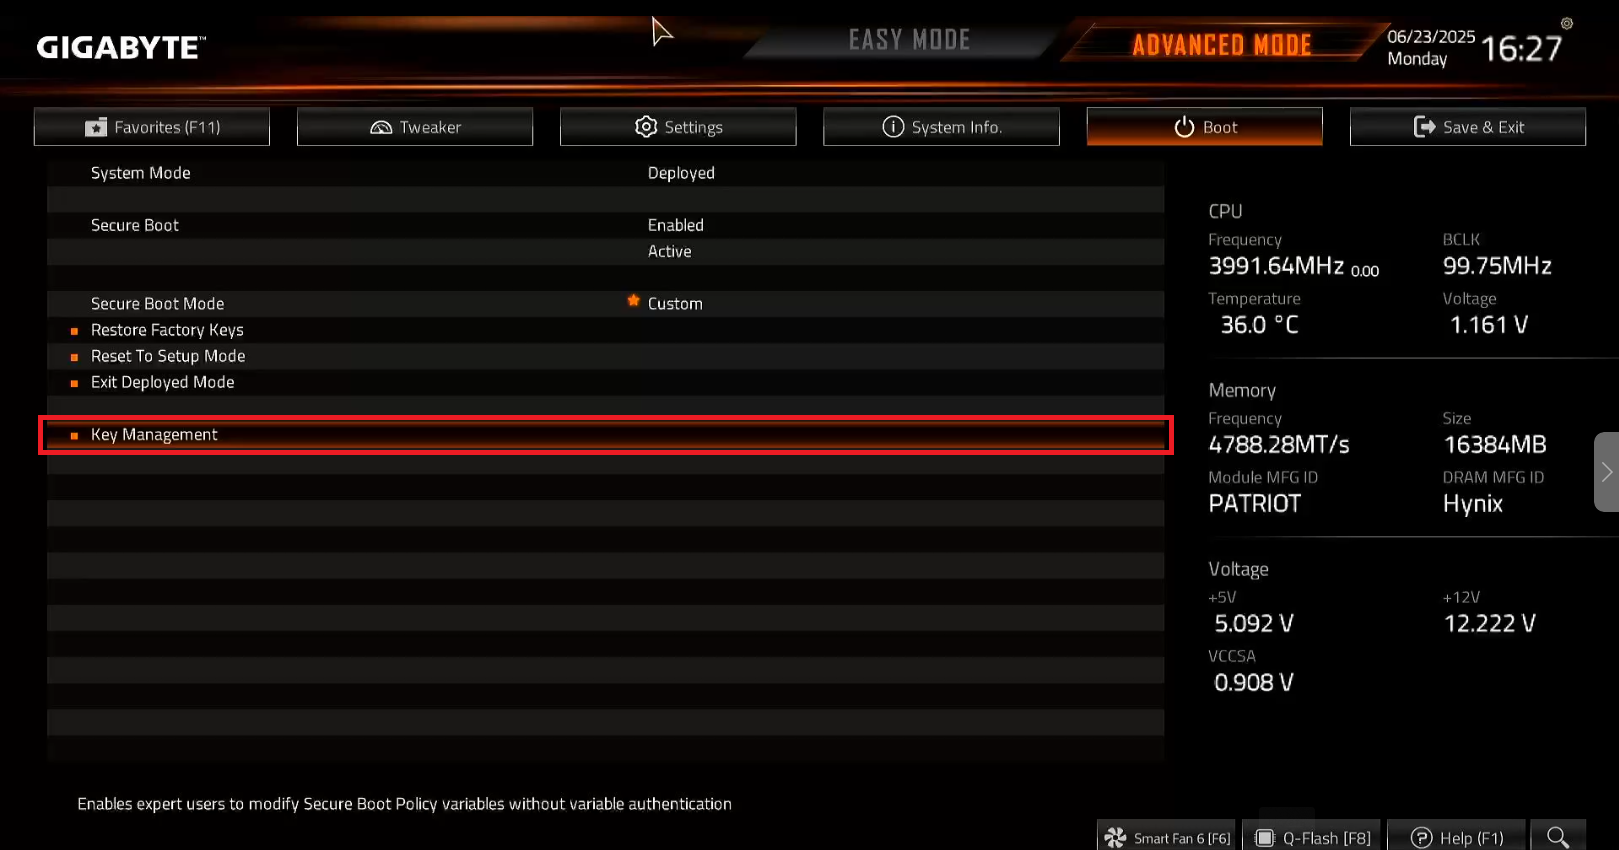
Figure 13
- On the Key management page click on the Authenticated Signatures (Figure 14)
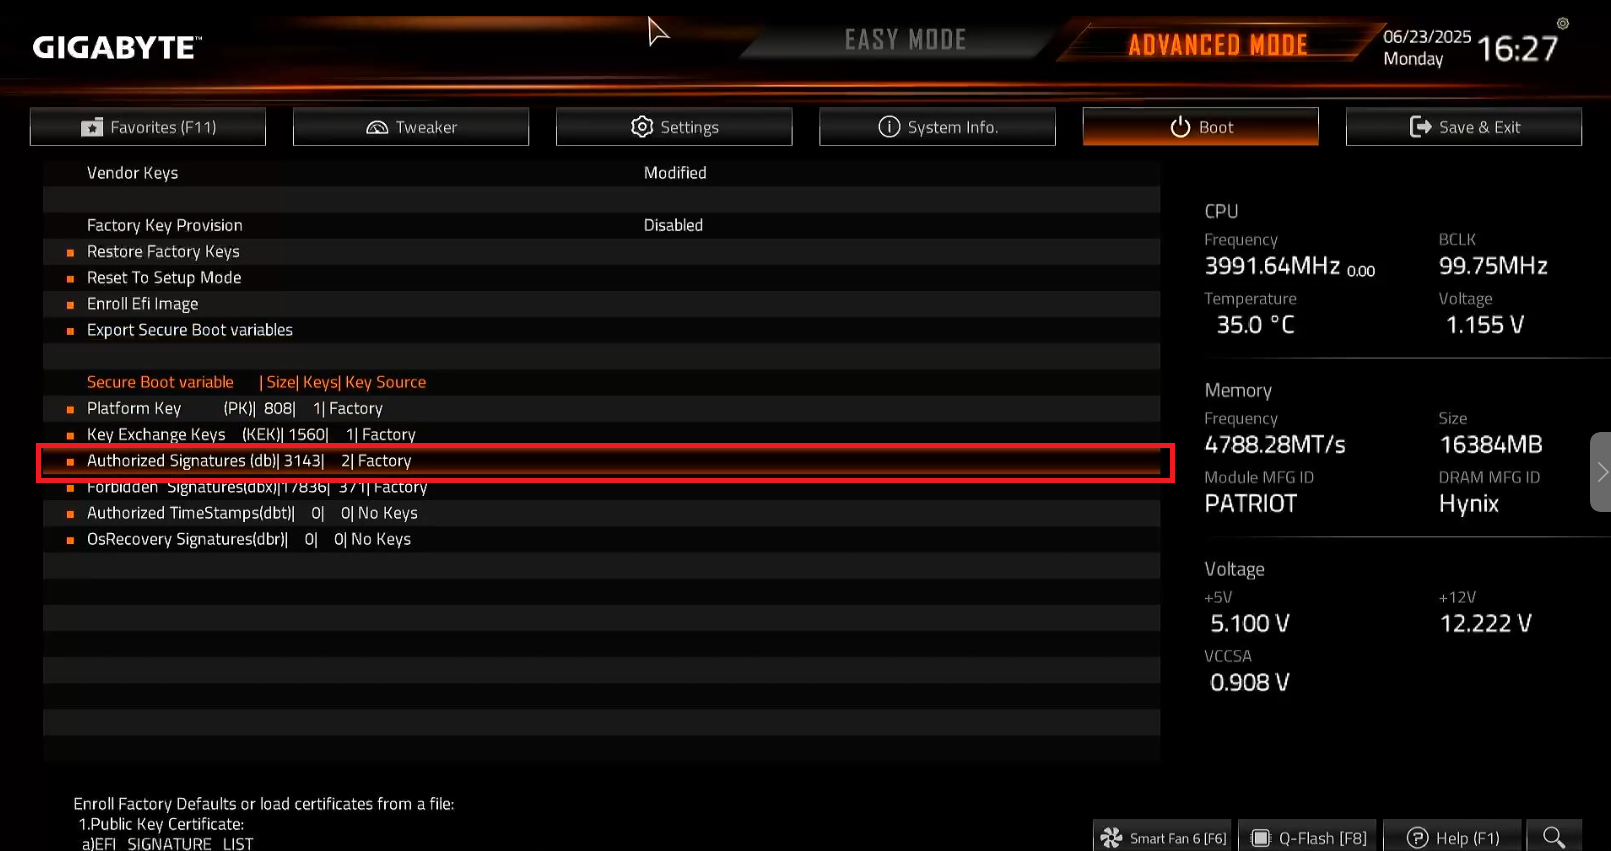
Figure 14
- select Append and press Enter (Figure 15)
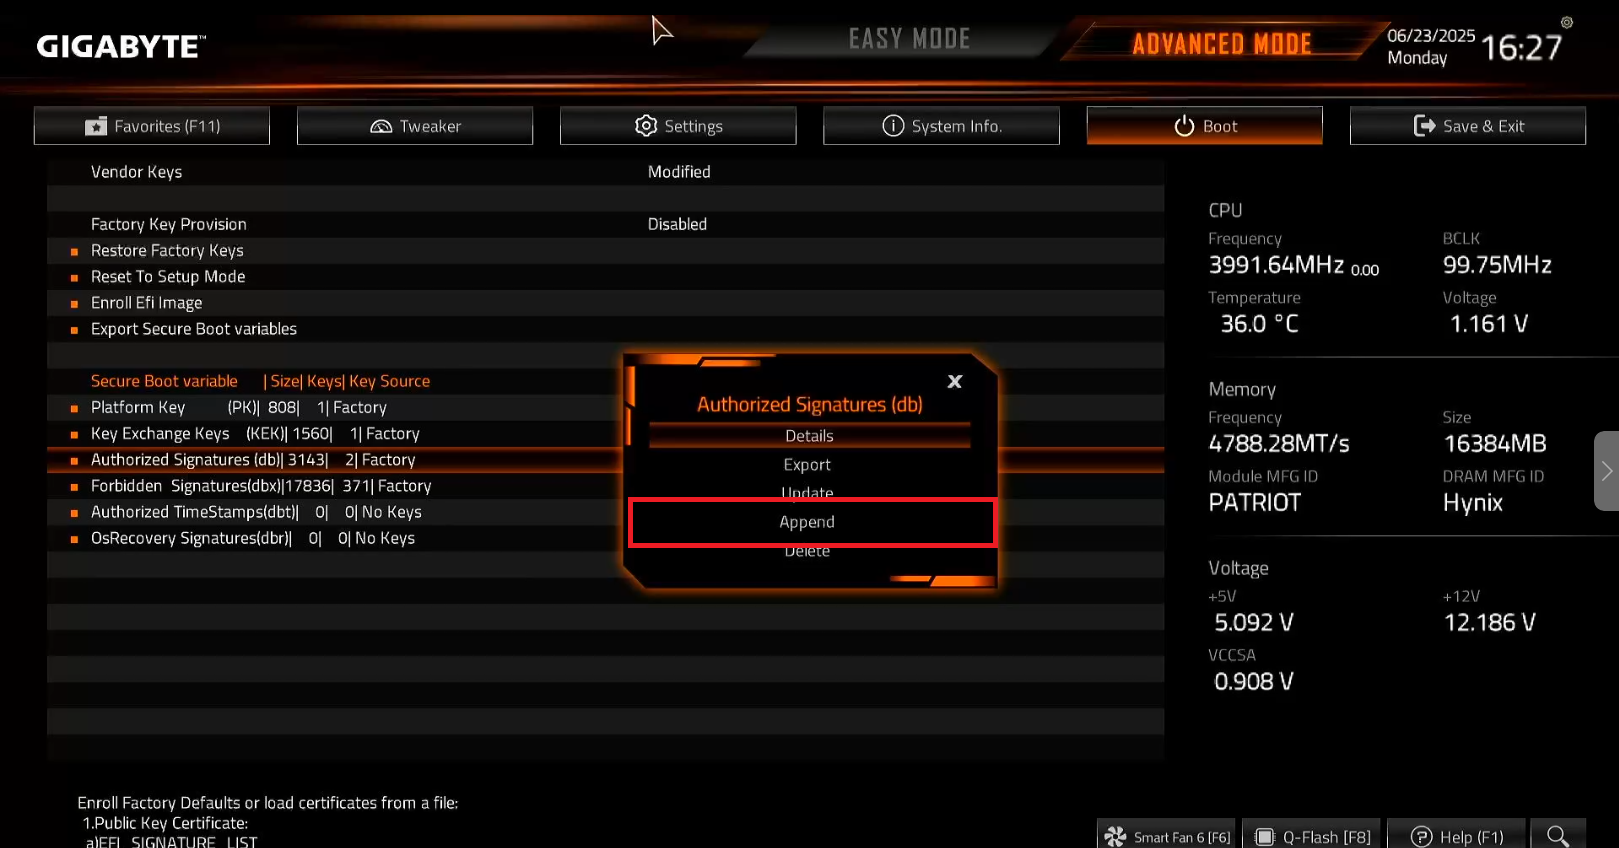
Figure 15
- At the append window select No and press Enter.(Figure 16)
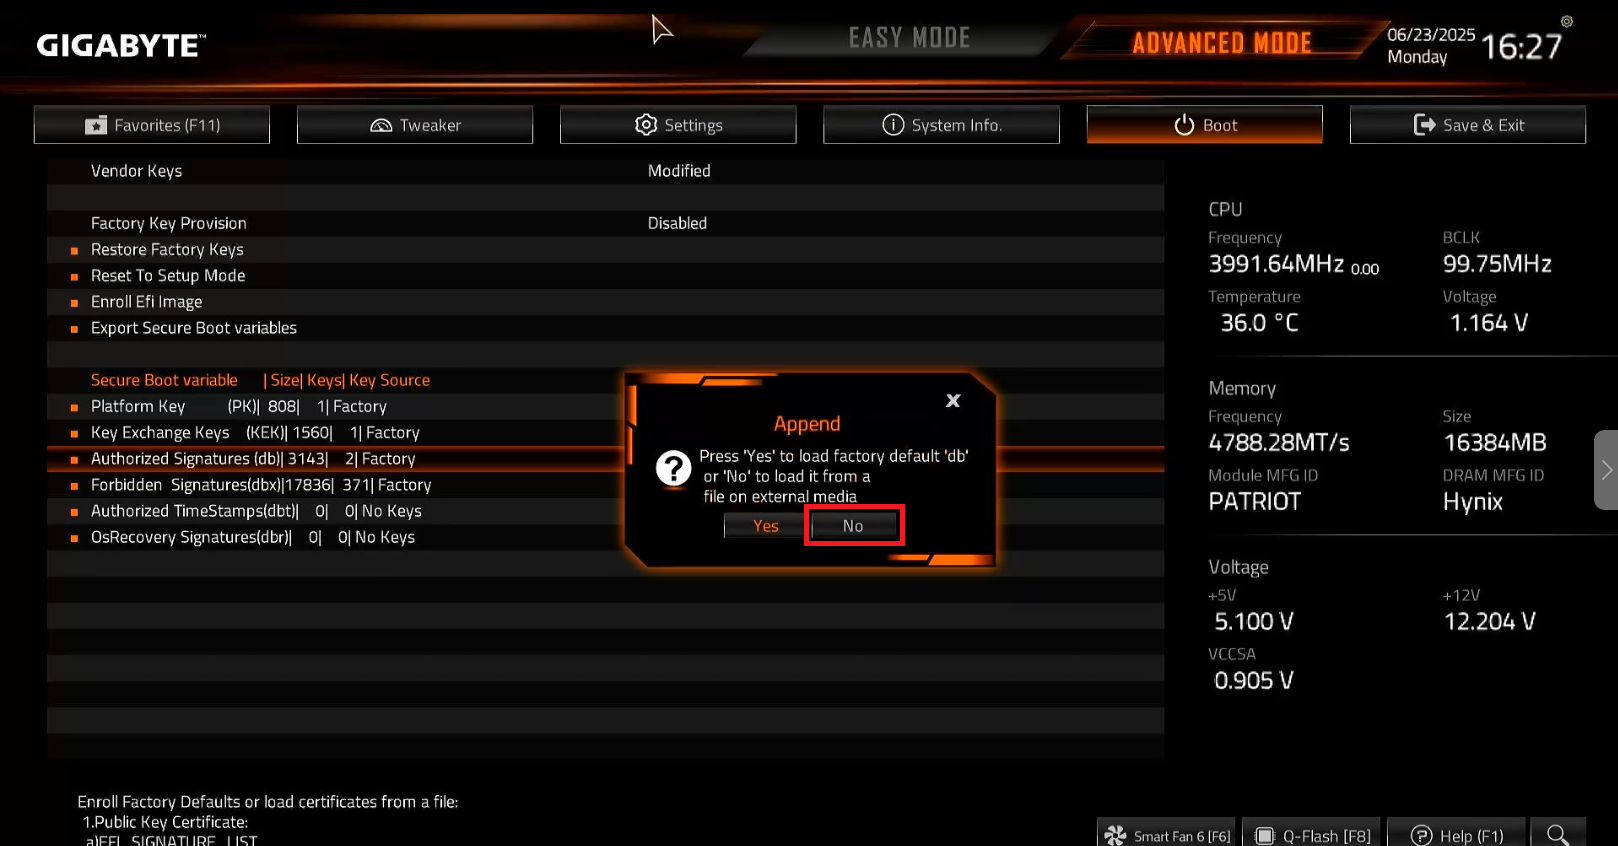
Figure 16
- Next, a window will open asking you to select the file system.If the list shows your USB drive, press Enter directly.
- If multiple options appear, carefully verify and select the correct USB device before proceeding.(Figure 17)
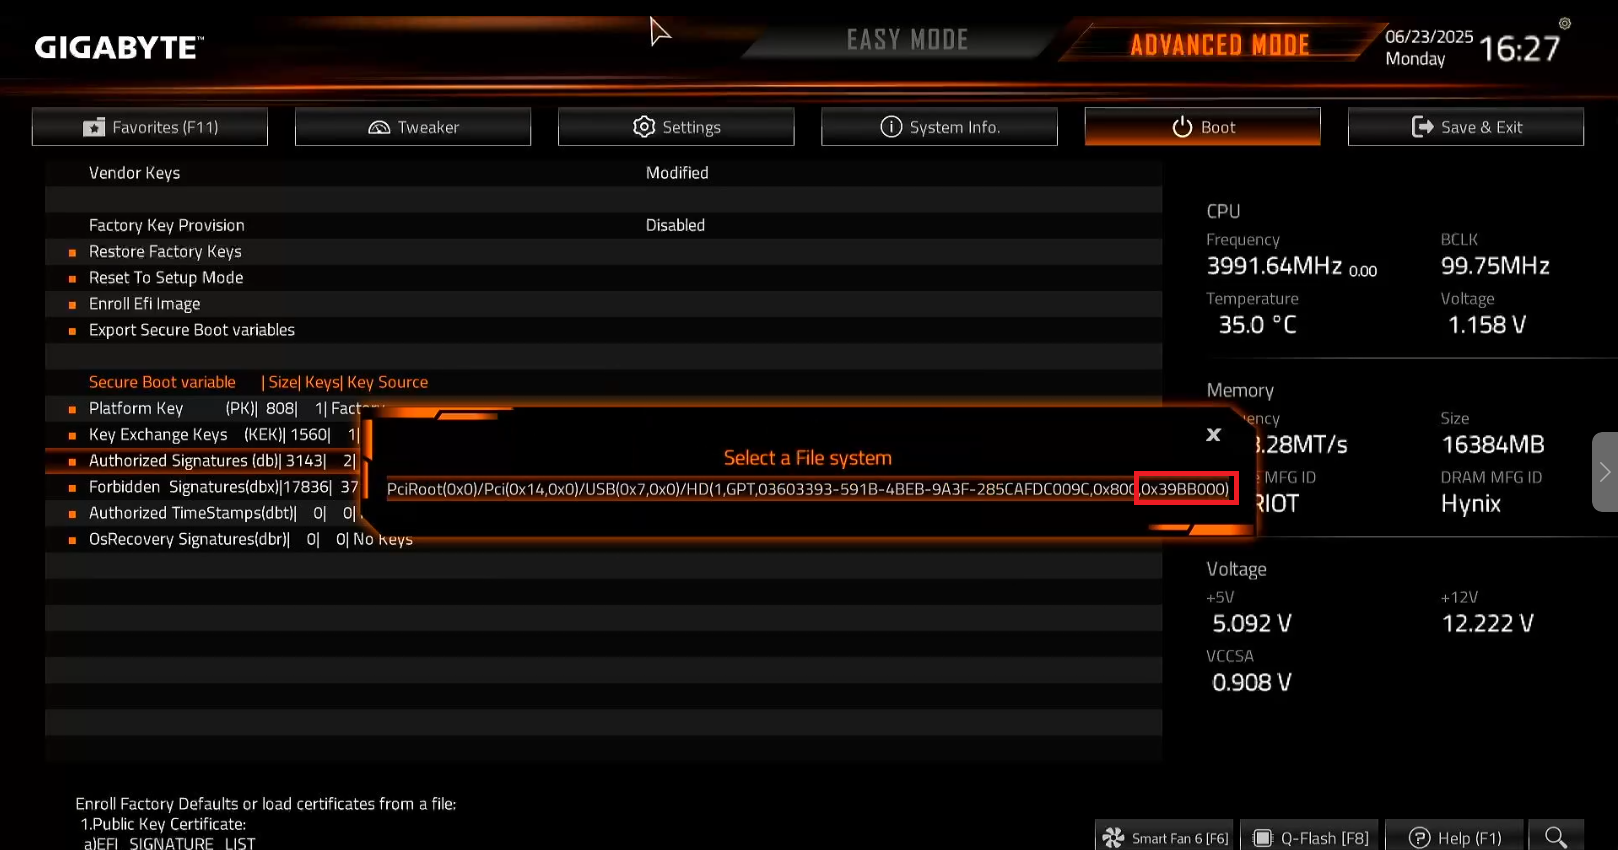
Figure 17
- Next select Youngzsoft certificate v2 to import the certificate. Some new motherboard only support ESL format cert(Figure 18)

Figure 18
- In the window that opens, select Public Key Certificate and press Enter. (After confirming, this window will close. Press Enter again to open the next window.) (Figure 19)
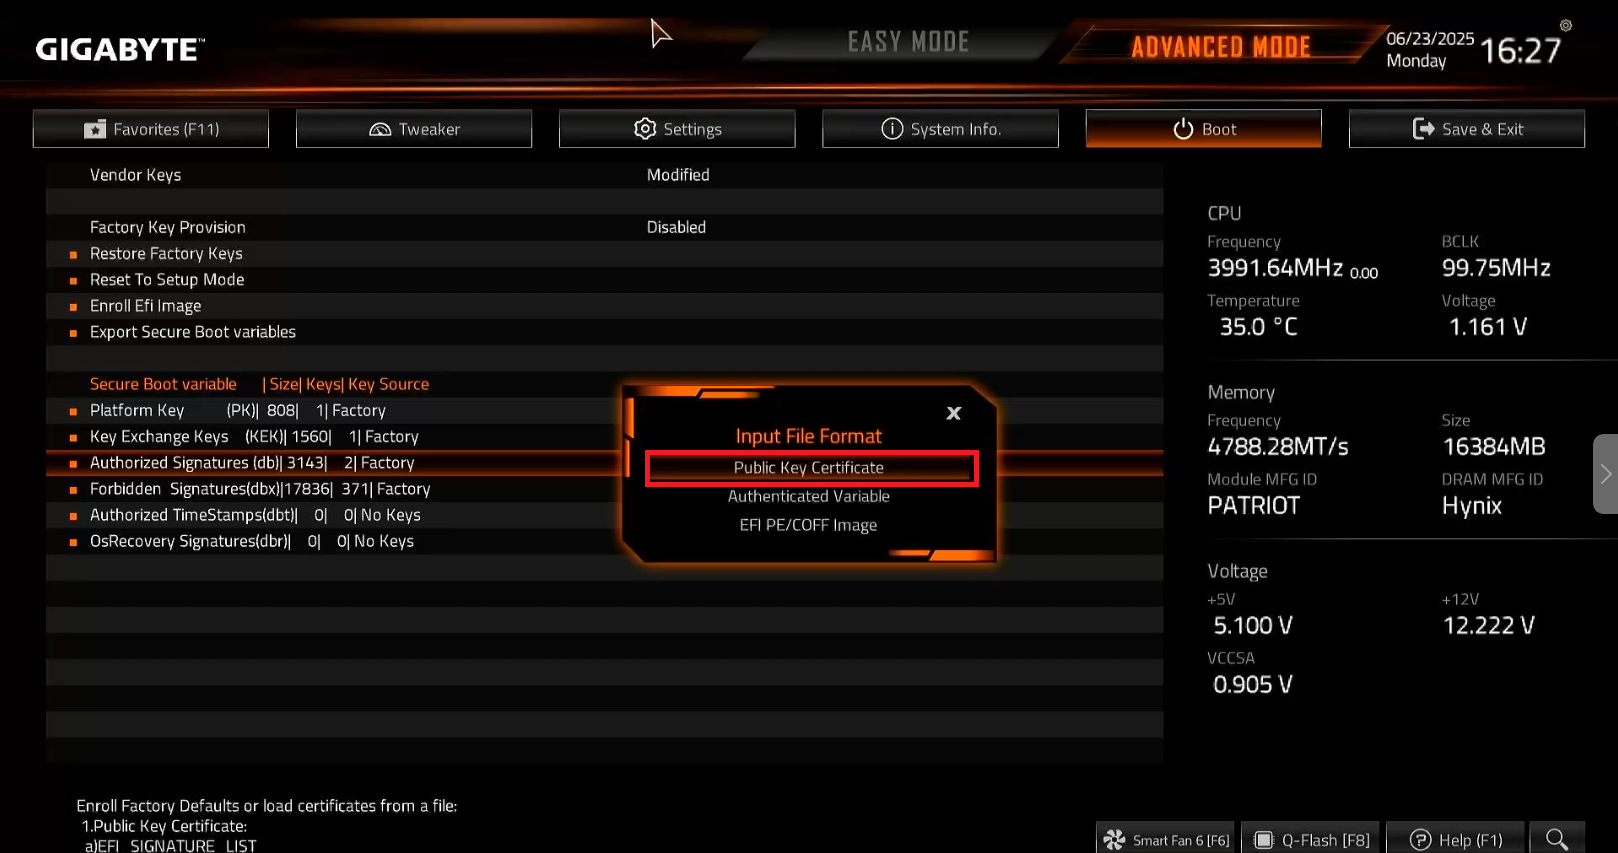
Figure 19
- In the window that opens, select Yes and press Enter. In the next window, press Enter. The window will close, and you're done.(Figure 20)
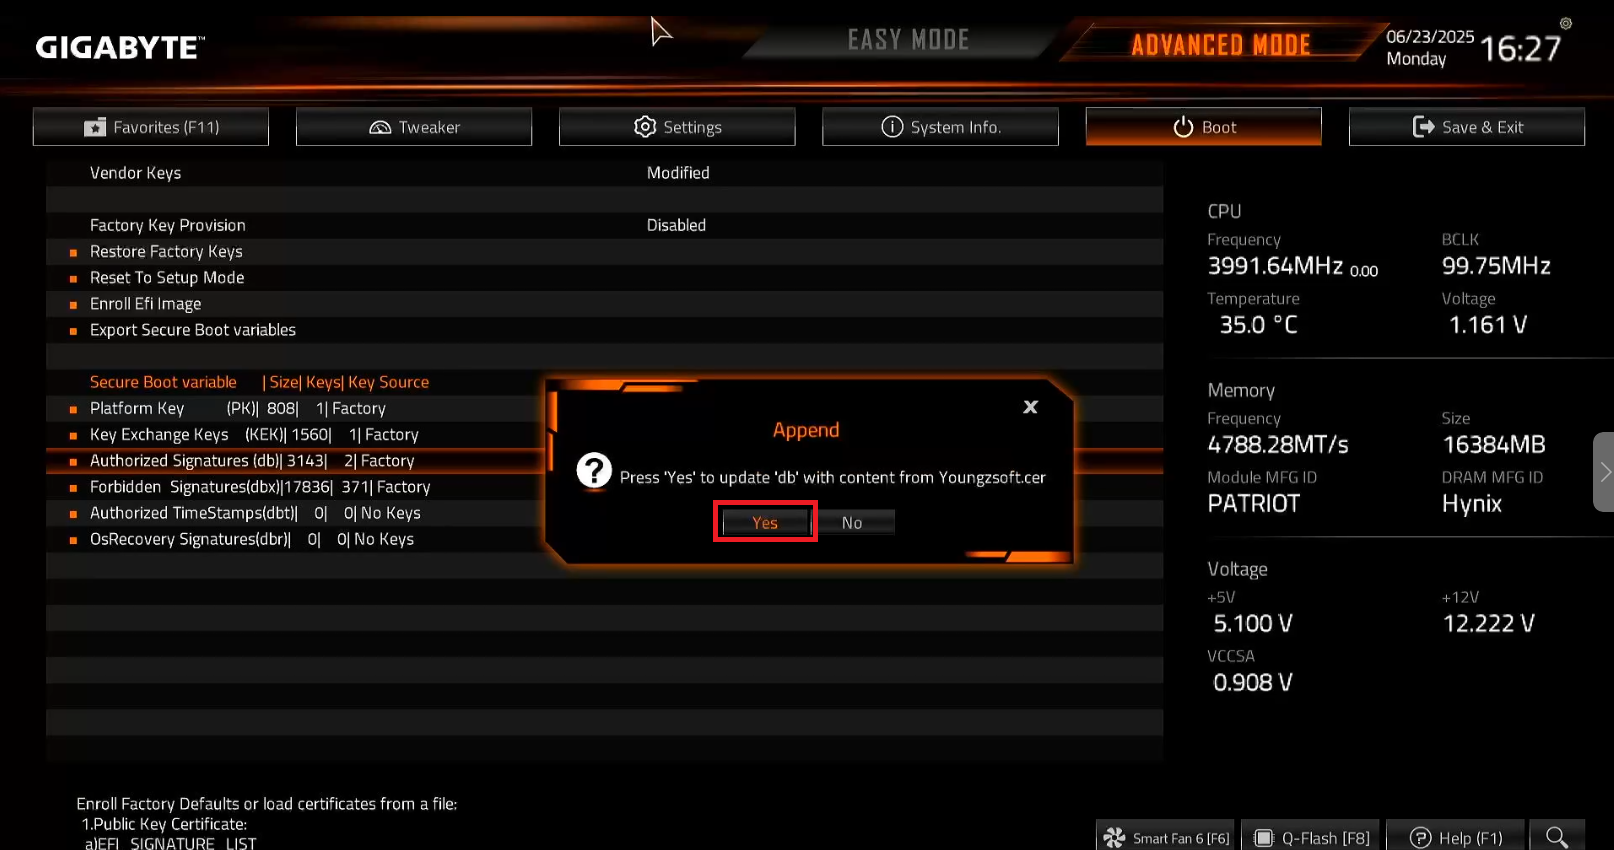
Figure 20
- Apped will show success. (Figure 21)
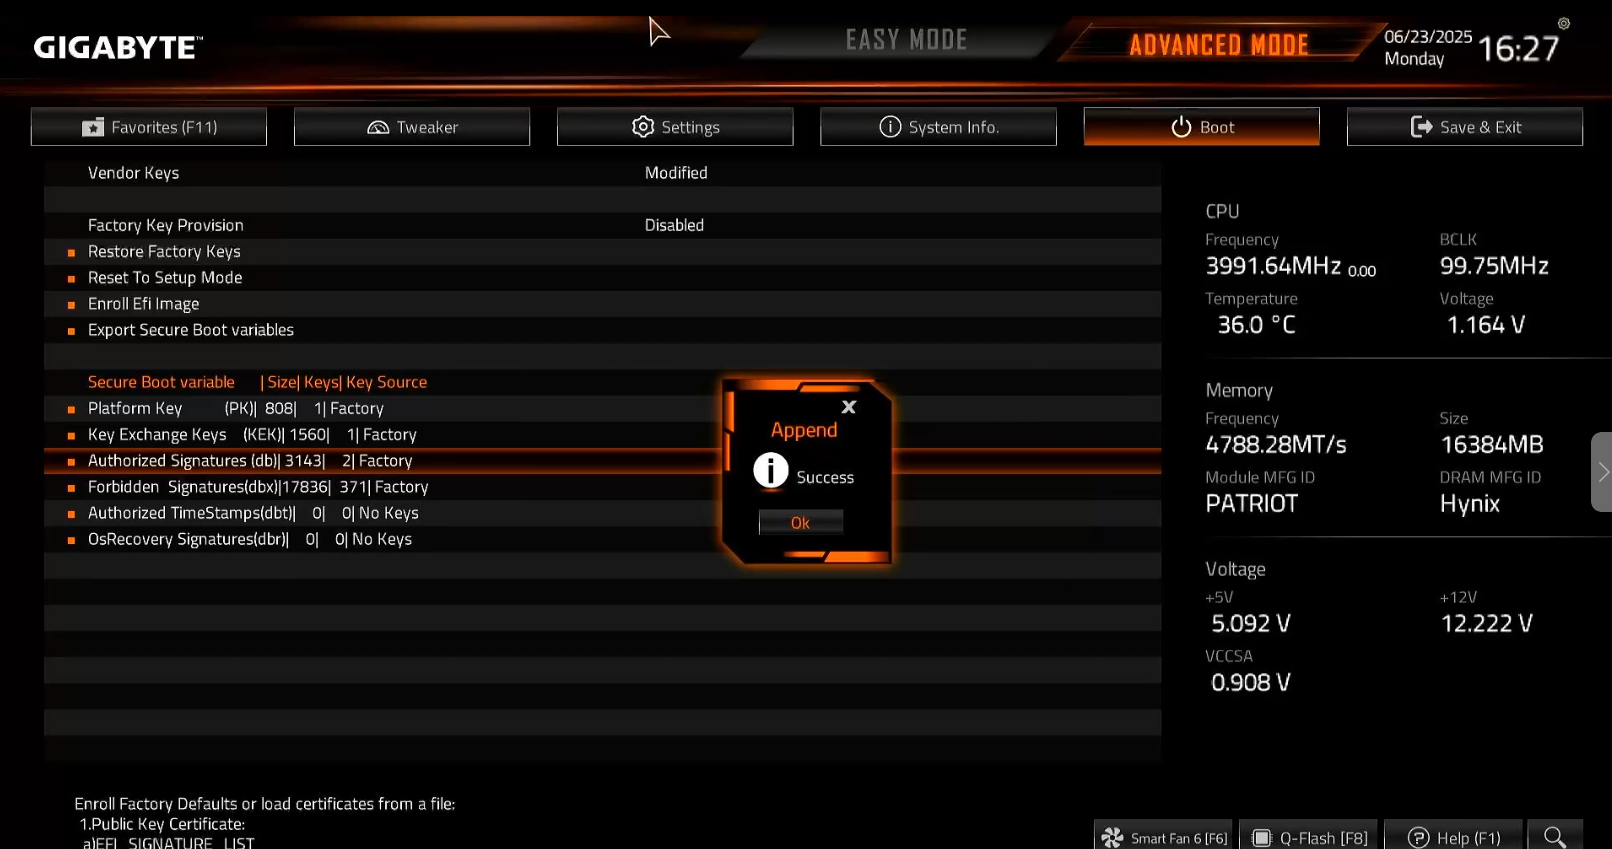
Figure 21
- Next click Save & exit setup to save the changes. (Figure 22)

Figure 22
Admin panel configuration G
- Once the image is ready on the iCafeCloud admin panel in the Boot section , edit the client PC and select ipxe2026.pxe(UEFI) on the PXE field. (Figure 23)
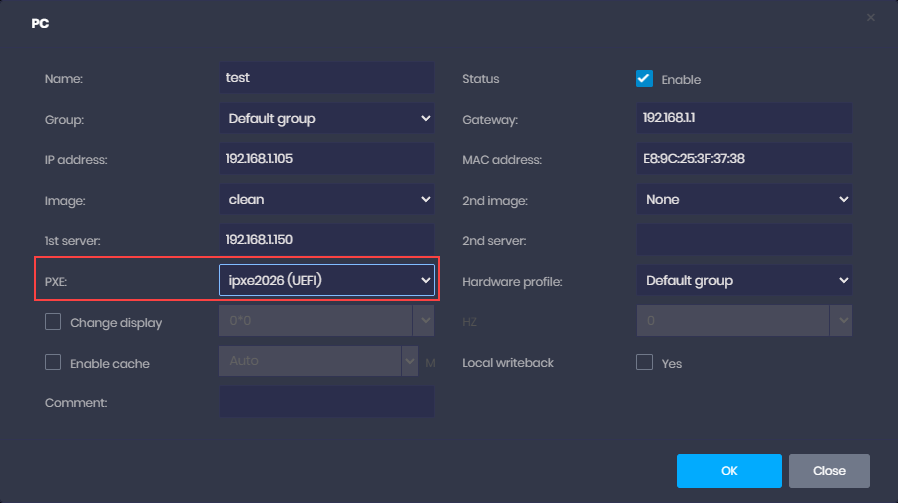
Figure 23
Possible problems G
Bios not saving
- If you have a Gigabyte x870e Aorus elite and your motherboard doesn't save the changes done after the append certificate is attached.
- If no message appears to save after pressing Enter on the Public Key Certificate section, press ESC first. This should allow you to save the changes made in the motherboard settings.
The process stops at step 21 and does not display step 22 or any subsequent steps from the manual.
Factory Keys auto reset
- If your motherboard is Aorus elite, disable “Factory key provision” as it reset the keys on every reboot.(Figure 24)
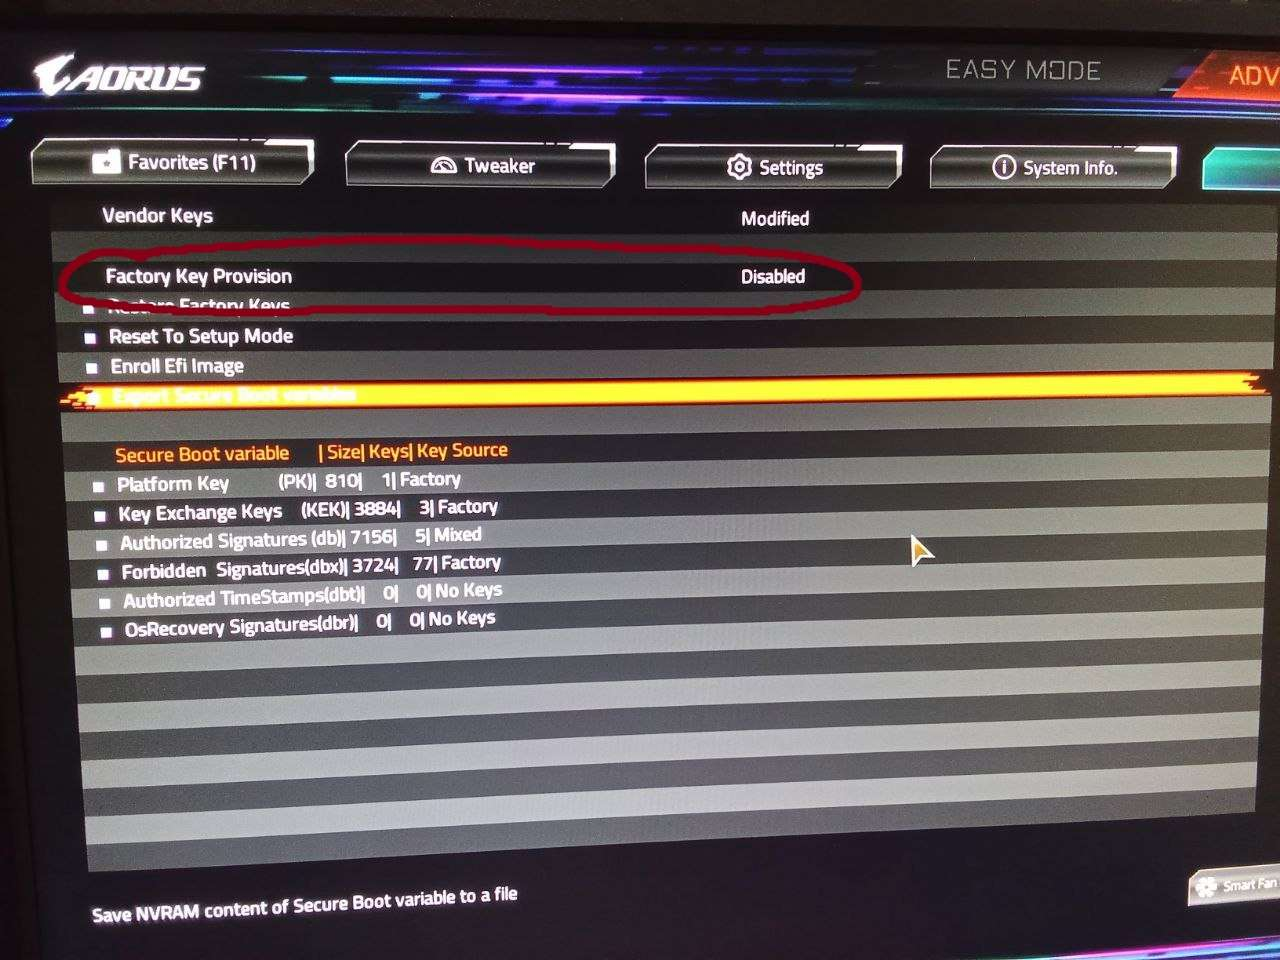
Figure 24
- If a "Failed" error persists after disconnecting the mouse as (Secure boot violation) (Figure 25)
Follow the steps below
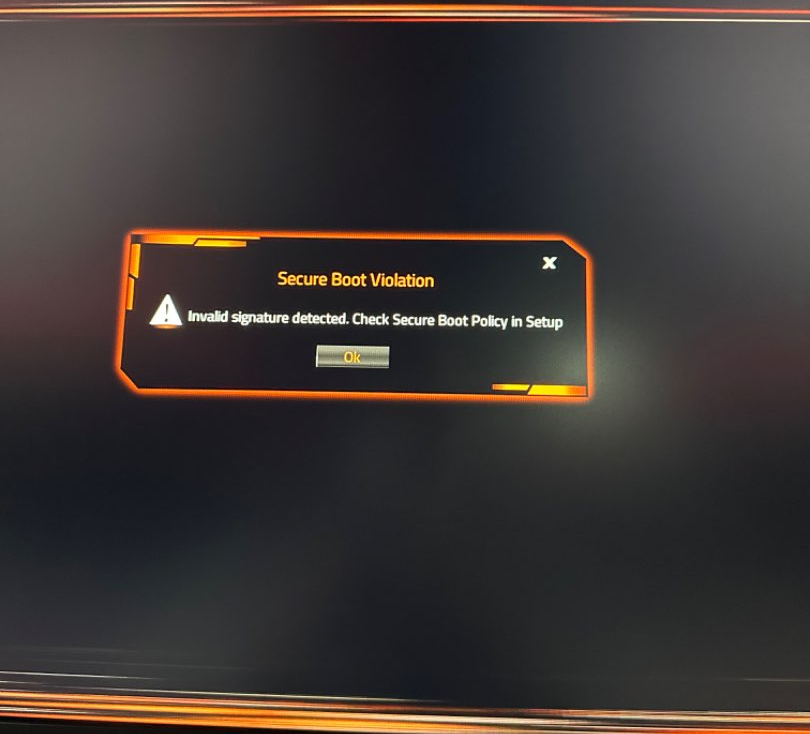
Figure 25
- Locate a PC that can successfully import keys (based on user experience approximately 1/2 of all PCs).
- Import the keys on this PC, save the changes, and navigate to "Export all DB keys".
- Save these keys onto a USB drive.
- Connect the USB drive to the PC that is unable to import keys manually.
- Instead of attempting to append keys from Youngzsoft.cer, update the authorized keys using the record from the USB drive (on Gigabyte motherboards, this file is typically named "db").
- Save the changes and exit.