2024-04-19
share, folder, windows10
The following provides step-by-step instructions for sharing folders and ensuring network sharing functionality on Windows 10, including configuring permissions and enabling necessary services for optimal performance.
- Follow the instructions below to share folder in Windows 10:
- Right click on the folder you want to share and click on "Properties" (Figure 1).
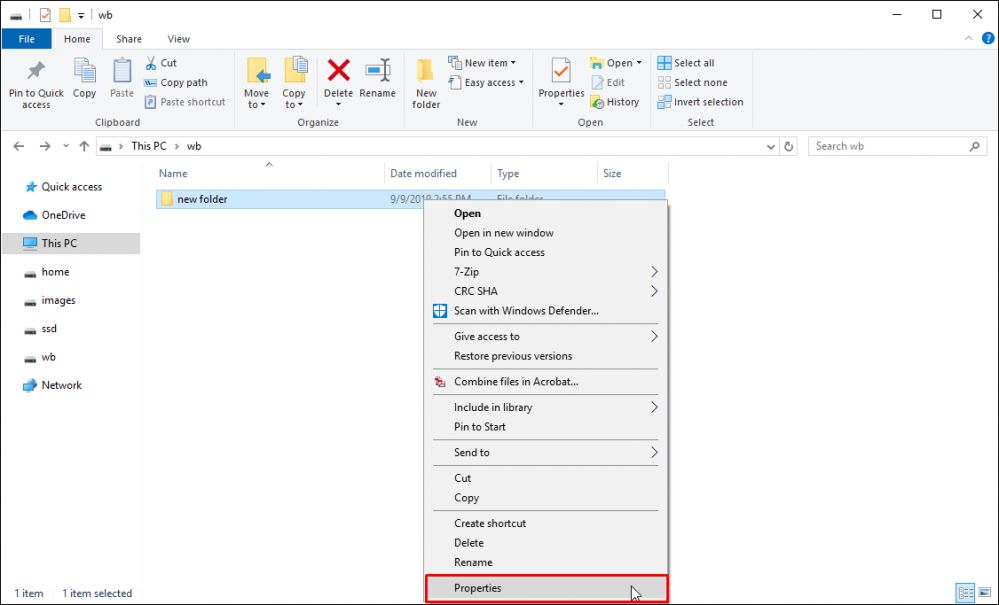
Figure 1
- Go to the "Sharing" tab and click the "Share" button (Figure 2).
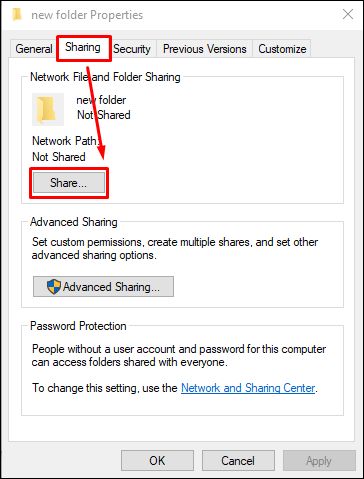
Figure 2
- Select the person to share with (Figure 3).
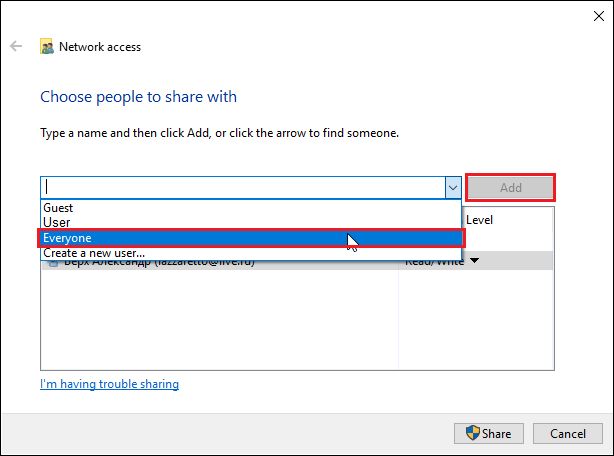
Figure 3
- Select permission to the person you want to share such as: read, write and read/write and click the "Share" button (Figure 4).
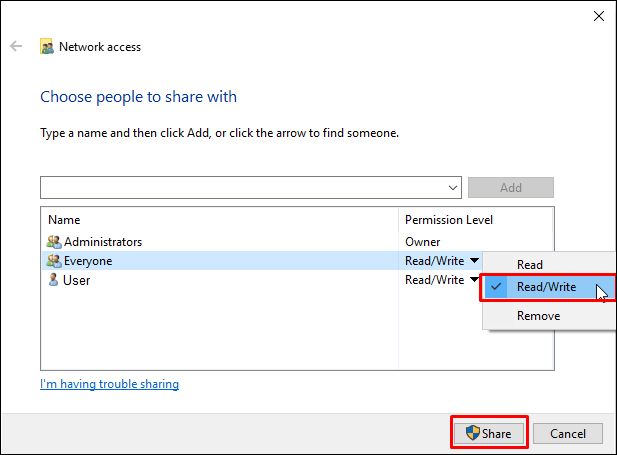
Figure 4
- Click on "Done" Button (Figure 5).
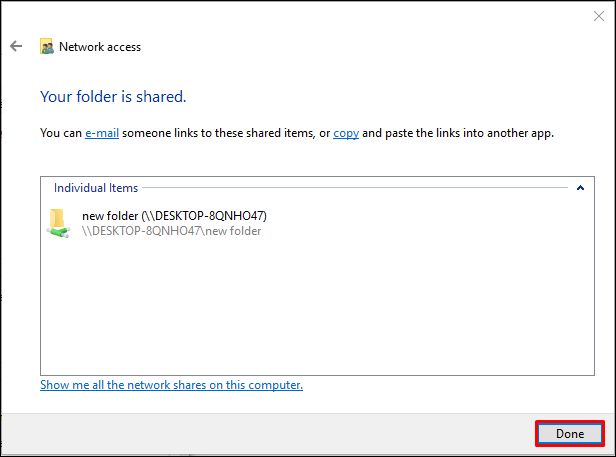
Figure 5
- Go to "Advanced sharing settings" from the control panel which path as in picture and mark the radio button as highlighted in red highlighted (Figure 6).
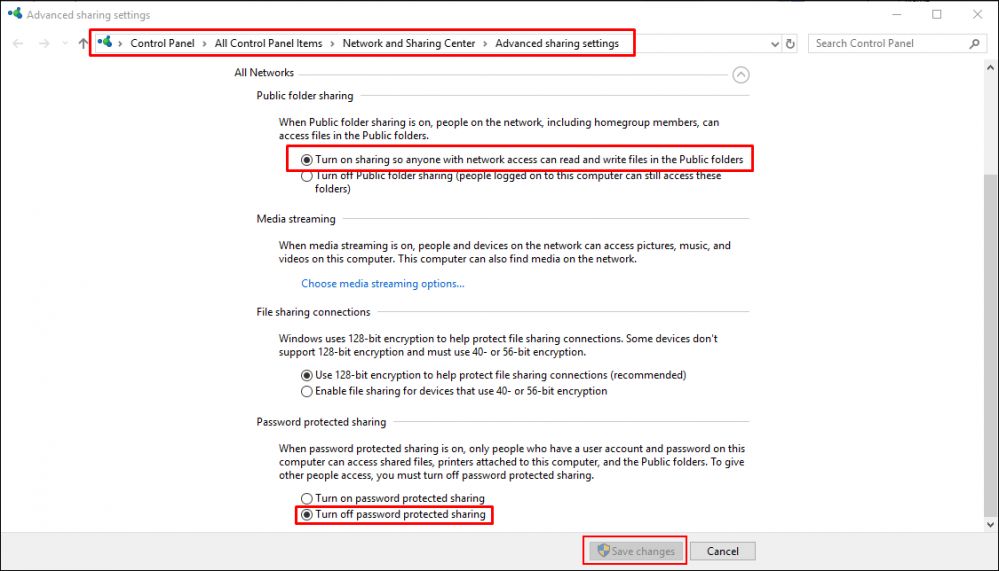
Figure 6
- If you still do not have access to shared folders then please make sure that the features in red are enabled on server and client side (Figure 7).
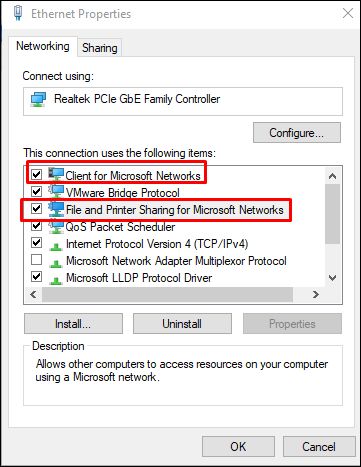
Figure 7
Network sharing
- To ensure network sharing functions properly, verify that the following services are enabled on the computer:
- Open the Services window by typing "services.msc" in the search bar and selecting Services.
- Check if the following services are enabled:
- TCP/IP NetBIOS Helper service
- DNS Client
- Function Discovery Resource Publication
- SSDP Discovery
- UPnP Device Host
- To start the service and set it to automatic:
- Right-click on each of the listed services and select Properties.
- In the General tab, locate the Startup type dropdown menu, and select Automatic.
- Click Apply, then click Start to initiate the service.