2023-06-04
diskless, boot, client, legacy
The following provides step-by-step instructions to enable diskless booting on a client PC via Legacy BIOS settings, including enabling LAN Option ROM, setting network boot priority, and configuring initial settings for successful booting.
- Choose one client PC and set boot from network in bios;
- Turn on the client PC and go to the BIOS by pressing "F2 or Del or ESC key.
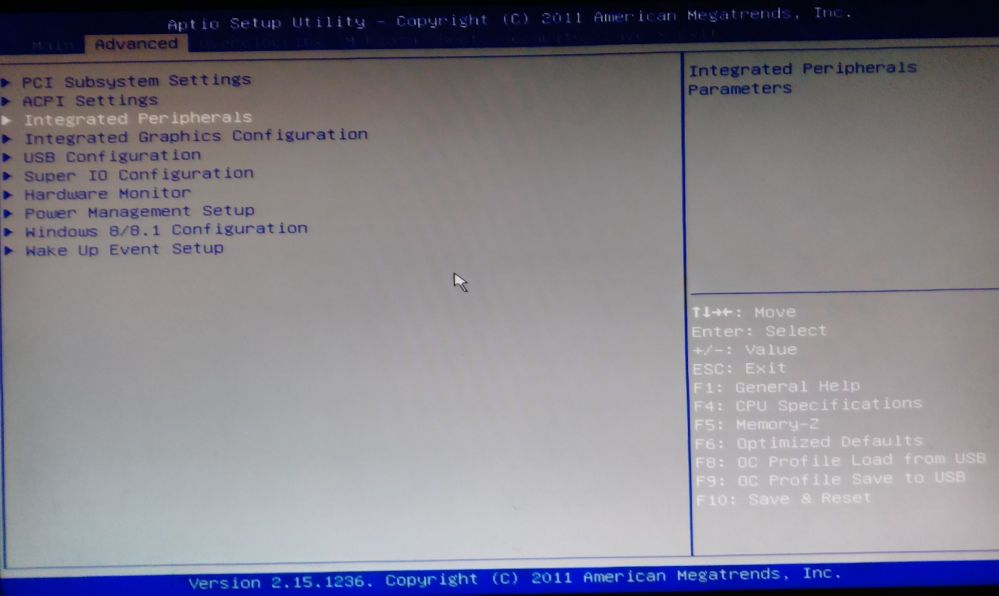
- Go to the "Advanced" tab, and select the "Integrated Peripherals" option and press "Enter" (Figure 1).
Figure 1
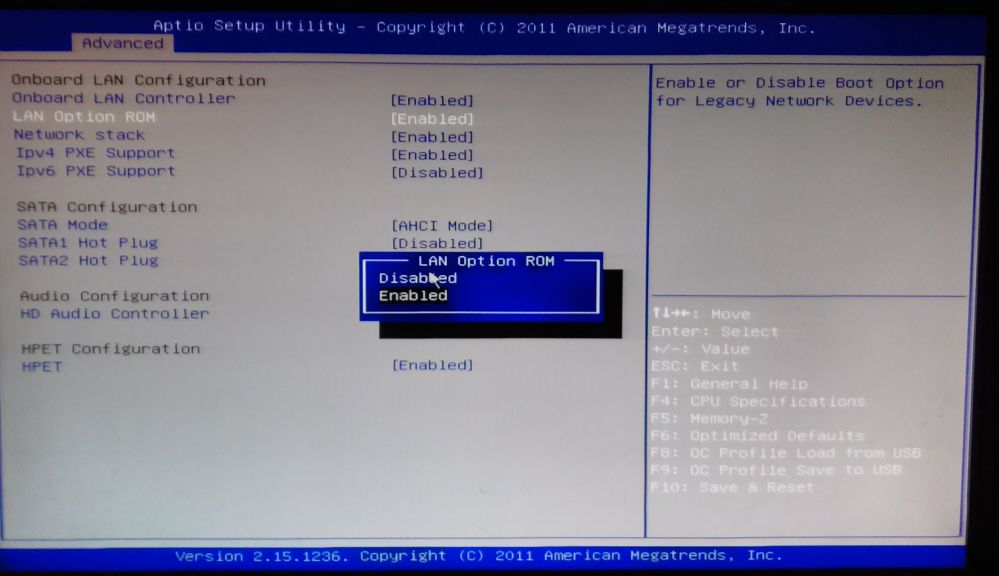
- In "Integrated Peripherals", look for "Lan Option ROM" or "Boot from LAN" or “PXE OpROM” or “Legacy PXE Boot Option ROM” and then change the option to "Enabled"(Figure 2).
Figure 2
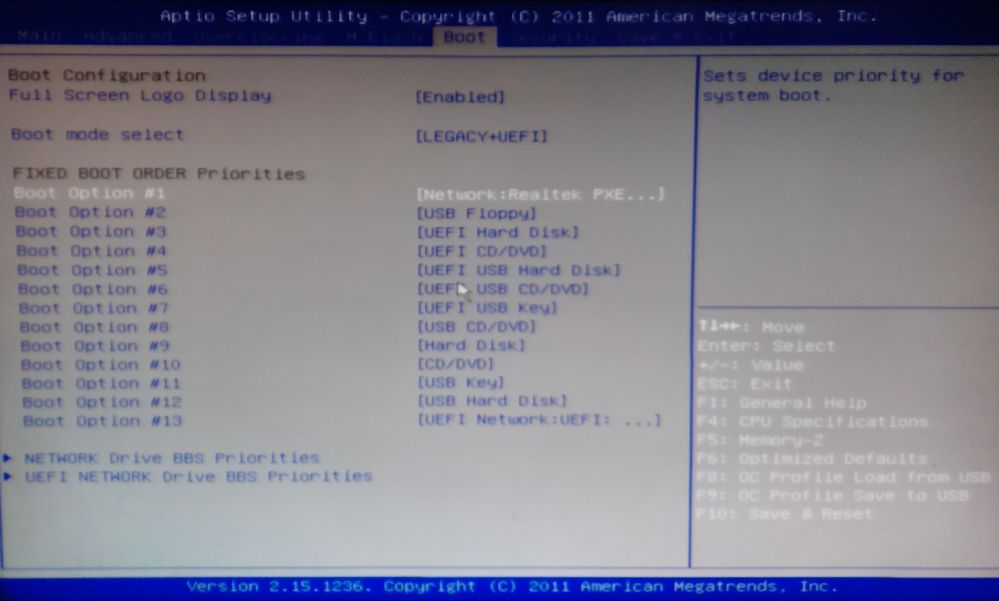
- After that, go to the "Boot" tab and then select "Boot Sequence" or "Boot Priority".
- You need to set the "Network" to be the first priority (Figure 3).
Figure 3
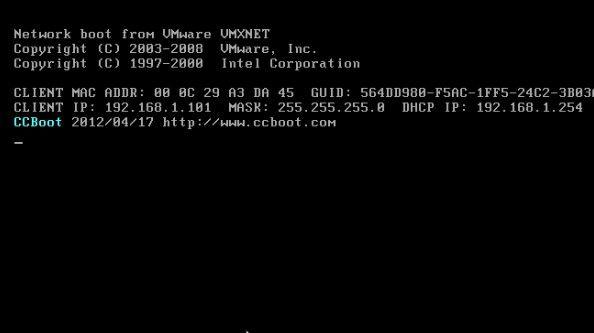
- Now plug off the hard disk on the client PC, then boot it. You will see the following picture.
Figure 4
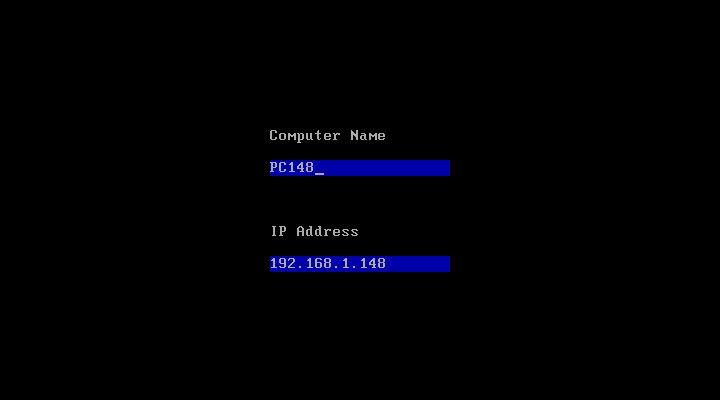
- For first-time diskless booting the PC, you can modify its computer name and IP address as you wish. And then press the Enter key. The client will reboot again.
Figure 5
- Now it will diskless boot successfully.
Figure 6

- Below are pictures of the BIOS to enable diskless boot.
Figure 7
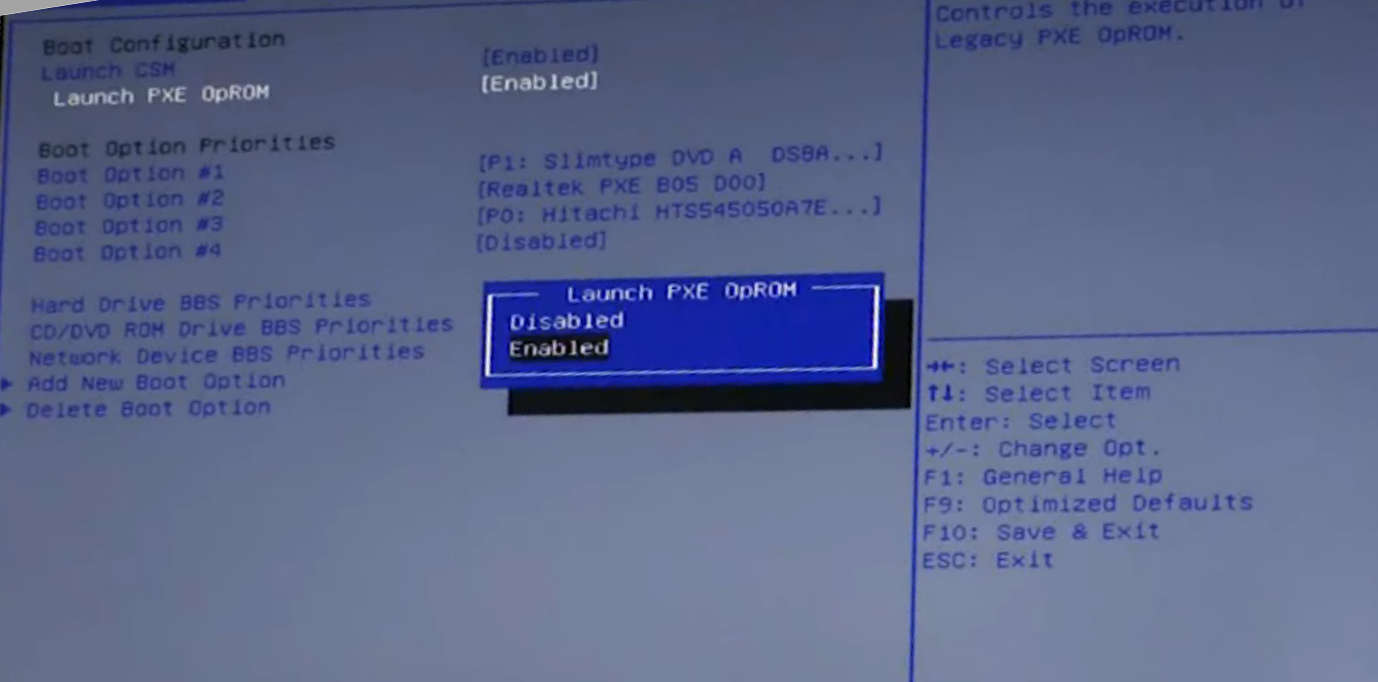
Figure 8
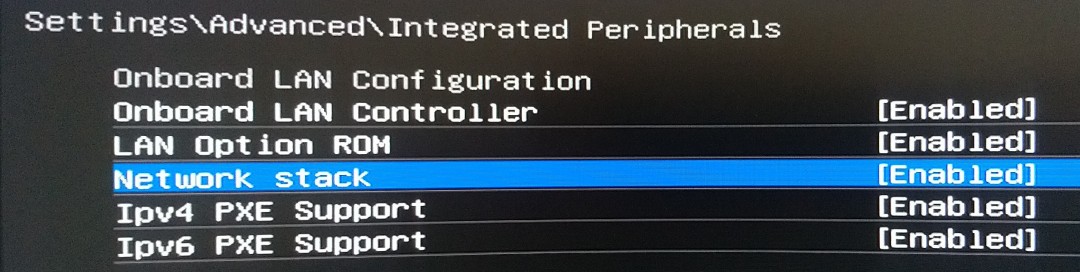
Figure 9