2025-11-21
diskless, boot, msi, uefi, secure boot
The following provides detailed steps for configuring UEFI secure boot on MSI motherboards, including importing the Youngzsoft certificate v2 and setting secure boot options.
- Bios configuration
- Enable virtualization
- Disable preboot iommu
- Enable secure boot
- Admin panel configuration
- Possible problems
- Maximum security
Bios configuration
- Before starting to configure the BIOS, prepare the USB for Secure Boot.
- To enter the BIOS and press F7 to switch to advanced mode, If you see simplified mode. (Figure 1)
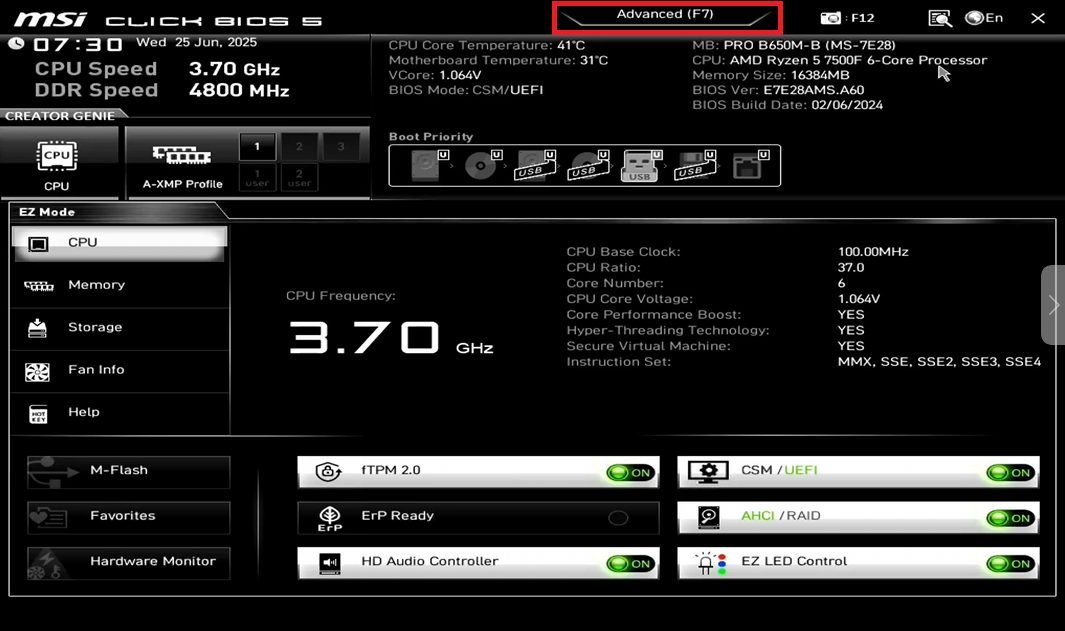
Figure 1
- Open the Settings tab, then the Advanced option. (Figure 2)
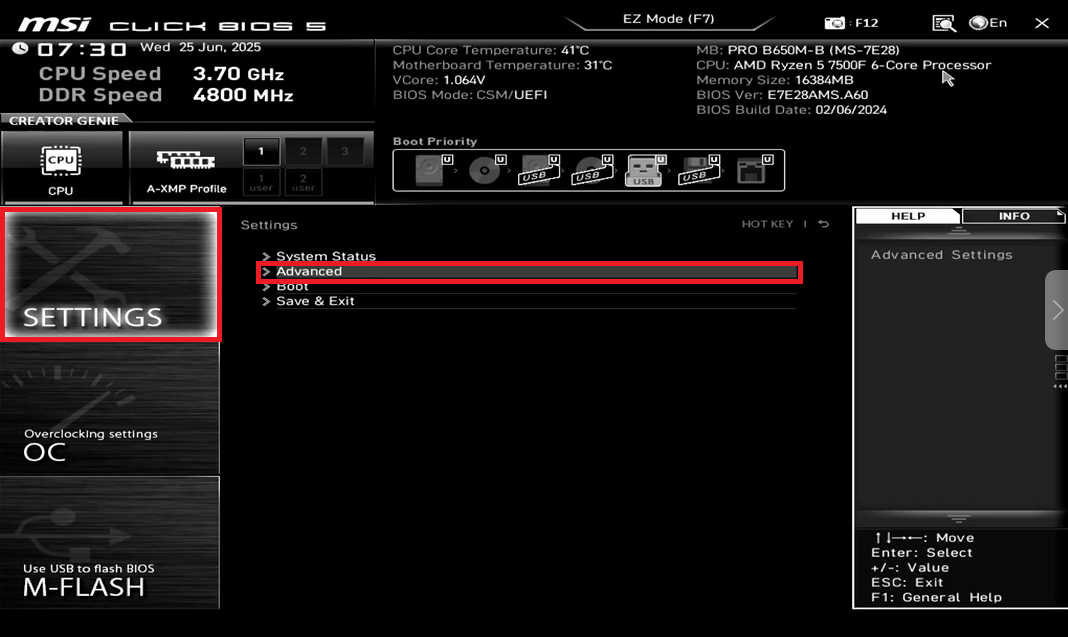
Figure 2
- Open the Integrated Peripherals settings. (Figure 3)
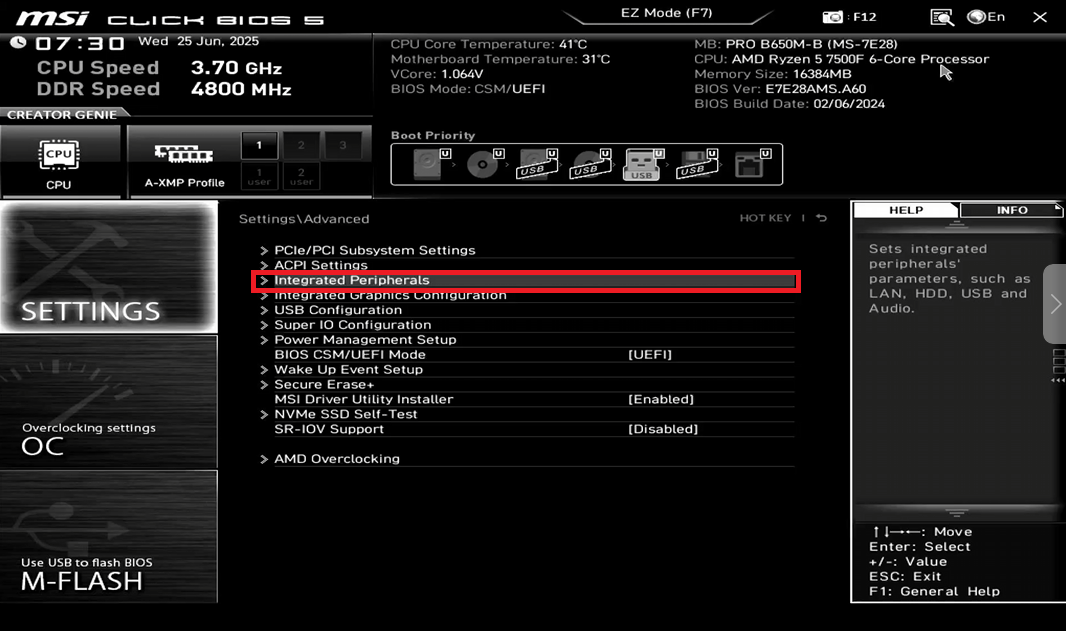
Figure 3
- Enable the Network Stack option. Additional settings will open. (Figure 4)

Figure 4
- In the list of additional settings, find IPv6 PXE Support and disable it. (Figure 5)
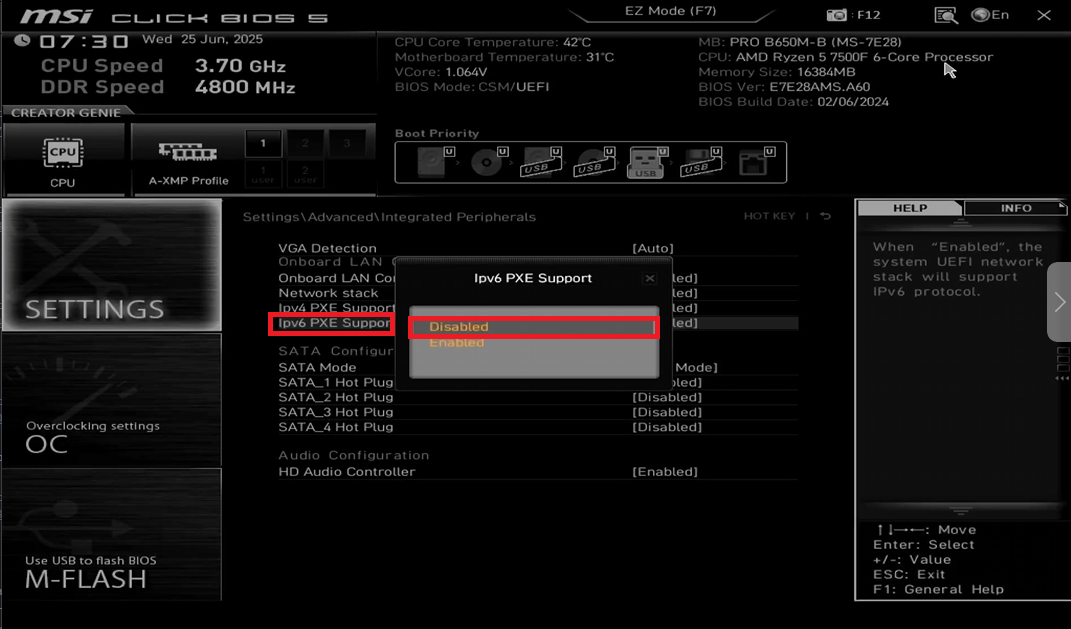
Figure 5
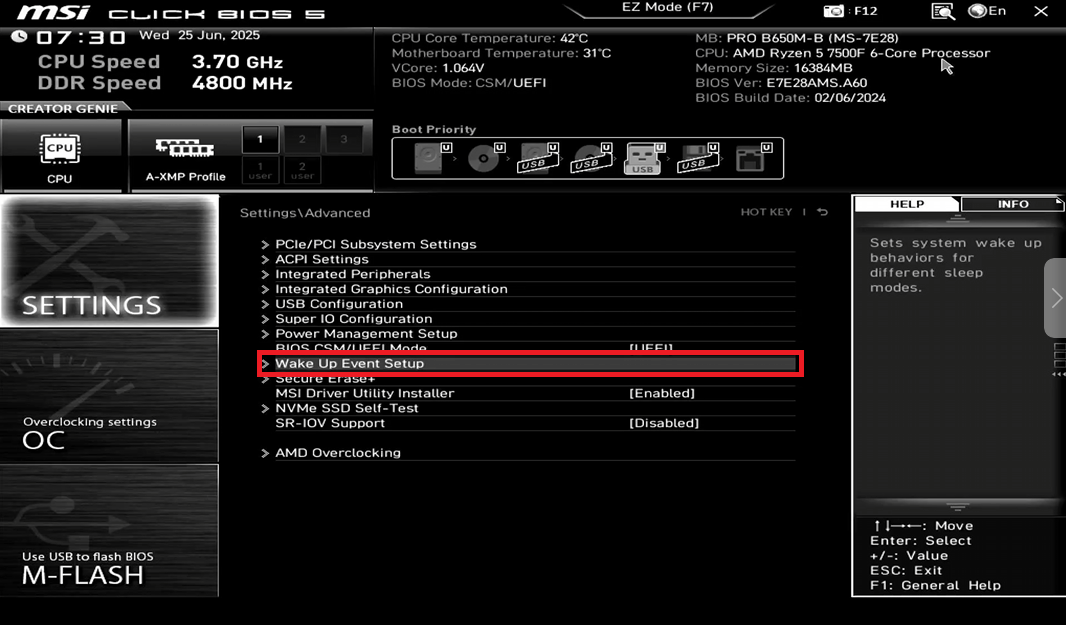
- Return to the Settings - Advanced tab and go to the Wake Up Event Setup settings.(Figure 6)
Figure 6
- Enable the Resume By PCI-E/Network Device setting. (Figure 7)
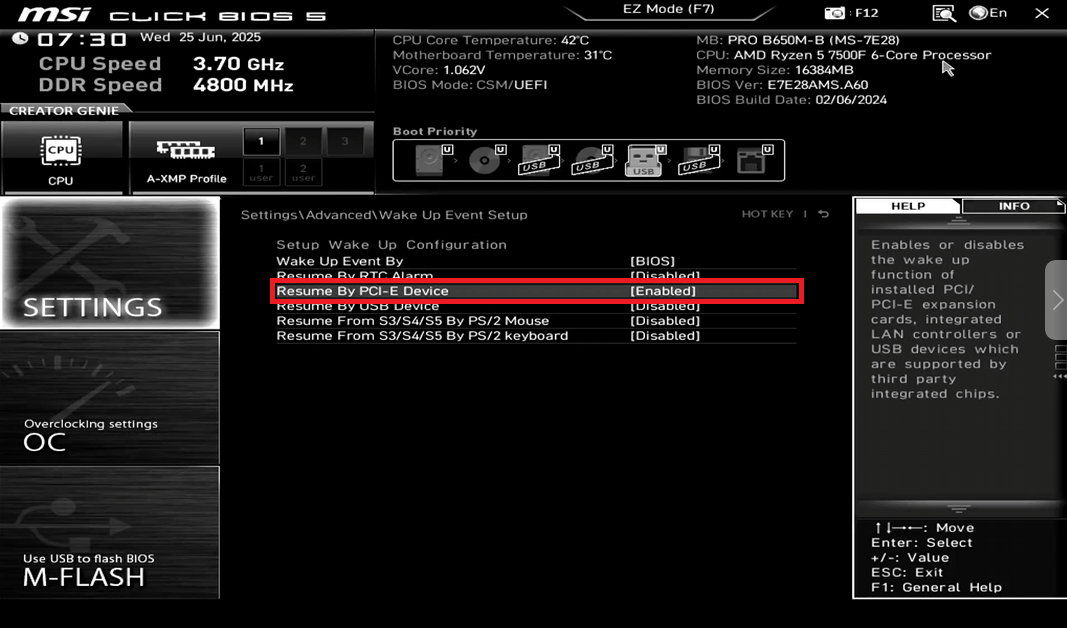
Figure 7
- Next, save the settings by pressing F10, a confirmation window will appear, in which you should select "Save & Reset the PC will automatically reboot.
Enabling virtualization
- Boot in bios and select f7 for advance mode then Open the OC tab and go to the Advanced CPU Configuration option. (Figure 8)
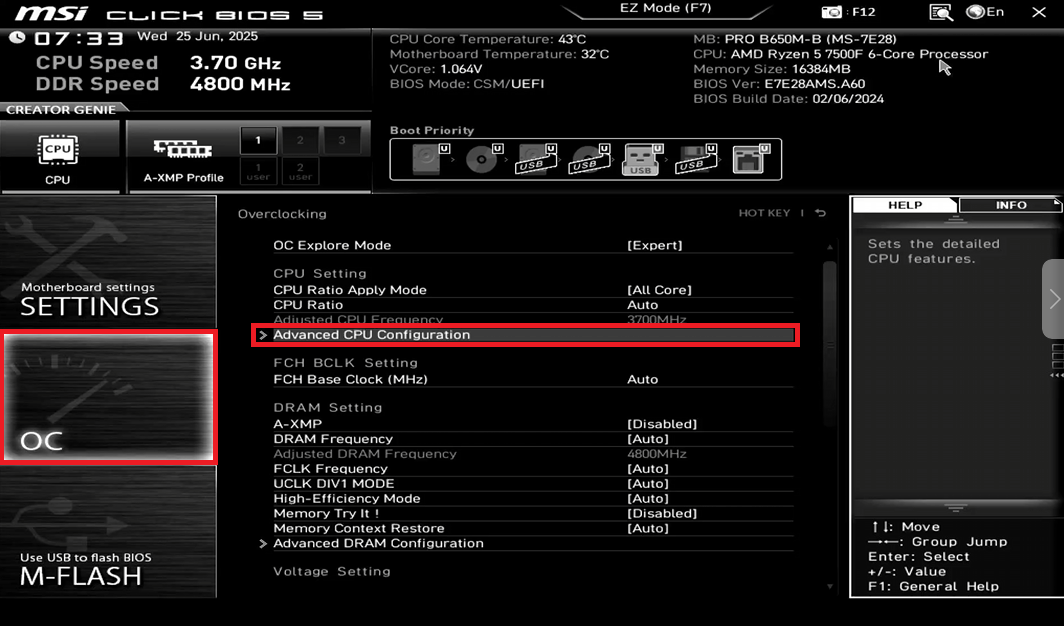
Figure 8
- Next, go to AMD CBS and enable the SVM Enabled setting. (Figure 9)
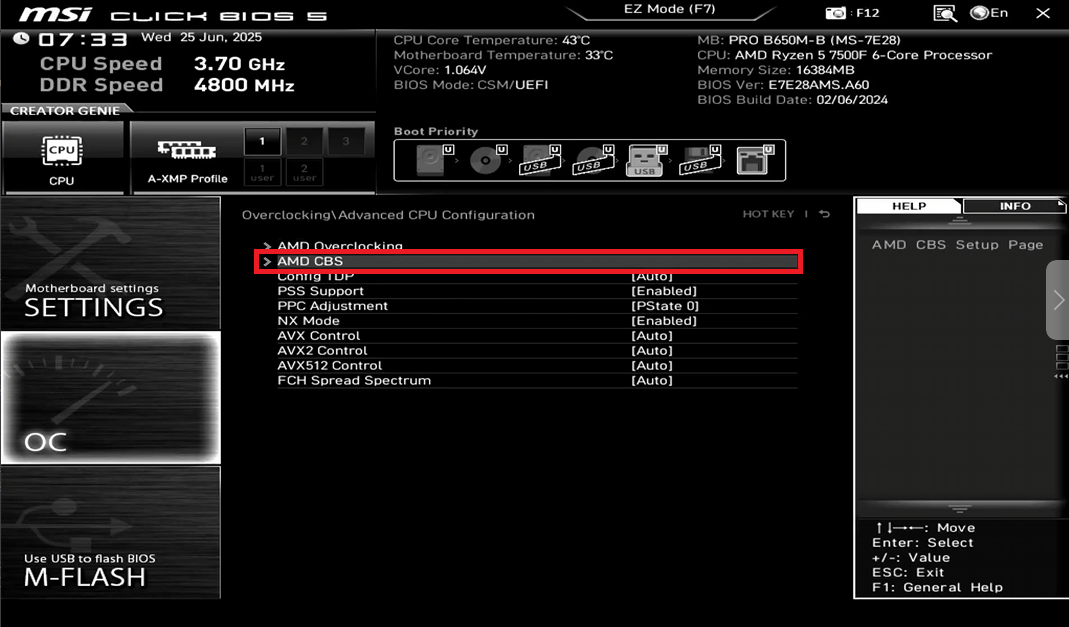
Figure 9
- Select “Enabled” at SVM.(Figure 10)
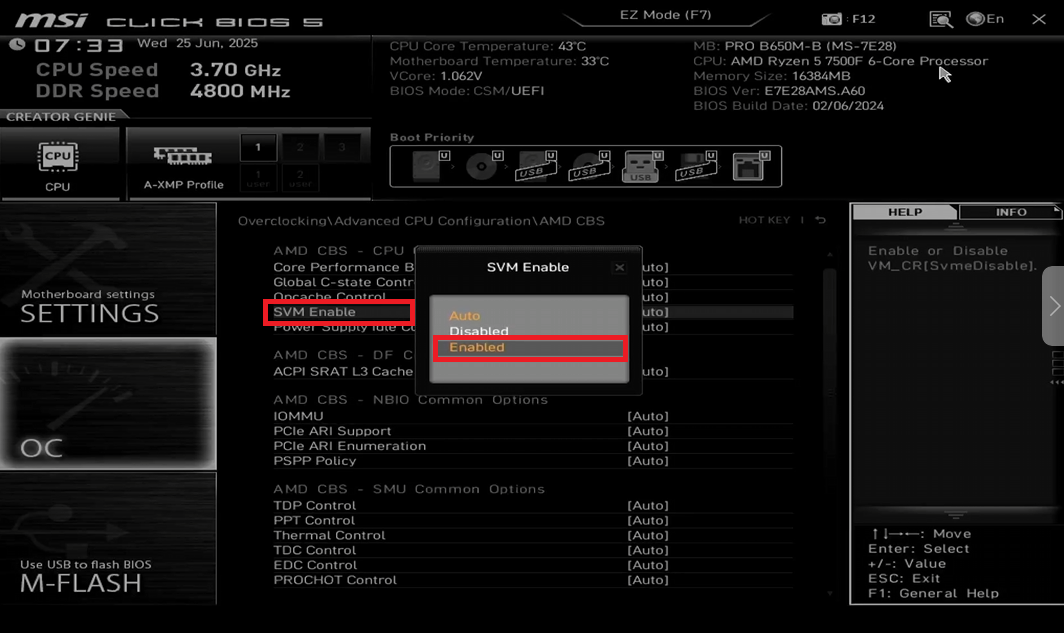
Figure 10
- Next, save the settings by pressing F10, a confirmation window will appear, in which you should select "Save & Reset the PC will automatically reboot.
Disable preboot iommu
- For AMD CPU:
Go to Advanced CPU Configuration → AMD CBS, then locate IOMMU and change it from Auto/Enabled to Disabled. (Figure 11) - For Intel CPU
If Control IOMMU Pre-boot behavior is visible, set it to Disable IOMMU during boot
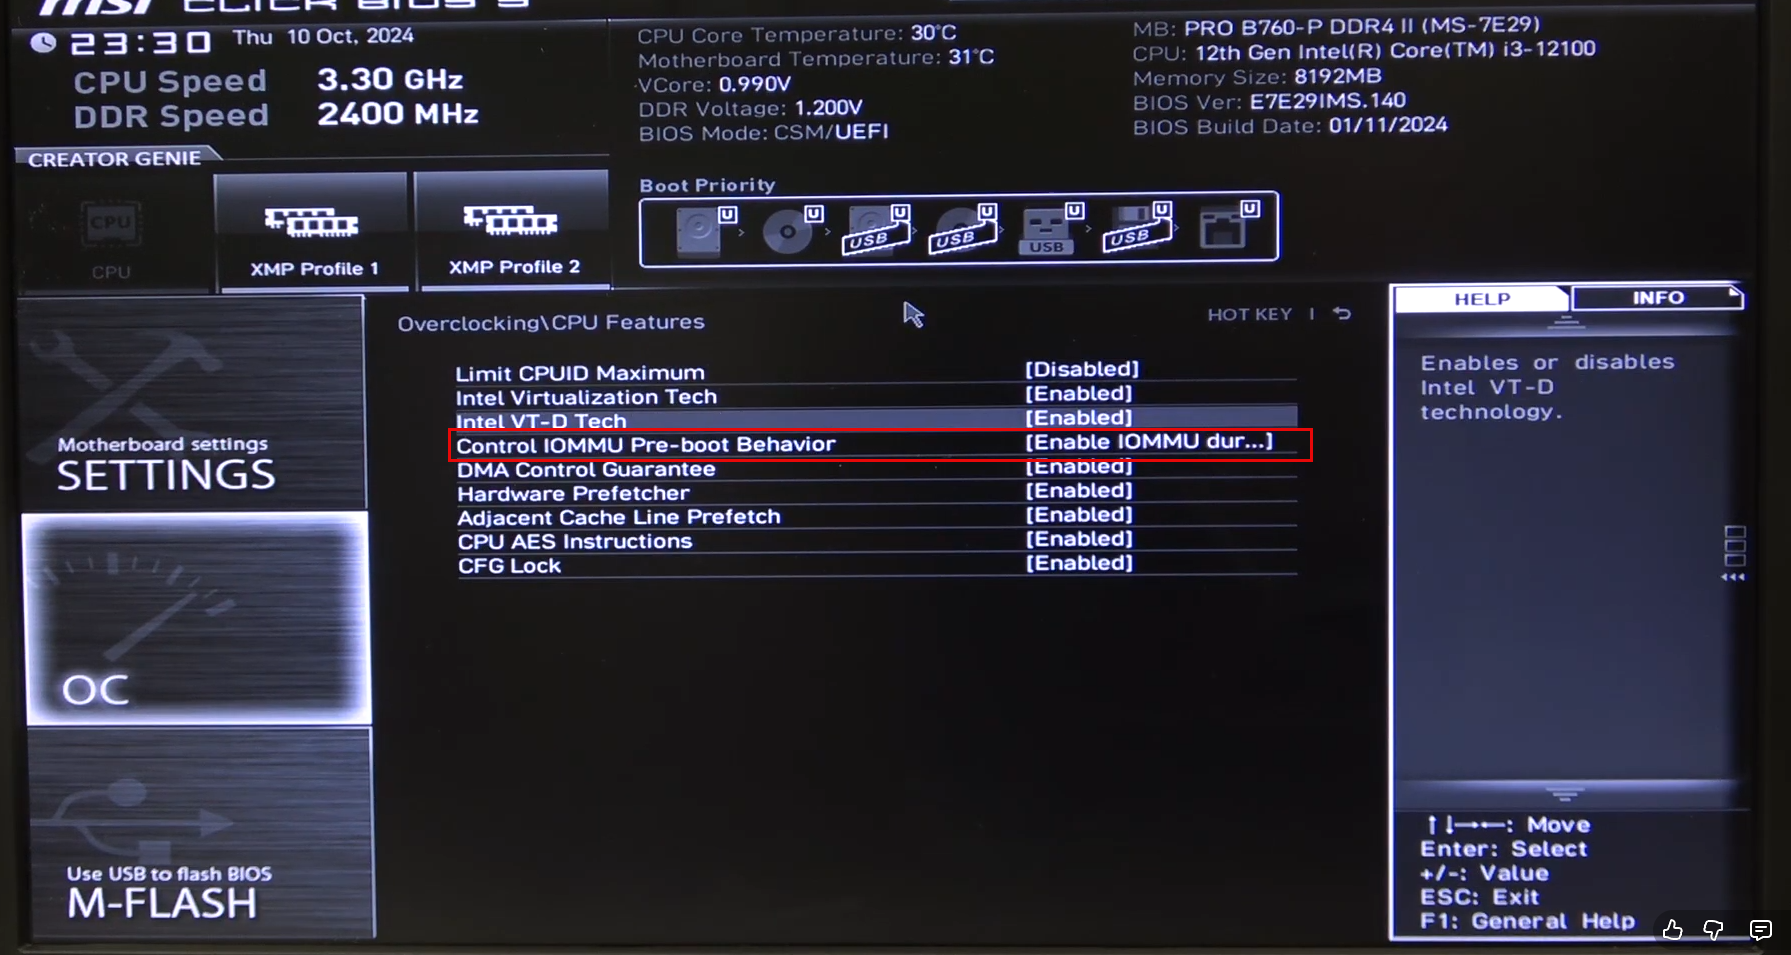
Figure 11
Enable secure boot
- Access the BIOS settings and open the Security tab and (Figure 11)
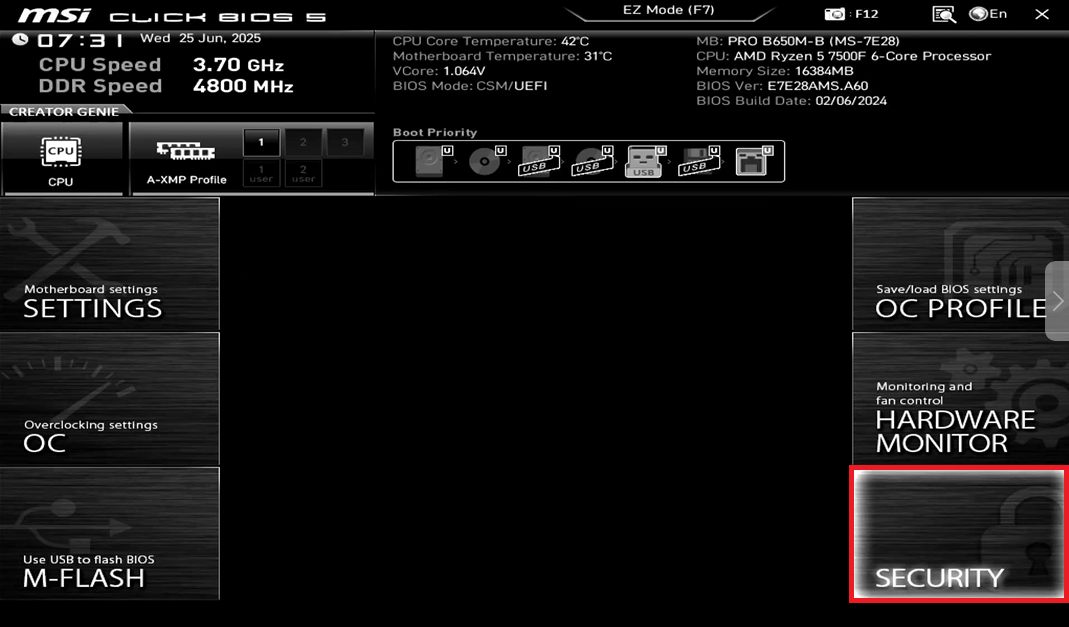
Figure 11
- Go to the Secure Boot option. (Figure 12)
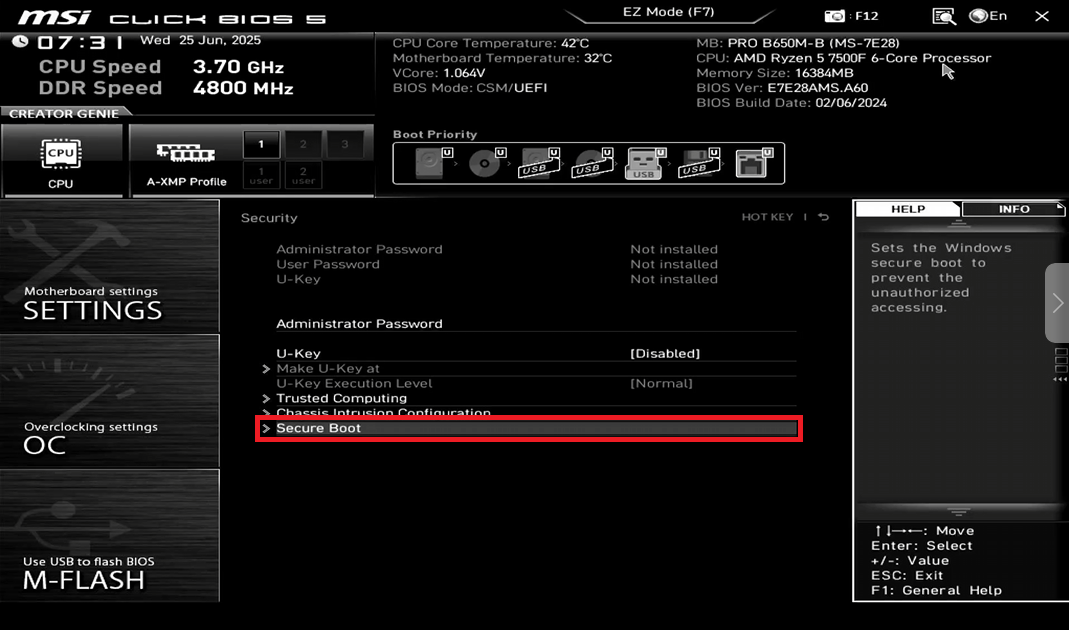
Figure 12
- Make sure that Secure boot is enabled and Secure Boot Mode is set to Custom. (Figure 13)
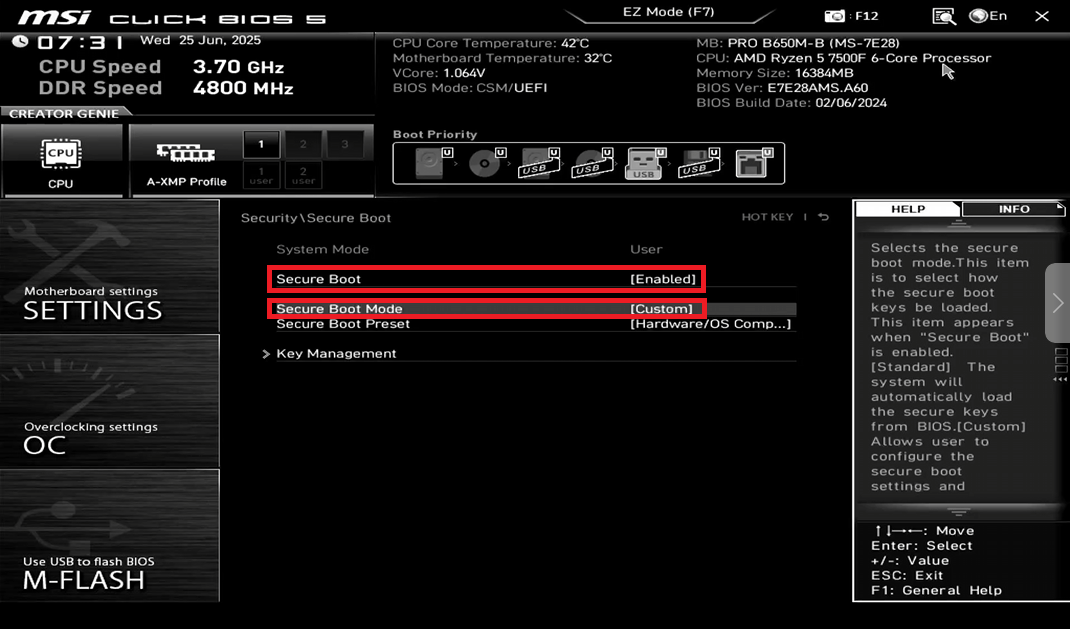
Figure 13
- Open the Key Management option. (Figure 14)
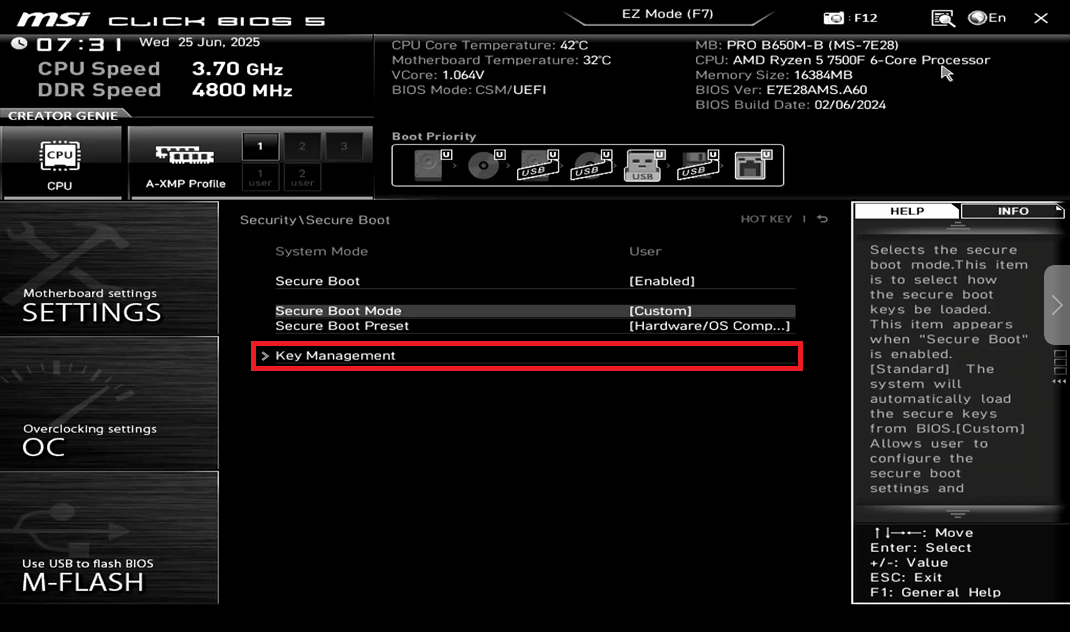
Figure 14
- Find the "Enroll all Factory Default Keys" option, use the arrow keys to select it, and press Enter. A window will open. Select "Yes" and press Enter.
- Do the same in the second window.
- Next, press F10 and then Enter to save the settings and reboot the PC. After rebooting, re-enter the BIOS. (Figure 15)
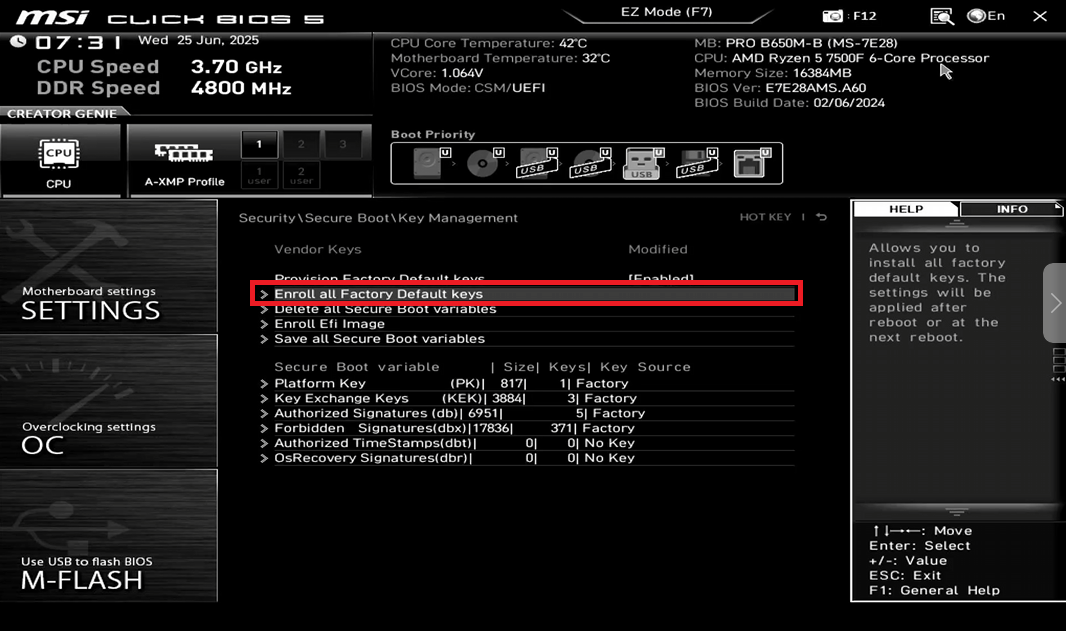
Figure 15
- Using the instructions above, reopen the Key Management option (Security - Secure Boot - Key Management).
- Find the Authorized Signatures option in this section (on some older motherboards it may appear as DB Management). Select it and press Enter.(Figure 16)
Note: DBX is the blacklist of Secure Boot keys, do NOT import anything into DBX.
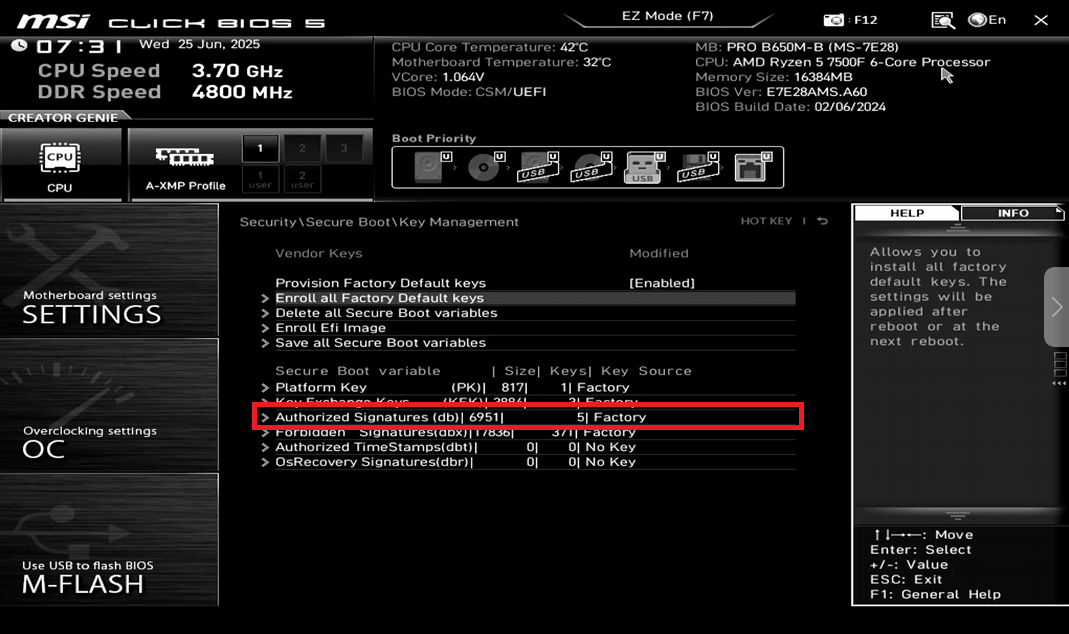
Figure 16
- In the window that opens, select Append key and press Enter.(Figure 17)

Figure 17
- In the window that opens, select No and press Enter.(Figure 18)
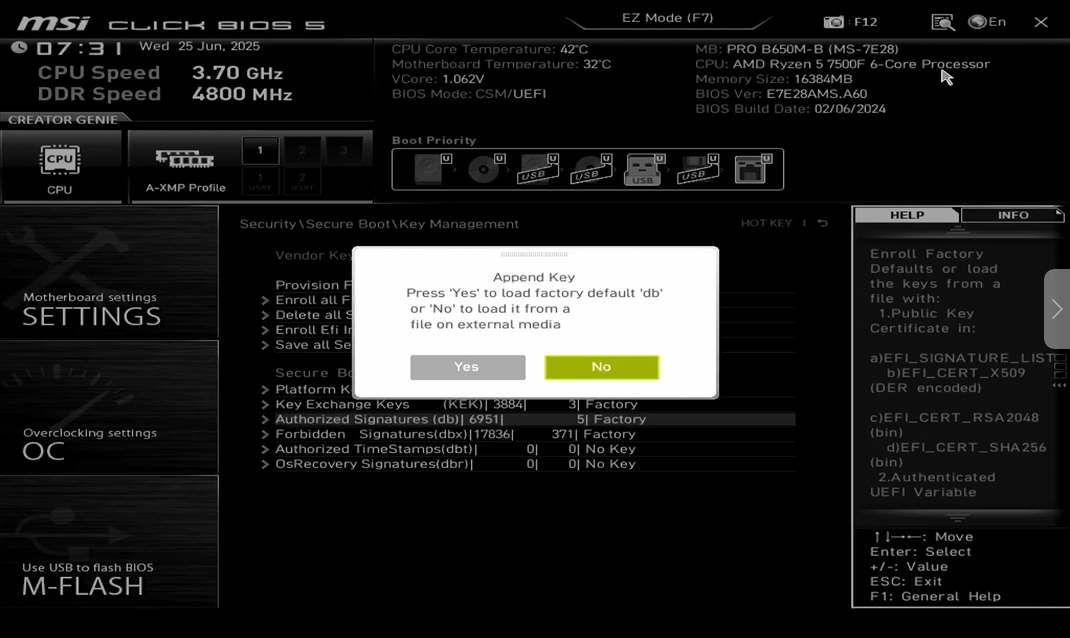
Figure 18
- In the window that opens, in many cases, as in this one, there will be one option without selecting anything, press Enter.(Figure 19)
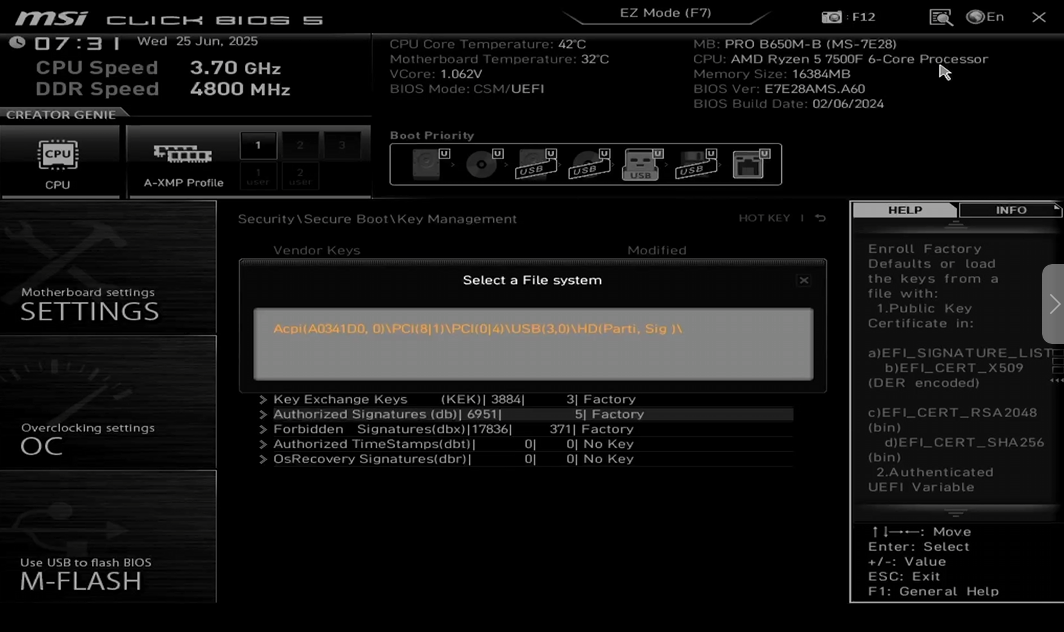
Figure 19
- In the window that opens, select the Youngzsoftv2.cer certificate and press Enter. (Figure 20)
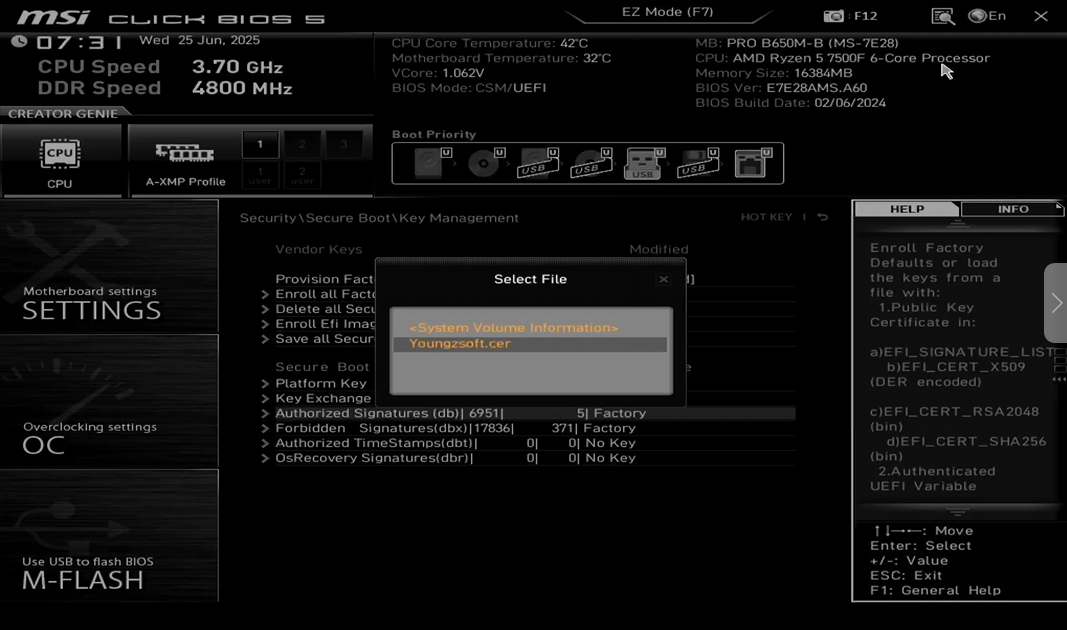
Figure 20
- In the window that opens, select the Public Key Certificate and press Enter.(Figure 21)
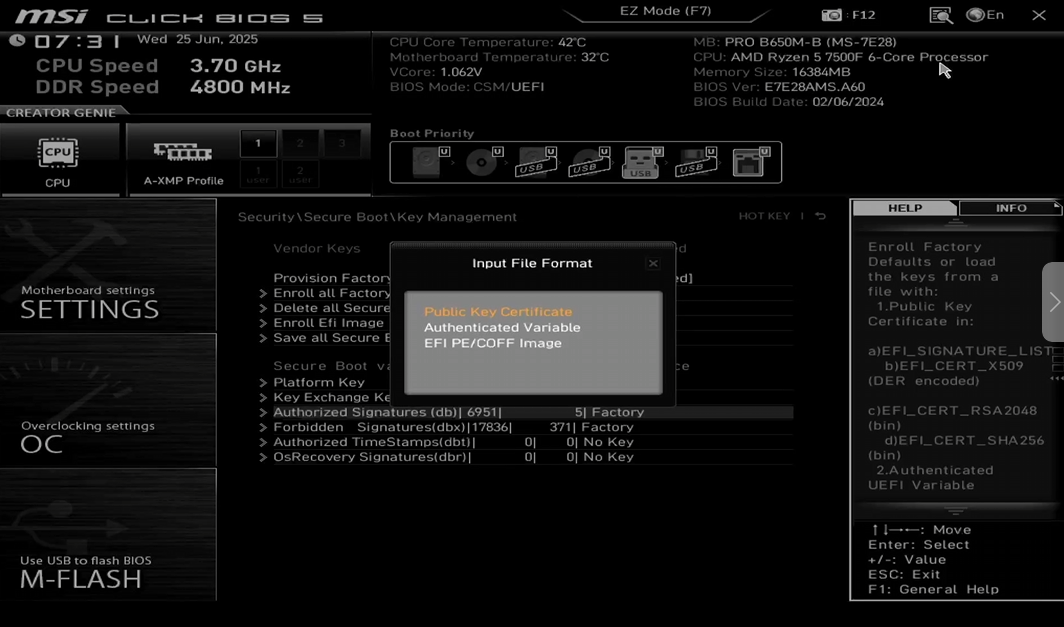
Figure 21
- In the next window, also Enter. (Figure 22)
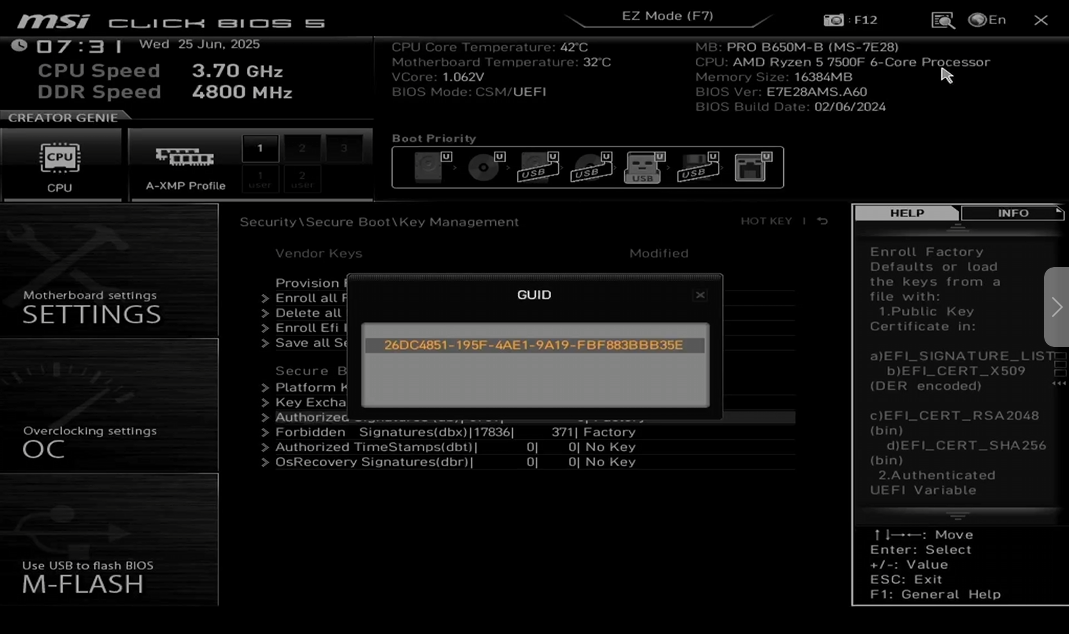
Figure 22
- In the window that opens, select Yes and press Enter.(Figure 23)
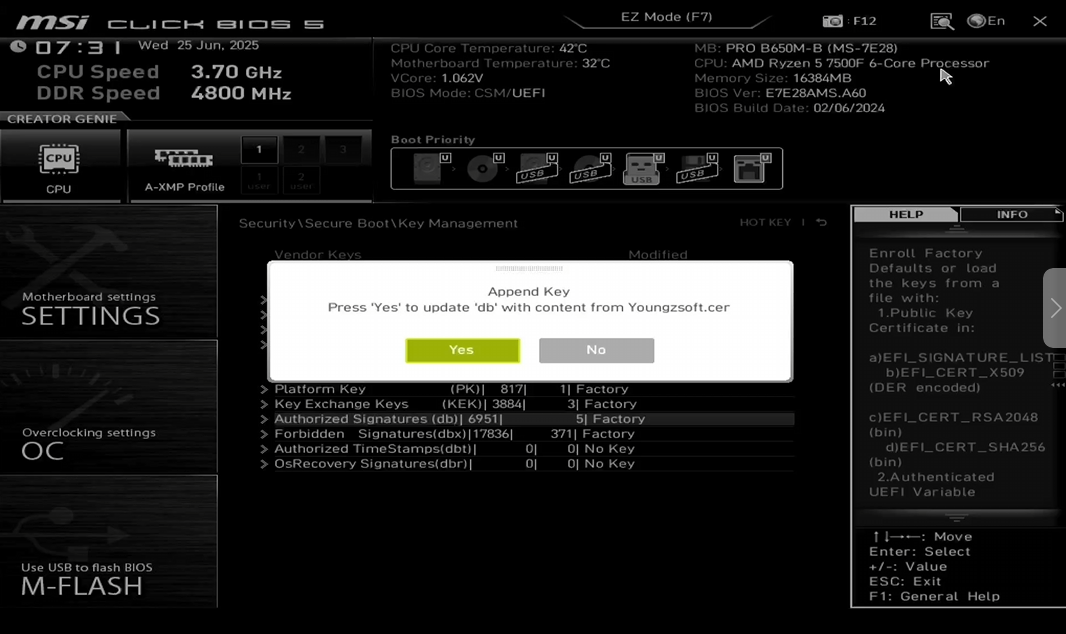
Figure 23
- In the next window, press Enter. The window will close, and you're done.(Figure 24)
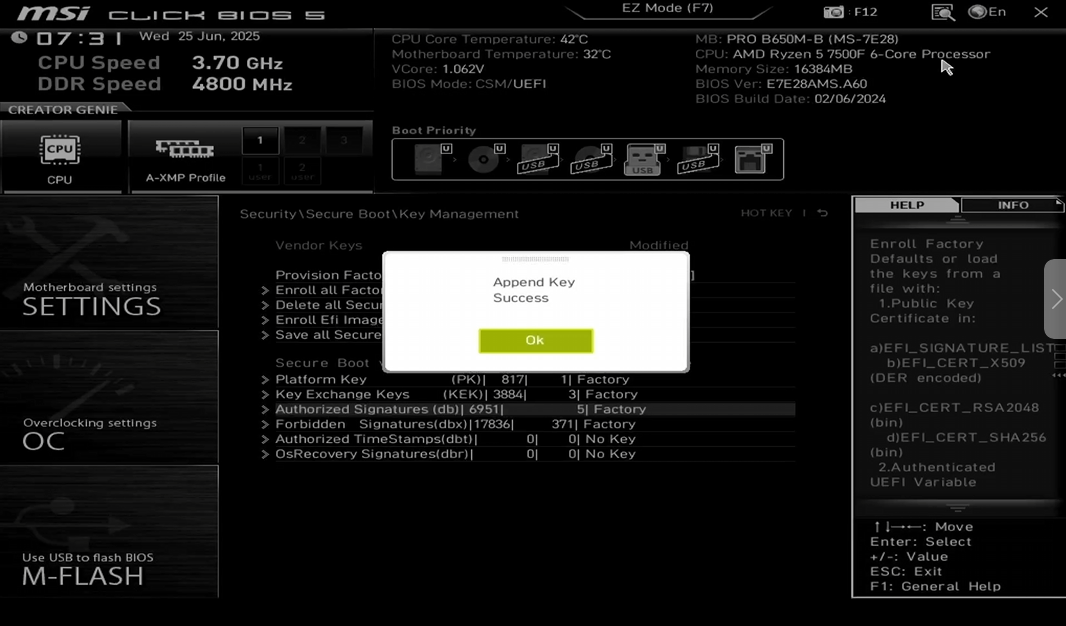
Figure 24
- Next, save the settings by pressing F10, a confirmation window will appear, in which you should select "Save & Reset the PC will automatically reboot.
Admin panel configuration
- Once the image is ready on the iCafeCloud admin panel in the Boot section , edit the client PC and select ipxe2026(UEFI) on the PXE field. (Figure 25)
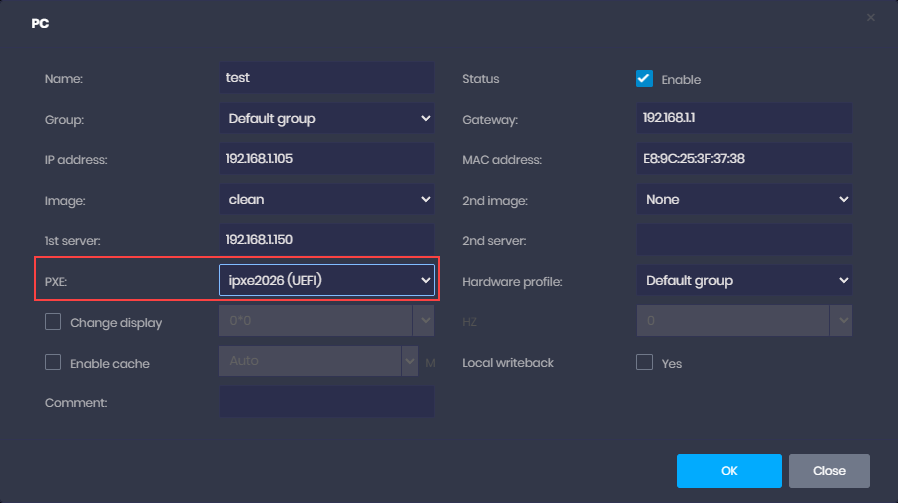
Figure 25
Possible problems
- In case the Append key failed remove the mouse USB and use only keyboard or follow the steps below (Figure 26)
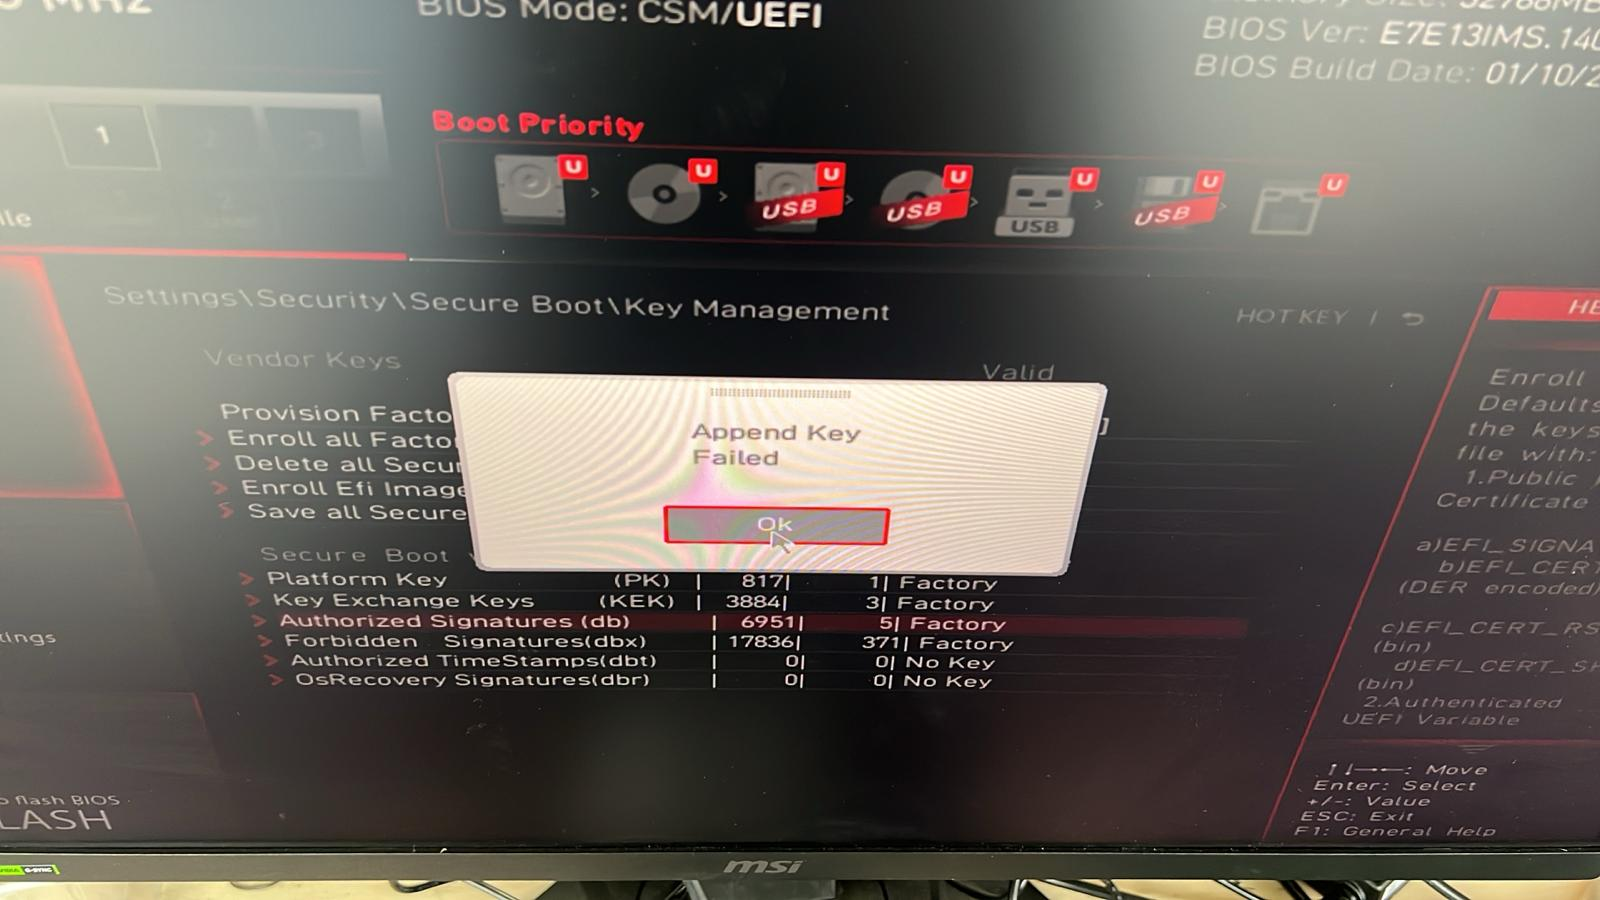
Figure 26
- Navigate to the BIOS settings and choose either IEXPO or XMP Profile 1 (Figure 27)
Figure 27

Maximum security
- If you still encounter issues with Faceit or other anti-cheats reporting that Secure Boot is not enabled even though it is enabled in BIOS on MSI systems, go to Settings - Security and click on Secure Boot Preset (Figure 1).
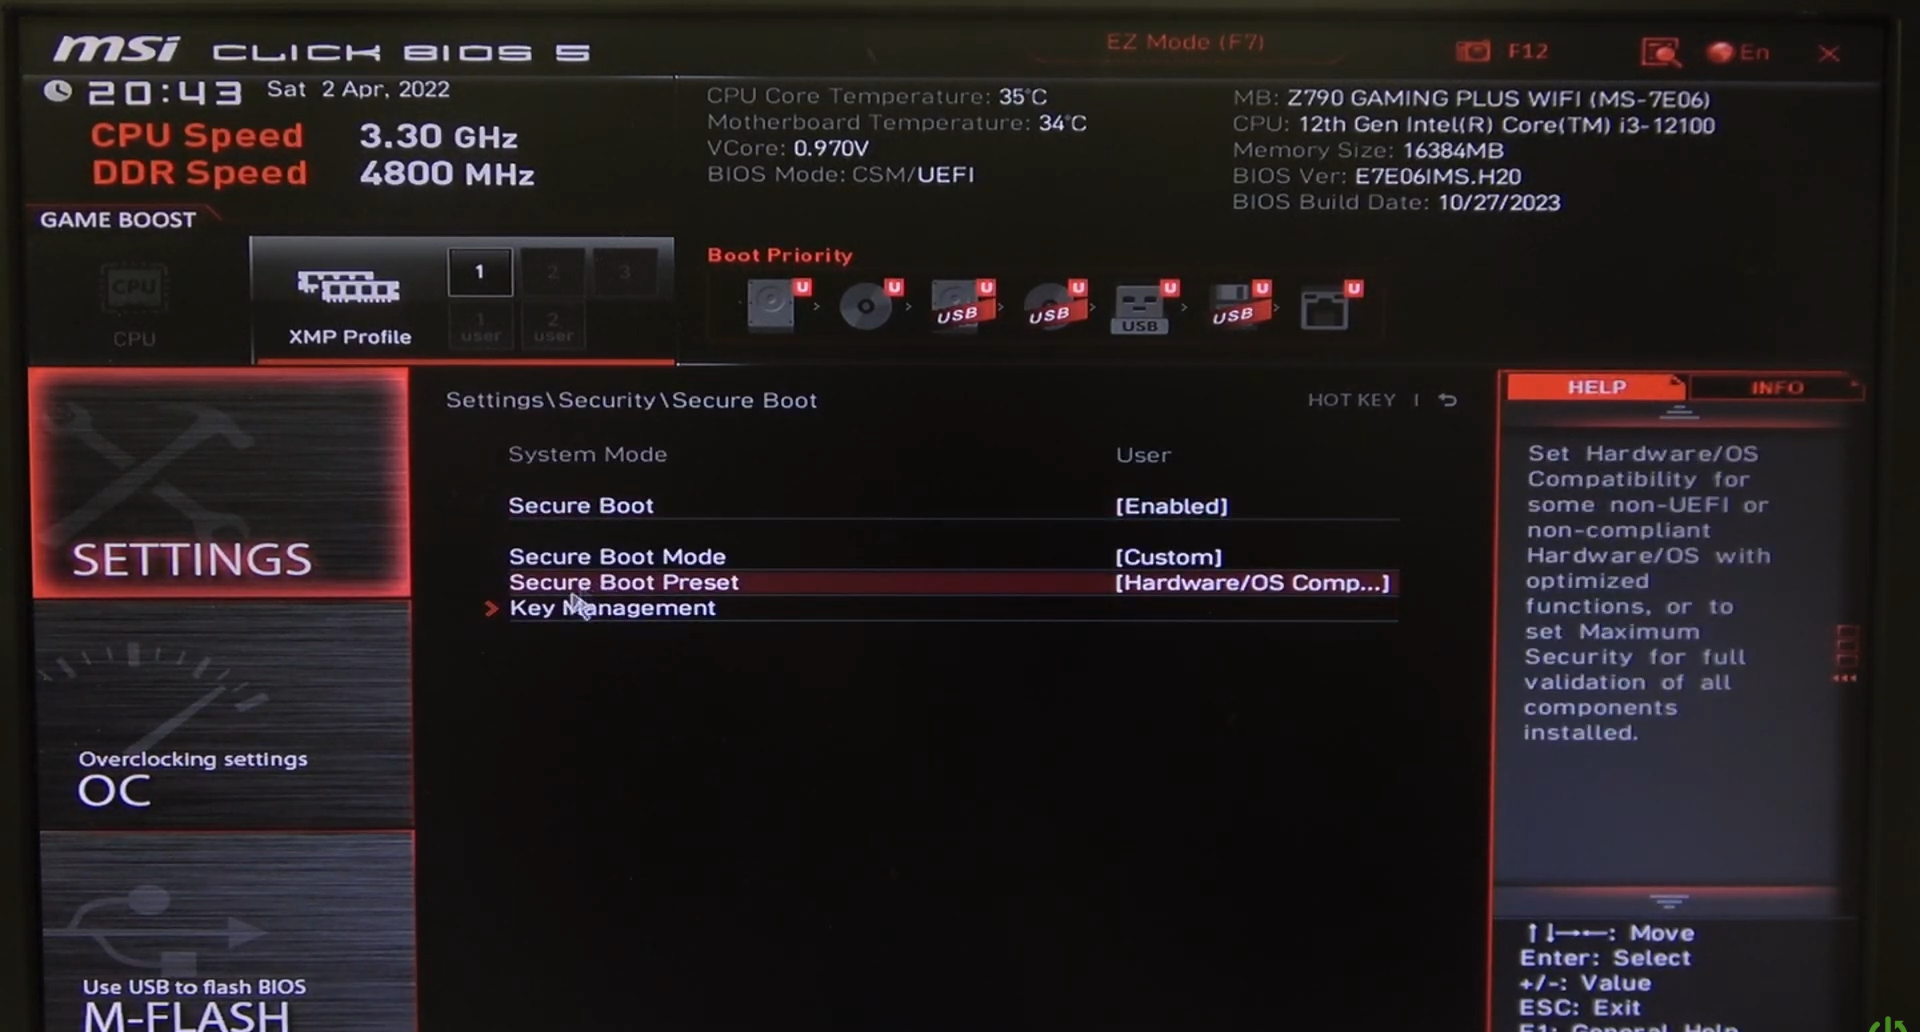
Figure 1
- And set it to Maximum Security, then press F10 to save the BIOS changes and boot the PC. The anti-cheat should now work correctly (Figure 2)
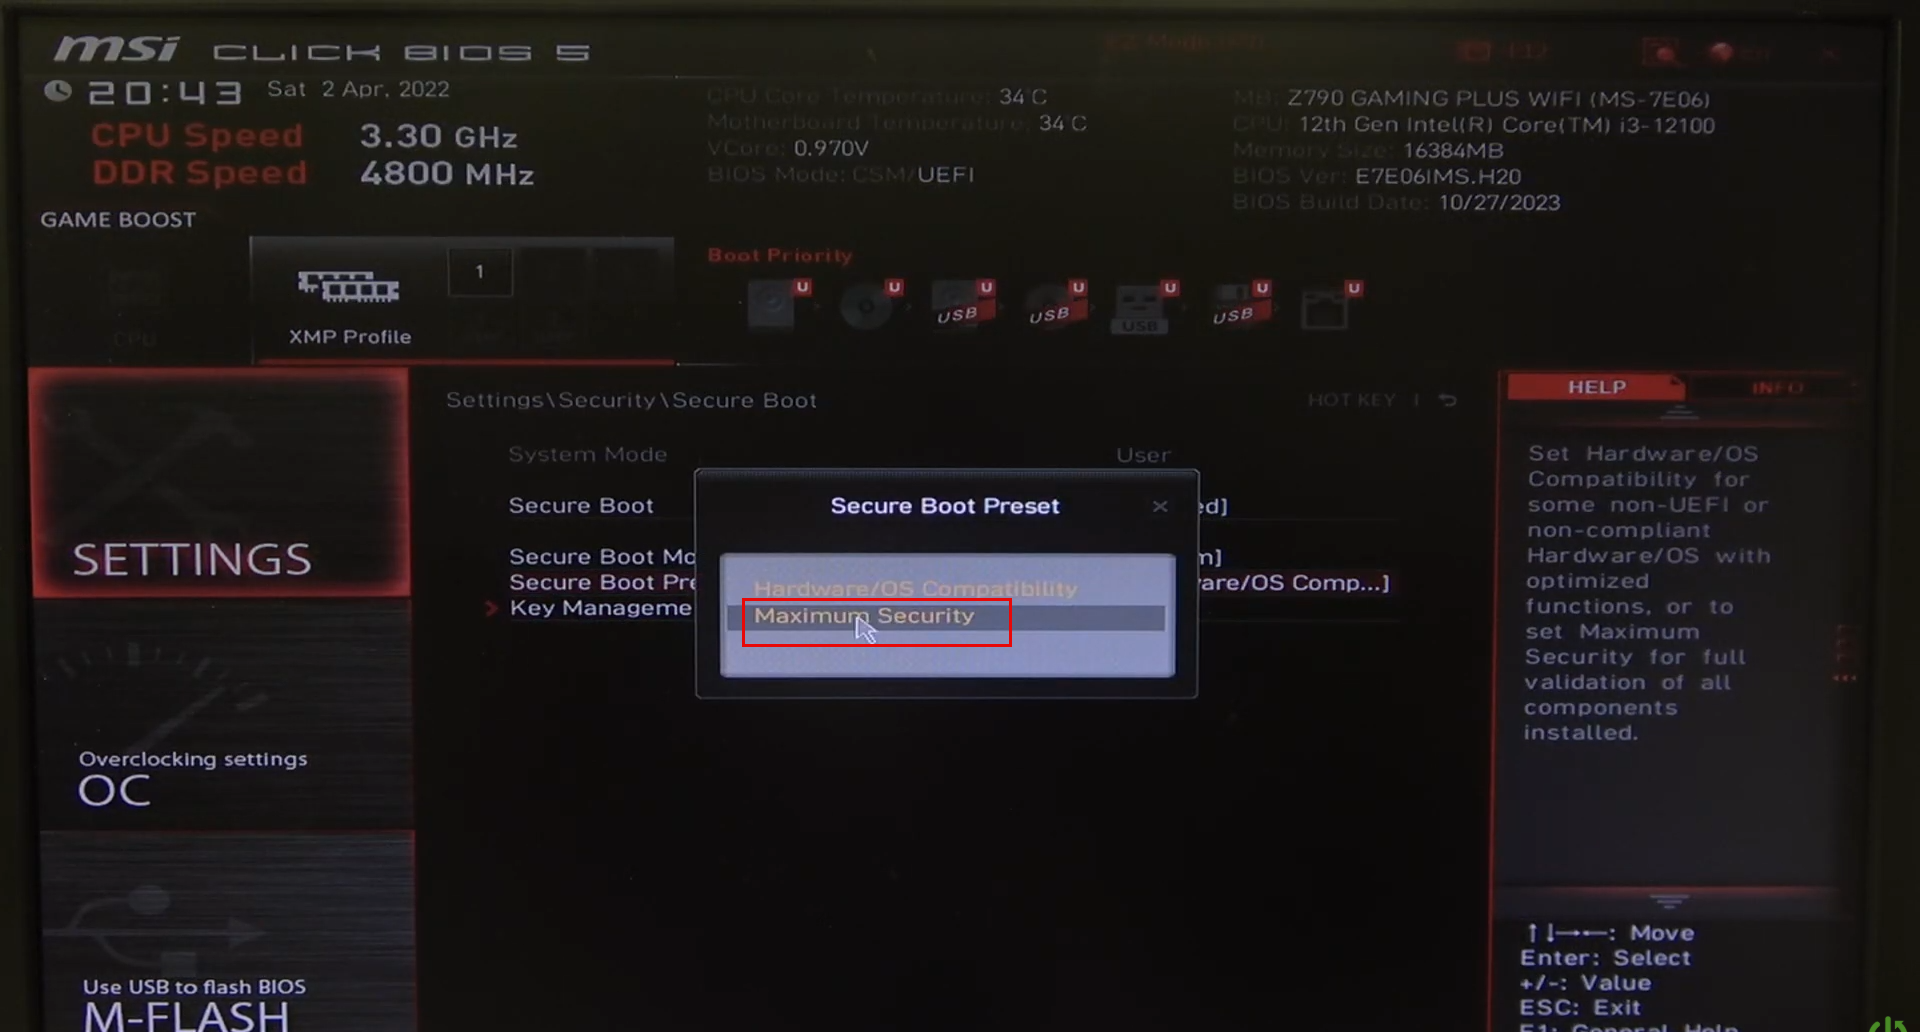
Figure 2