2026-01-27
gpu, pnp, drivers, auto
The following explains how GPU PNP works and how GPU drivers are automatically installed on the image for Nvidia and AMD gpus.
Enable Nvidia GPU PNP
- Update CCBoot server to latest version and update CCBoot client
- Go to the Boot page, select the Image, and click Edit Image. (Figure 1)
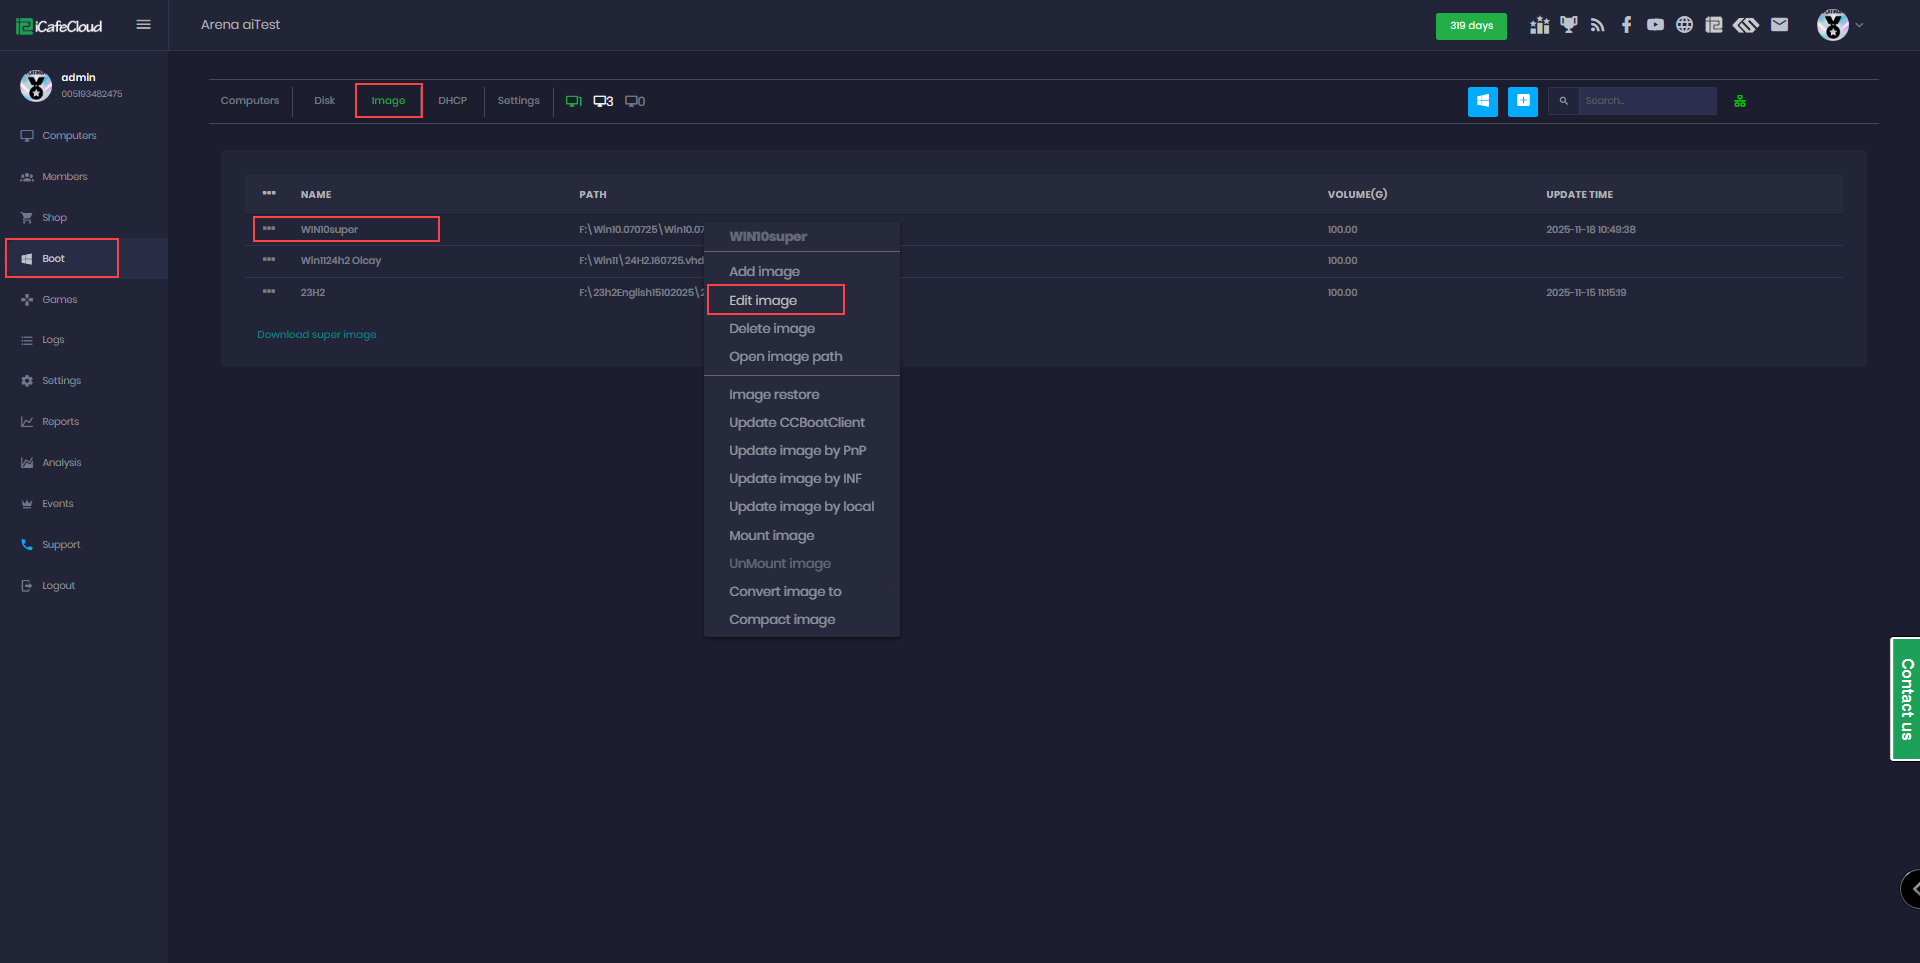
Figure 1
- Next, enable GPU PNP, then click at infGPU.zip (Figure 2)
- Direct link infGPU.zip including (Nvidia, AMD, Intel) (4.18 GB)
- Google drive link infGPU.zip , including (Nvidia, AMD, Intel) (4.18 GB)
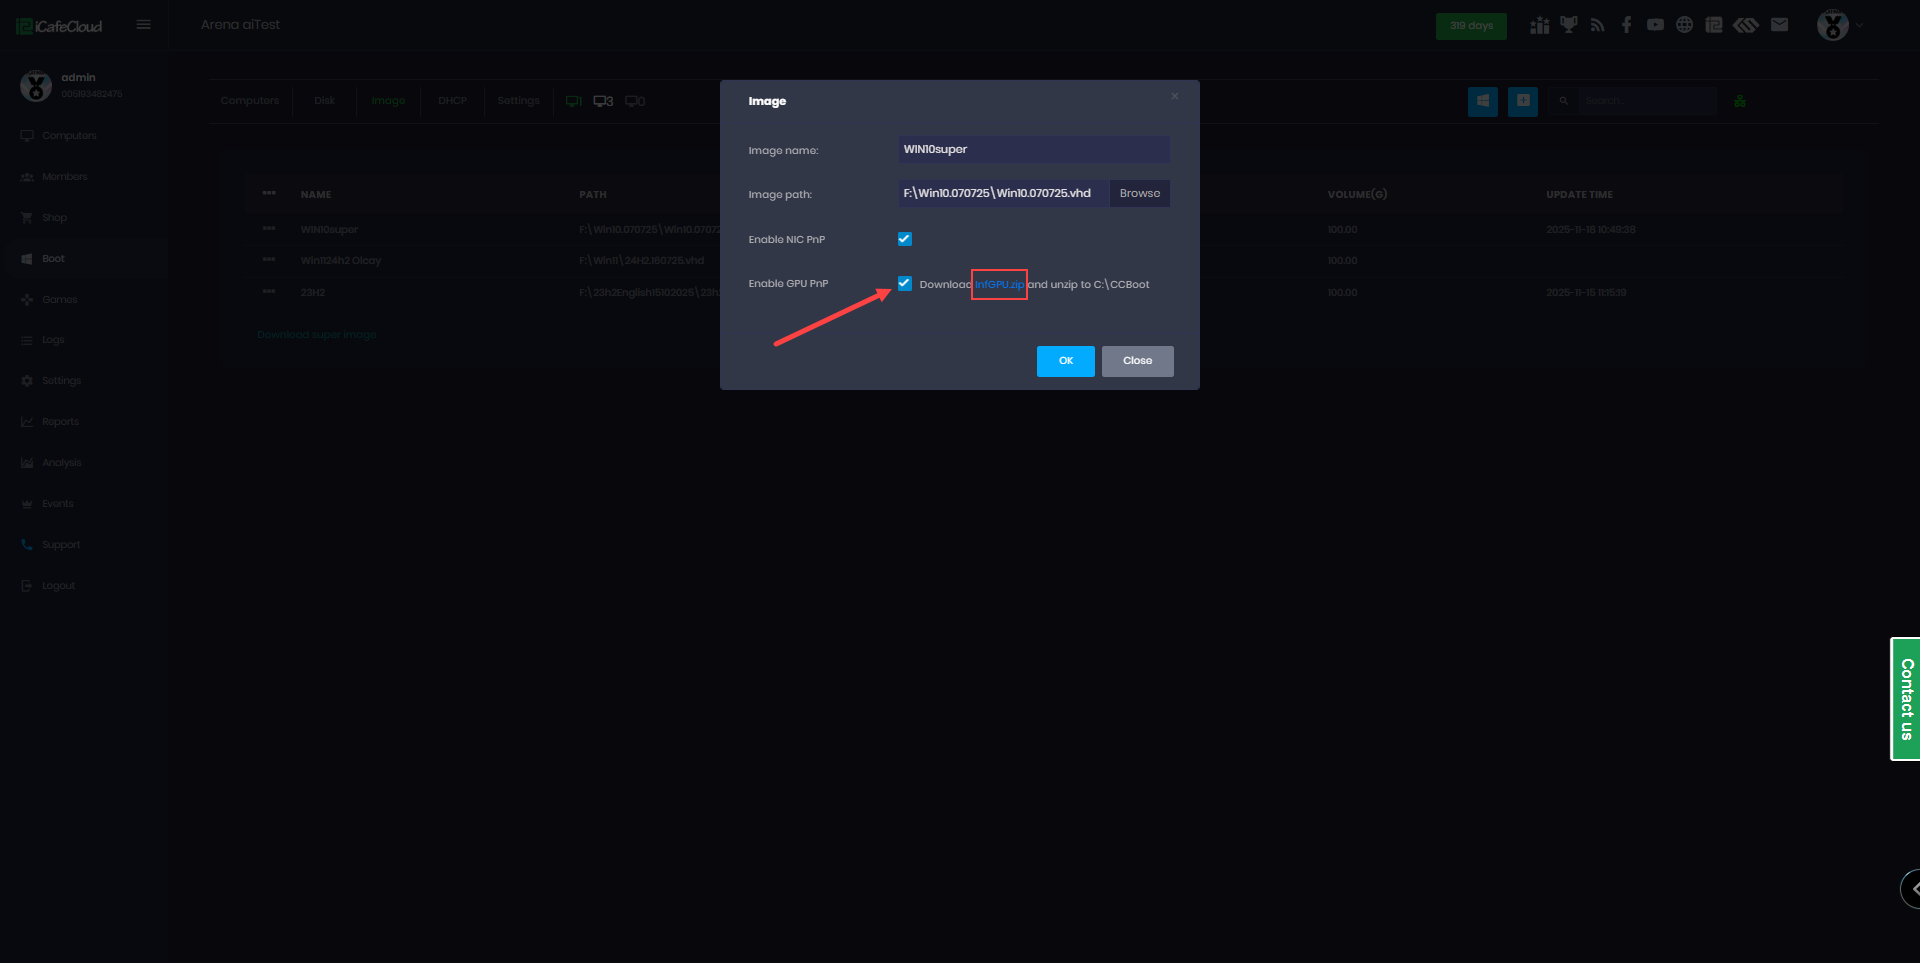
Figure 2
- Individual download files in Google drive - GPU drivers ← Nvidia , AMD, Intel.
- Nvidia GPU driver 32.0.15.8180 - Support all series from 700 to series 5000
Yandex download link - Nvidia 32.0.15.8180
- Once the ZIP file is downloaded, extract the InfGPU folder into your CCBootCloud directory, for example: C:\CCBoot (Figure 3)
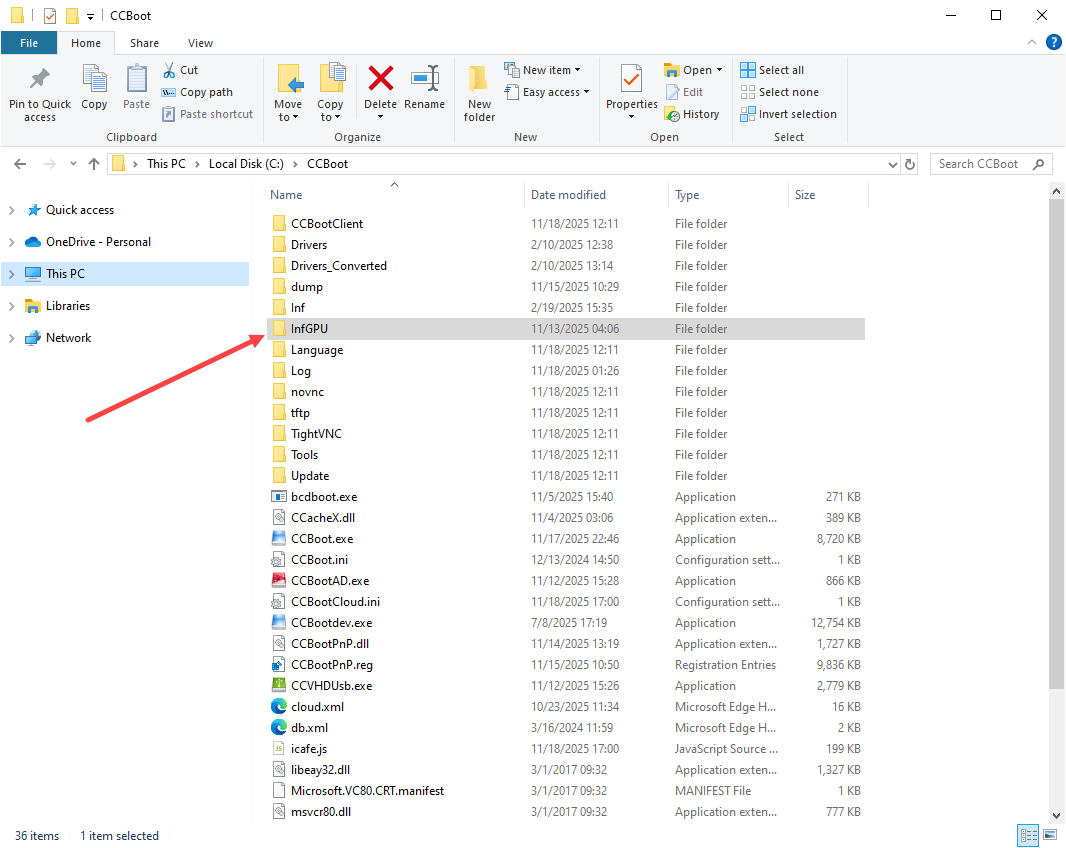
Figure 3
- The folder structure would be like -
C:\CCBoot\InfGPU\nvidia_devices.32.0.15.8180\
not
C:\CCBoot\InfGPU\nvidia_devices.32.0.15.8180\nvidia_devices.32.0.15.8180 (Figure 4)
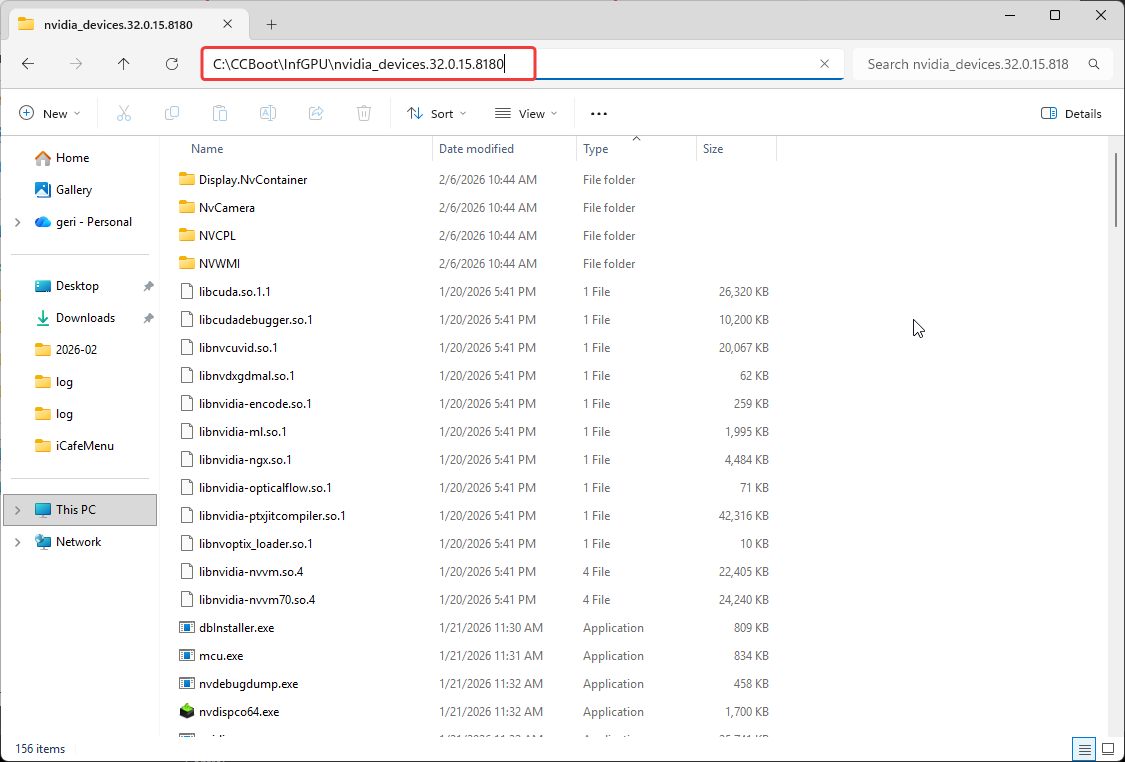
Figure 4
- Next, boot the client PC where you want to install the GPU driver and select one model first.
- Make sure you don't have Hardware profiles enabled if you do delete them all.
- Make sure to select ipxe2026 when booting the client PC other PXE doesnt support it.
- The first boot after enabling GPU PNP will take longer than usual because the system is installing the GPU drivers.
- After the first boot, you need to reboot the computer again to complete the installation process for NVIDIA drivers.
- Don’t boot all PCs together for the first boot, boot PCs one by one, else you will get this error:
*** ERROR *** file_read 1 Unknown error 6 reason: 0x6 The handle is invalid. - Once installation is completed successfully, you can verify it in the CCBootCloud log.
auto gpu pnp success VEN_10DE&DEV_1C82&SUBSYS_10DE11BF&REV_A1 (Figure 5)
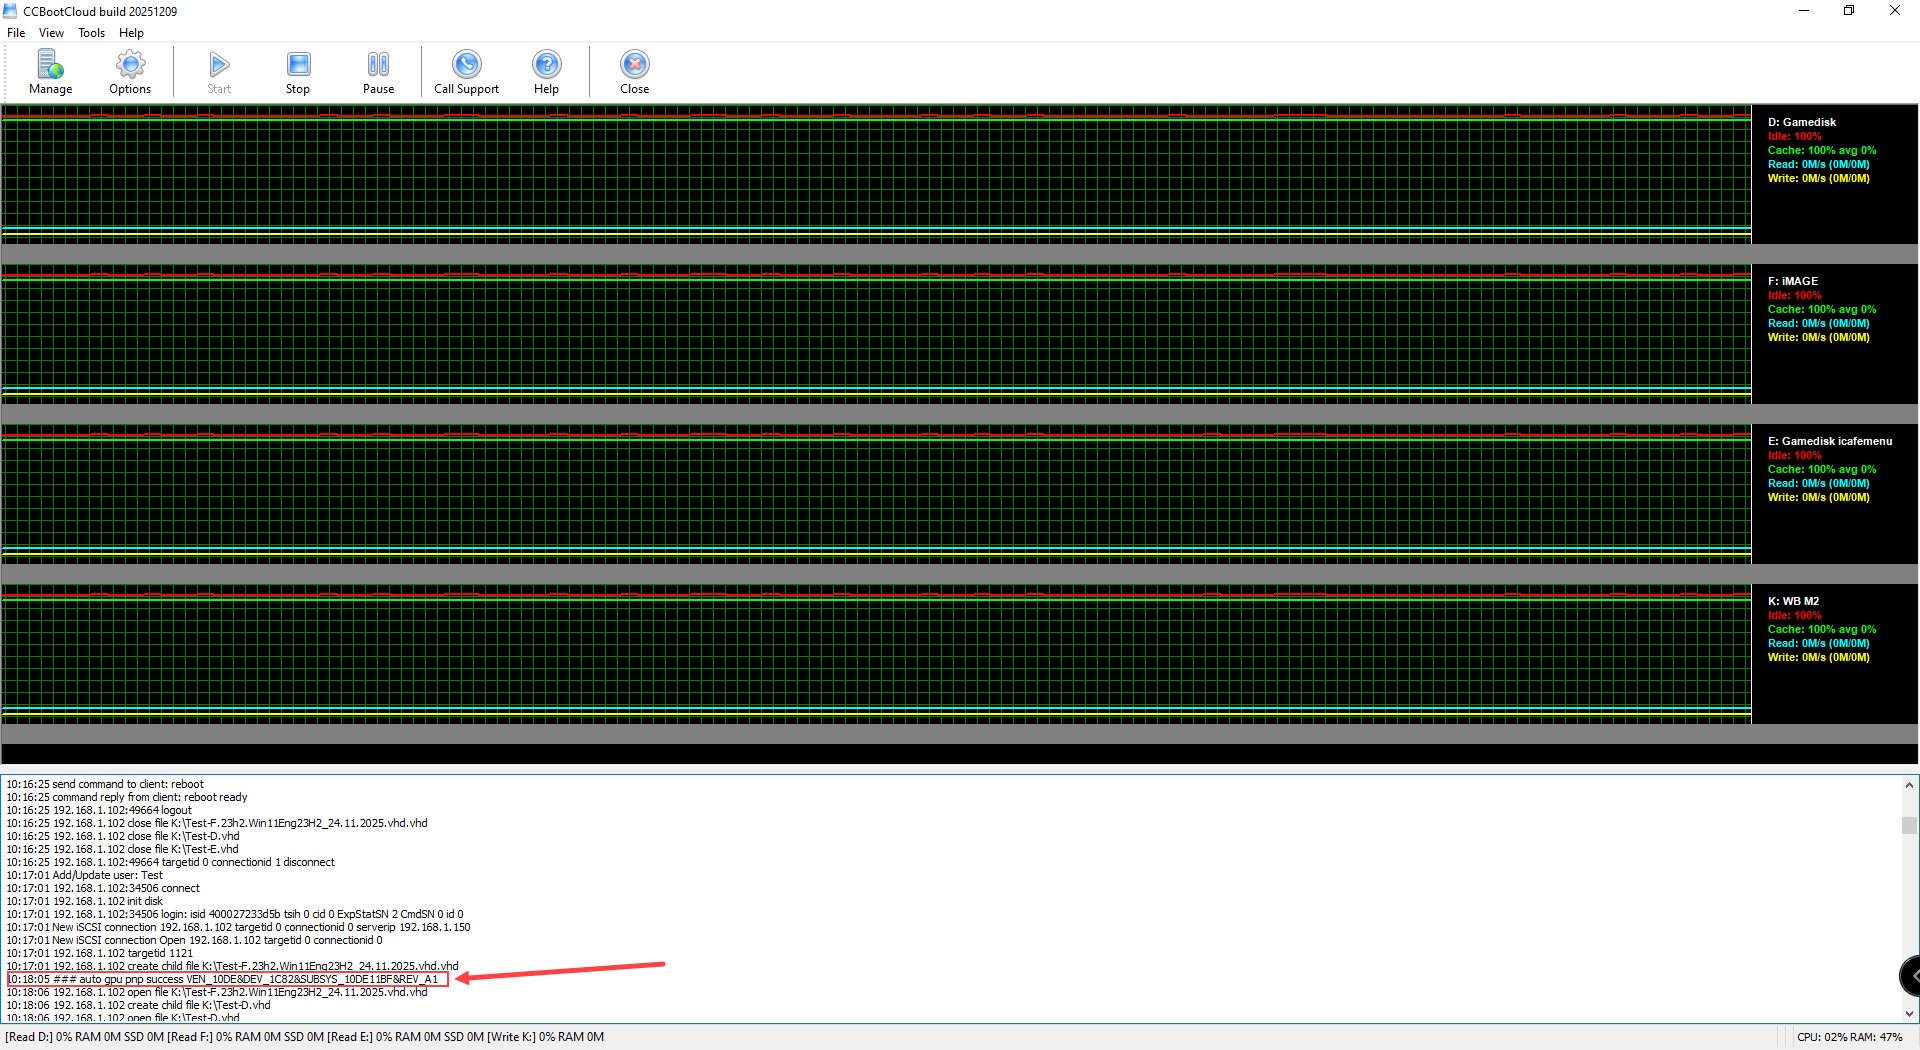
Figure 5
- You can also verify that GPU PNP installed correctly by going to Boot → Image → Restore Image and checking the restore point details.(Figure 6)
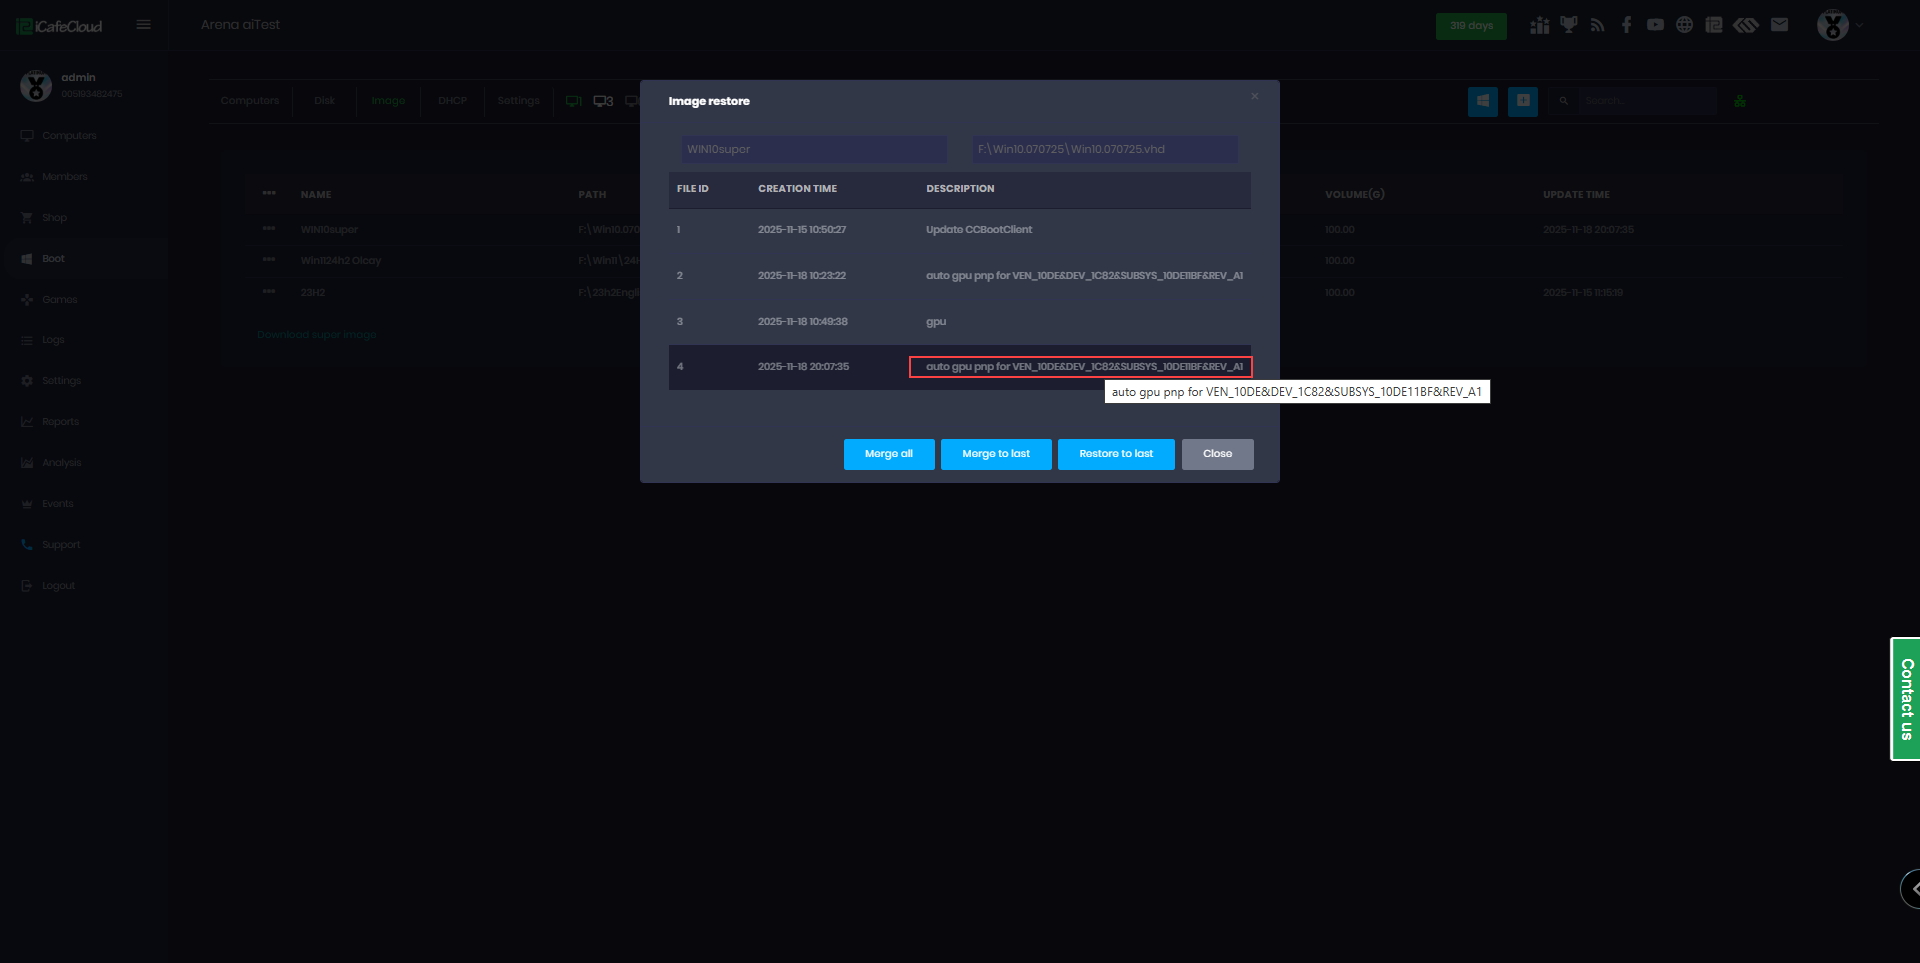
Figure 6
- If you check the Device Manager on the client side immediately after installation, the device may appear as not configured correctly (Figure 7).
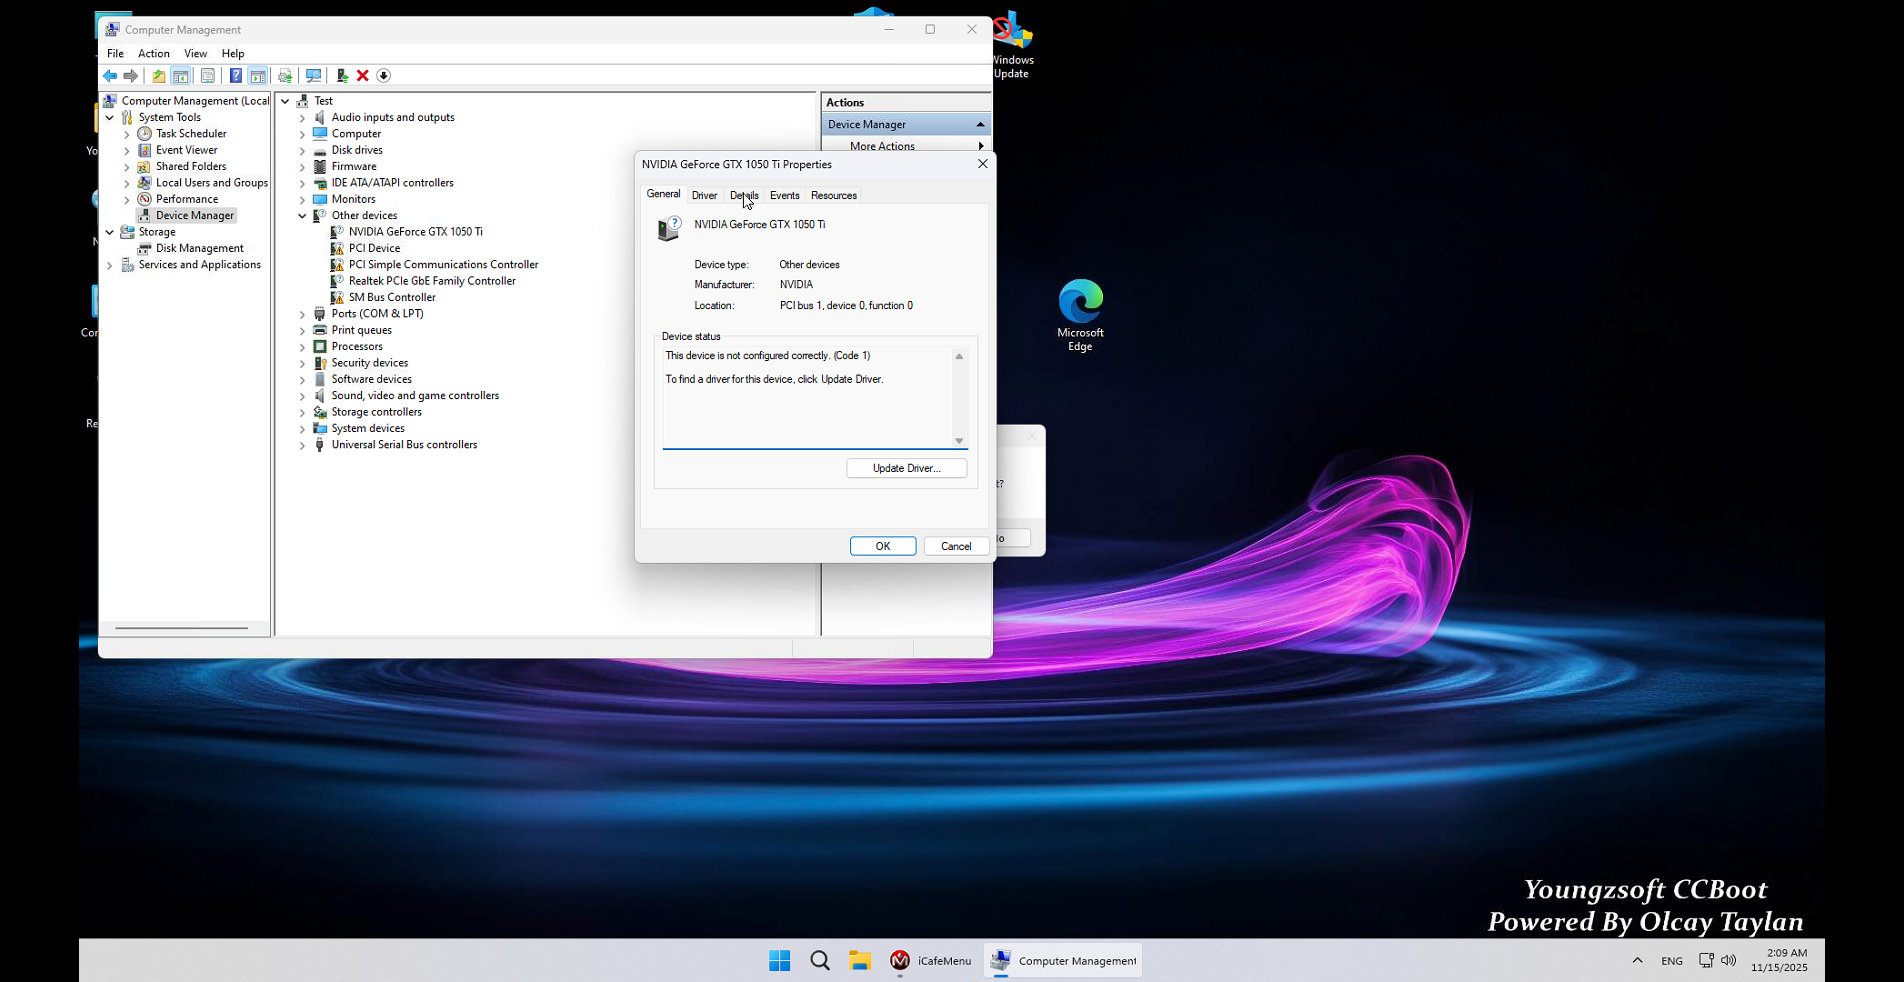
Figure 7
- Just reboot the PC again and it will complete the setup process and on the next boot will show as “The device is working properly.” (Figure 8)
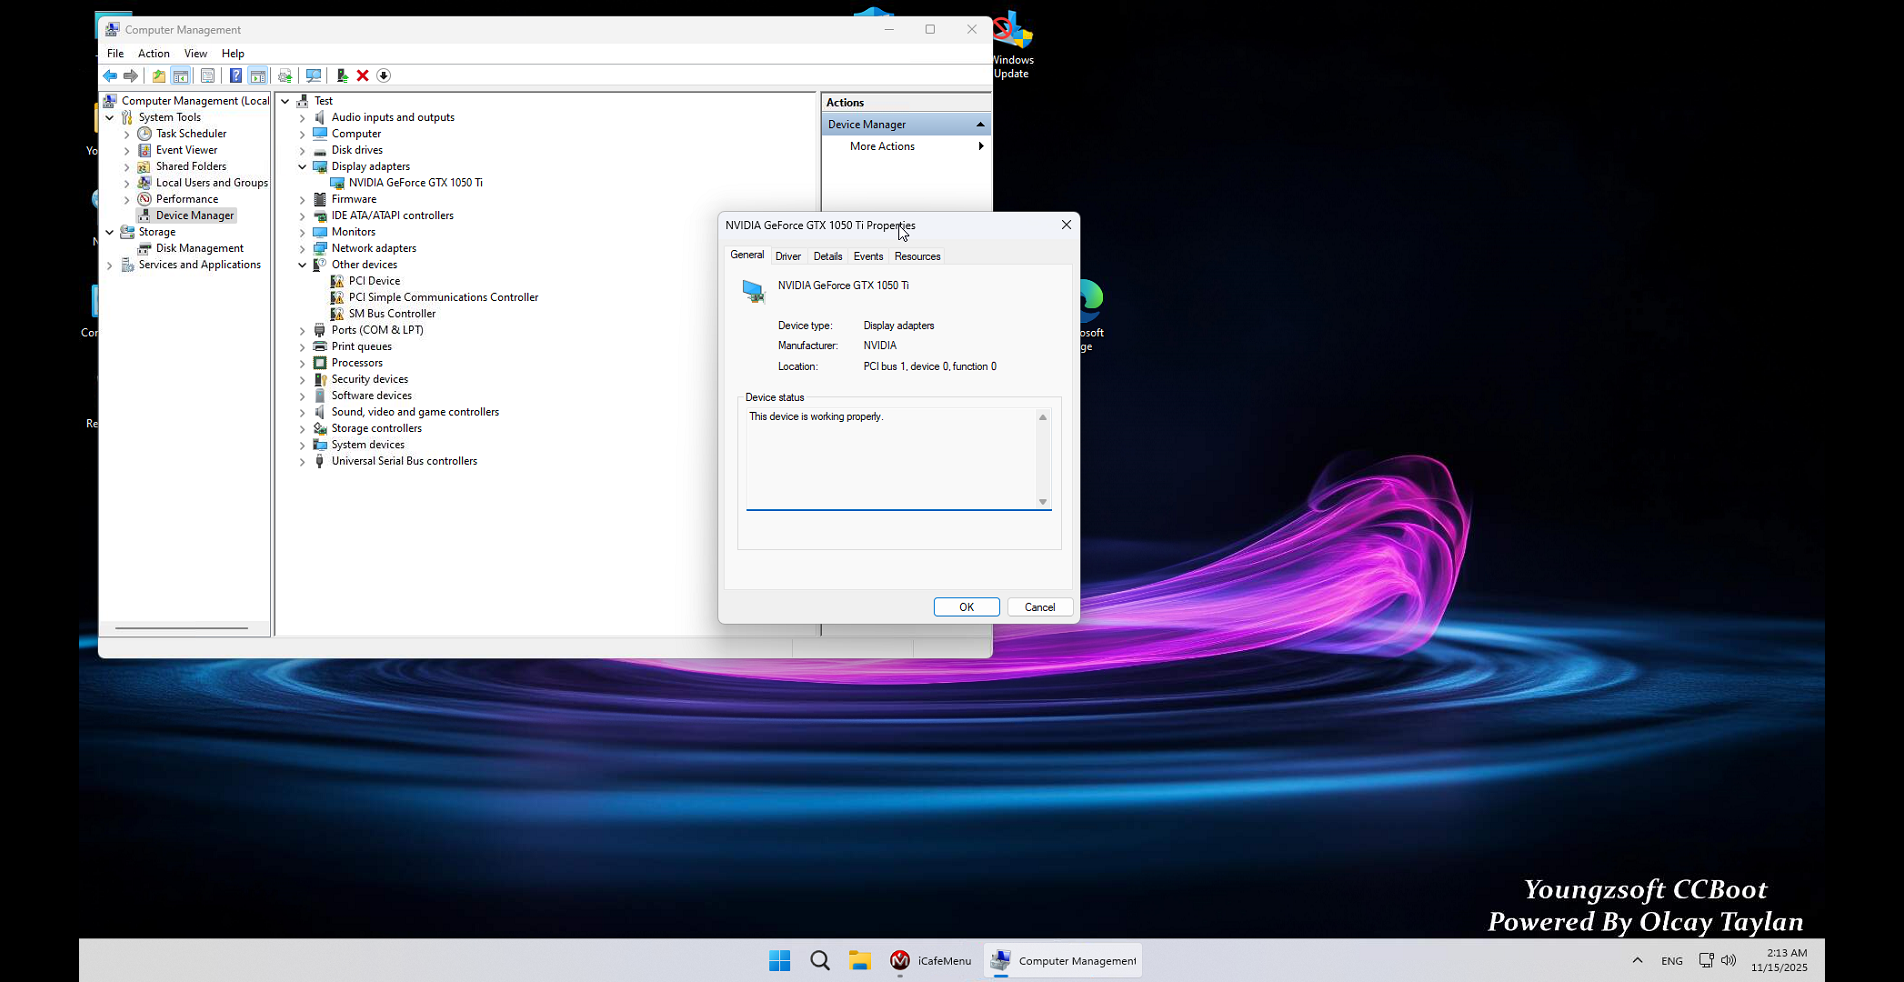
Figure 8
- If you have a Ryzen CPU with integrated graphics and are using a dedicated NVIDIA GPU, for GPU PNP to work you must disable the integrated graphics (iGPU) in the BIOS. Otherwise, the system may incorrectly prioritize the iGPU over your NVIDIA card, potentially causing the error:
“Unfound GPU in cloud db – VEN_1xx&DEV_1xx&SUBSYS_1xxxx&REV_xx” - GPU PNP supports only one NVIDIA driver version per image.
You may choose either an older or newer driver version, but all client PCs using the same image must use the same driver version.
For example:
If you have both the GTX 1060 and RTX 5060 GPUs in your environment, you can install driver version 581.80 it supports both models.
However, if you install driver version 591.xx it does not support the GTX 1060, that GPU will not be recognized.
You can either use 2 image or use older driver - If you encounter a black screen on the PC while using a DisplayPort (DP) cable, we recommend trying an HDMI cable before drawing any further conclusions.
Possible problems
- If after enabling GPU pnp, the PC doesn’t have an Nvidia Control Panel, turn on the super client for that PC and turn it on.
- When the PC is booted, open task manager and look for NVIDIA Container, then end the task. (Figure 1)

Figure 1
- After that, NVIDIA control panel should open. Shut down the PC and save the super client.