2025-11-02
nvidia, GPU, pnp, drivers
Sometimes, you have different series Nvidia GPUs in the center. Install one series driver, other series GPU not working. For example you have 5000 and 3000 series in your center. The key point is you need to use DDU to clean the GPU driver, just install the Nvidia driver once on one PC, and other PCs just wait for Windows to update the driver itself.
- Boot one PC with super client
- Use clean installation if you have drivers already installed on your image
Use DDU uninstaller to remove the drivers and then download the latest one and install - Download the latest driver from NVIDIA’s official site: https://www.nvidia.com/Download/index.aspx
- Install the driver follow the steps at below:
- Once the .exe file is downloaded (e.g., 546.33-desktop-win10-win11-64bit-international-dch-whql.exe), do not run it. Right-click the .exe file → Select "Extract to [folder name]" (This is the default WinRAR extract option)
- Wait for extraction to complete. It will create a folder like: 599-desktop-win10-win11-64bit-international-dch-whql\
- Inside that folder, navigate to: Display.Driver\
- That’s the actual driver files (including .inf files) used for manual installation.
- Open Device Manager
- Expand Display adapters - Right-click your GPU - Choose Update driver
- Select: "Browse my computer for drivers" → "Let me pick" → "Have Disk" → Browse
- Point to the folder:[Extracted Folder]\Display.Driver\
- Select the .inf file (usually nv_disp.inf), then install. (Figure 4)
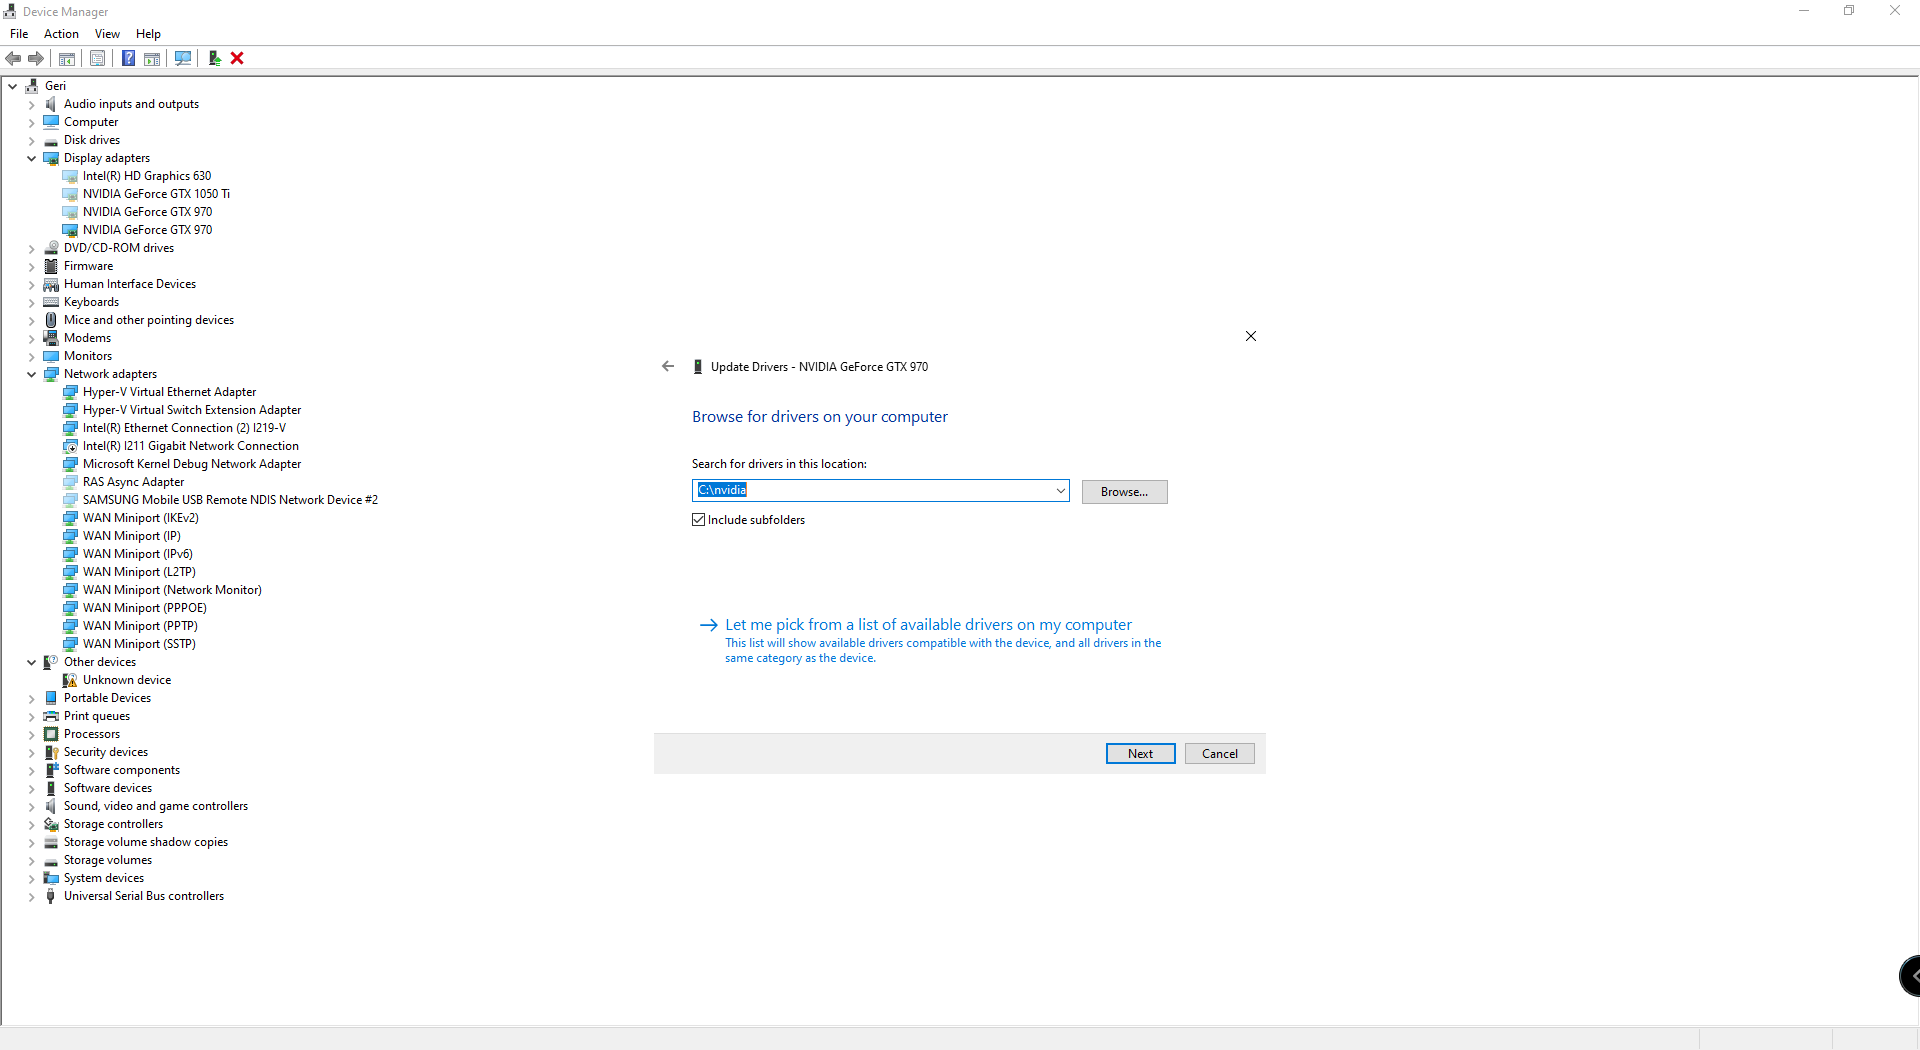
Figure 4
- Shutdown, disable super client and save image.
- Boot with super client mode on another PC that unfound Nvidia GPU driver. Boot to desktop and wait 5-6 minutes. Don't install GPU driver again. The Windows self will install the GPU driver well. You can check the driver status in Windows device manager.
- Shutdown, disable super client and save image.