2024-06-29
update, windows, image
For a smooth update of windows follow the steps below to avoid problems.
1 - Update windows directly
- Enable super client on client PC and boot it
- Create Disabledriversupdate.bat file on the desktop and edit it (Figure 1).
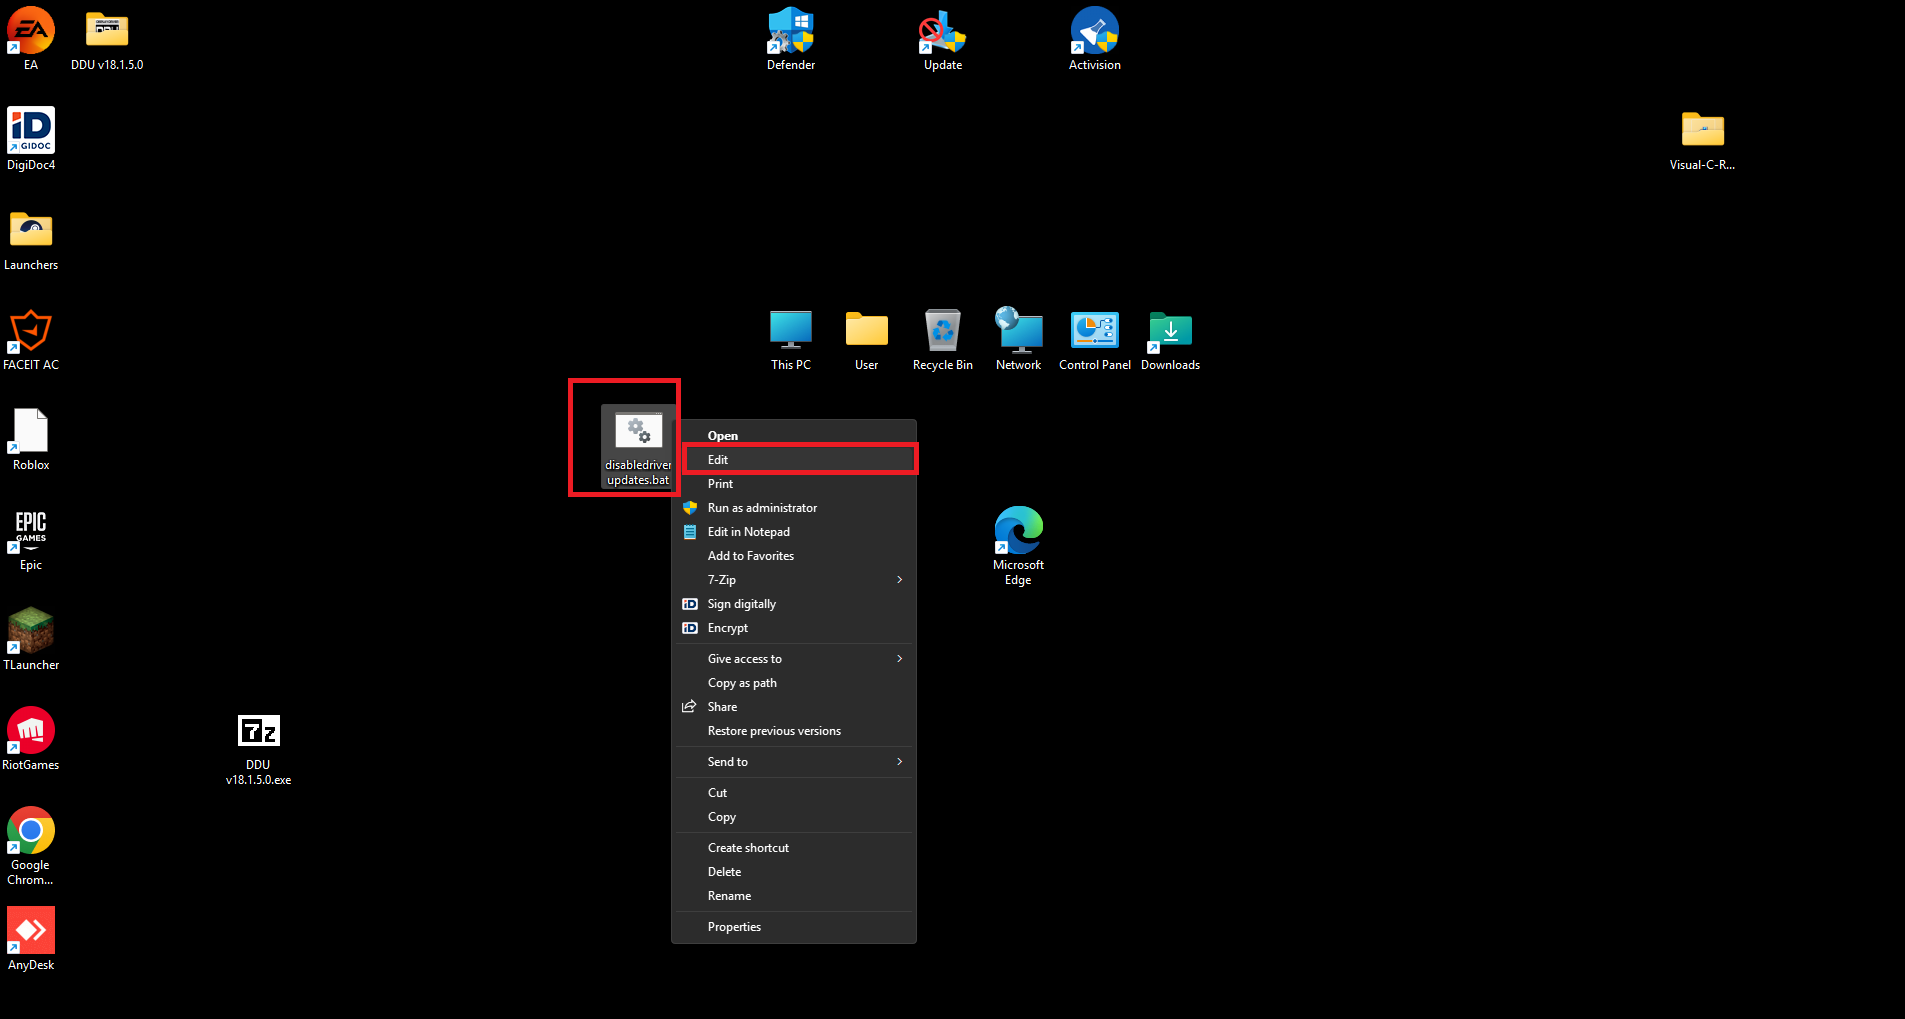
Figure 1
- Edit .bat file adding commands from below (Figure 2).
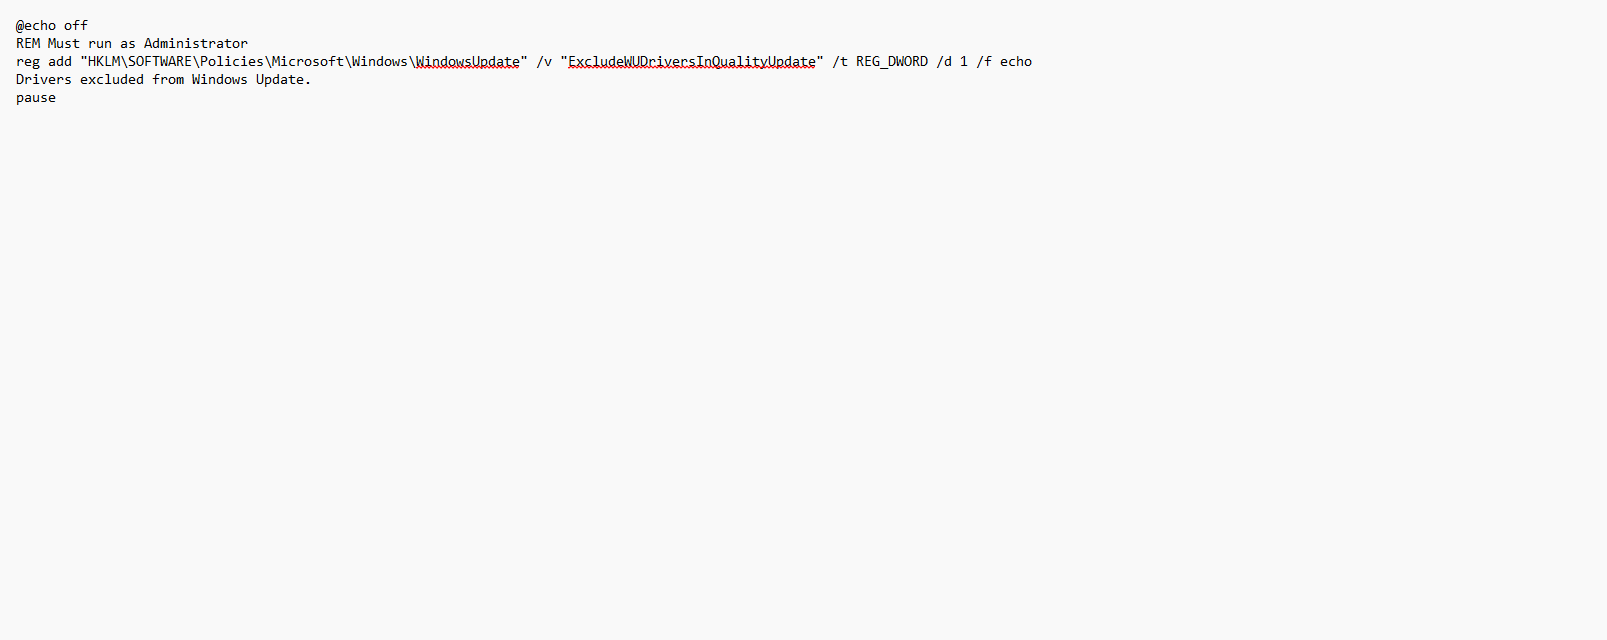
Figure 2
Disabledriversupdate.bat
@echo off reg add "HKLM\SOFTWARE\Policies\Microsoft\Windows\WindowsUpdate" /v "ExcludeWUDriversInQualityUpdate" /t REG_DWORD /d 1 /f echo Drivers excluded from Windows Update. pause |
- Save the .bat file and run it with Administrator privileges.
- Now you can start windows updates
- If you have Windows Update Blocker, open it and enable Windows updates (Figure 3).
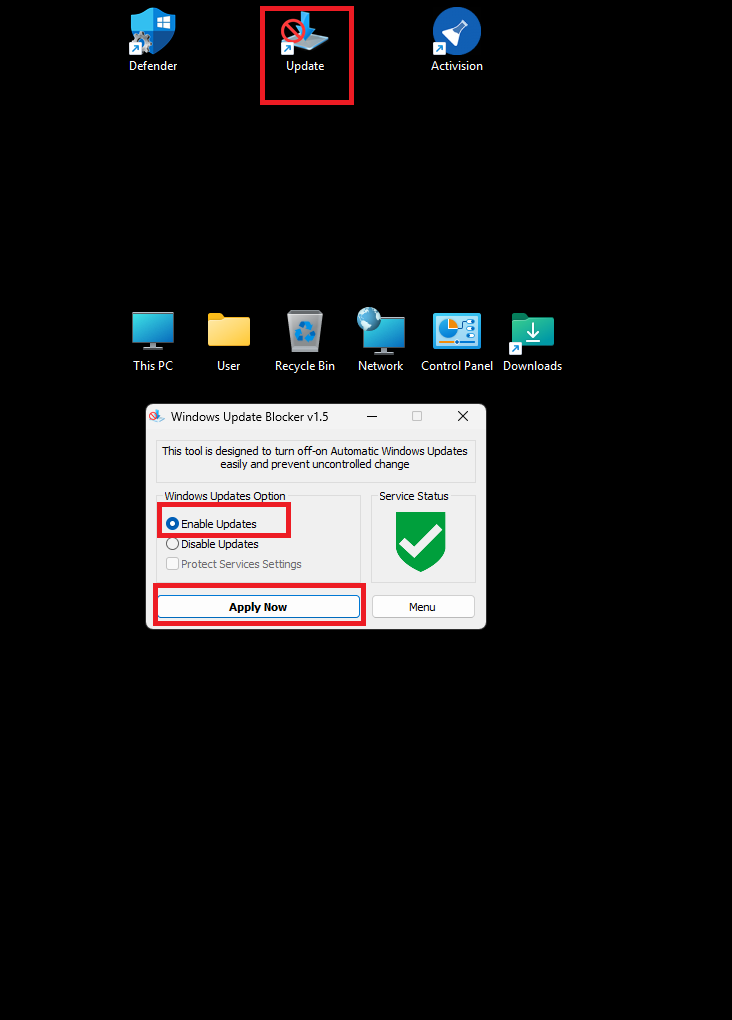
Figure 3
- Press Win + I to open the Settings.
- Go to "Update & Security."
- Click on "Windows Update" in the left sidebar.
- Click on "Check for updates" to see if there are any available updates.
- If updates are available, click "Install now" to begin the update process (Figure 4)
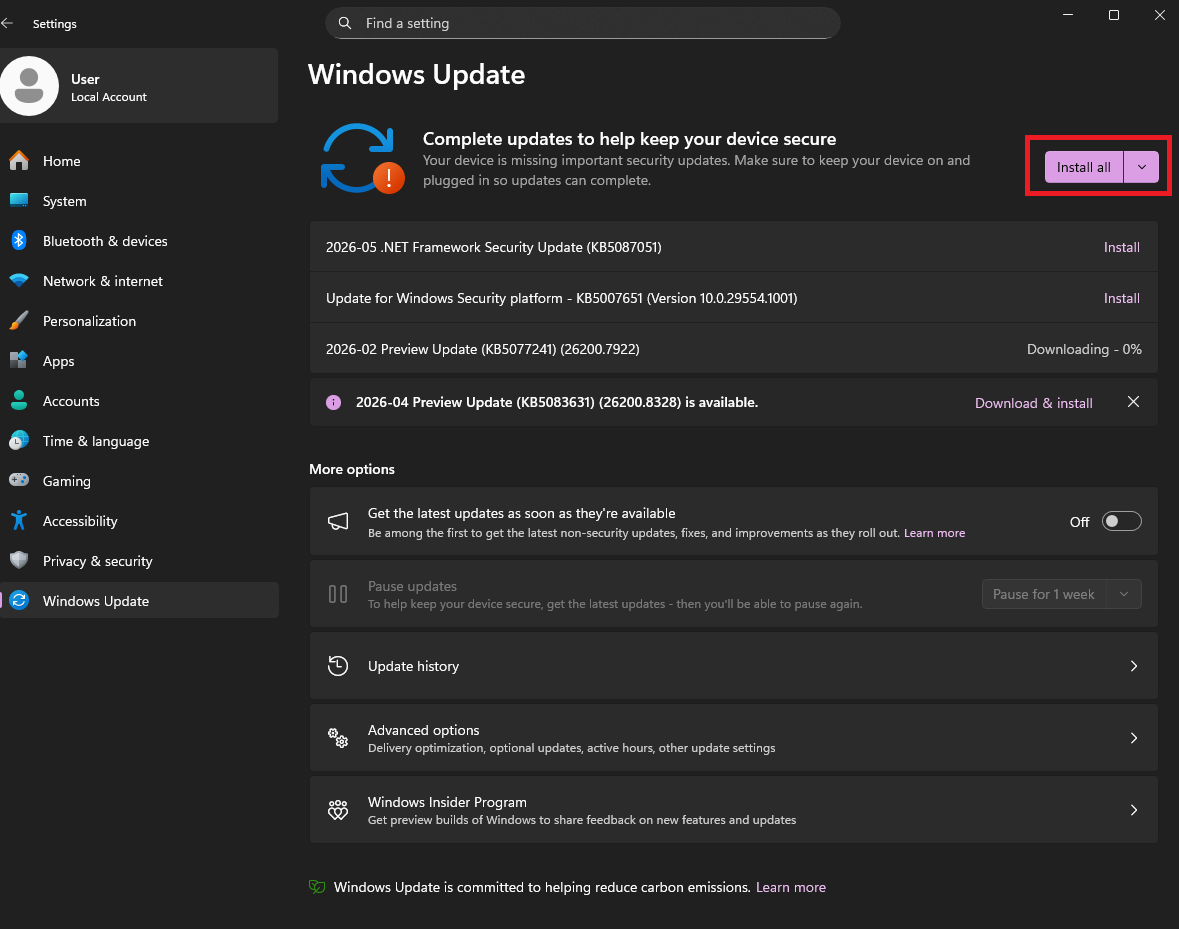
Figure 4
- Once updates are finished, click Check for updates again, to install all available updates (Figure 5 & 6)
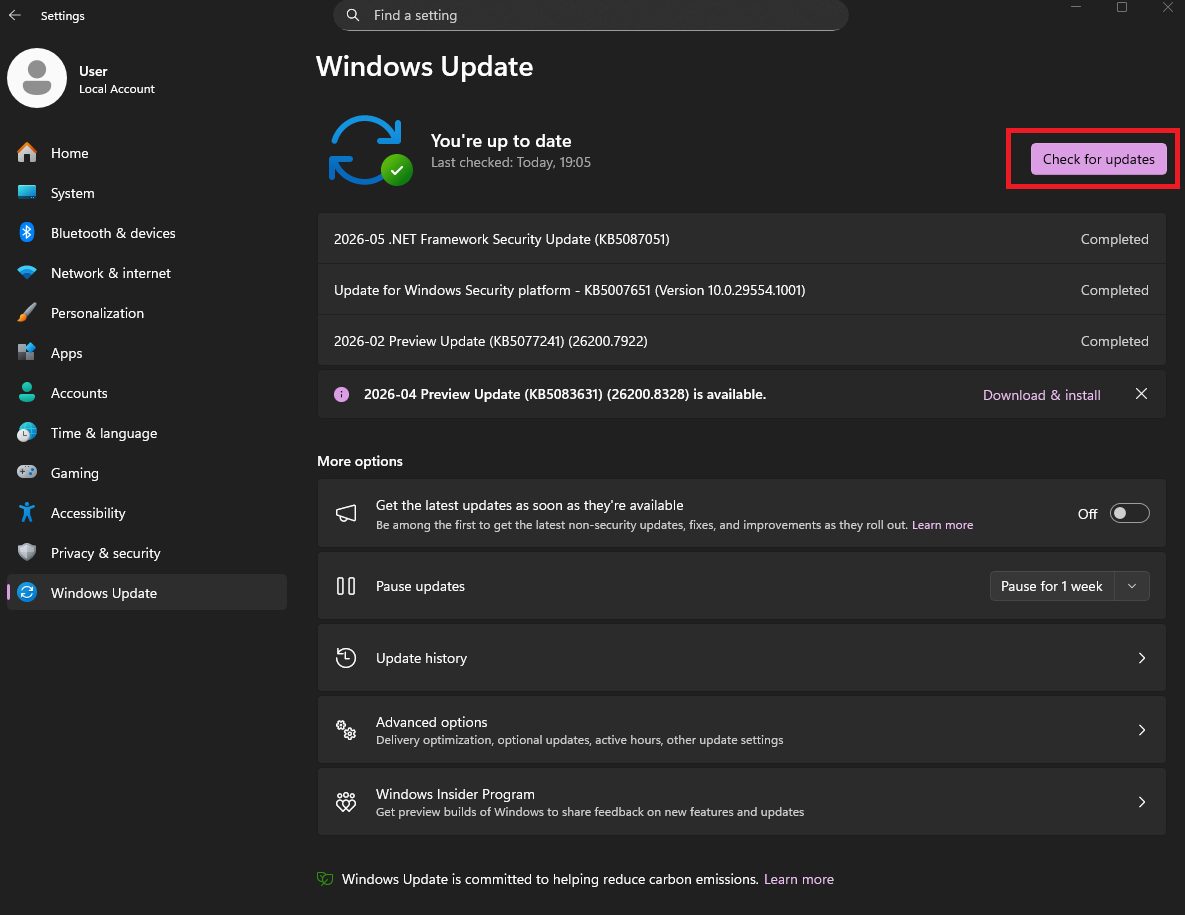
Figure 5
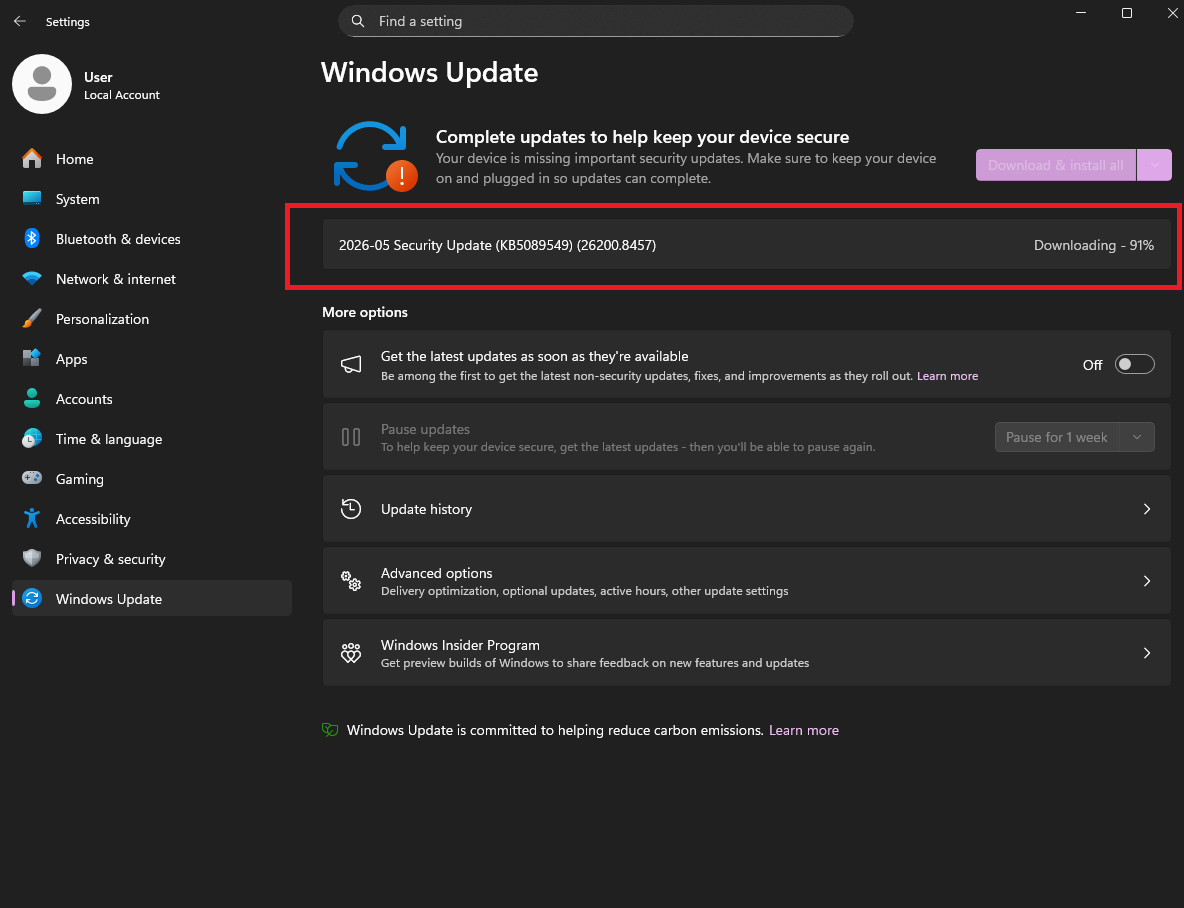
Figure 6
- Once updates are finished, reboot the PC and let it run for a few minutes.
- Then disable Windows Update Blocker, so updates don’t auto start in working hours (Figure 7).
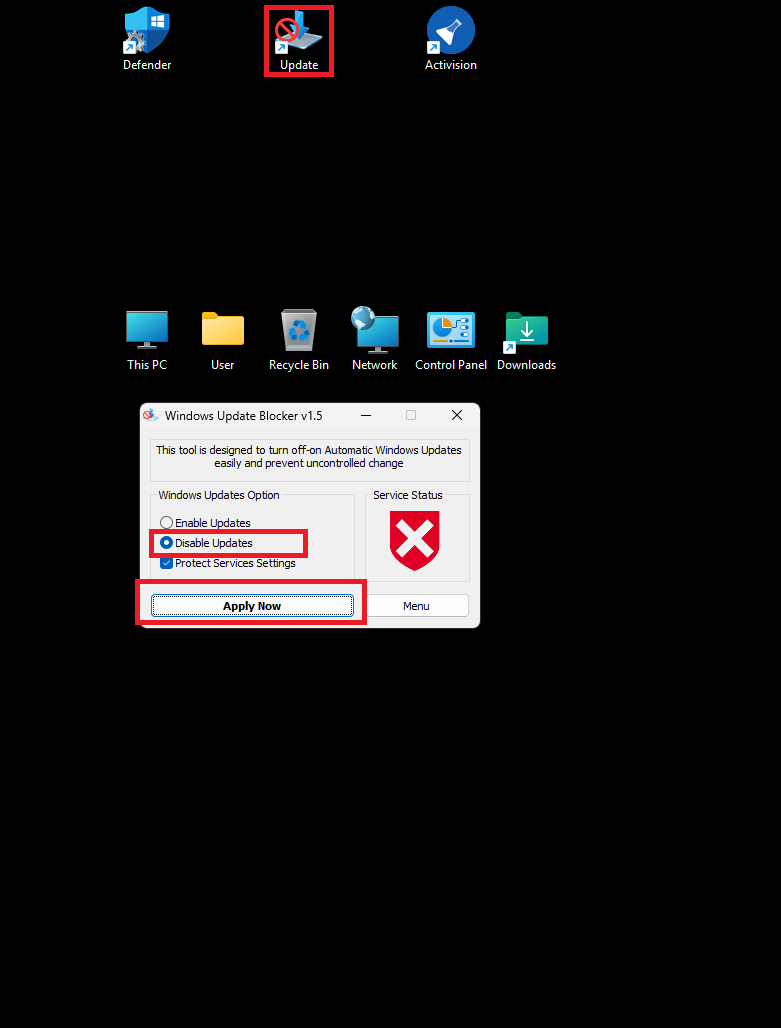
Figure 7
- Shutdown the client and save the super client changes.
2 - Transfer image VHD to USB
- Follow the instructions to prepare a USB drive with your Windows image in a way that allows it to boot on a PC.
- When following the wiki guide, you can skip the "Clean PNP" and "Reset Network" steps. Simply proceed with the remaining instructions as described.
- The goal is to transfer your Windows image to a high-speed USB drive, which will act as a temporary bootable disk (similar to an SSD) for the client PC.
- Once the PC boots from the USB, you can perform all Windows updates and necessary changes directly on the USB drive.
- After the updates are complete, simply copy the updated VHD file from the USB back to your image disk on the CCBootCloud server.
- Your client PC will then be able to boot from the server with the newly updated Windows version.
3 - Create a new image
- If none of the methods above work, the best solution is to create a new image from scratch or download a pre-configured Super Image from the CCBootCloud website.
- Create a new image
- Download super image