Wiki Home Boot image Create boot image
Create boot image
2023-06-04
create, boot, image
This guide provides detailed steps to create boot images for diskless PCs, covering both legacy and UEFI boot modes. It includes instructions for using clean Windows ISO files, setting up the master PC, installing the OS
Install clean image
- Select one of the client PCs as the master PC and connect the SSD. If you have multiple PCs with different motherboards or specifications, choose the most recent one, such as a newly-released motherboard.
- Before creating the image, check the BIOS settings.
- For Legacy boot image, set the BIOS to Legacy (or Legacy + UEFI) mode.
Diskless boot with Legacy BIOS
Videos for BIOS configuration
- For UEFI boot image, use UEFI boot mode.
Diskless boot with UEFI BIOS
Videos for BIOS configuration
- Create boot image on USB - Recommended
- Create a USB bootable drive using the Media Creation Tool.
We highly recommend using a clean Windows ISO, preferably from the Microsoft website. - Install the client OS, Windows updates, and service packs
Here’s quick guide for install windows:
- Start your PC with the USB bootable media.
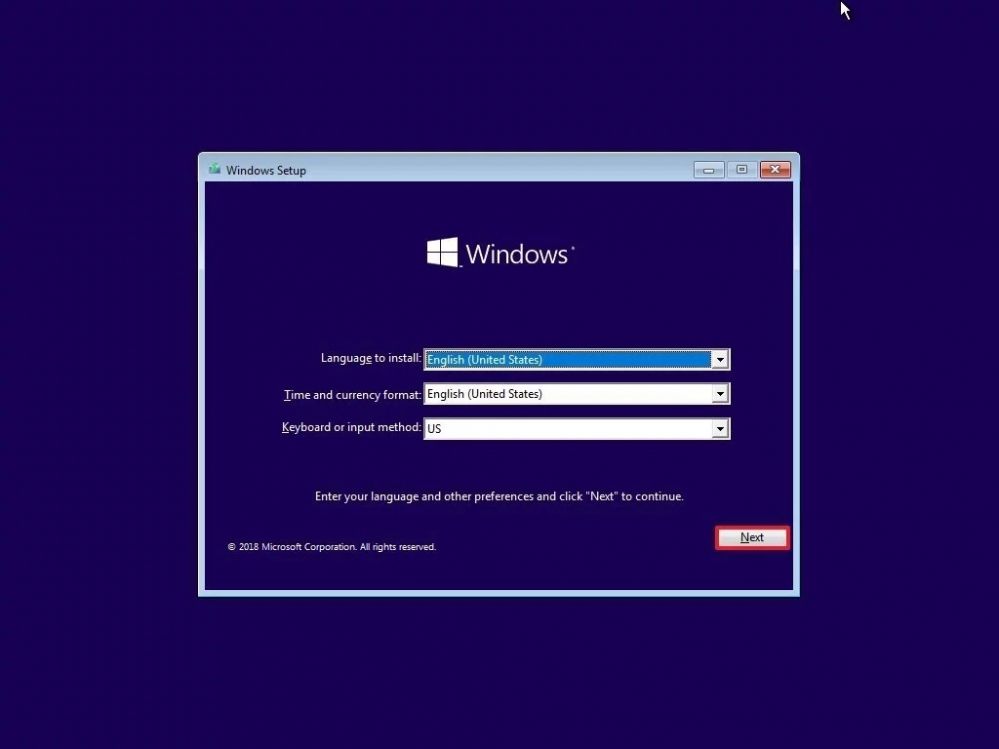
- On "Windows Setup," click Next to begin the process (Figure 1).
Figure 1
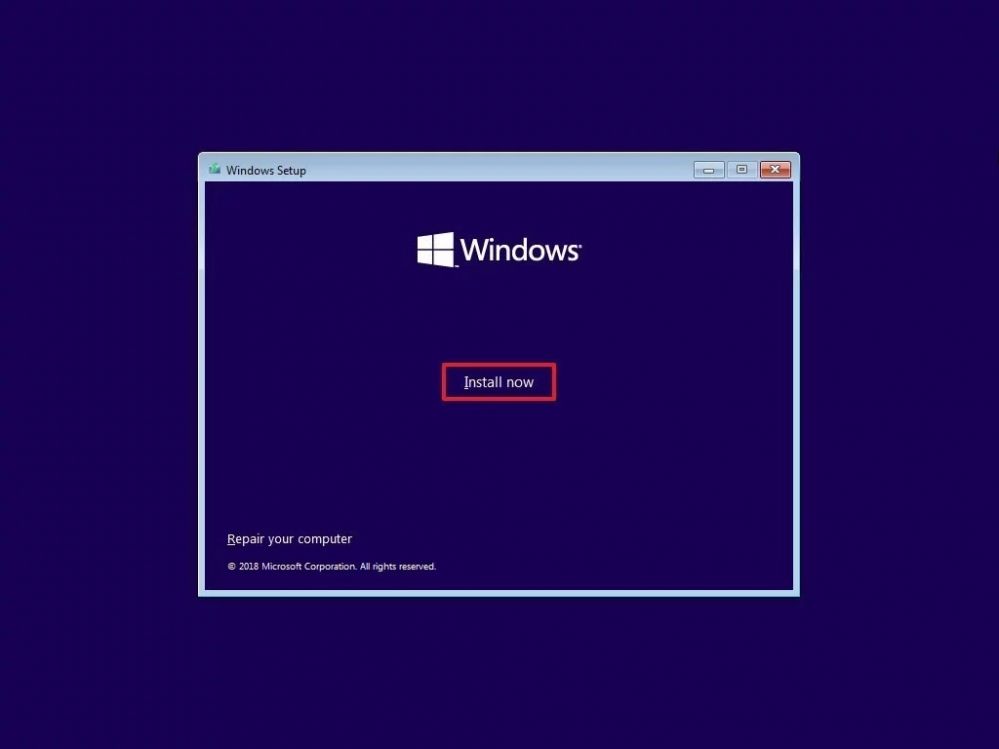
- Click the Install Now button (Figure 2).
Figure 2
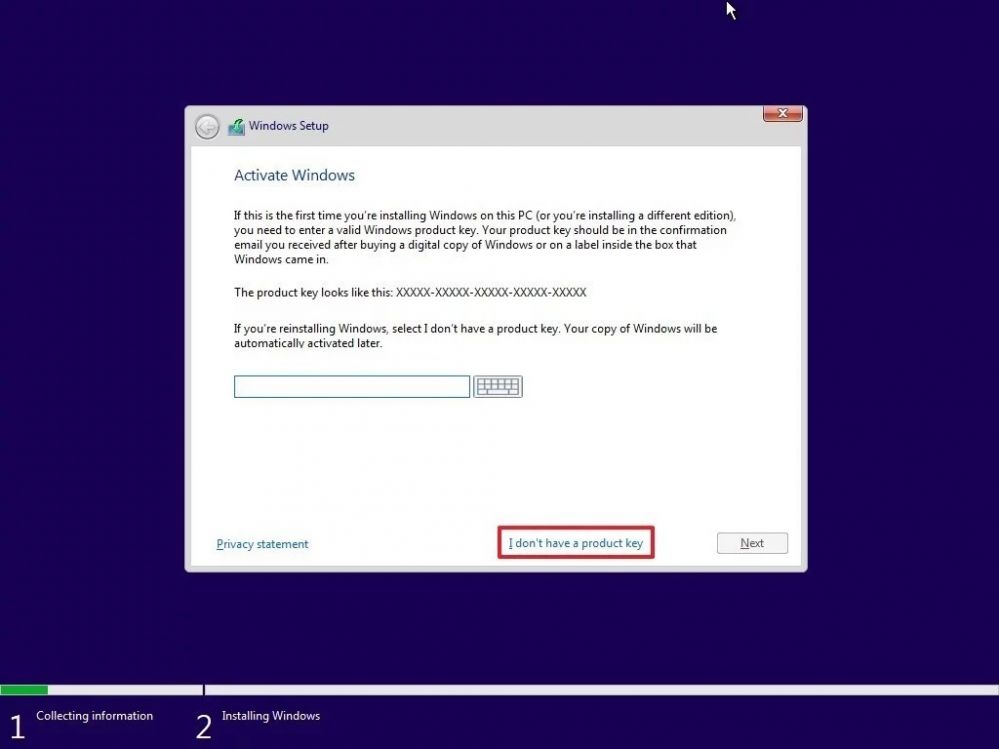
- Click the I don't have a product key option to continue (Figure 3).
Figure 3
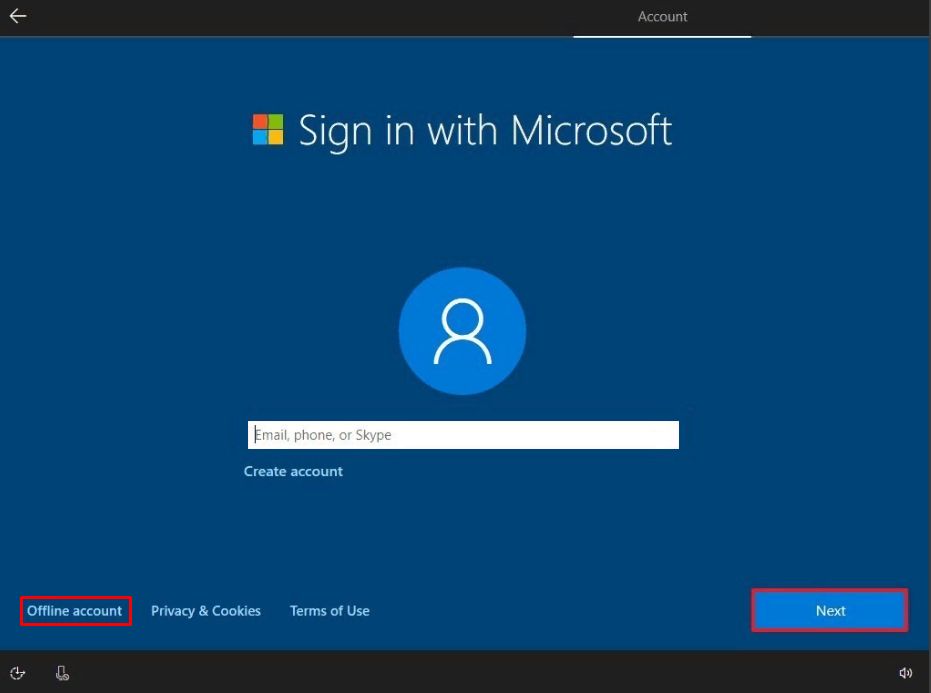
- Click the Offline account option at the bottom left corner to create a traditional local account (Figure 4).
Figure 4
- Install only chipset and NIC drivers for wide compatibility. Avoid installing other drivers to prevent conflicts. Add remaining drivers after booting in Super Client mode.
- Download and install the NIC drivers from the vendor's site (Realtek or Intel).
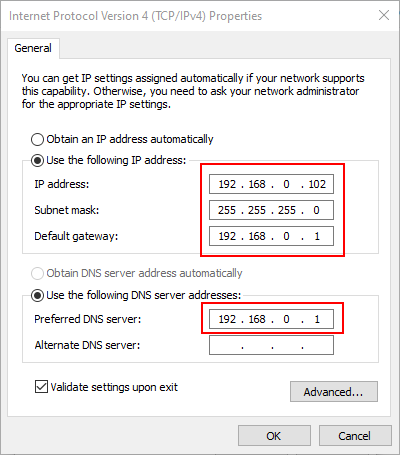
- Set static ip (Figure 5).
Figure 5
- Static ip depends on your network.
- Install the latest Windows patches and service packs, if available.
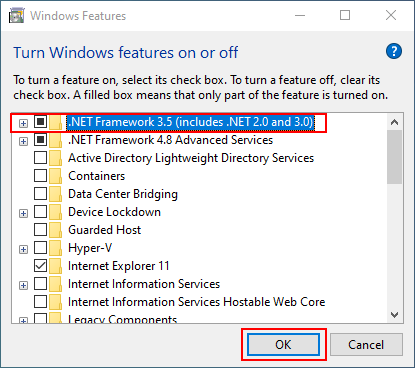
- Enable .Net framework 3.5 (Figure 6).
Figure 6
Install CCBoot Client
- Optimize the NIC Driver (Server and client network optimization).
- Install CCBoot Client. (Follow steps)
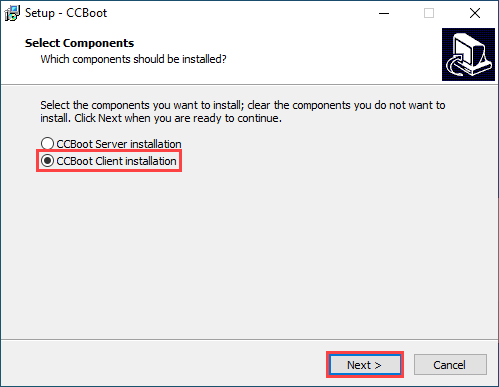
- Run the CCBoot setup file and select the “CCBoot Client Installation” and click the “Next” button(Figure 1).
Figure 1
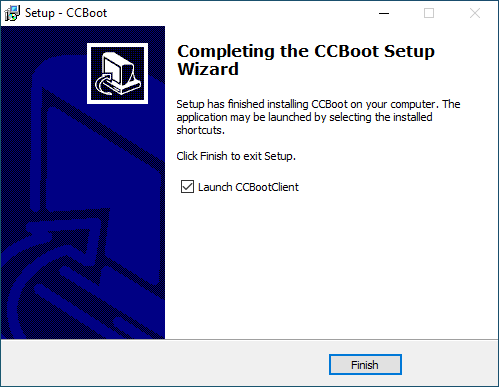
- Continue with the installation till you reach the last dialog, check the “Launch CCBoot” checkbox and click the “Finish” button (Figure 2).
Figure 2
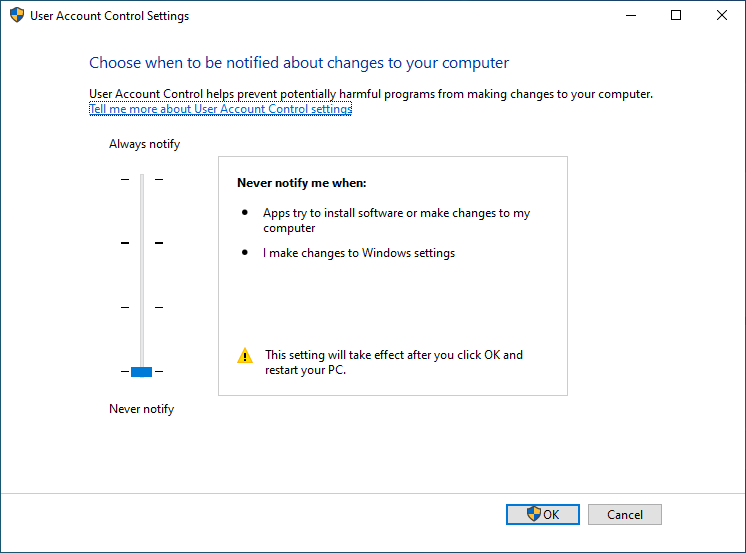
- Once the "Finish" button is clicked. Disable UAC and click on the "OK" button (Figure 3).
Figure 3
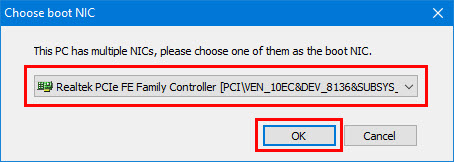
- Once UAC is disabled, select NIC from the dropdown and click on the "OK" button (Figure 4).
Figure 4
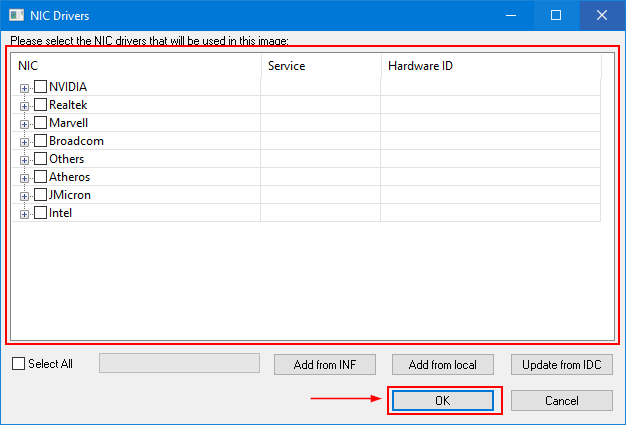
- DO NOT check any checkbox in the “NIC Drivers” and click on the "OK" button (Figure 5).
Figure 5
- Click the “OK” button once installation is completed. You need to reboot the system once.
Multi specs clients
Note (only for multi specs clients): If you have more than one board model then repeat the following steps
- Disconnect the disk from the PC and connect it to the different board PC,
- Once booted install its NIC drivers
- Set the static IP for the nic (If not set already).
- Open CCBootclient application and click the “Install Client” button
- Click the “OK” button in the “NIC Drivers” window and finish installing.
- Once the installation is done, turn off
- Repeat steps I through VI, if you have any other different boards.
Upload Image
- Now it's time to upload the image to the server.
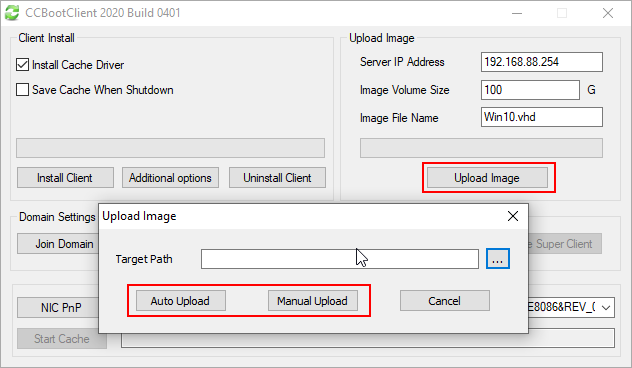
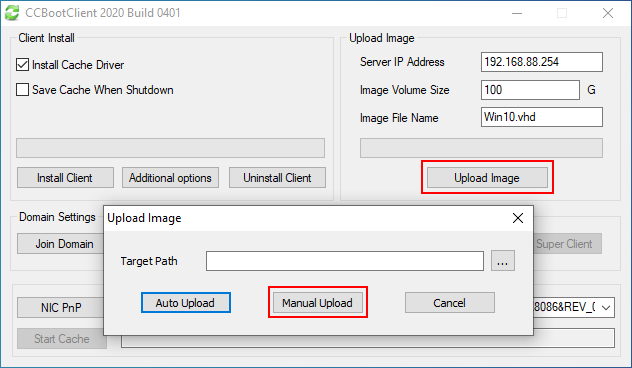
- Once CCBoot client installation is done, upload the image by clicking the “Upload Image” button (Figure1).
Figure 1
- You can choose any of the following options to upload the image.
- Important: Ensure sharing is enabled on both client and server. Windows 10 image upload requires a shared folder, if sharing is disabled, the upload will fail.
Auto Upload :
- Enter the shared folder path (e.g., \\192.168.1.254\ccbootshare), which is located on the server in C:\ccbootshare. Then, click the Auto Upload button (Figure 2).
Figure 2
- Then the image will be uploaded to the specified folder i.e. CCBootShare
Manual Upload :
- After clicking on the upload image button and clicking on the manual upload button (Figure 3).
Figure 3
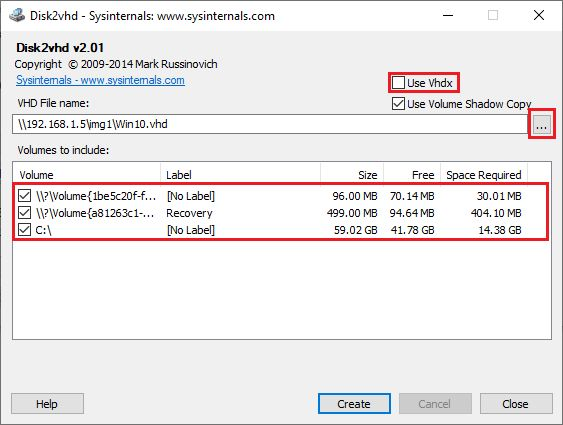
- Select all hidden partitions and uncheck “Use VHDX.” In this case, the system will create a .VHD image.
- VHDX is intended for images larger than 2 TB that are not required in the CCBoot environment, and VHDX images cannot be mounted within CCBoot.
- Then choose the path where the image will be uploaded and press the "Create" button (Figure 4).
Figure 4
- Then the image will be uploaded to the shared folder.
Add boot image
Now, all you need to finish this is upload the image to CP, use Add boot image wiki to do this.

