2023-07-16
vmware, create, boot, image
The following provides instructions for using VMware to create a CCBoot boot image by setting up a virtual machine, installing the CCBoot Client, and locating the virtual hard disk file.
- You can use VMware to create a CCBoot boot image.
- Install VMware Workstation on a computer.
- Create a virtual machine in VMware.
- Install Windows system in the virtual machine, named it as "Windows 10 x64" and optimize the system if it’s necessary.
- Install the CCBoot Client software and then restart.
- Shutdown virtual machine.
- Open the virtual machine settings, click the "Hardware" tab, and click on “Hard disk (NVMe), the disk file location will be under “Disk File” section (Figure 1).
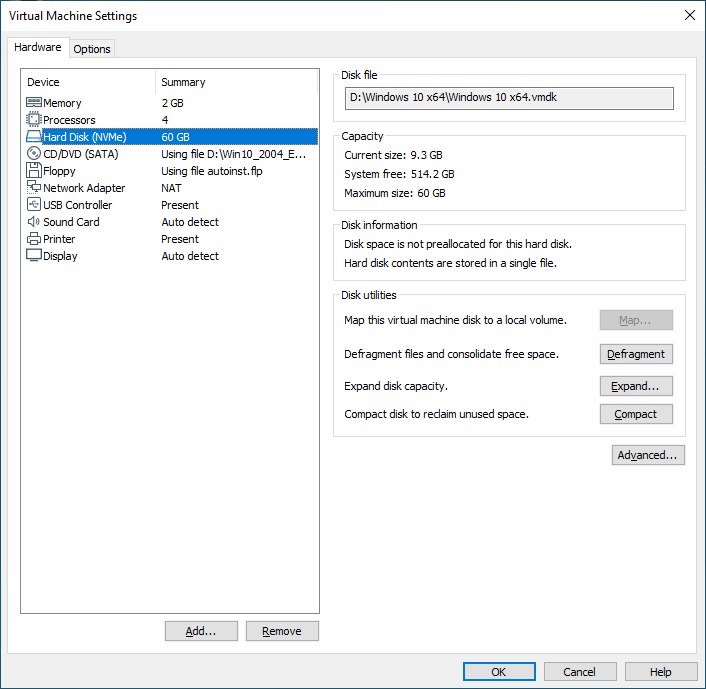
Figure 1
- Click the "Options" tab, the section "Working directory" will show the directory location of the virtual disk. Here it’s "D:\Windows 10 x64" (Figure 2).
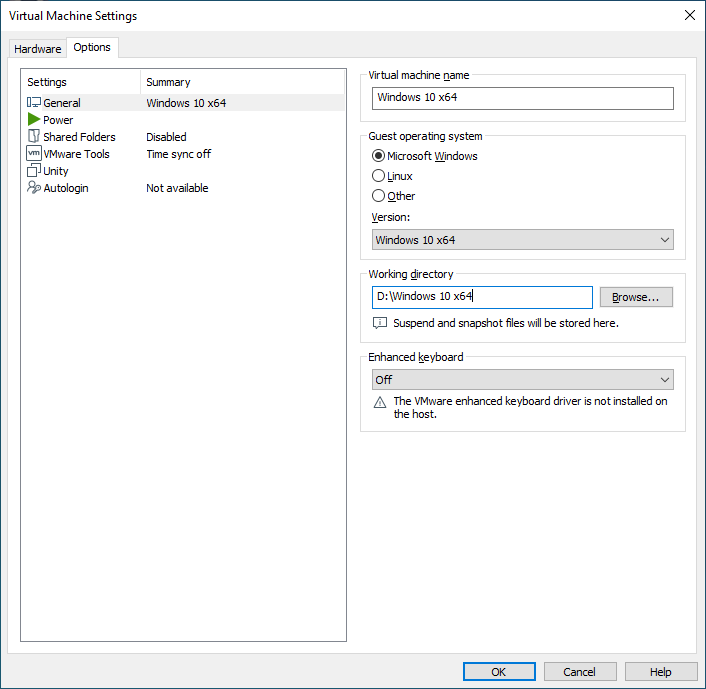
Figure 2
- In the CCBootCloud panel, click the “Image” tab and then click “+” button and browse to the directory "D:\Windows 10 x64" and select the “Windows 10 x64.vmdk” file and click “Select” button.
- Now, you can use the image as a boot image directly.
Note: We recommend using "VMDK2VHD" to convert vmdk to vhd file and using the VHD as the boot image. Please refer to "Convert VMDK to VHD".