2026-01-29
gpu, pnp, drivers, auto, update
The following explains how to update the Nvidia GPU driver when using GPU PNP.
- If you want to update the GPU driver after GPU PNP is completed, follow these steps:.
- Go to C:\CCBoot\InfGPU\nvidia_devices.32.0.15.8180 and delete all files inside the folder, but do not rename or delete the folder itself.
- Download the latest driver version before 610.47, then extract it on your PC using WinRAR. Version 610.47 doesn't have an Nvidia Control panel (Figure 1).
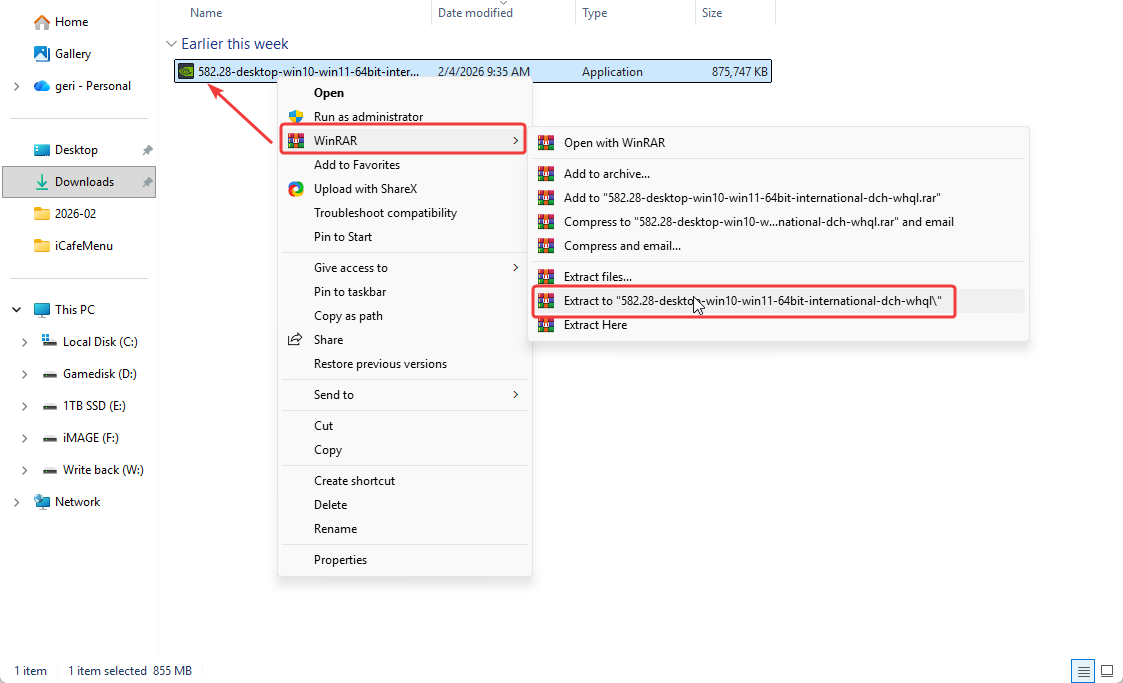
Figure 1
- In the extracted folder, locate and open the Display.Driver folder. (Figure 2)
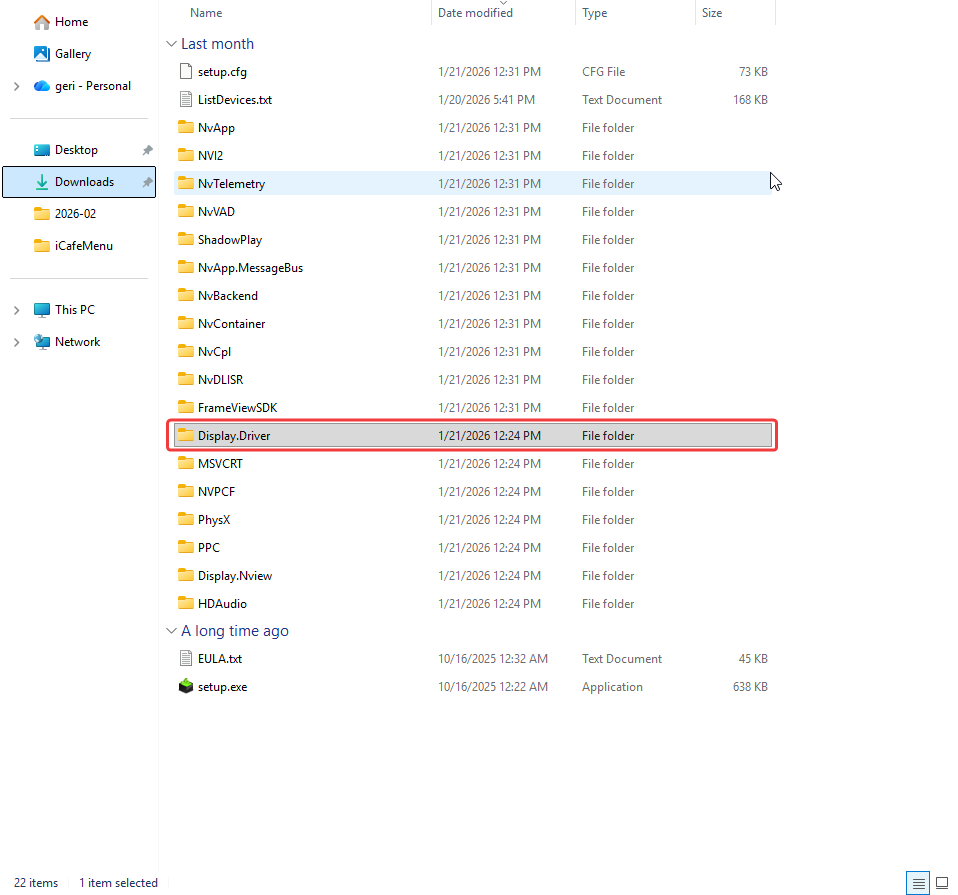
Figure 2
- Copy all the files inside Display.Driver and paste them into
C:\CCBoot\InfGPU\nvidia_devices.32.0.15.8180. (Figure 3)
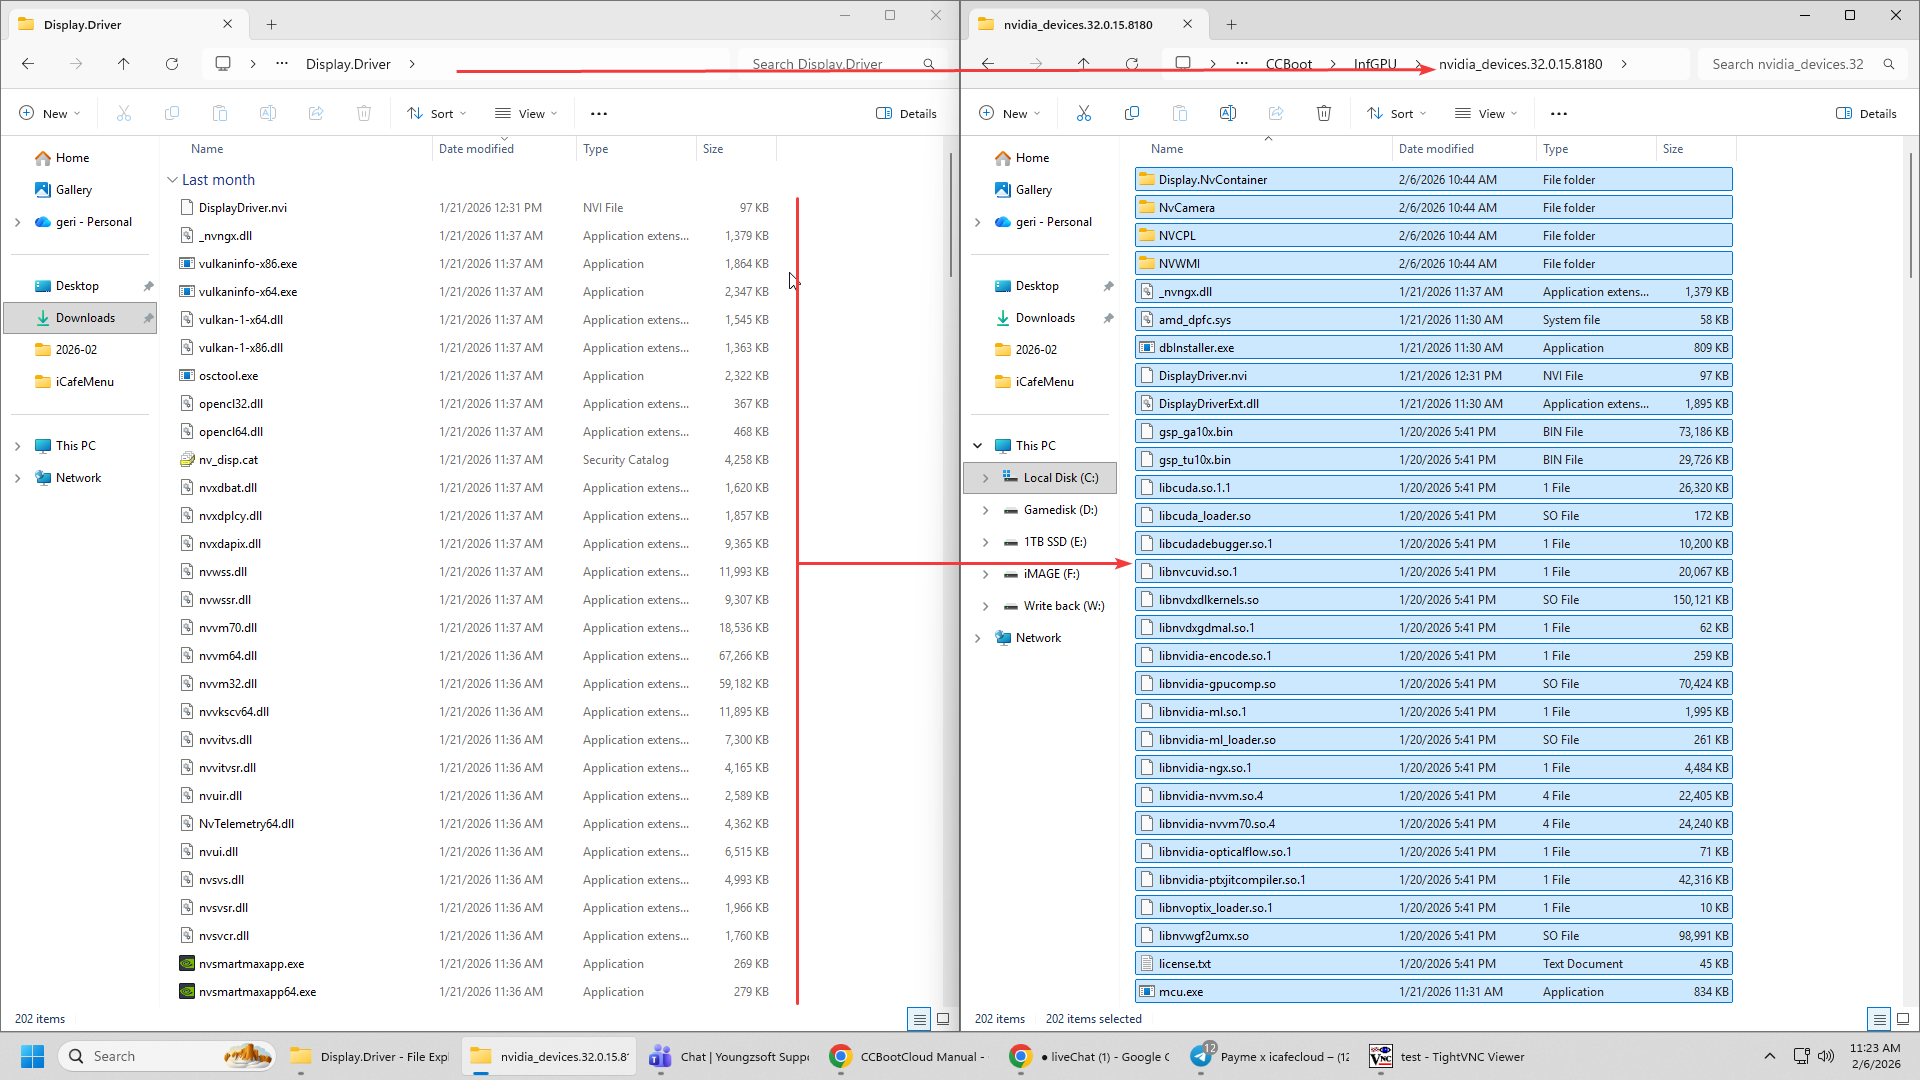
Figure 3
- Once the files are copied, go to the Image you want to update and click Edit Image, then enable GPU PNP by checking it if it is unchecked.
- If GPU PNP is already checked, uncheck it, click OK, open Edit Image again, and check it once more to reset GPU PNP. Then boot the client PC — the GPU drivers will be installed again. (Figure 4)
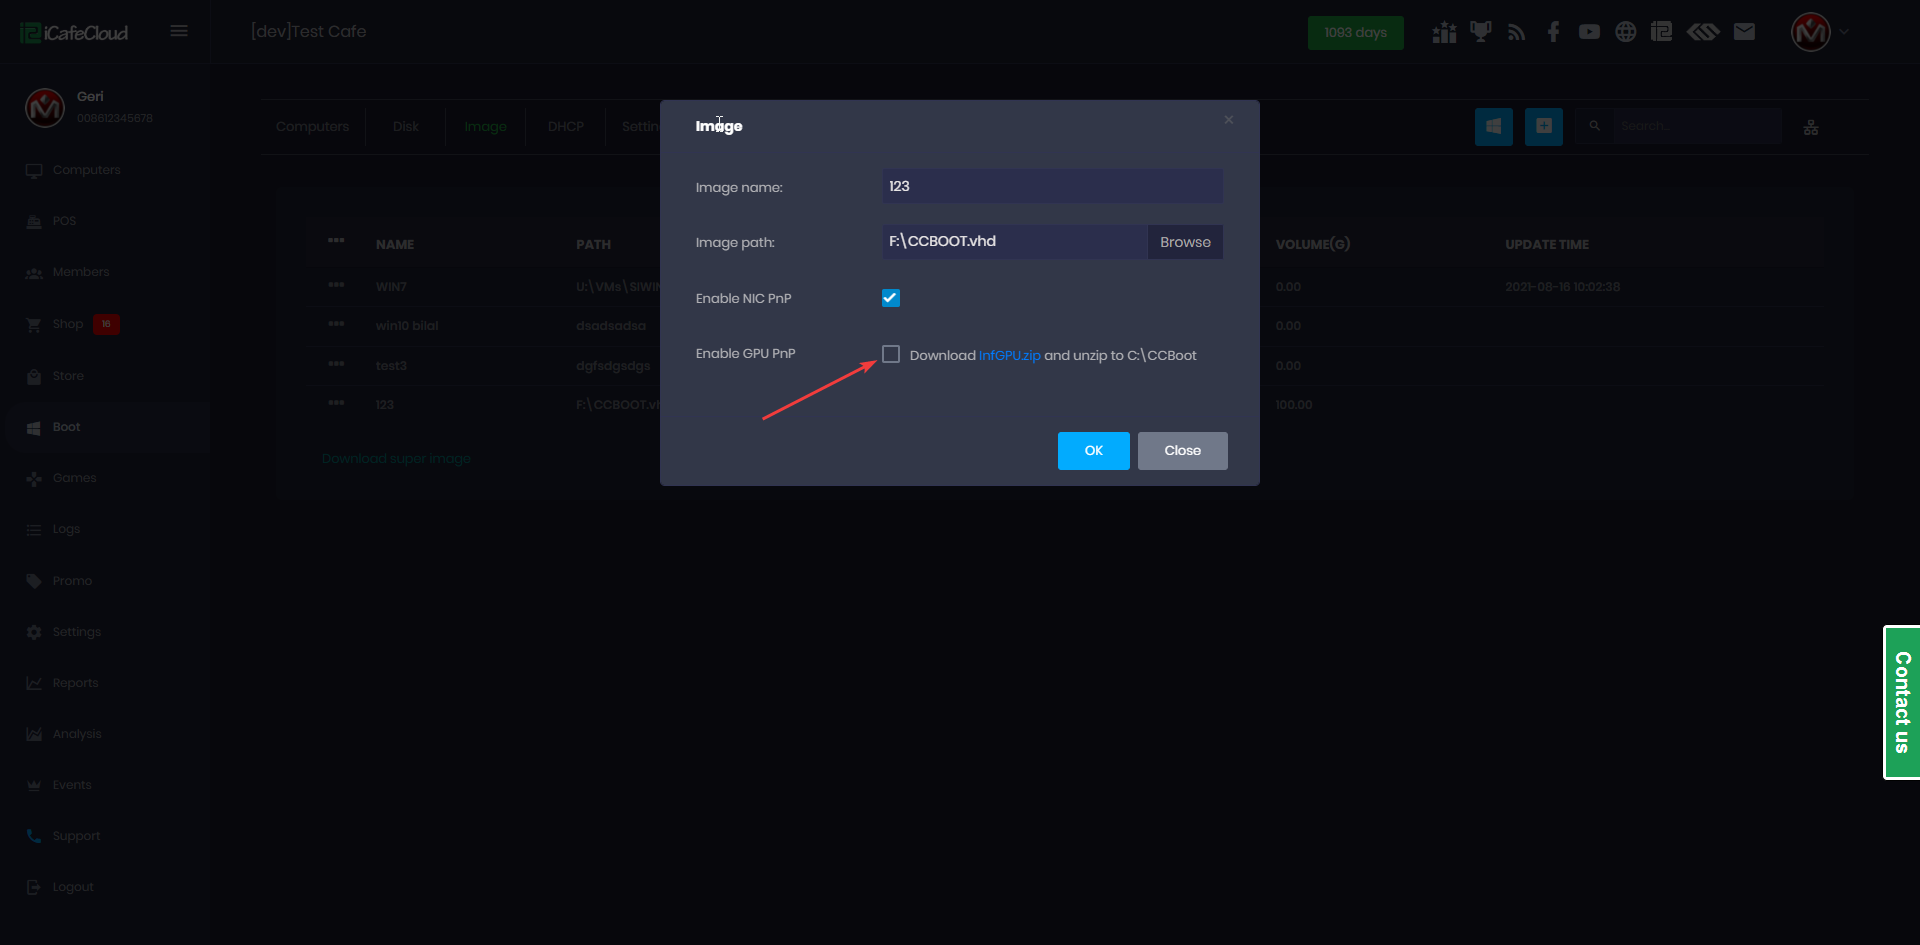
Figure 4
- Once finished, you can open Device Manager and check the driver properties to verify the installed driver version.(Figure 5)
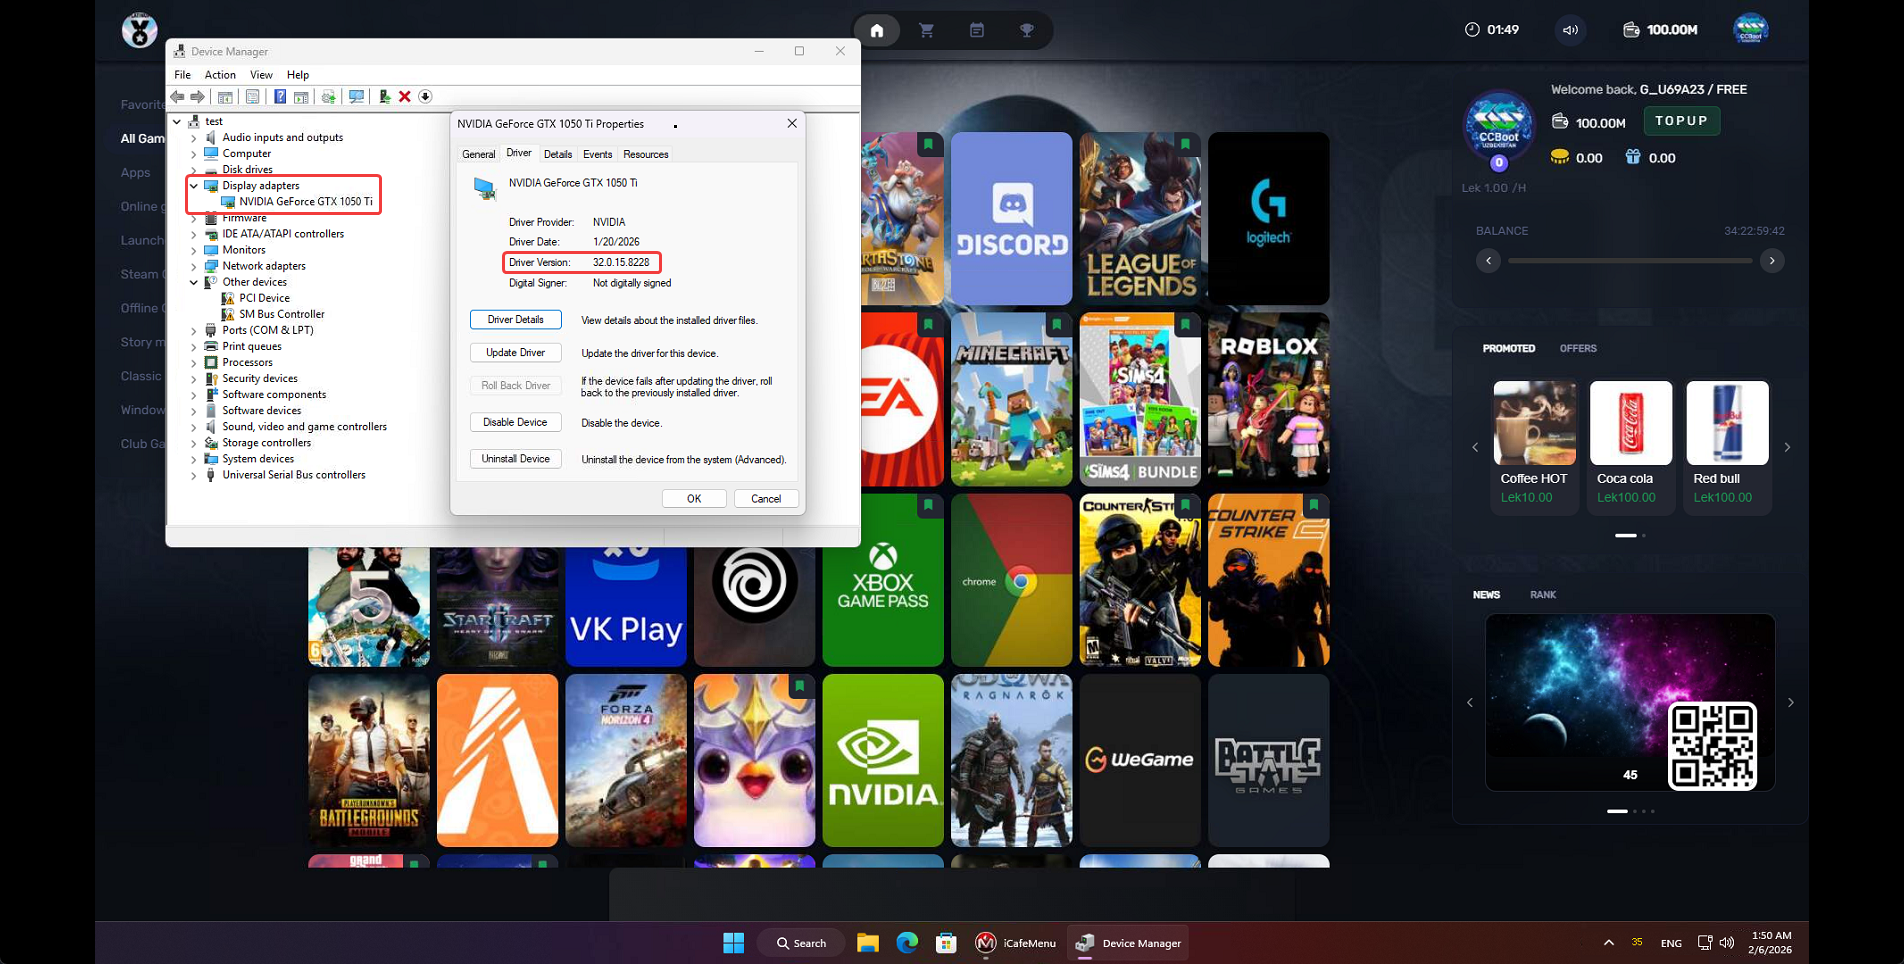
Figure 5