2024-07-11
diskless, boot, asus, uefi, secure boot
The following provides detailed steps for configuring UEFI secure boot on Asus motherboards, including importing the Youngzsoft certificate v2 and setting secure boot options.
Bios configuration
- Before starting to configure the BIOS, prepare the USB for Secure Boot.
- Enter Bios and press F7 to switch to advanced mode.(Figure 1)
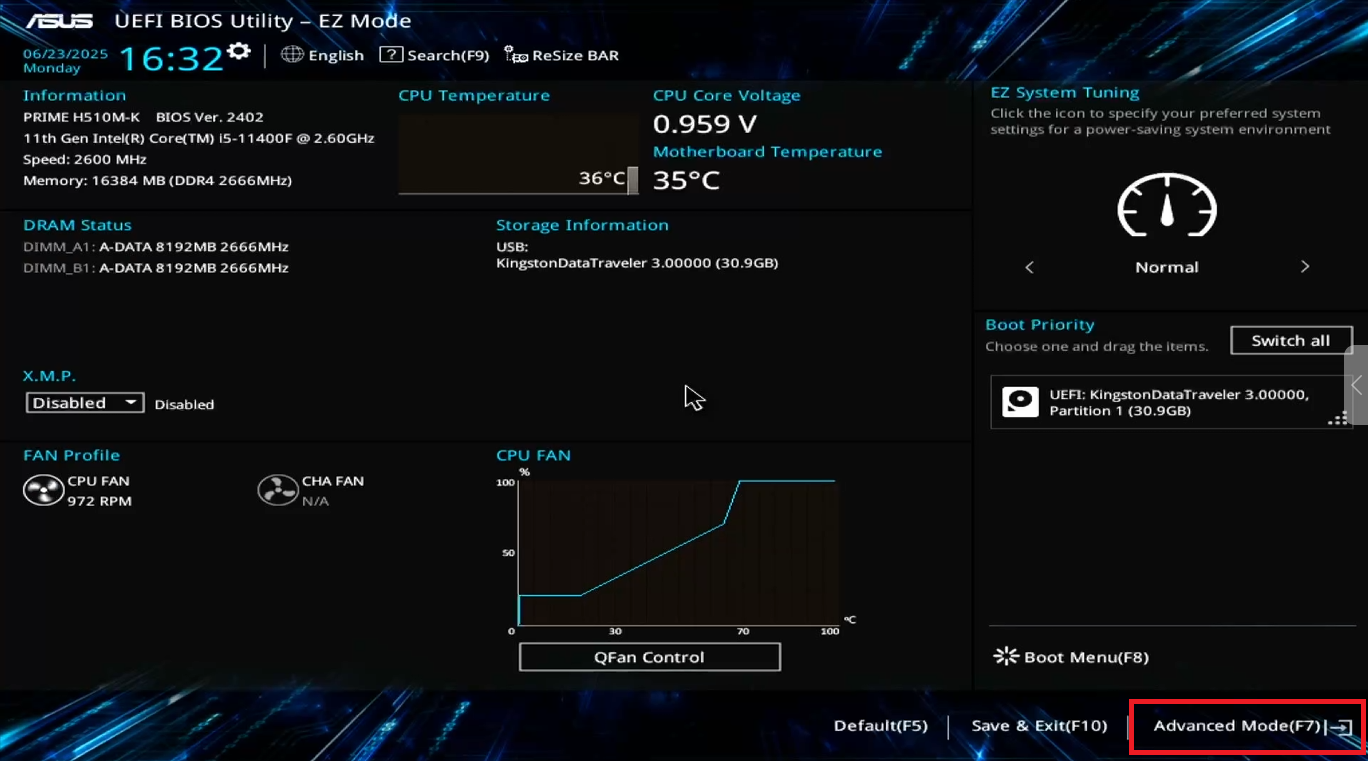
Figure 1
- Open the Advanced tab and go to the Network Stack Configuration option. (Figure 2)
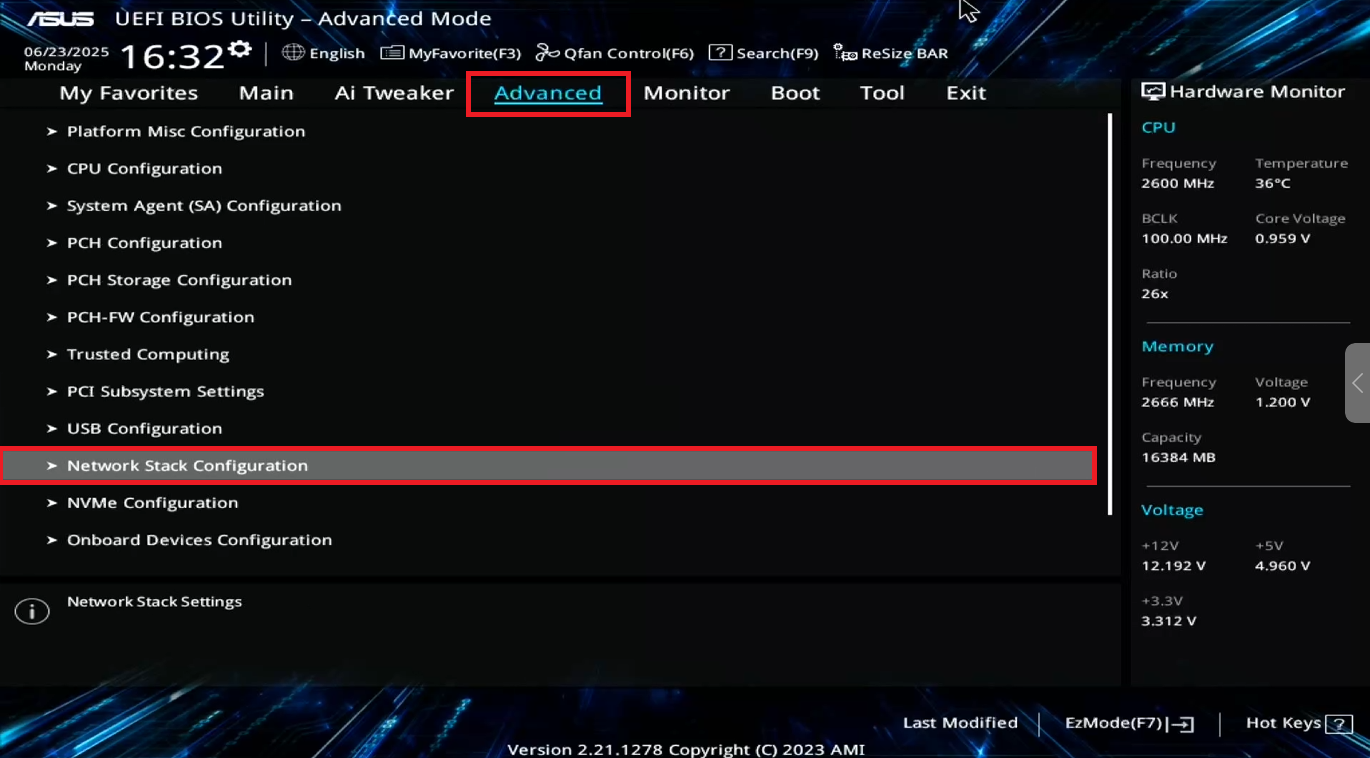
Figure 2
- Enable the Network Stack option. Additional settings will open. (Figure 3)
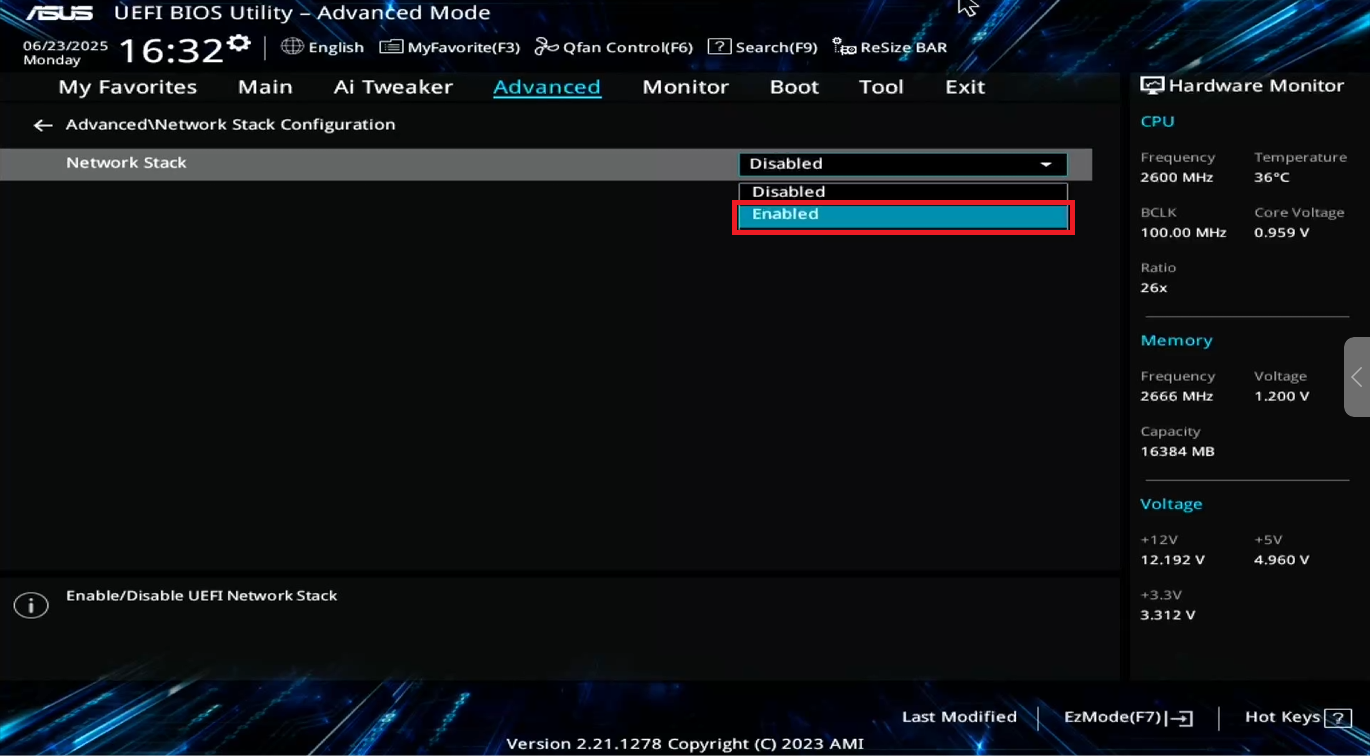
Figure 3
- In the list of additional settings, find IPv6 PXE Support and disable it. (Figure 4)
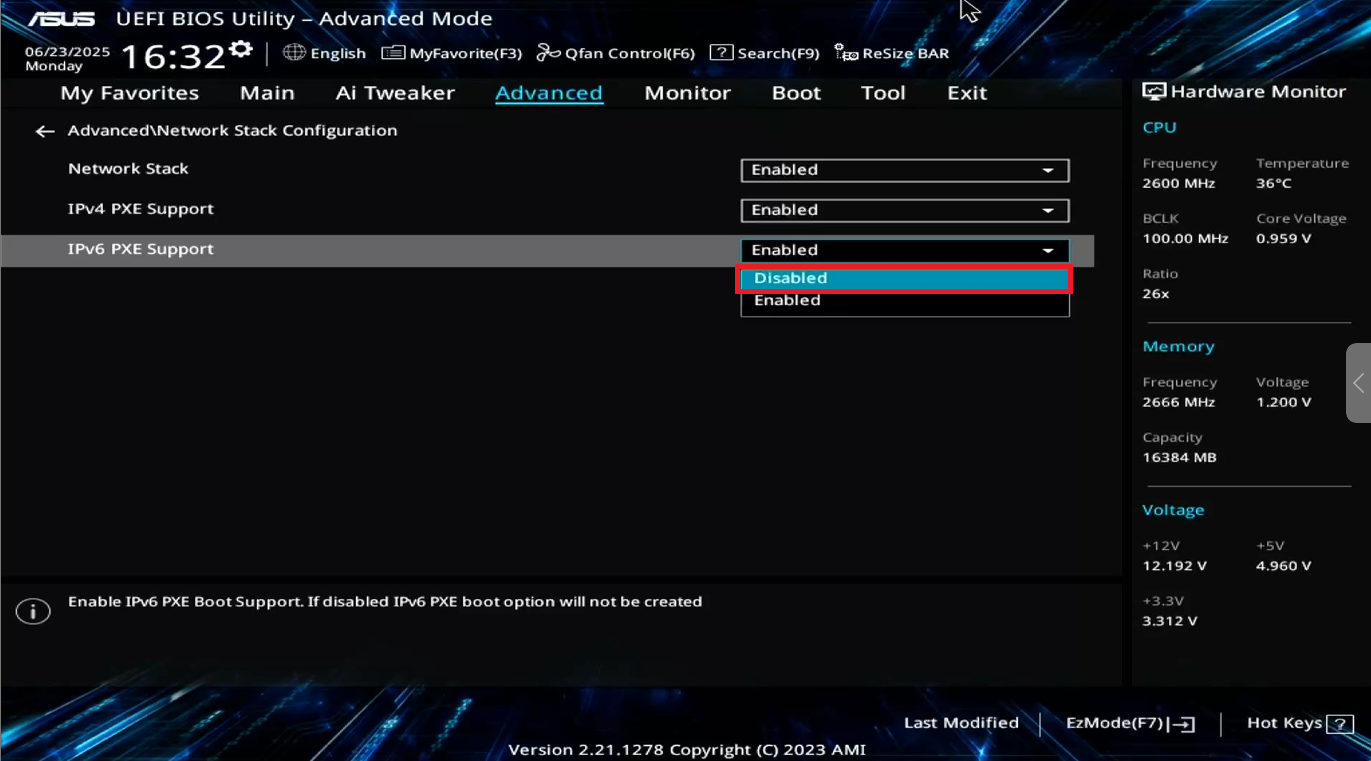
Figure 4
- Go to the Boot tab, then to the CSM (Compatibility Support Module) parameter. (Figure 5)

Figure 5
- Make sure the Launch CSM option is disabled.(Figure 6)
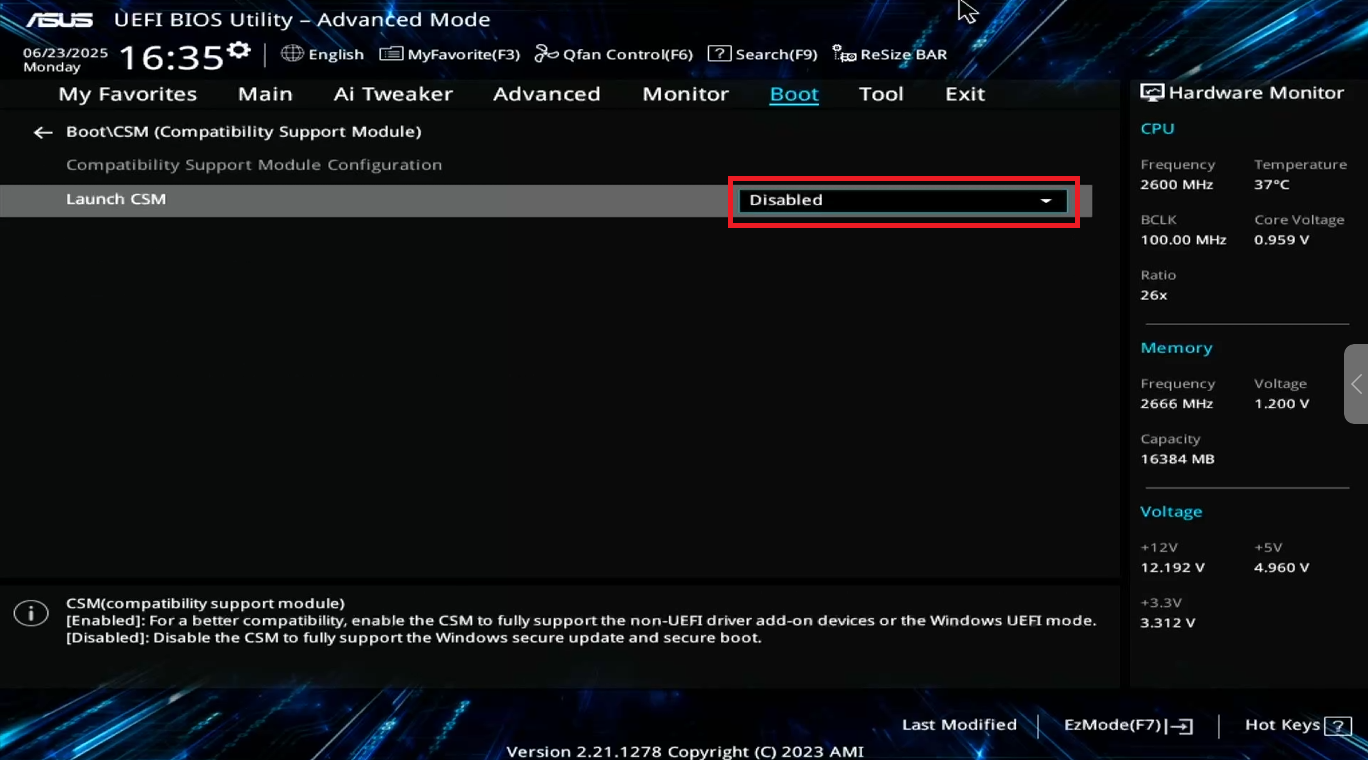
Figure 6
- Next press F10 to save the settings, the PC will automatically reboot.(Figure 7)
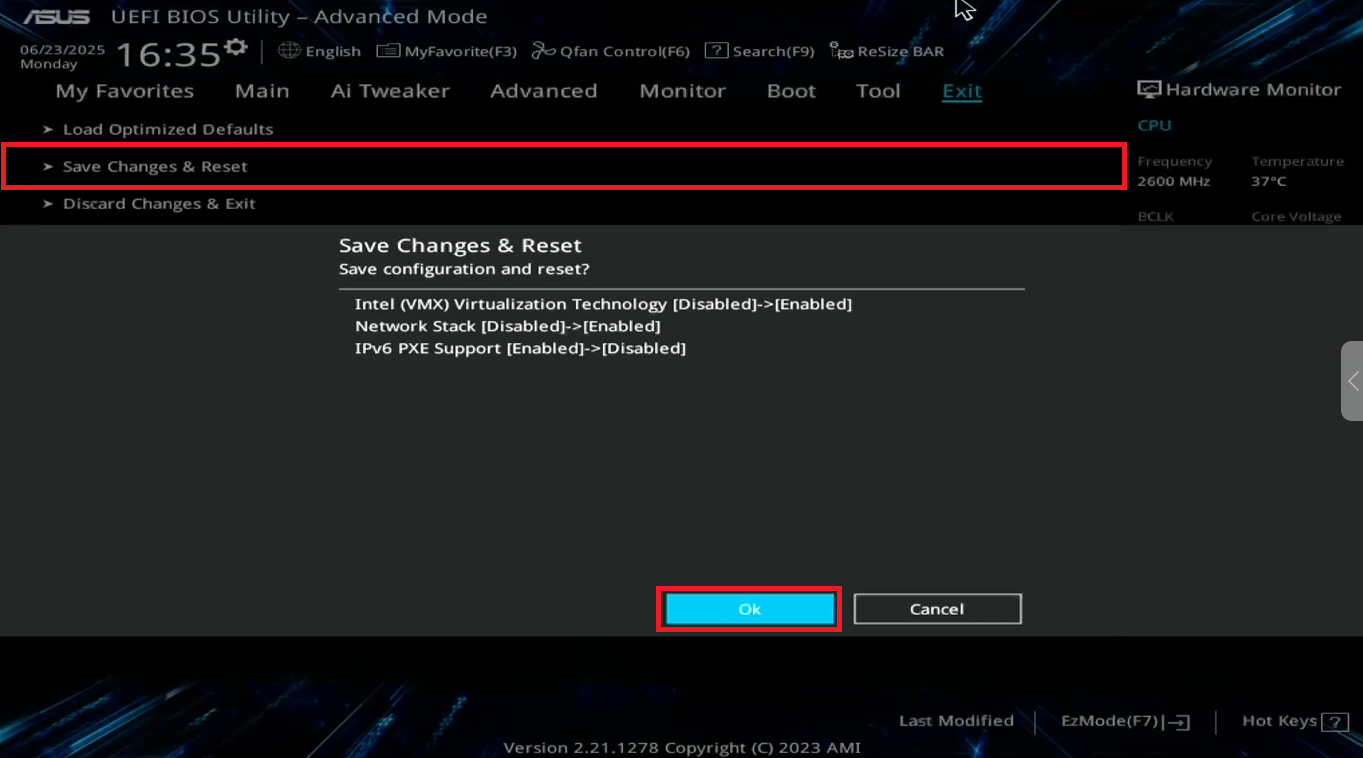
Figure 7
Enable Virtualization
- Enter bios and then advance mode and open the Advanced tab and go to the CPU Configuration option. (Figure 8)
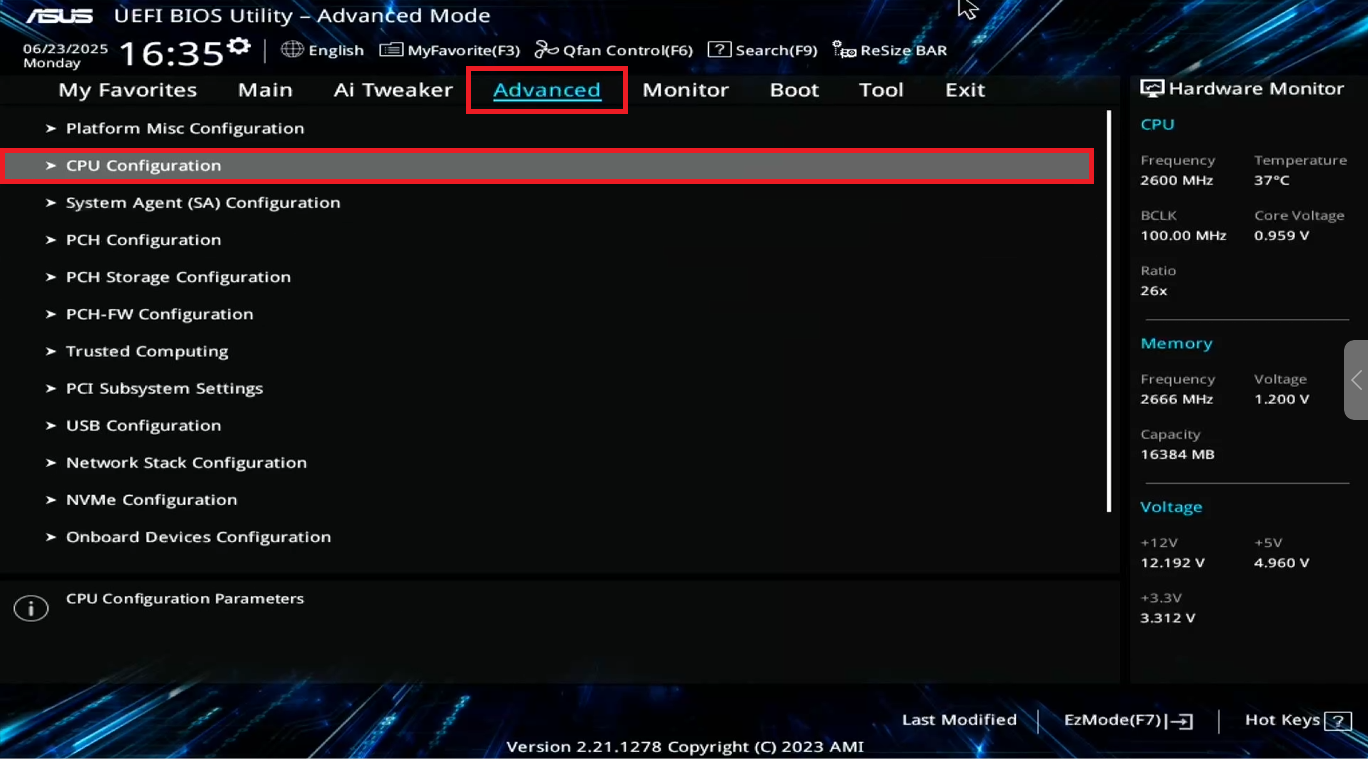
Figure 8
- Scroll down to the bottom to find the Intel (VMX) Virtualization Technology option and enable it. (Figure 9)
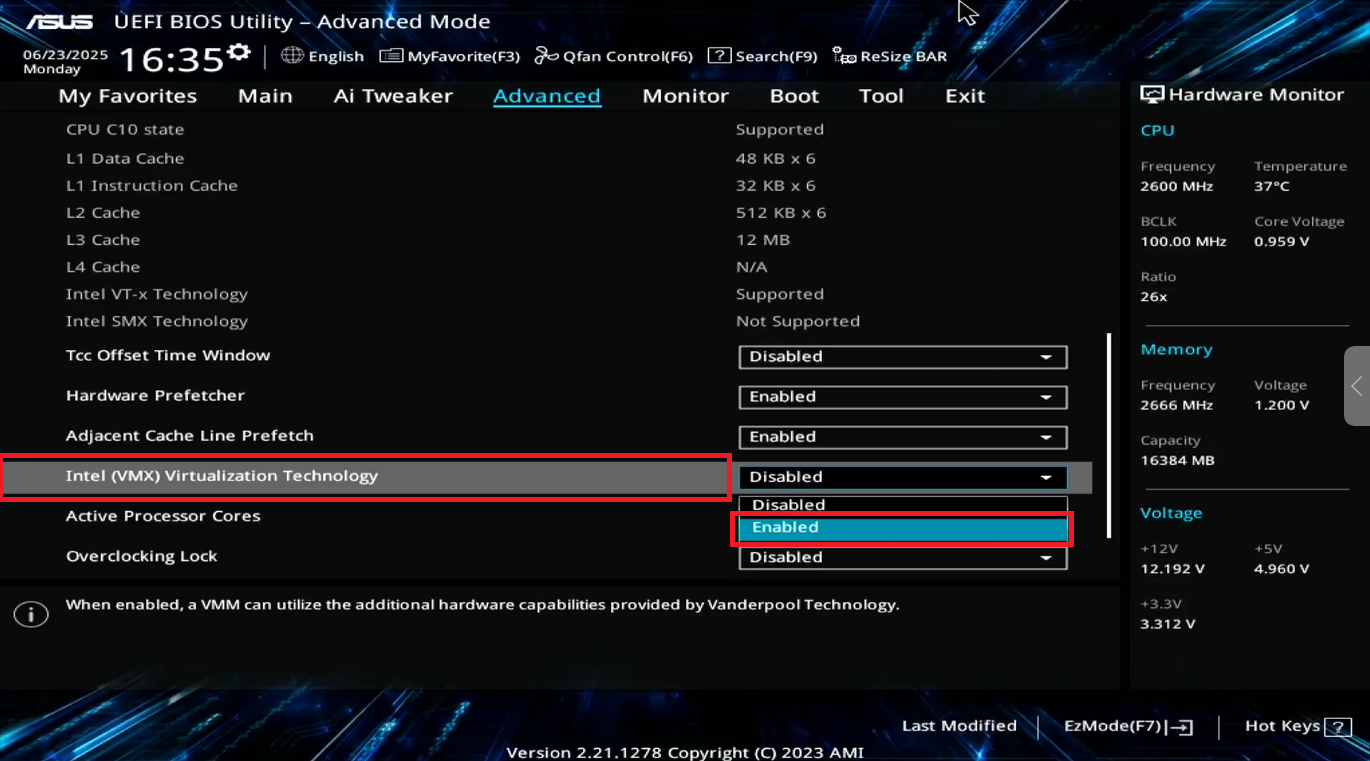
Figure 9
- Next press F10 to save the settings, the PC will automatically reboot.
Enable secure boot
- On Bios press F7 for Advanced mode(Figure 10)

Figure 10
- Navigate to “Boot” and click on the secure boot. (Figure 11)

Figure 11
- Select OS type “Windows UEFI mode” and secure boot mode “Custom”.(Figure 12)
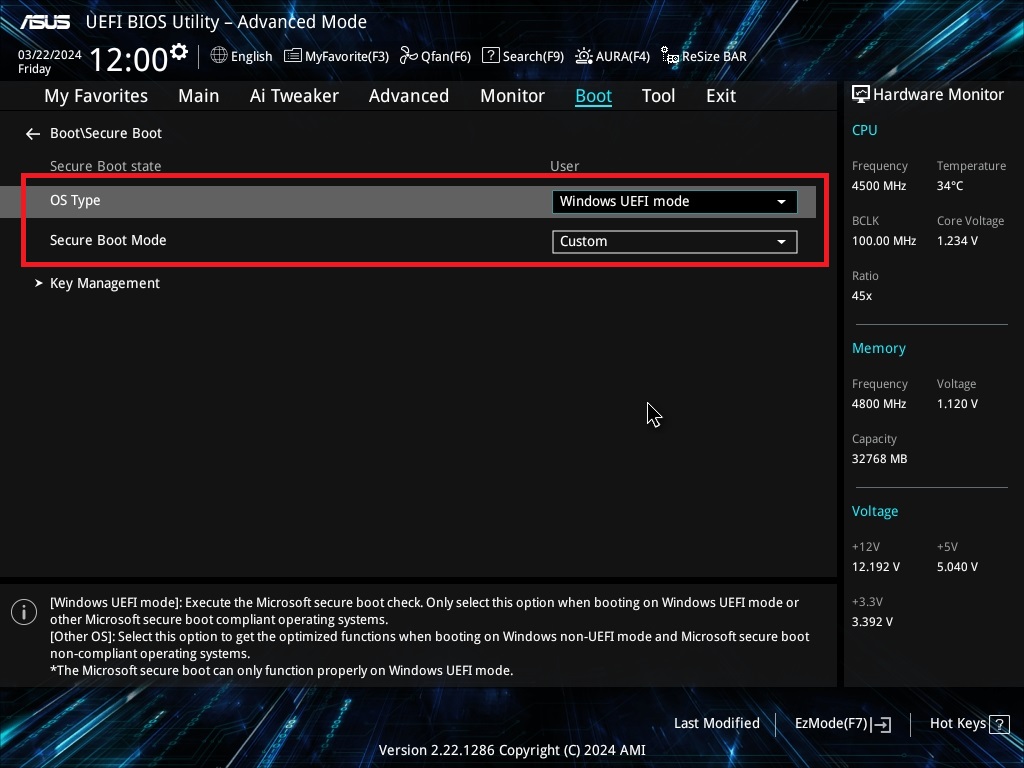
Figure 12
- Next click on the Key management. (Figure 13)
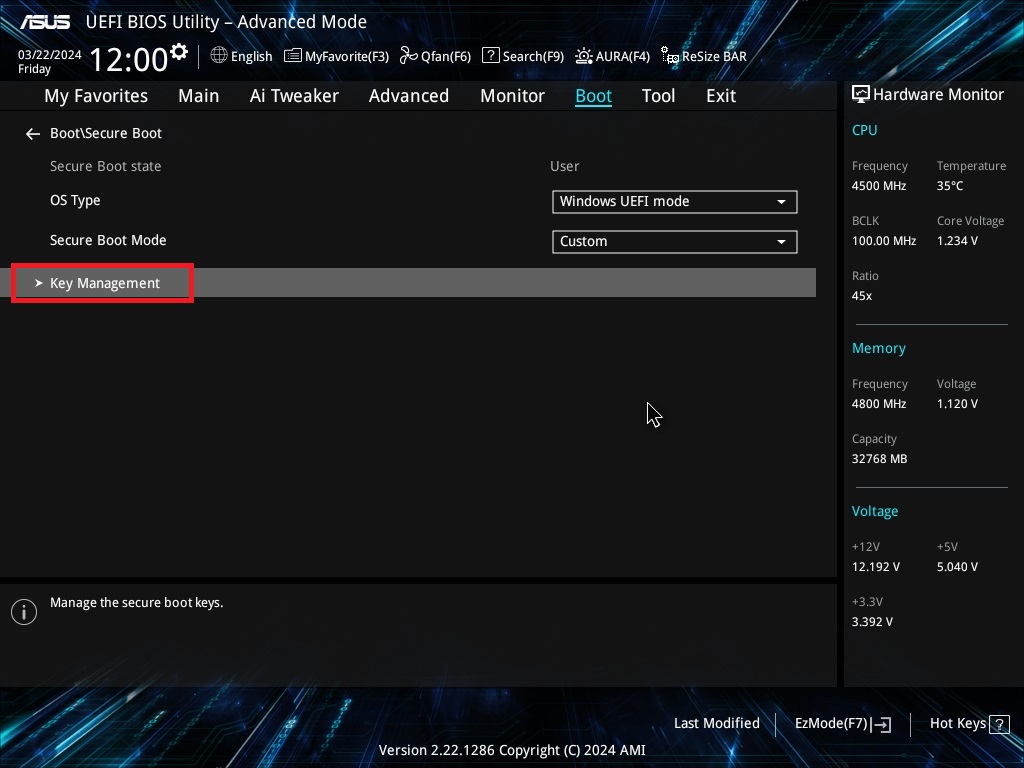
Figure 13
- On the list with the option to select ,click on the “DB Management”. (Figure 14)
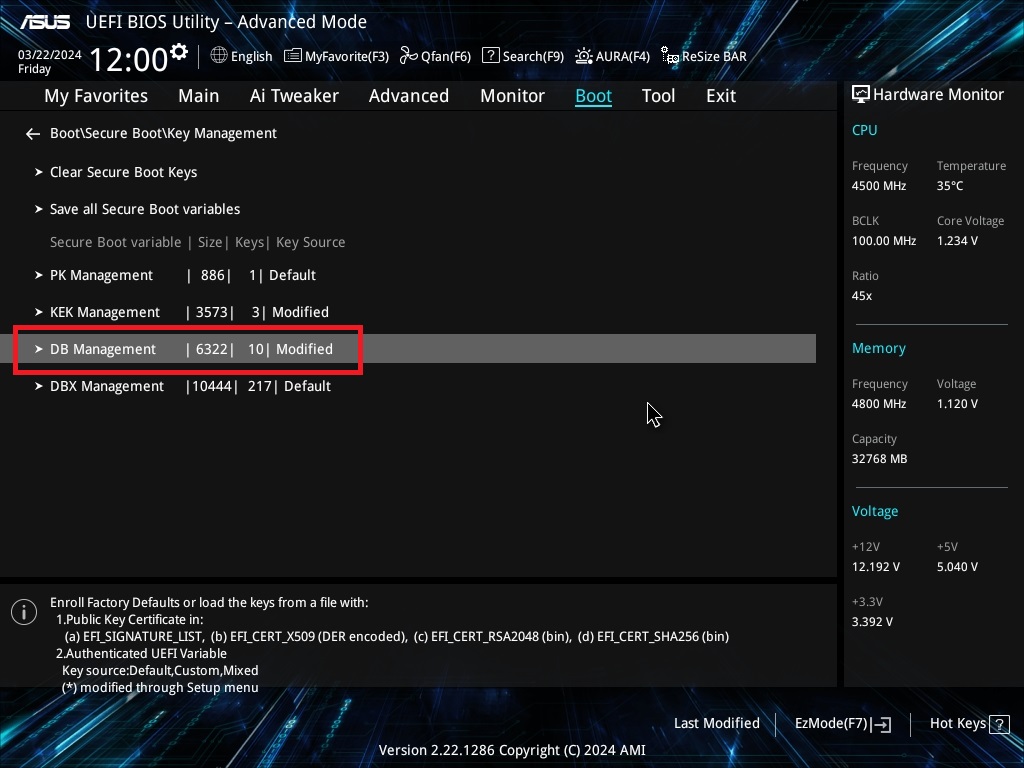
Figure 14
- On DB Management select Append key.(Figure 15)

Figure 15
- The Append key will ask to load factory default select No. (Figure 16)
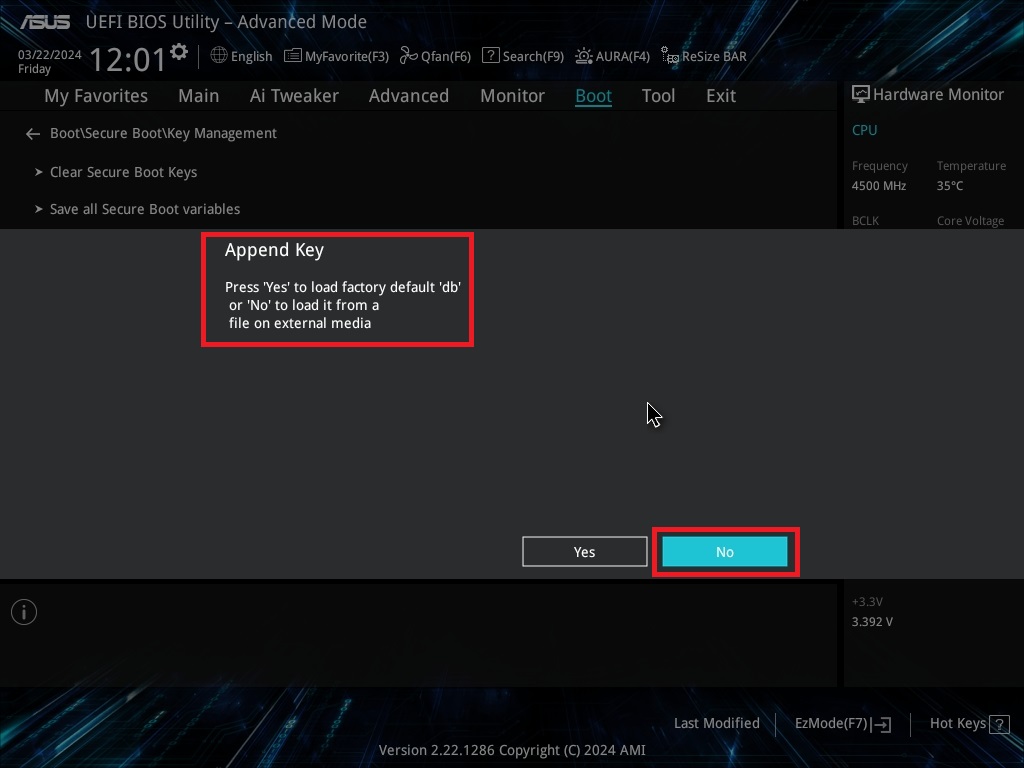
Figure 16
- Next select the USB you prepared earlier as requested on the start of the manual .(Figure 17)
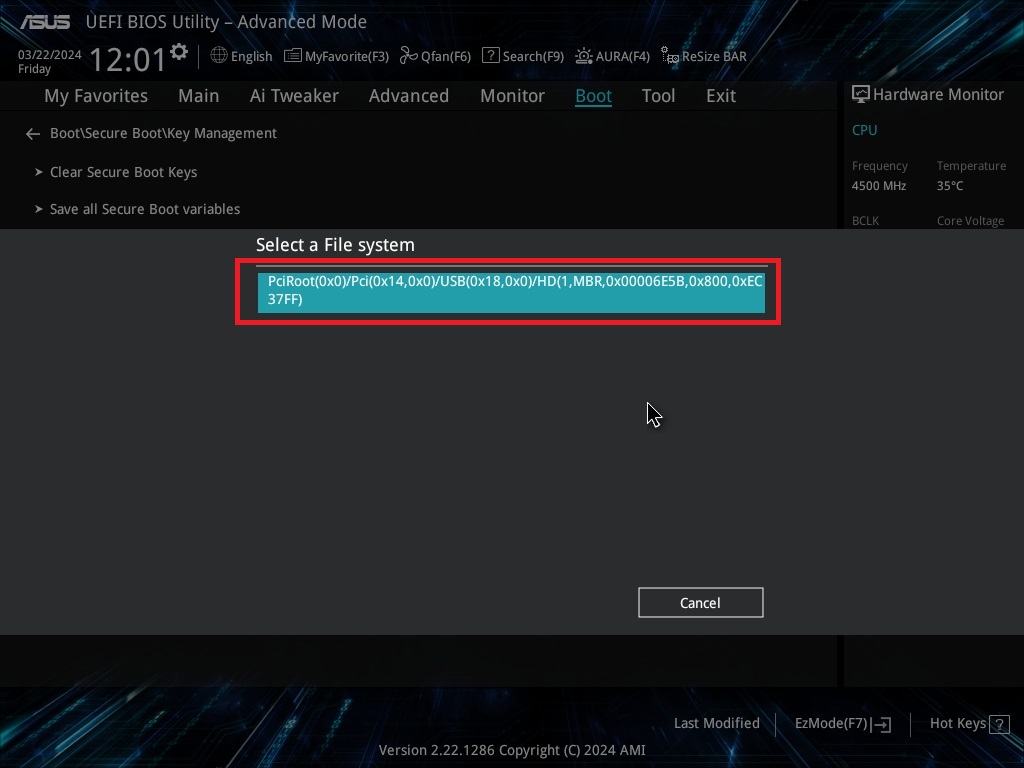
Figure 17
- Next select the Youngzsoft certificate v2 file ( You can find if on the start of the manual) (Figure 18)
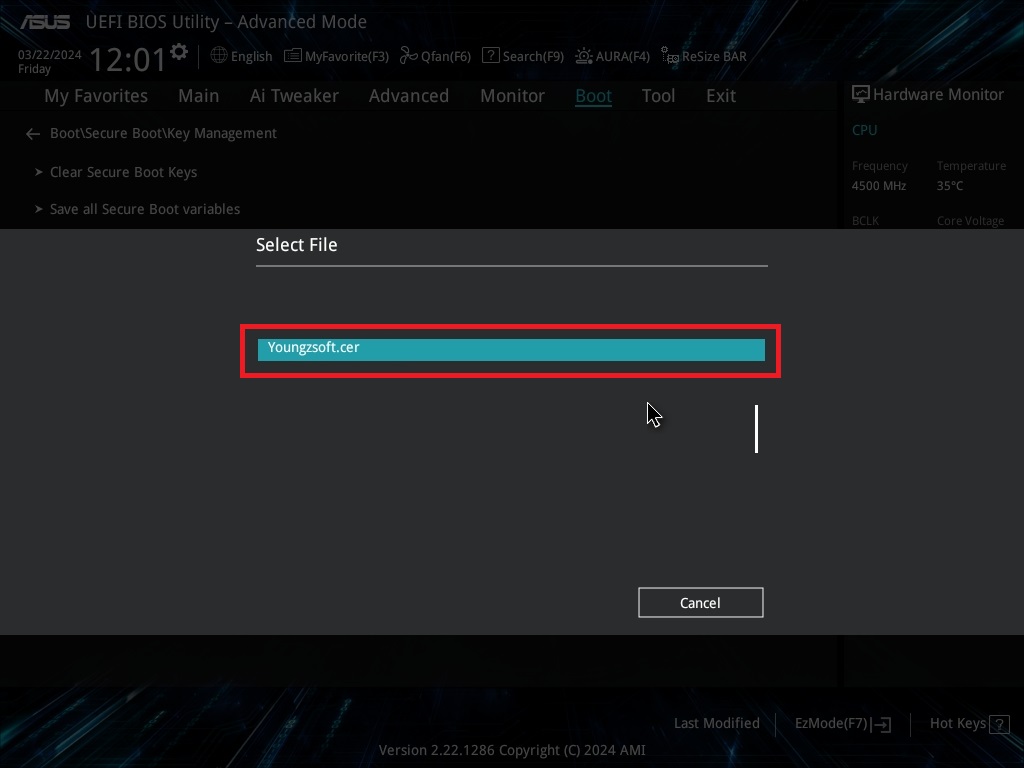
Figure 18
- On input file format select “Public key Certificate”. (Figure 19)
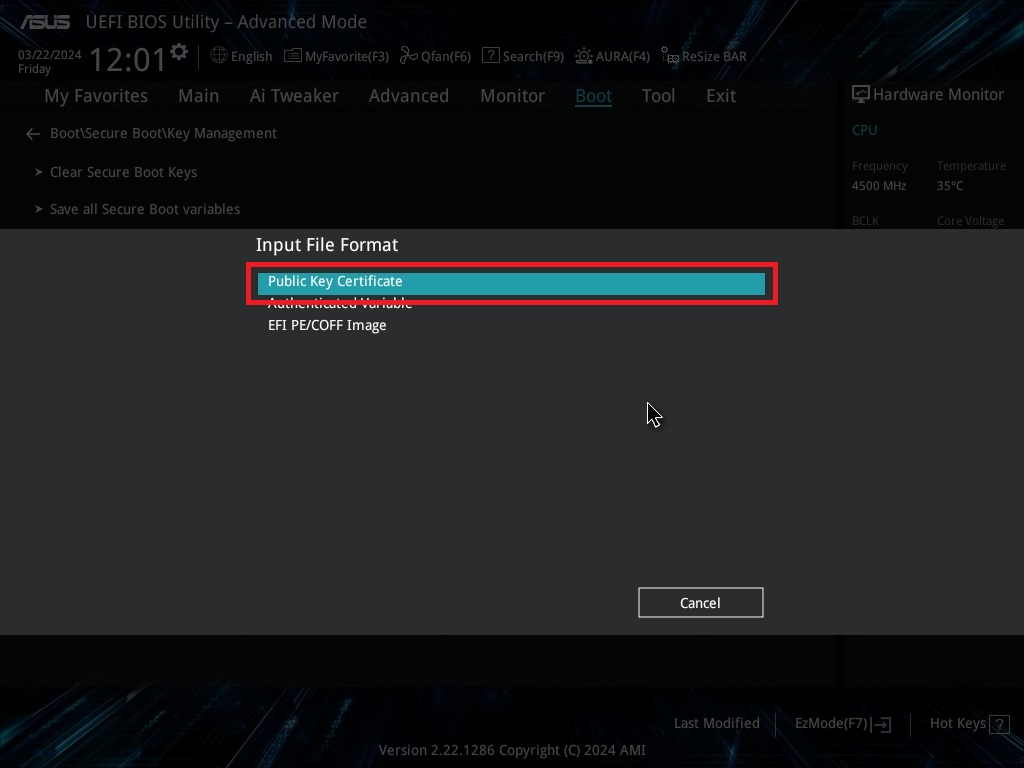
Figure 19
- Next it will ask to append the key select Yes. (Figure 20)
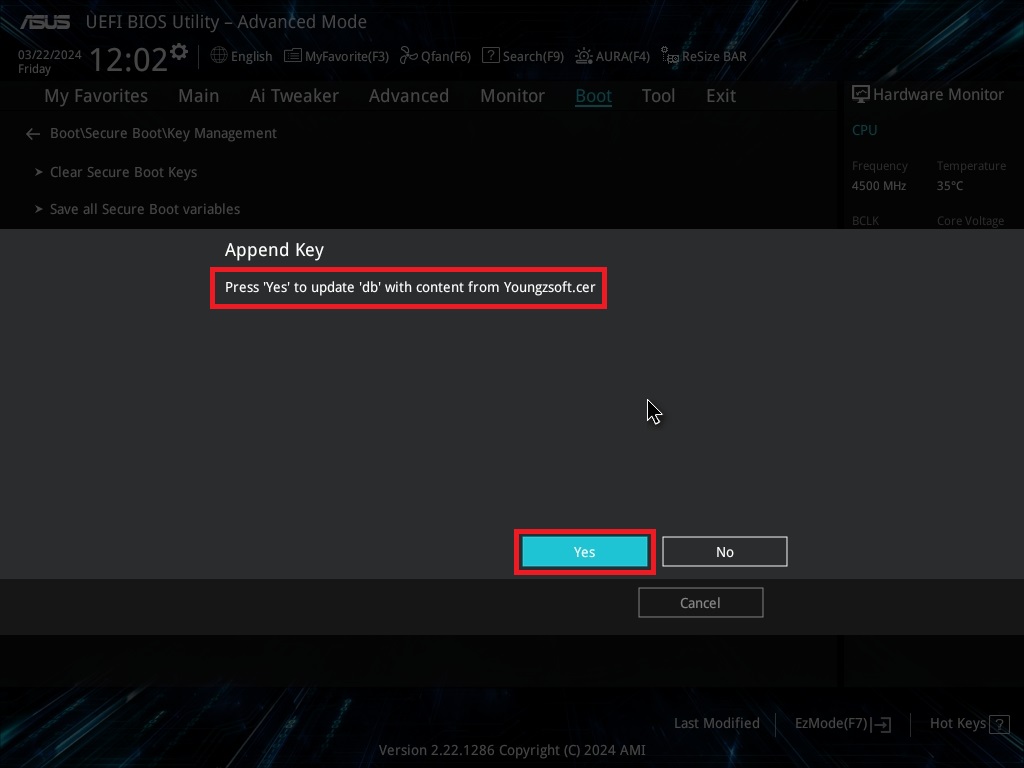
Figure 20
- Save and exit changes. (Figure 21)
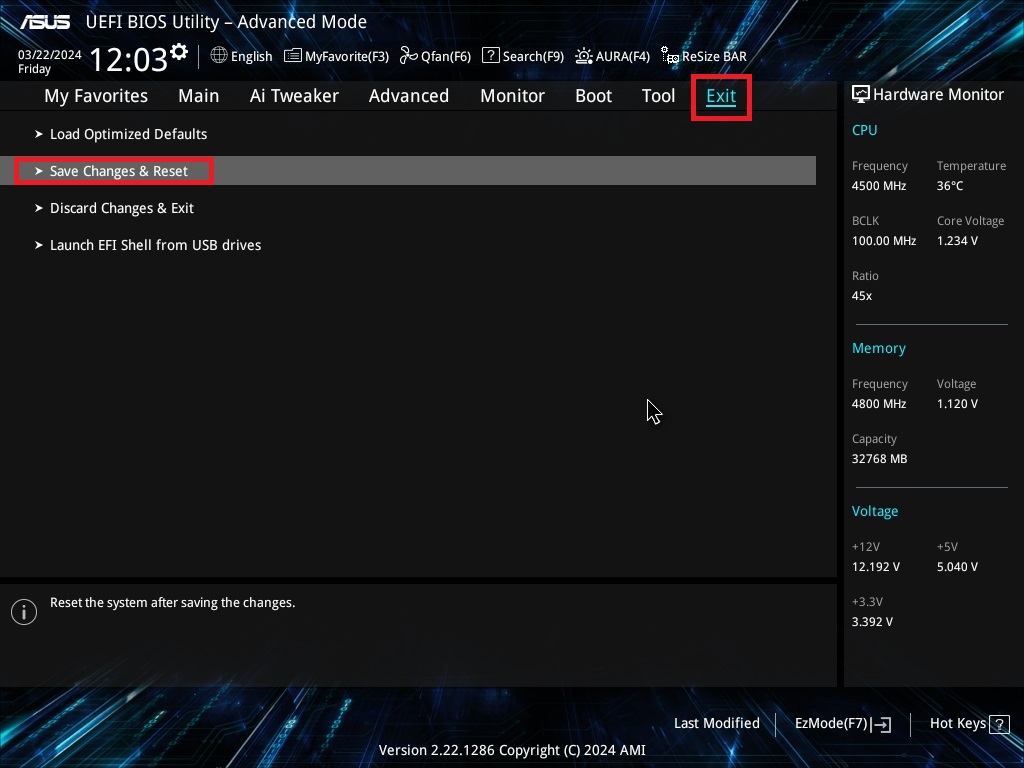
Figure 21
Admin panel configuration
- Once the image is ready on the iCafeCloud admin panel in the Boot section , edit the client PC and select ipxe2026.pxe(UEFI)on the PXE field. (Figure 22)
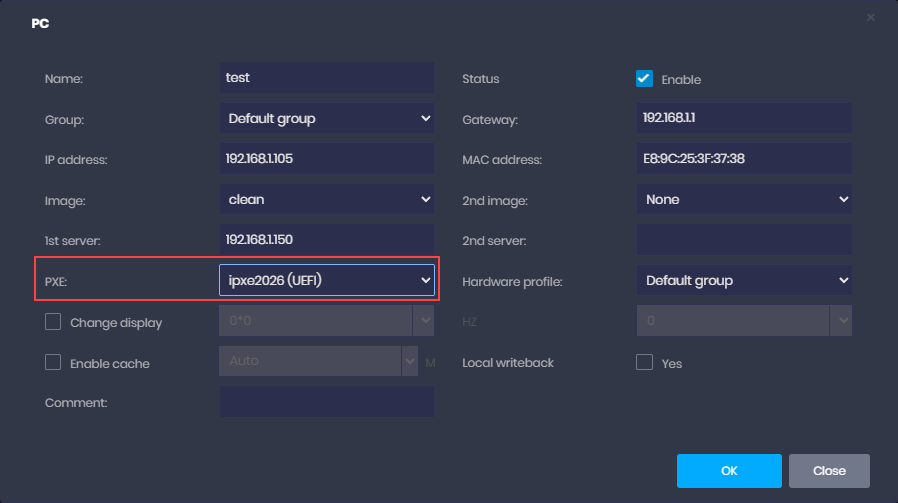
Figure 22