2025-06-25
diskless, boot, image, pnp, auto
The following explains how to automatically add drivers to an image without manually collecting or installing them. All drivers can be auto-updated directly from our cloud.
- Auto PnP introduced on CCBootCloud 2025 versions
- Install CCBootCloud 2025 version or later , update CCBootclient on image.
- Navigate to the Boot section, go to Images, select the image you are using, and click Edit. On the next screen, check the box if the function is enabled for "Enable NIC PnP". (Figure 1)
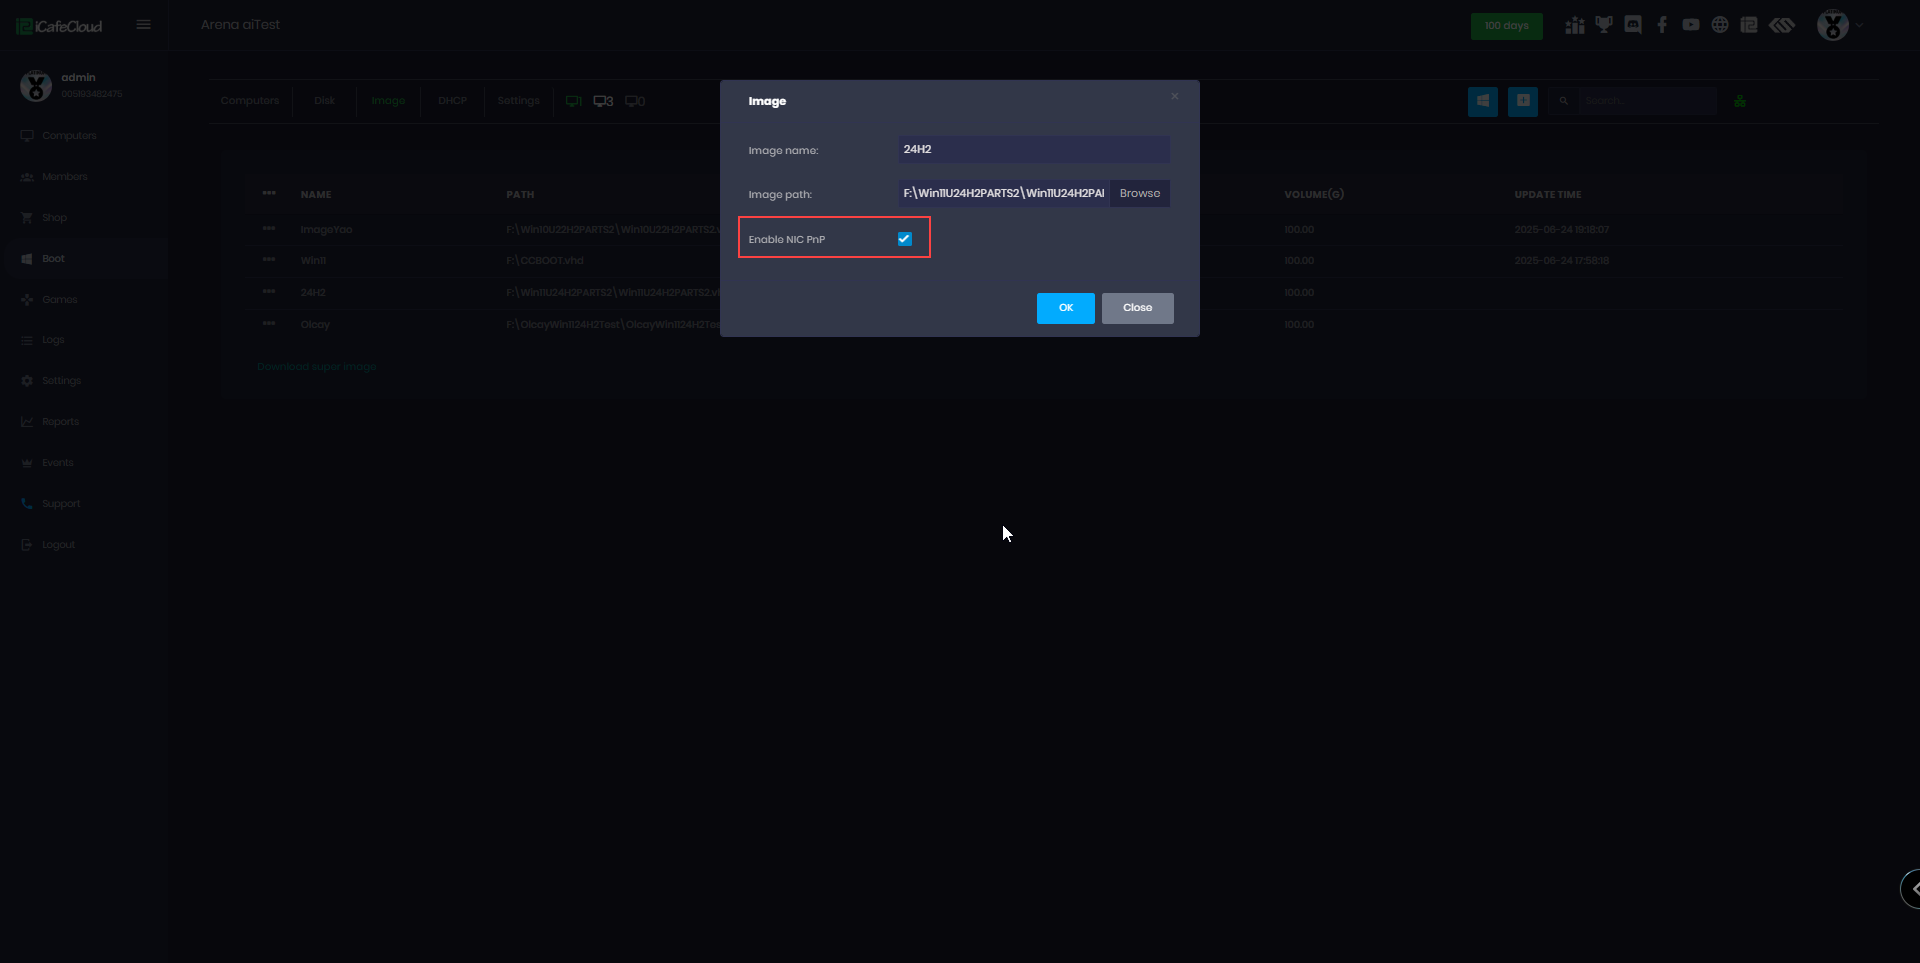
Figure 1
- Next, boot the PC using the selected image. During the client booting screen, you will see the NIC driver version displayed. (Figure 2)
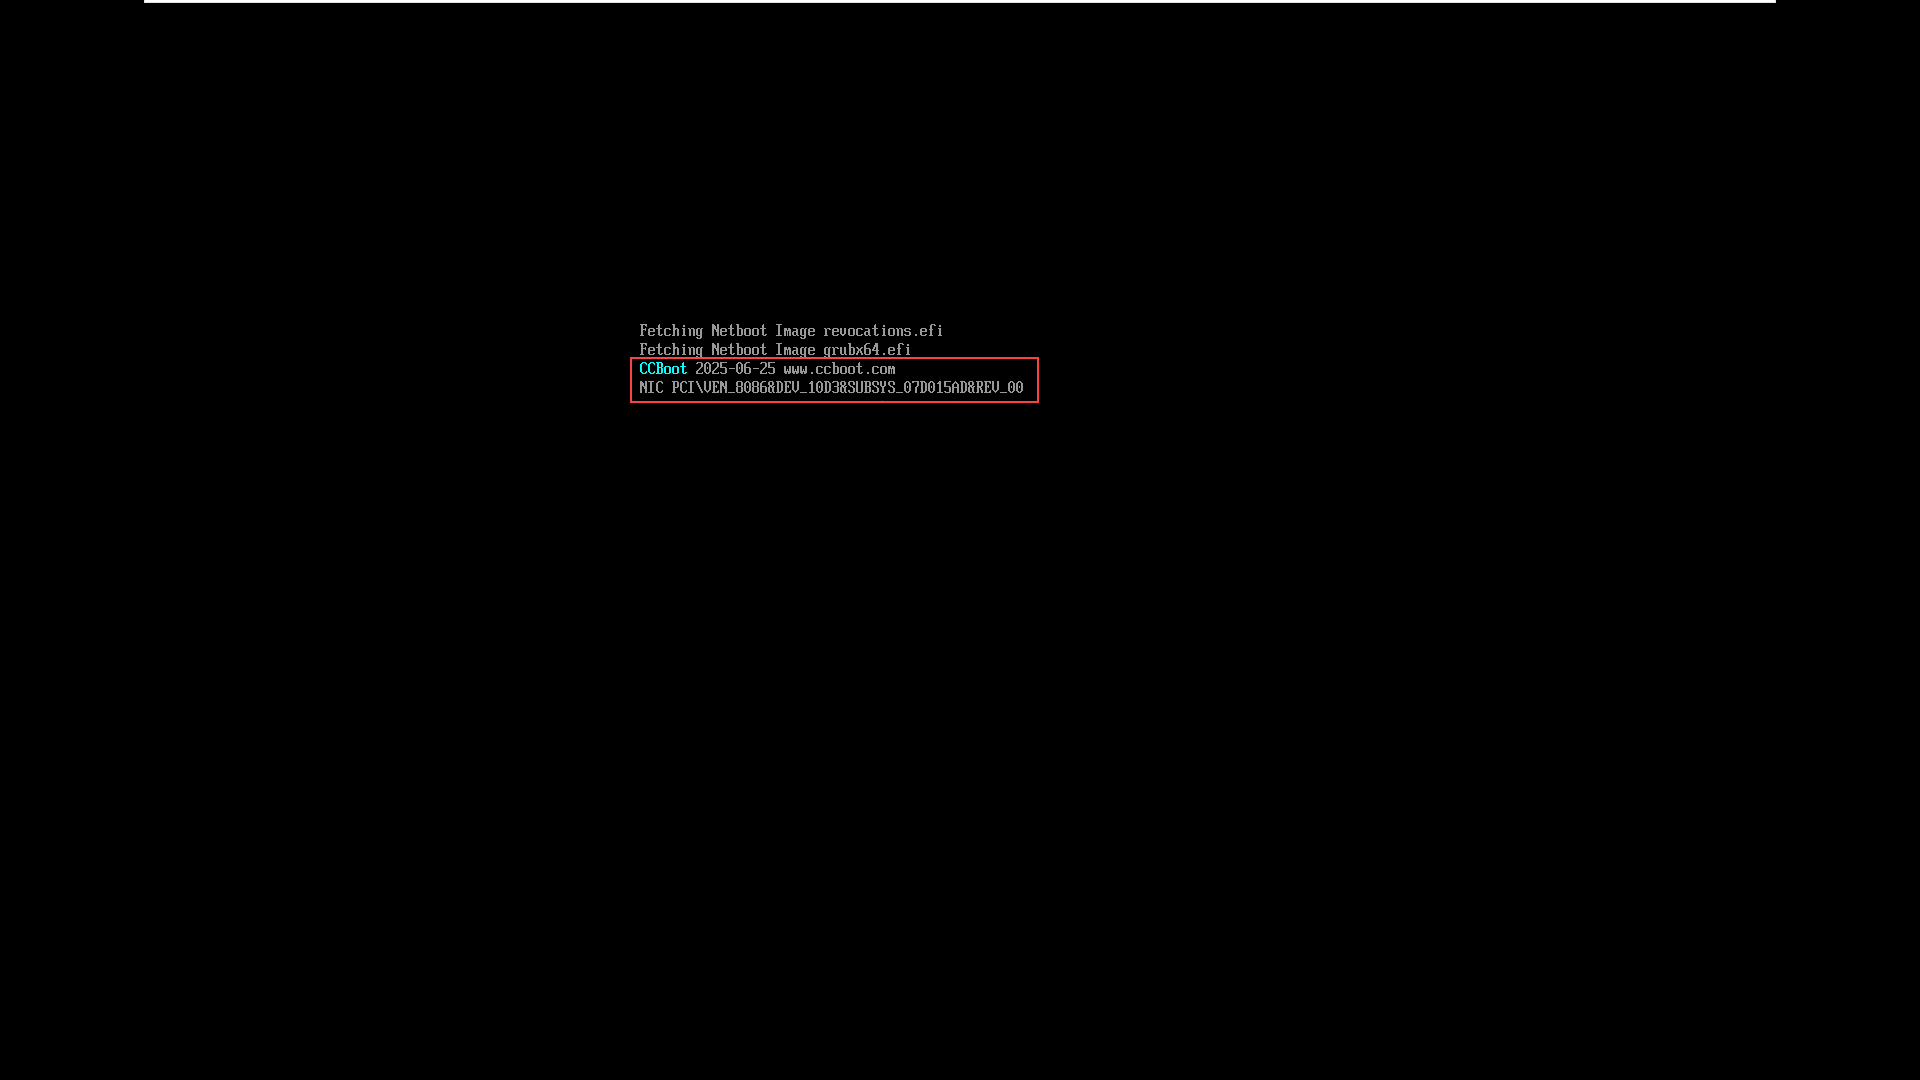
Figure 2
- Once the PC boots successfully, it means Auto PnP has worked and the driver has been added to the image.
- If the PC fails to boot, you can check whether the NIC driver was added via Auto PnP by going to the Boot section, selecting the image, and clicking Image Restore. In the list, you will see the NIC driver version. (Figure 3)
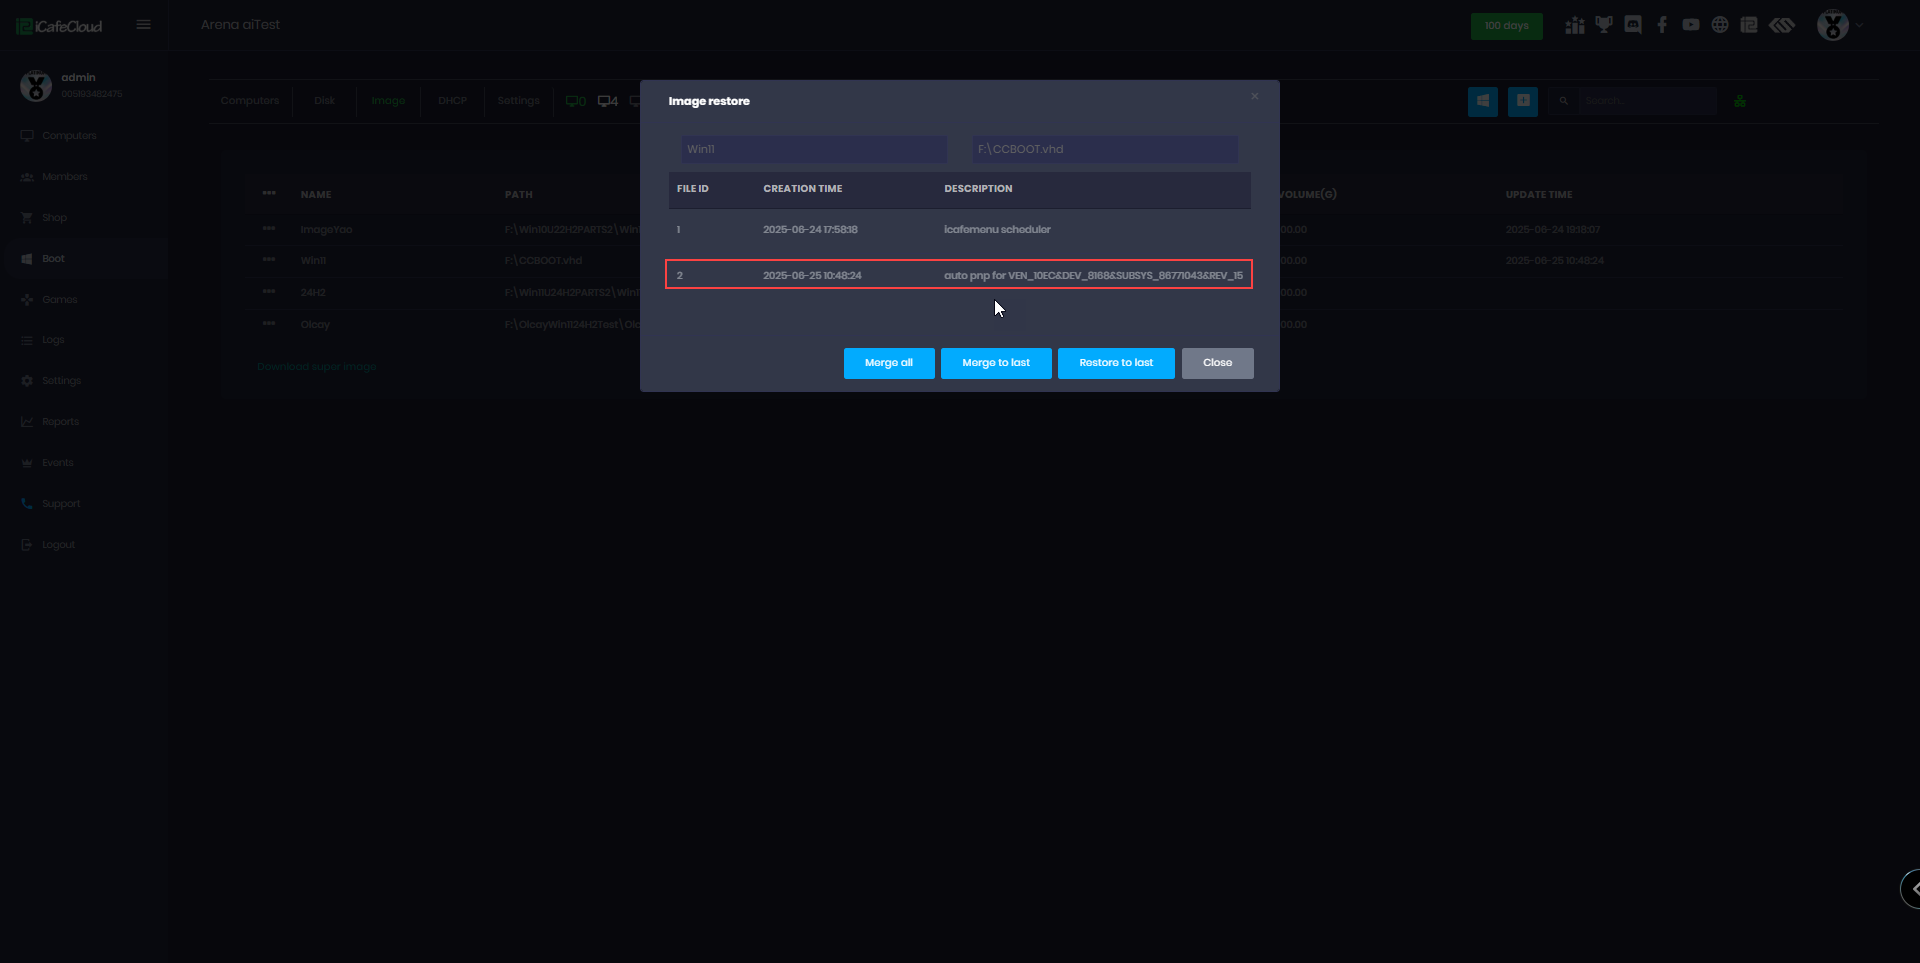
Figure 3
- You can continue to boot different motherboards on the same image to add other NIC models by auto PNP.
- Different motherboard or CPU models, including both Intel and AMD, can operate together using the same image.