2023-06-04
configure, DHCP
The following provides instructions for configuring DHCP settings on CCBoot, including setting up static IP addresses and managing multiple IPs for client boot servers to optimize network booting and load balancing.
- Go to the Boot page, open the DHCP tab, configure the DHCP settings for your network, and click Save (Figure 1).
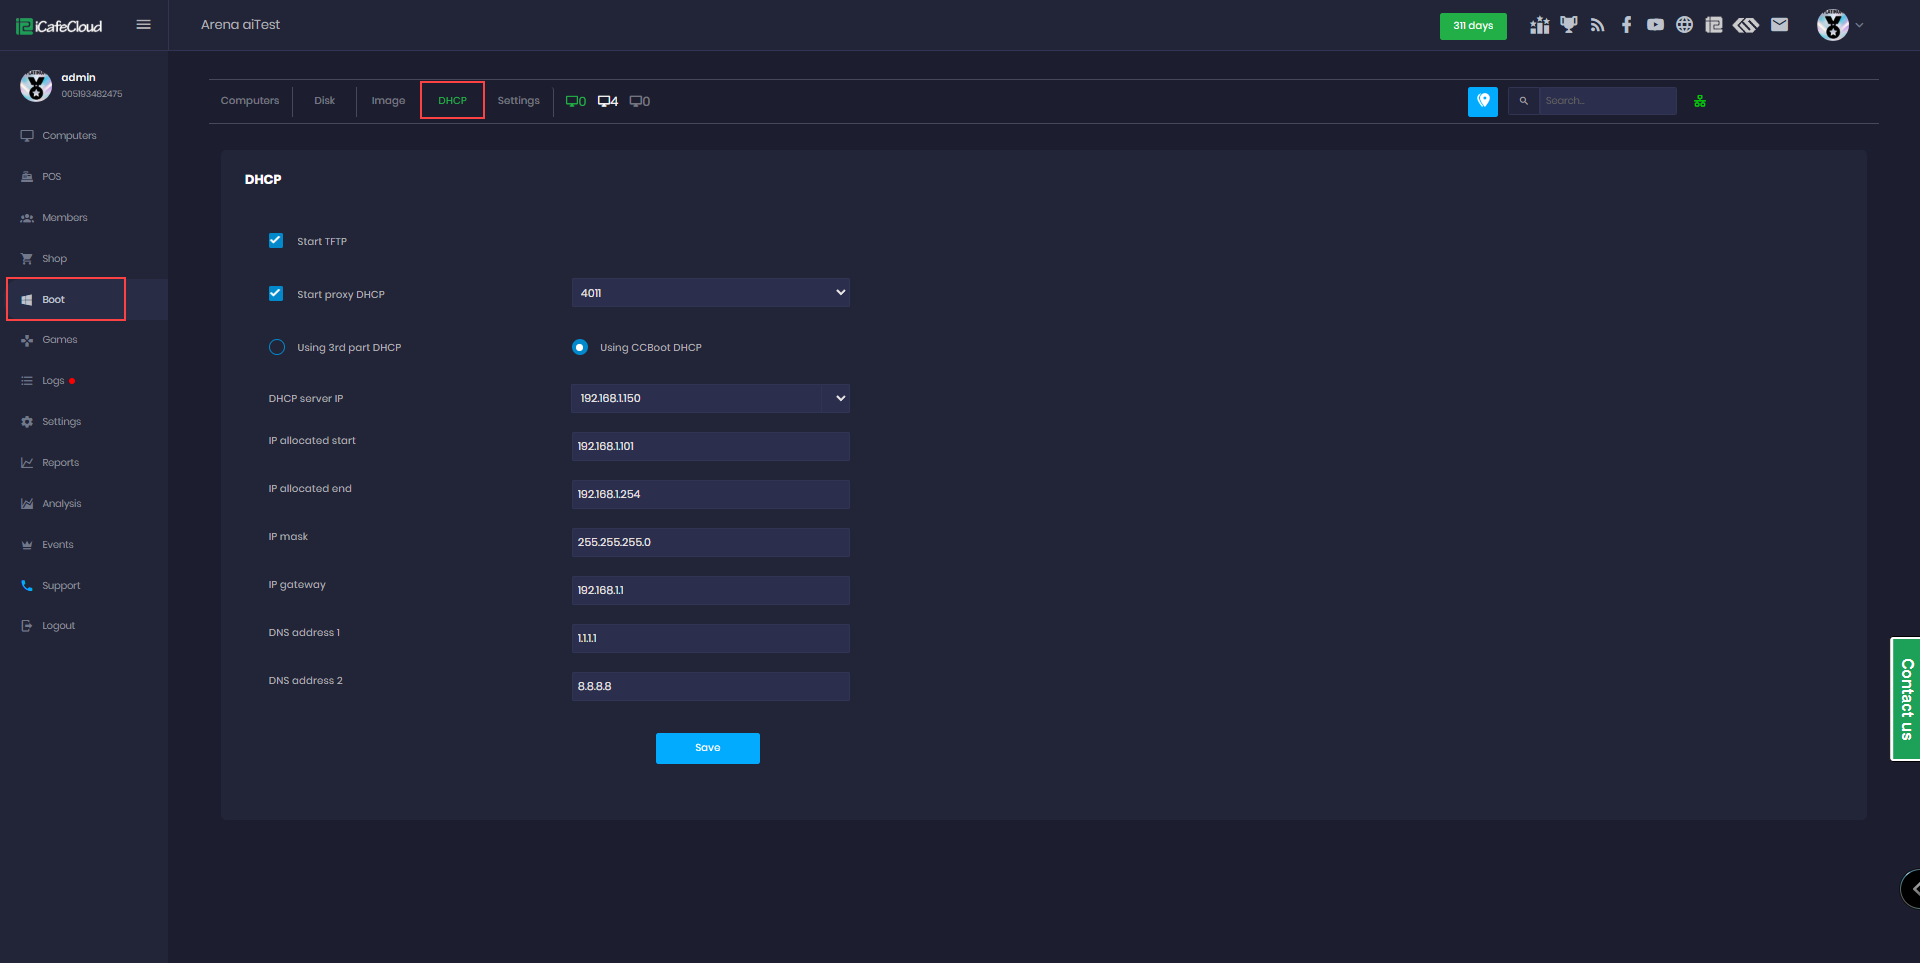
Figure 1
- The CCBoot Server should have a static IP in the LAN. Do not set CCBoot server to get IP from DHCP.
- If you have multiple IPs on server you should use 0.0.0.0 as DHCP.
- You can configure multiple IP addresses for DHCP on a server by manually adding them to the list, such as "192.168.1.1;192.168.1.2". (Figure 5)
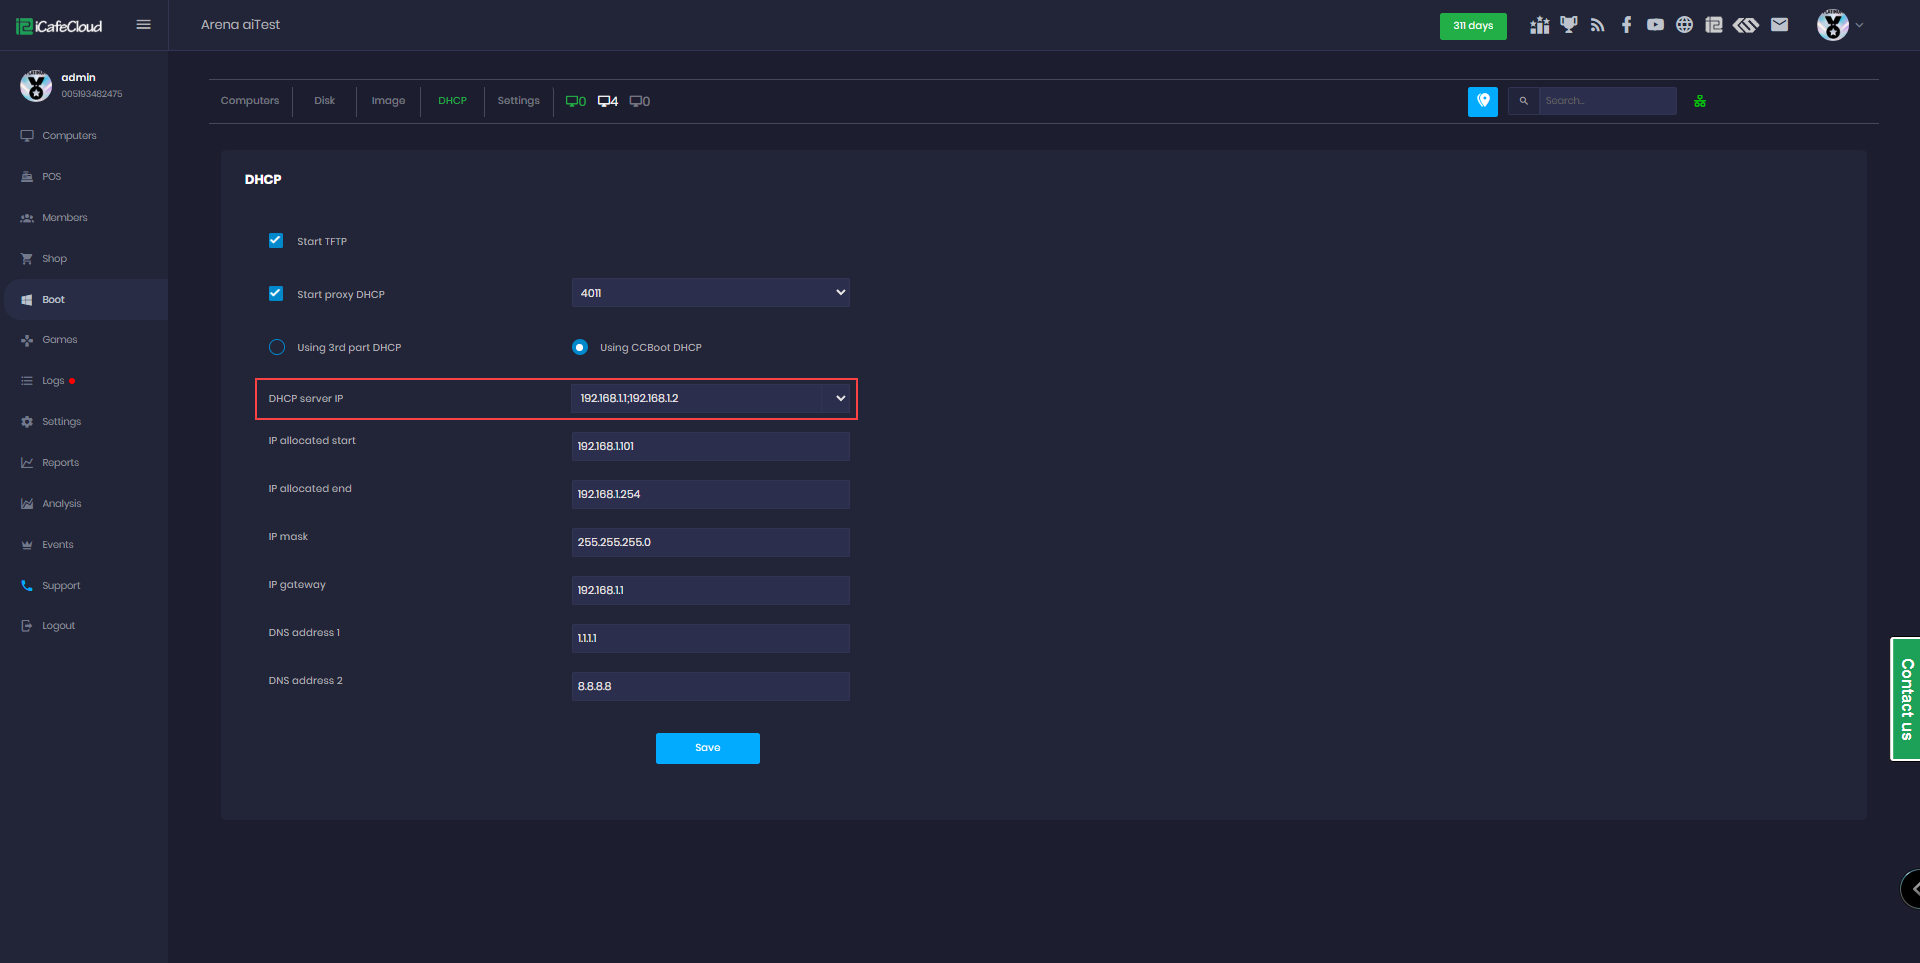
Figure 2
- 192.168.1.1;192.168.1.2 means only this two ip as server ip like you have vpn connect or other unused ip exists on server
- In this setup, if both IPs are online, clients will prioritize the IP with fewer active connections for booting. However if one IP goes offline, the client will boot from another available IP address.
- If a client sets a boot server, we will prioritize the client's settings over the DHCP settings, even if the DHCP assigns the wrong IP address. For example, DHCP IP is 192.168.1.2, but if you set the client boot server to 192.168.1.1, the client will boot from 192.168.1.1.
- If all PCs are booted simultaneously but each client has set a different IP address for the first boot server, each client will boot from its specified first boot server, ignoring other boot servers or DHCP configurations.
- client 192.168.1.1;192.168.1.2 means load balance between the two ips like you want to load balance between two servers.(Figure 3)
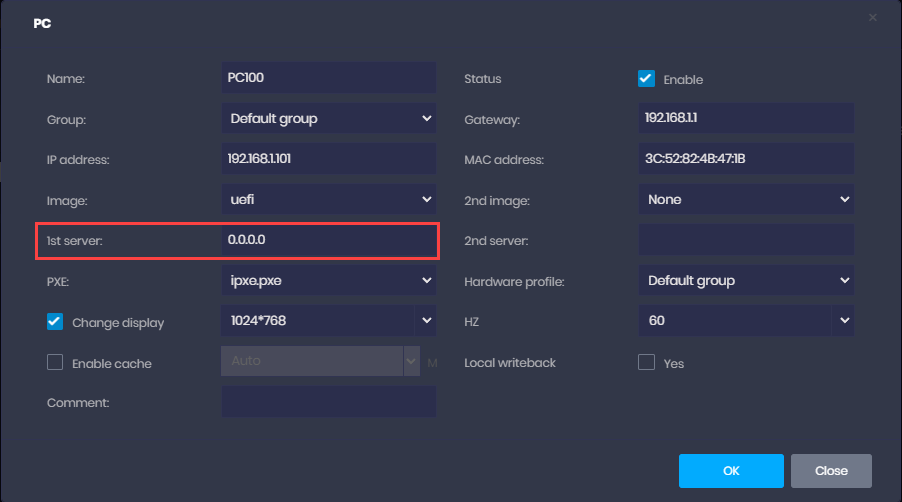
Figure 3
- If you have two servers, and you want to update one server image, you need to set the client boot server ip address to the target server ip.