Wiki Home Installation Secure boot and TPM
Secure boot and TPM
2025-06-25
diskless, boot, certificate, tpm, secure boot
The following explains how to use TPM and and secure boot with CCBoot
- Working only with CCBootCloud version 20250702 or newer
- Upgrade CCBootcloud server and next update CCBootclient don't skip this part.
- Enable Secure Boot in the BIOS. Msi ,Asus ,Gigabyte , Asrock
- Use MOK way to import the Younzsoft v2 certificate don't import directly in BIOS
- If the image is new and does not yet have NIC drivers, first boot all different PC models and complete the Auto PnP process.
- Once all models have been configured successfully, you can proceed to the next step.
- On the Boot page, navigate to Settings, scroll down, and click Edit.
Then you will notice 2 options: “Virtual TPM” and “Virtual Secure Boot” options.(Figure 1)
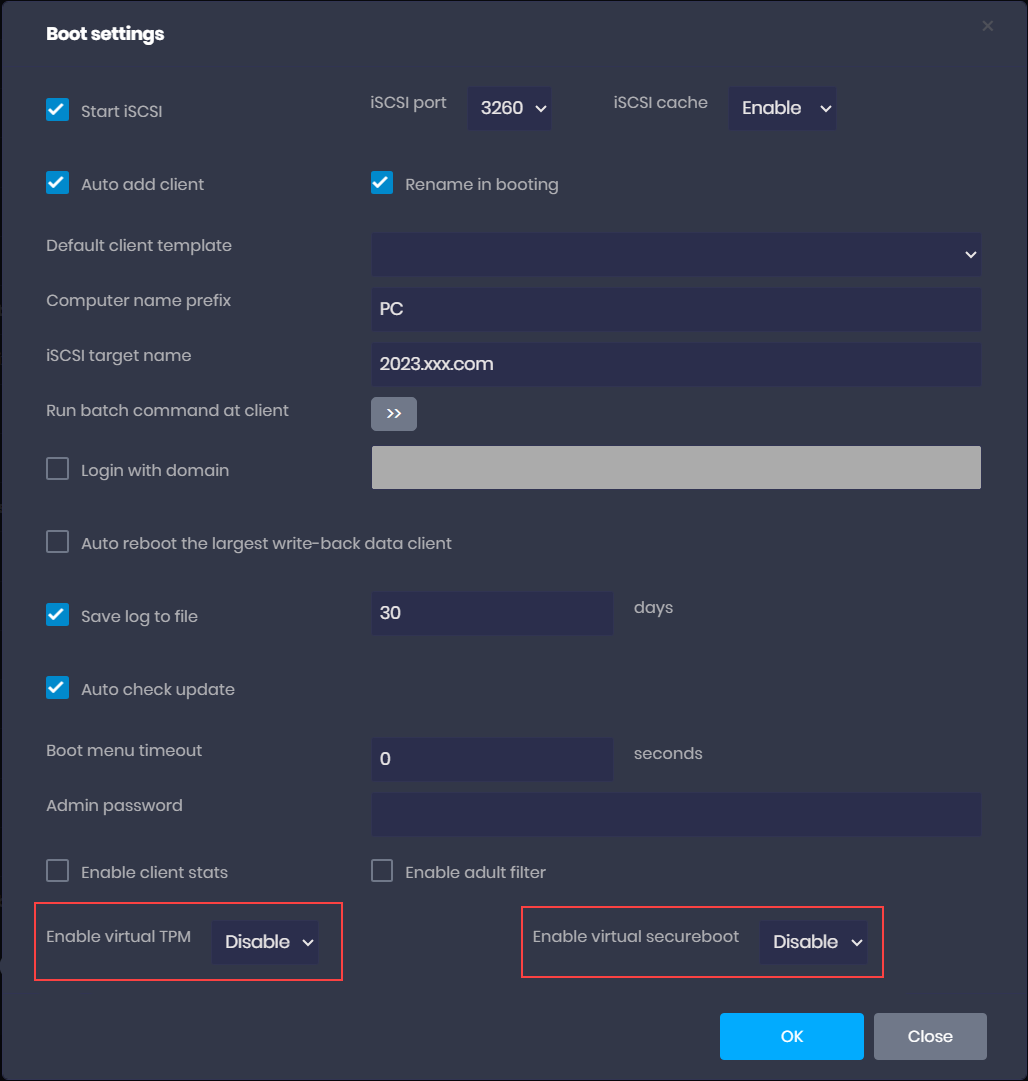
Figure 1
- We recommend keeping Virtual TPM disabled, enabling it may cause problems with FACEIT anti-cheat.
- We recommend keeping Virtual Secure Boot disabled, enabling it may cause issues with Vanguard anti-cheat.
- On the Boot page, select ipxe2025 (UEFI). The new version CCBootCloud works only with ipxe2025, whether using BIOS or UEFI. It does not support other PXE versions.(Figure 2)
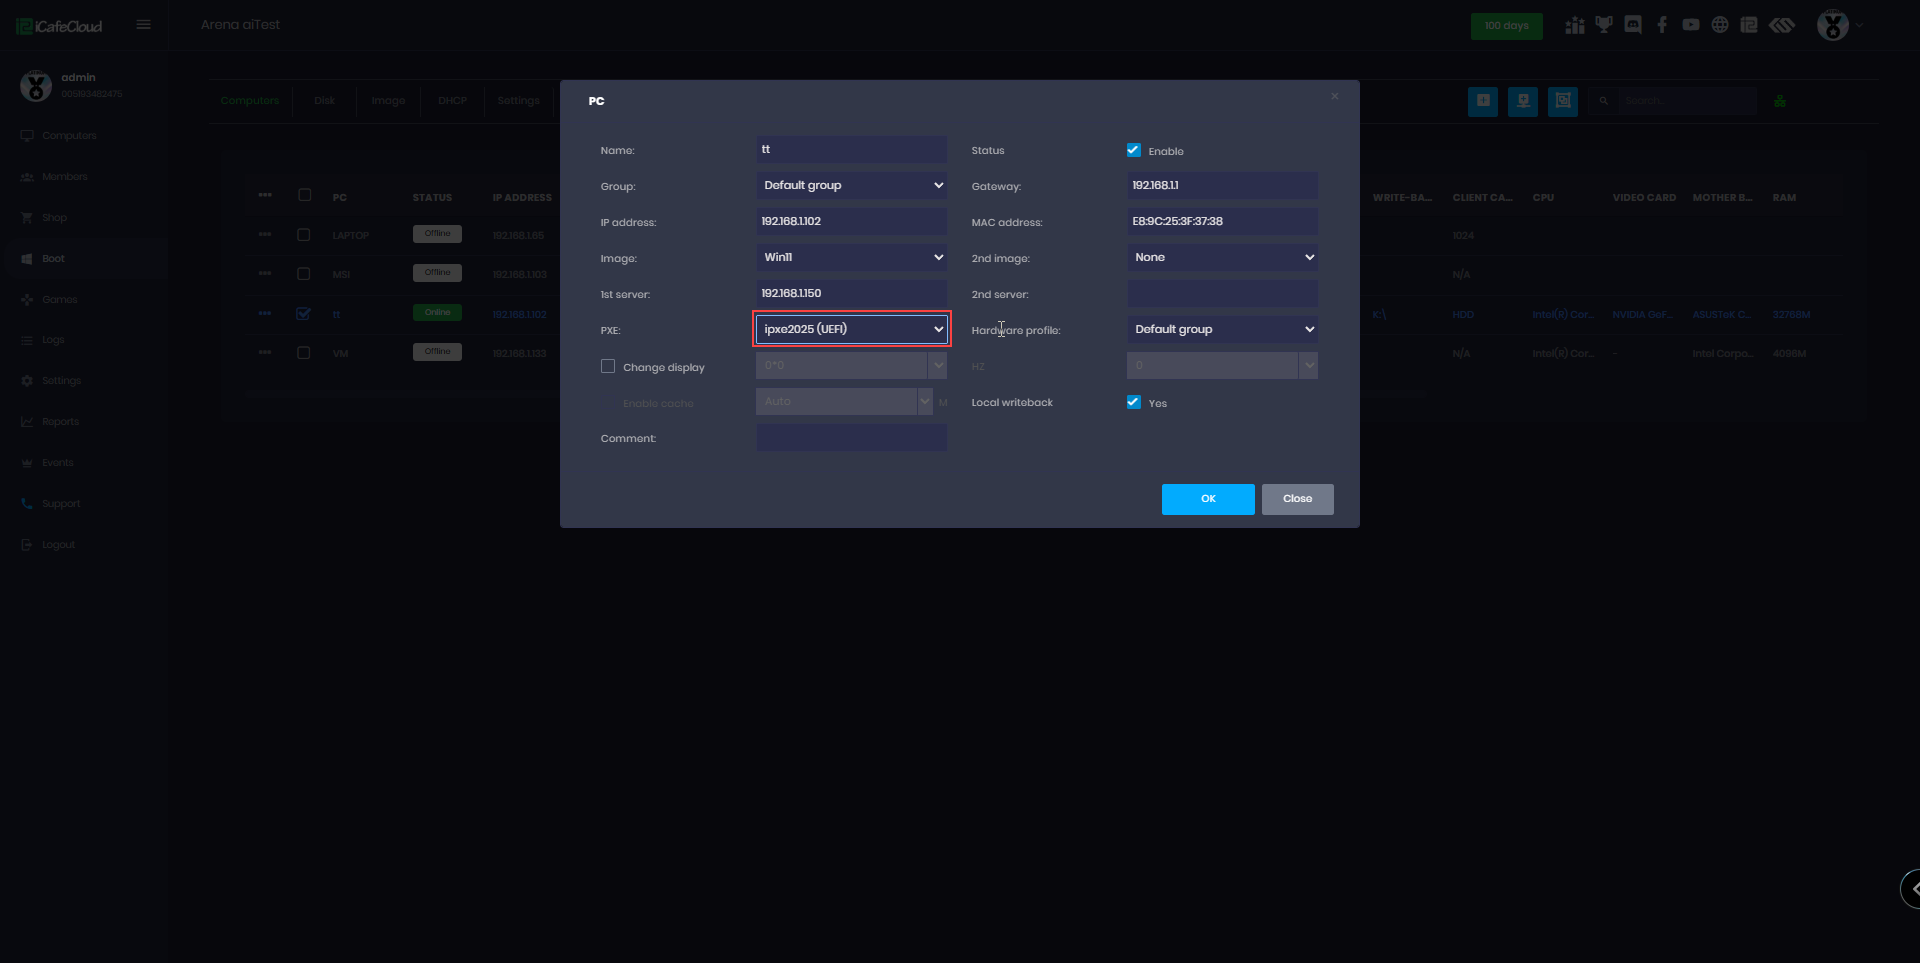
Figure 2
- Next, boot the client PC to verify that it starts up successfully.
- If you are upgrading an existing image, it is recommended to enable Super Client mode once.
- This action adds the NDIS update, which automatically starts during the PC’s boot process and is removed on shutdown, helping to improve boot speed.
- This action auto disable windows updates
- CCBootcloud update solved the problem with Faceit , Valorant and other anticheat problems.
- Also resolve issues such as game freezing caused by certain drivers in previous setups.