2024-03-31
client, diskless, boot, failed
The following provides solutions for problems with clients failing at boot, DHCP and TFTP errors, PXE loading issues.
DHCP
- The client stops at DHCP when booting and the address of the server IP can't be obtained.
- Problem of the network:
testing method, use one computer to PING server and use the server to PING the computer.
Solution: Check whether there is a problem for the client network cable and the server network cable and make sure they have been connected to a LAN. - Problem of the firewall. Solution: Shutdown the firewall of the server.
- The CCBoot service stops. Solution: Click the "start" button in the main interface of CCBoot, start the CCBoot service.
- The server port needed by DHCP is blocked. Solution: open port 67 on the server.
- The client is not added to the user list of CCBoot and the server of CCBoot hasn’t enabled the "auto add client" option.
TFTP
- Stops at the TFTP In the process of booting the client, DHCP can obtain the IP address of the server, but it stops at the location of "TFTP" and the error of TFTP occurs.
- CCBoot hasn’t started the TFTP service.
- The firewall of the server system does not open TFTP port, solution: to open port 69 in the firewall.
Solution:
On the "DHCP Setting" uncheck the "start TFTP" checkbox and click the "Ok" button, and again check the checkbox of the "start TFTP".
- On new motherboards, sometimes "gpxe.pxe" and "gpxex.pxe " will take much time to start booting. In this case you can use "ipxe.pxe" (Figure 1).

Figure 1
Boot failed Please check the image file or network
- If you noticed the following error Boot failed Please check the image file or network(Figure 1)
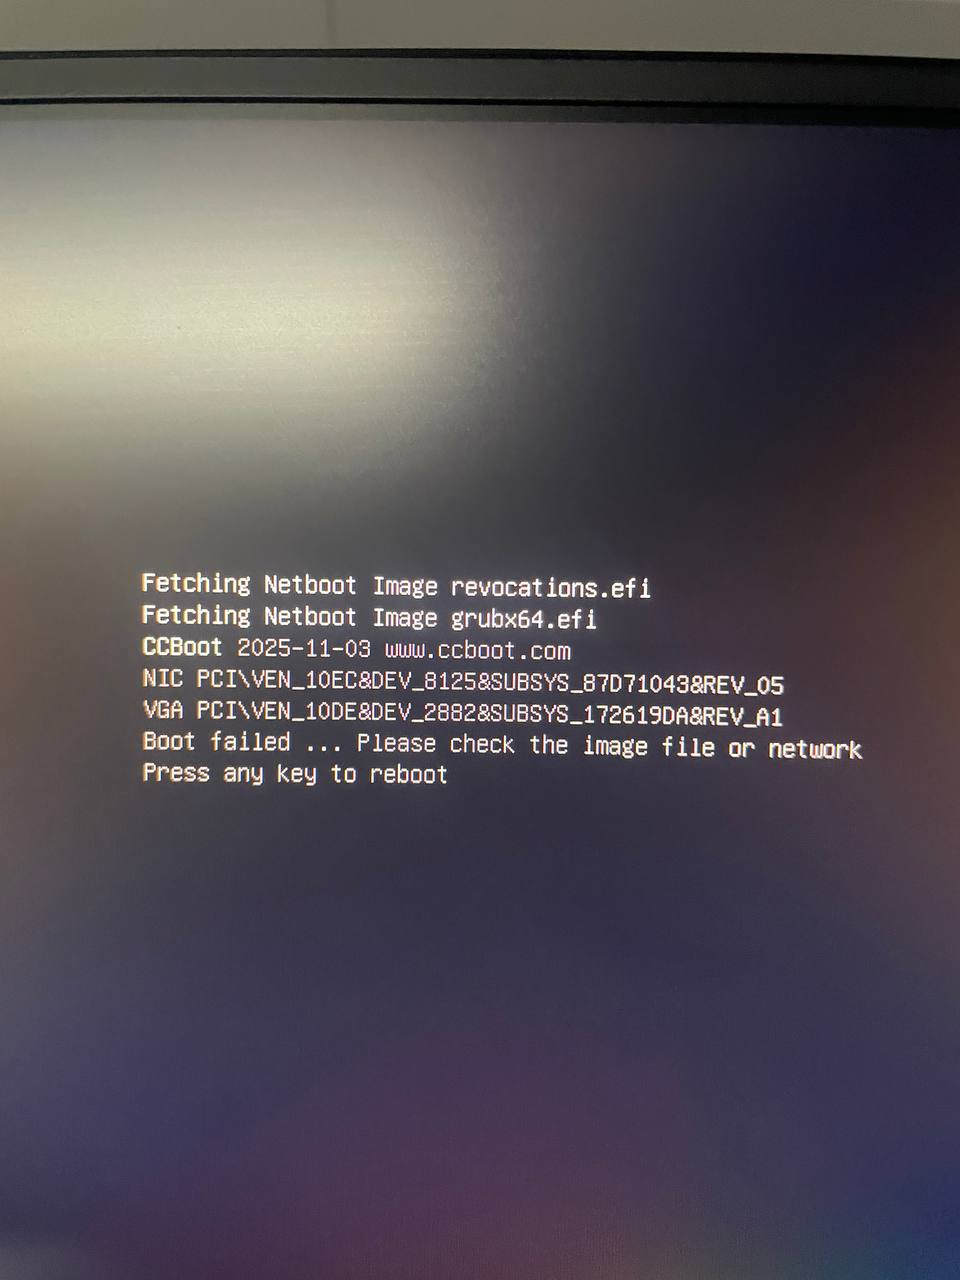
Figure 1
- Check if your license includes enough PC slots to boot all client PCs.
- If the number of active clients exceeds your license limit, additional PCs will not be able to boot.(Figure 2)
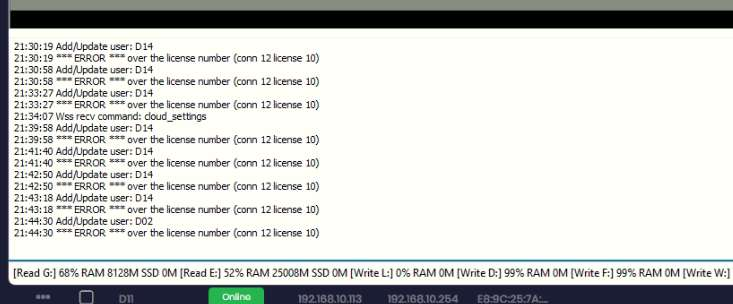
Figure 2
Diagnostics by read size
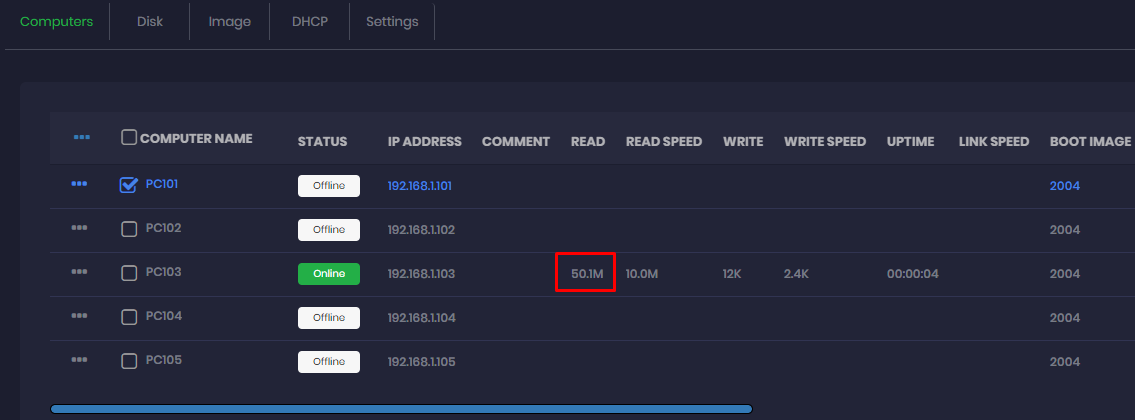
- 1K - you use UEFI images when the bios is configured legacy.
- Solution: Use legacy images with legacy boot type configured on the bios.
- 300-500K - You used wrong pxe for the client PC
- Solution: Try other pxe

- 60-180M - Your image does not have the correct NIC driver for your motherboard.
- Solution: Add NIC drivers from local.
- 200-700M - Your image does not have some critical drivers for your PC.
- Solution: Enable super client and turn on PC then wait until PC restarts once, after that it will boot properly.