
Search for how to set up a diskless system and the first page hands you kernel images, initrd files and a TFTP daemon on a Linux box. Those instructions are correct. They are also written for a completely different machine than the one you are standing in front of, which is a Windows PC that needs to run Valorant at 240 frames a second for a paying customer at seven tonight.
The idea underneath is the same. The parts have different names, the work happens in a different order, and roughly none of the Linux commands transfer.
What those Linux guides are actually describing
A diskless system is one machine holding the disks and a room full of machines borrowing them over Ethernet. That is all it has ever been. Every guide you read is describing the same four pieces, so it helps to know which piece is which before you start.
What a Linux guide calls it | What it is on a Windows gaming floor |
TFTP server serving pxelinux | The small boot file handed out |
NFS root export | An iSCSI virtual disk the client mounts |
Kernel and initrd | The master Windows image you build |
tmpfs or an overlay per client | The write-back file, one per station, |
Editing dhcpd.conf by hand | DHCP settings in the server console, |
The right-hand column is the whole job. On a Windows floor that work is done by one piece of software rather than four services you wire together, which is why the setup reads as a sequence of ordinary decisions instead of a configuration file. CCBoot is the one doing it in around 30,000 rooms, and everything below follows its shape.
One difference matters more than the rest. A Linux diskless node usually shares a read-only root and keeps its scratch space in memory. A Windows station cannot work that way, because Windows writes constantly, to registry hives and log files and shader caches and the settings someone just changed on station 14. So every client gets its own write-back file on the server, reads come from the shared image, writes land in that file, and the file is thrown away at reboot. The station comes back byte-for-byte identical to the master every single time.
That last property is the one the owners notice first. Nothing installed by a customer survives the night.
Three machines, not one
Here is the mistake that costs people a weekend, and it happens before any software gets installed.
A working diskless setup has three roles: the server, the master, and the clients. The server holds the drives and answers the floor. The master is one ordinary PC where you install Windows and the games, and it becomes the image every seat reads from. The clients are the seats themselves.
Two of those can share hardware in a pinch. The server and the master should not.
You need exactly one client to prove the setup works, though two is better, because a second machine with different hardware tells you on night one whether the image travels across your floor's hardware variations or only across identical boxes. (Most rooms have at least two batches of PCs in them, bought years apart, and the batch nobody remembers buying is usually the one with the odd network card.)
If you build the master on the server itself, every future game update means taking the whole floor down while you work on the machine that is also serving the whole floor. Keeping them separate and updating a game is something you do on a spare PC in the back office at two in the afternoon, with forty customers playing, on the same network, noticing nothing.
Keep that master machine when you are done, too. Do not wipe it and put it on the floor to recover a seat. It is the door through which every future change to your image walks, and rebuilding it from scratch in six months to install one game is a bad afternoon.
Four phases of a diskless rollout with the check that ends each one
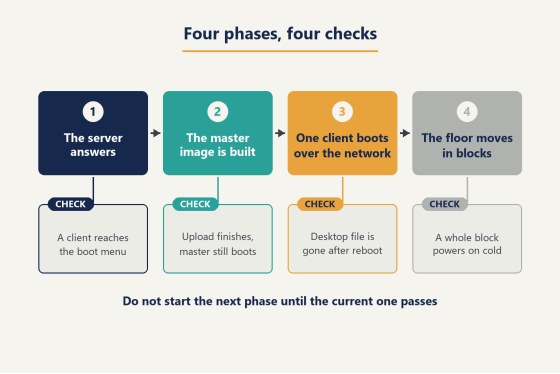
How to set up a diskless system, phase by phase
Four phases. Each one ends with something you can look at and confirm, and the rule that saves the most time is that you do not start the next phase until the current one passes its check. Skipping ahead is how people end up debugging four things at once on a Saturday night.
Phase 1: the server answers
Install the server software on the machine that will hold the drives. Give it separate volumes for the image, the games and the write-back files rather than one large partition, since these three do very different work and putting them on one drive is the most common reason a new floor feels slow.
Then turn DHCP off on the router. This is not optional and it is the single most common cause of a first night going badly, because the server hands out the boot information along with the address, and a router answering first means the client gets an address and no idea where to boot from. If the room has particular hardware questions, what the server and the switch need covers the memory, drives and switch side in detail.
Spend ten minutes in the console before you go any further, because the tabs across the top are more or less the order you are about to work in. Disk is where the volumes you just created get their roles. Image is where the master will land in Phase 2. DHCP is where the address range and the boot file live. Settings hold the cache sizes. Computers, or Boot depending on where you are looking, is the list of stations you will spend the rest of the project watching. Knowing where those five live now saves you hunting for one of them later with a customer waiting.
The check: power on any client PC with network boot enabled in its BIOS. It should get an address and reach a boot menu. It has nothing to boot yet, and that is fine. If you see the menu, the server and the network are talking, and that is everything Phase 1 was for.
Phase 2: build the master
This is the long one. Budget an evening, and expect to use most of it.
Take a clean PC, install Windows on its local drive, and set it up exactly the way you want every seat in the building to look. Drivers first, including the network driver for your floor hardware even if the master uses a different card. Windows updates next, run all the way to the end. Then the games and the launchers, and this is the part that eats hours: log into Steam and Riot and Epic, let every first-run update and shader compilation finish, and leave the machine alone while it works. Whatever state this PC is in when you capture it is the state forty machines will wake up in tomorrow morning.
While it runs, strip the things you do not want multiplied by forty. The trial antivirus. The second browser. The update agent that pops a dialog at 3pm in front of a customer.
This is also where the housekeeping gets done, and in practice it is the part people forget and then fix forty times over the following month. Power settings so a station never sleeps mid-session. Auto-login for the floor account. The wallpaper, the desktop shortcuts, the taskbar arranged the way you want customers to find it. Whatever notification Windows shows about finishing the setup of your PC, turned off. None of it is interesting work, and every item you skip here is an item you will be doing by hand on every seat in the building.
Then upload it. The master becomes a read-only image on the server, and every seat will read from that copy.
The check: the upload finishes, and the master PC still boots normally from its own drive afterwards. You will want it.
Master PC set up on a workbench in the back office of a gaming center
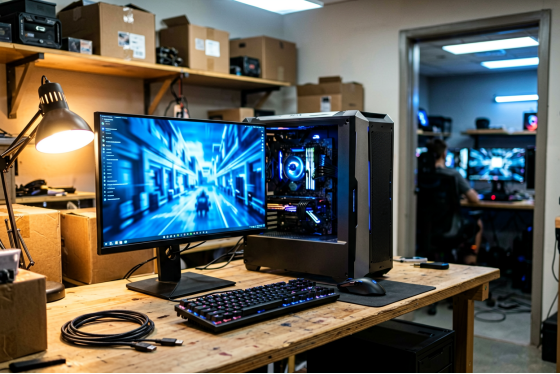
Phase 3: one client over the network
Pick one machine off the floor. Go into its BIOS, set network boot as the first boot device, and leave its hard drive physically installed if you want, because nothing is going to be written to it. Assign it a write-back file on the server. Start it.
If it loads Windows and reaches a desktop, the hard part of the whole project is behind you. Everything after this is repetition.
Now do the test that actually proves the system is doing its job, which takes thirty seconds and tells you more than any log file. Save a file to the desktop. Name it something obvious. Reboot the machine and look at the desktop again. The file is gone, the write-back file was discarded, and the station came back as a fresh copy of your master. That is the whole product working in front of you.
If the boot stalls instead, the error on screen is usually specific enough to be useful, and what happens in the four seconds after power-on explains which stage each message belongs to.
Boot console listing client PCs with their status, boot image, write-back drive letter, client cache and link speed
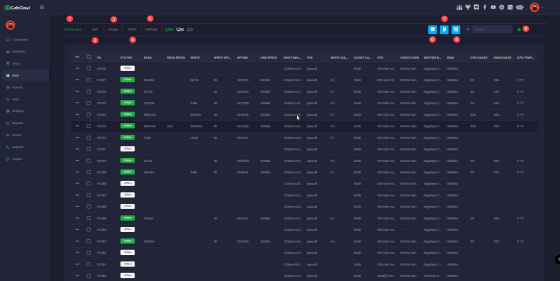
The console is where you confirm all of this without walking the floor. Every station gets a row, and the columns worth watching on day one are the ones in that screenshot: status, the boot image each client is using, the write-back drive letter assigned to it, client cache, and link speed. A seat with no write-back drive letter is a seat that has not finished being set up, and spotting that in a list beats discovering it when a customer sits down.
Phase 4: roll the floor
Not all at once. Take ten seats, convert them, and run them through one full evening with paying customers on them. Then take the next twenty.
Converting in blocks costs you a few days and buys you this: any surprise shows up while most of the room is still on its old setup and still earning. The blocks also give you a clean comparison, since half your floor is running the new way and half is not, on the same night, with the same games.
Mixed hardware is not a problem here and does not call for a second image. PnP adapts one master image to clients with different motherboards, chipsets and GPUs, which is what makes a room assembled in three separate purchases over four years boot from a single image. Licensing counts seats rather than servers, and per-PC licensing runs USD 2.50 per PC per month, or USD 2.00 on annual billing.
Give a personal disk a thought while you are here, because it is the answer to the question your staff will ask on the first day. The front desk PC keeps its files. A regular who wants their own settings to stick gets them. Data you choose survives the reboot while everything else still resets, and it works alongside Windows domain logins for the business side of a venue.
The check: power the whole block on at once, cold, the way it happens at opening. Machines that boot perfectly one at a time can behave differently when forty ports come up in the same second. (Honestly, this is the only test in the whole project that a single machine can never give you, which is why it is worth doing deliberately rather than waiting for a Saturday to do it for you.)
Rows of gaming stations powering on together before opening at a US esports lounge
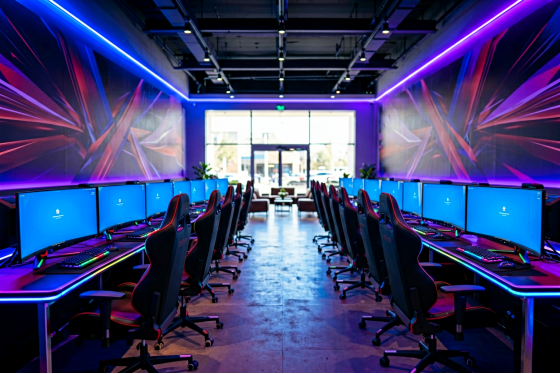
So how long does this actually take?
One evening for Phase 1 if the hardware is already on the bench. One long evening for Phase 2, and it is mostly waiting for game installs. An hour for Phase 3. A few days of ordinary business for Phase 4, most of which is watching rather than working.
Call it a week of evenings for a first-timer, with two of those evenings being real work.
That estimate assumes you are learning the shape of it as you go, which is the honest way to describe how to set up a diskless system for the first time. Nobody does Phase 2 efficiently on their first attempt, because half the evening goes into deciding what belongs on the image rather than installing it, and those decisions are the ones you only make once.
The second time you do it, Phase 2 takes about forty minutes, because you already know what goes on the image and in what order. And the thing nobody warns you about is that the setup is the last time you will spend an evening on this at all. After that, installing a game for forty machines is installing a game once.
Six months later: adding machines to a floor that already runs
Rooms grow in batches, and the batch never matches what you bought before.
Six new PCs arrive with a different motherboard than the rest of the floor. You do not build a second image for them. Set network boot in their BIOS, assign each one a write-back file, and start them. The same image adapts on first boot. What you do need is licensing for the additional seats, since the count follows stations.
If a change to the image turns out badly, that is what the restore points are for. Create a recovery point before you touch anything, merge to last when a change proves fine, restore to last when it does not, and a bad driver update becomes a two-minute rollback rather than a rebuilt image.
Start with the spare machine in the corner
There is almost certainly a PC in your back office that nobody is using. That machine is enough to walk through Phase 1 and most of Phase 3 without touching your floor, your customers or your current setup, and it will tell you in about an hour whether anything on your particular network puts up a fight.
Download the free trial, install it on that spare, and point one client at it. Watch the boot menu appear. Then do the desktop file test and see it disappear on reboot. That is the entire idea of how to set up a diskless system, proven on two machines, before you commit a single seat of your floor to it.