2024-04-19
install, VPN
Some VPN applications when running in a diskless client fail to connect to the VPN network.
- To fix that issue follow the steps below.
- Solution 1: For the same VPN application, to make them connect properly, you need to change the metric value of the VPN adapter to 1 and your client NIC to more than 1.
1. Open VPN adapter properties, select the "Internet Protocol Version 4" then click on properties, then click on "Advanced" button. Uncheck the "Automatic metric" check box and enter "1" in the text box, then click the "OK" button (Figure 1).
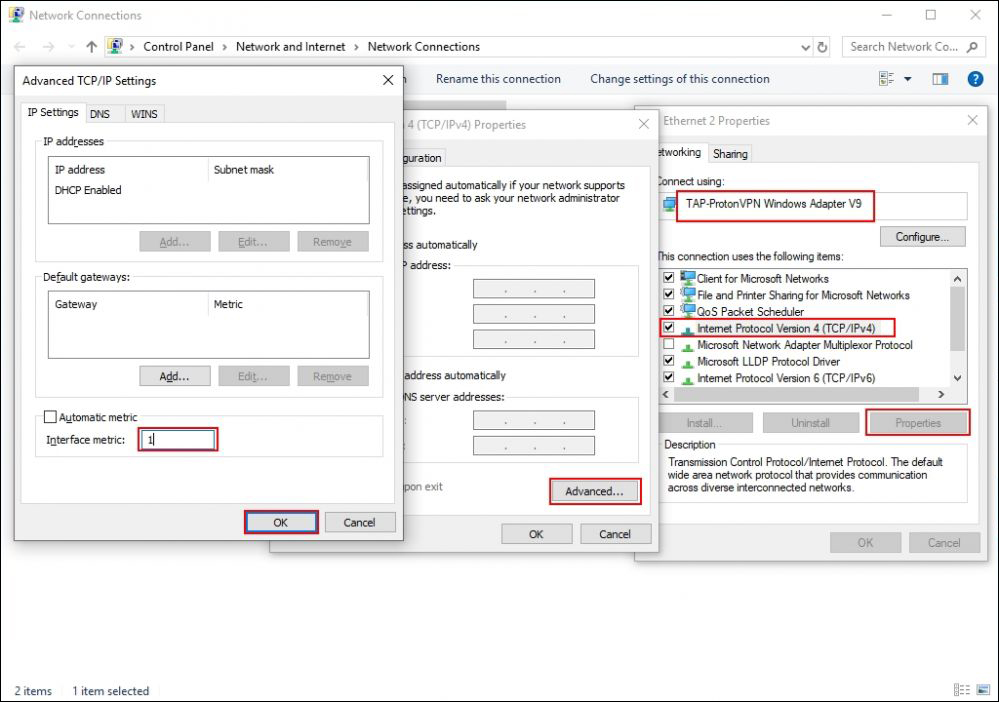
Figure 1
2. After this, you can try to connect to VPN network, it will connect successfully.
- Solution 2:
- Some VPN applications fail to assign IP addresses when you try to connect to the VPN network.
1. Let's take ProtonVPN for example, click on the "Quick connect" button to try to connect to the VPN network (Figure 2).

Figure 2
2. It will try to connect to the VPN network but it will be stuck at the "Assigning IP" stage (Figure 3).
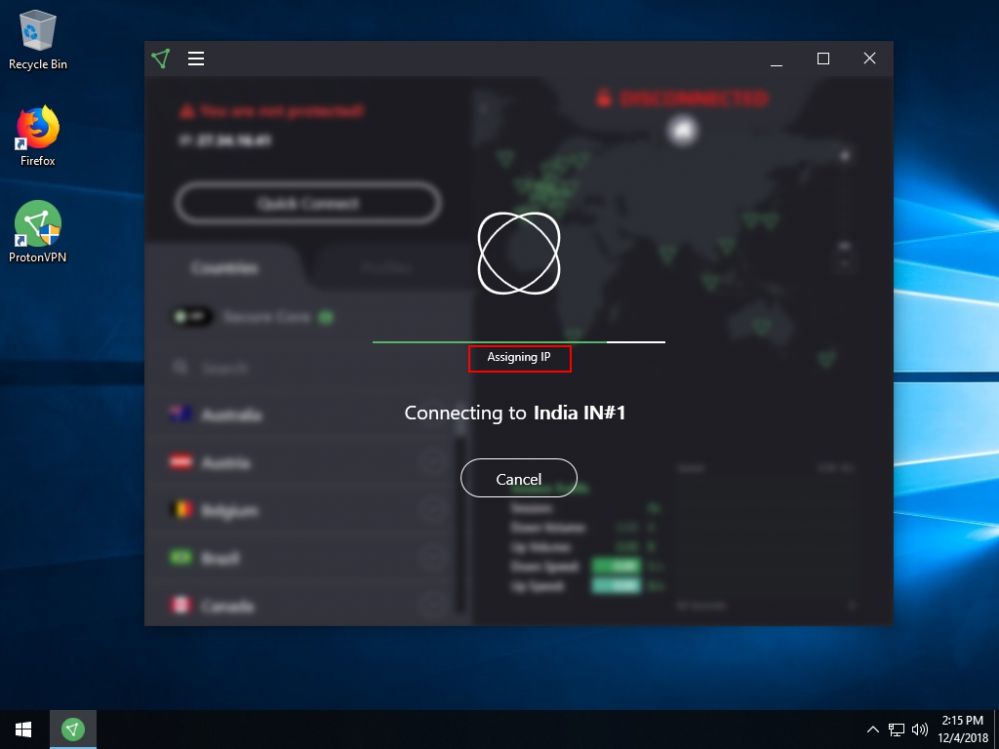
Figure 3
3. To solve this, before connecting to the VPN, run the following command in command prompt with administrative privilege (Figure 4).
netsh interface ip set address "Ethernet 2" static 192.168.0.101 255.255.255.0 192.168.0.1
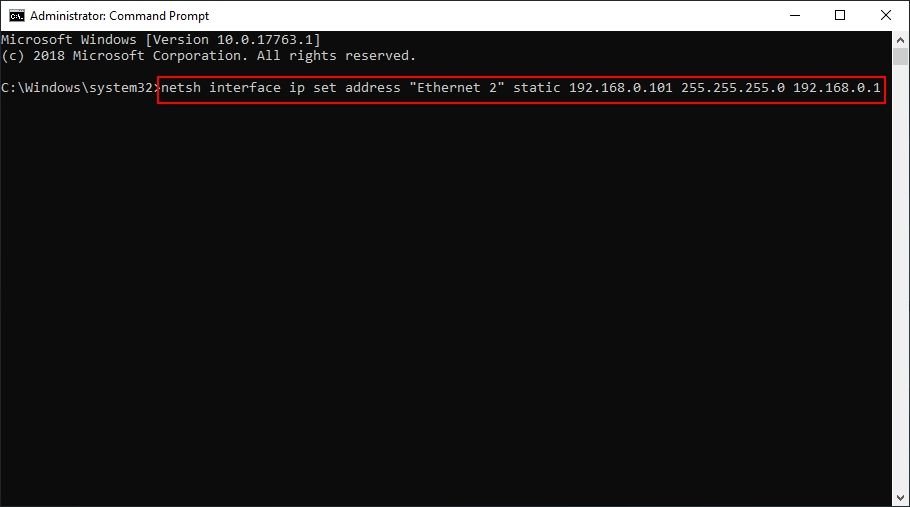
Figure 4
Note: Depending on the name of the VPN adapter, change the "Ethernet 3" to your adapter's name.
Important: If you encounter an "Access is denied" error when running the command, then you may need to use a different image or restore any new changes done to group policies.
4. After that, try to connect to the VPN network, it will connect successfully (Figure 5).
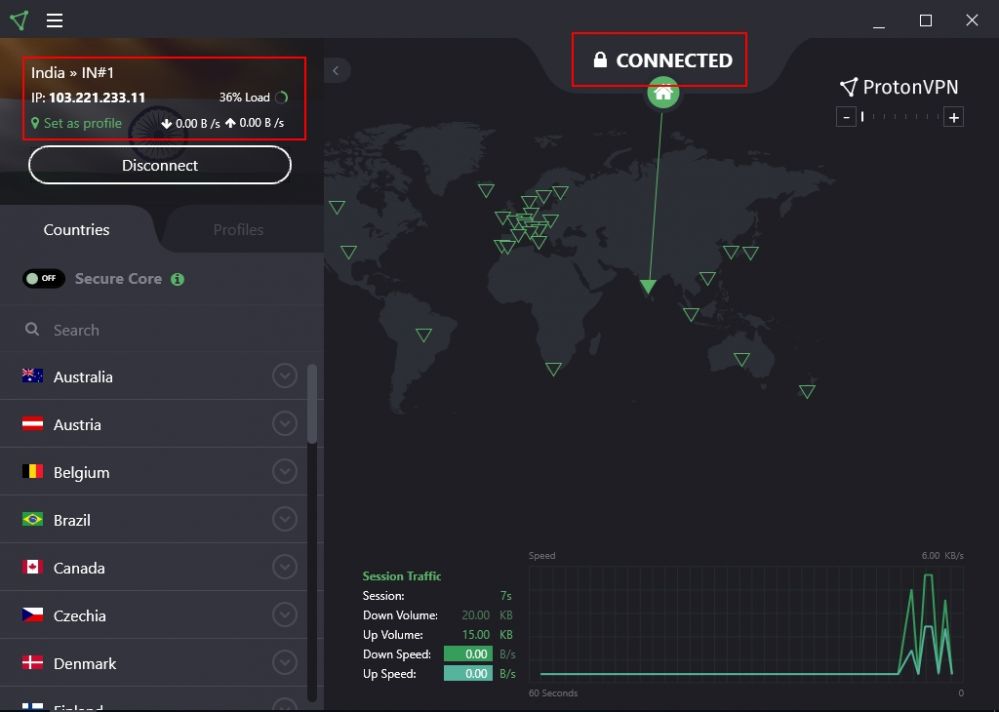
Figure 5
5. If you want to connect to another VPN network, then you need to re-run the command once again (Figure 6).
Figure 6
6. Once the command is run, you can connect to another network successfully (Figure 7).

Figure 7