2026-01-05
ccboot, hybrid, solution
The following explains CBoot Hybrid Solution is a deployment mode where each client PC installs and runs the operating system locally on its own SSD, while games and shared data are stored and managed centrally on the CCBoot server.
Enable hybrid solution
- Open cloud panel
- Go to settings -> Center settings -> in diskless mode select CCDisk and click save (Figure 1)
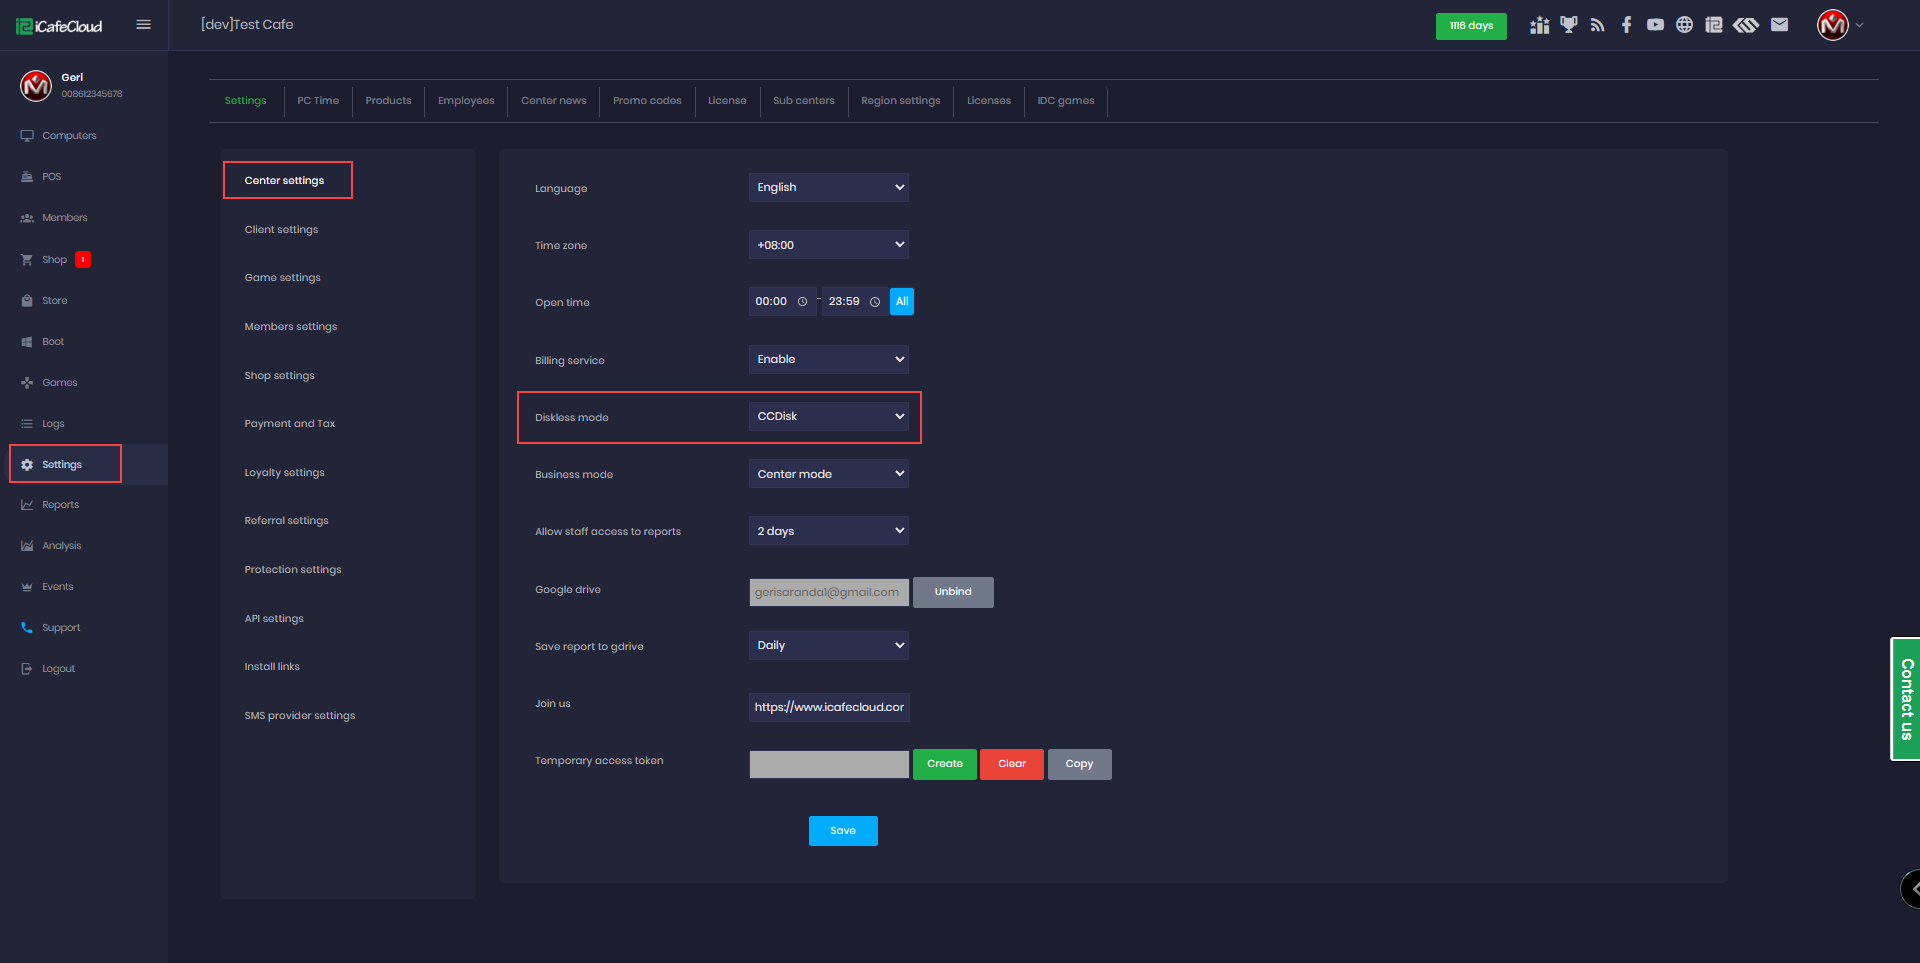
Figure 1
- Once CCDisk is enabled it will stop TFTP services , DHCP services, DHCP proxy services.(Figure 2)
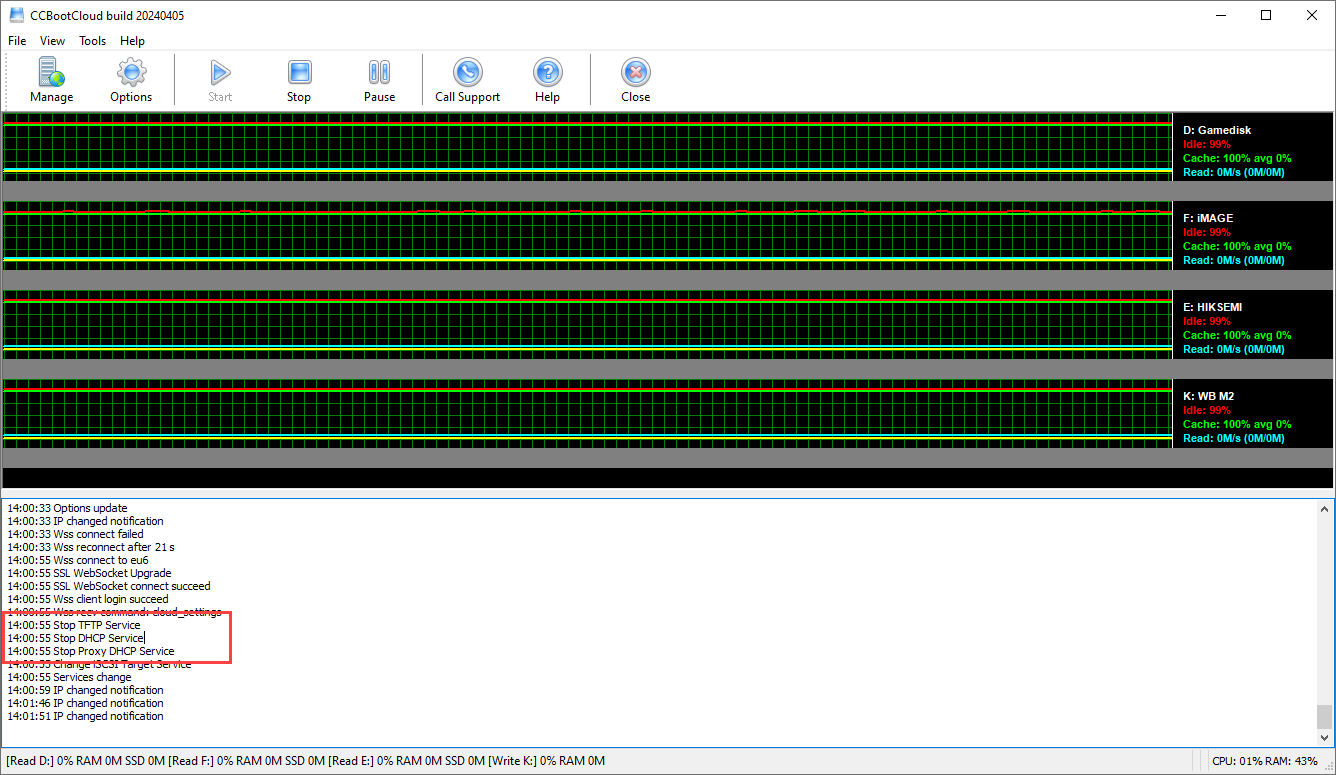
Figure 2
- The page will change to Disks once CCDisk mode is enabled. (Figure 3)
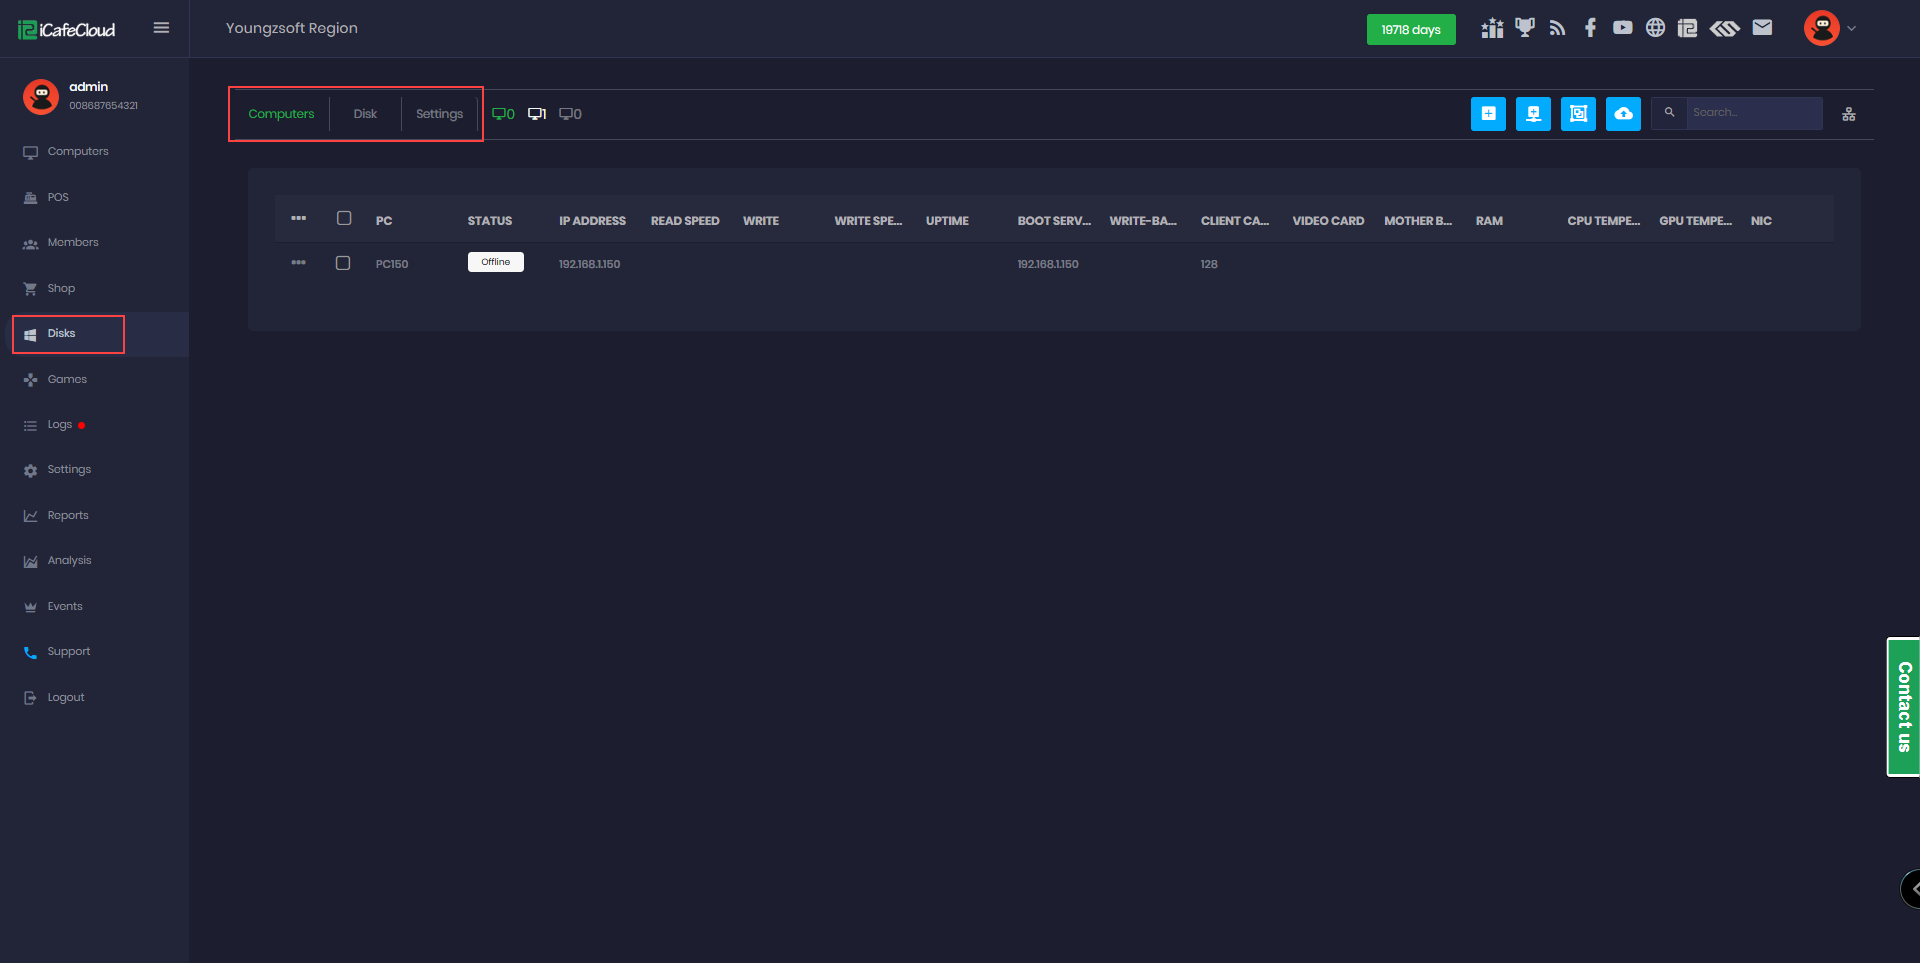
Figure 3
- The setup files can be found at settings - install links - CCBootCloud for the CCDisk server and client setup. (Figure 4)
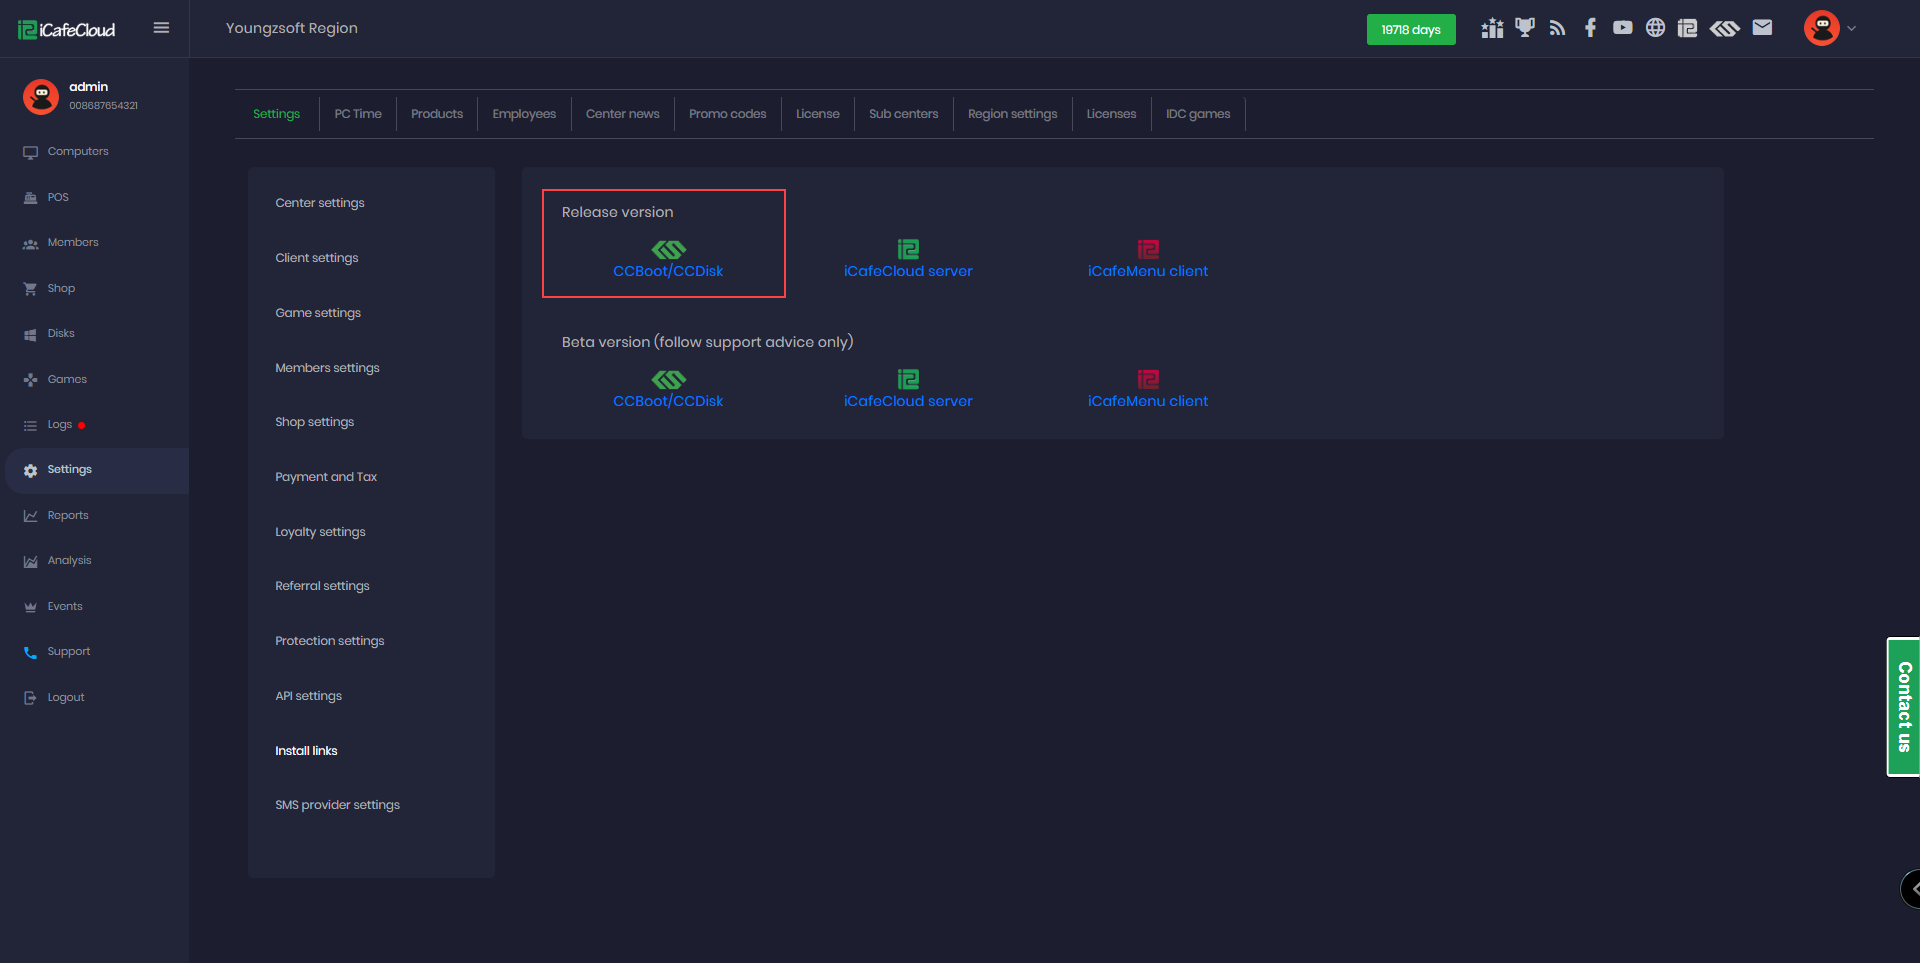
Figure 4
Install Server
- Once the CCBootCloud file is downloaded, double-click on it to start the setup. In the setup window, choose "CCBoot server installation" and click "Next”. (Figure 5)
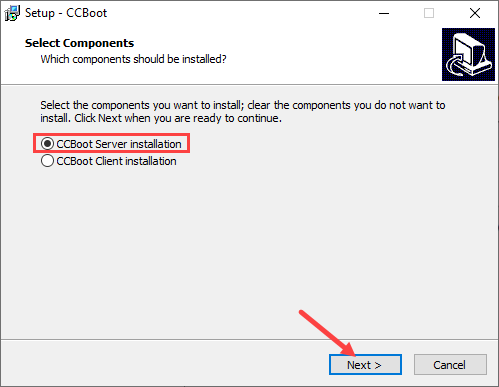
Figure 5
- On the destination folder leave it as default C:\CCBoot and click next. (Figure 6)
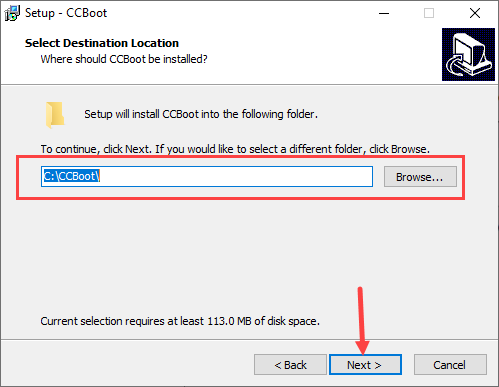
Figure 6
- After selecting "CCBoot server installation," click "Next" on the "Select start menu folder" window, then click "Next" again on the "Select additional tasks" window. Finally, click "Install" to finish the installation. (Figure 7)
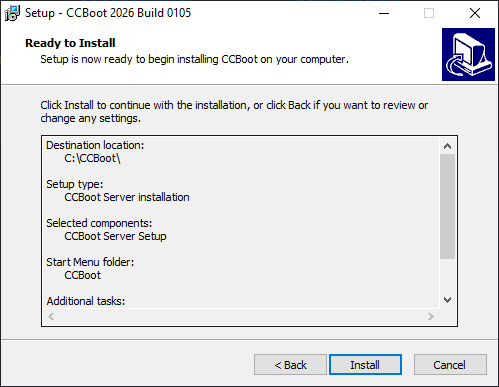
Figure 7
- Once the setup is complete, the CCBootCloud server will open and ask for your license and password. After you fill in this information, click "OK," and it will connect with the cloud.(Figure 8)
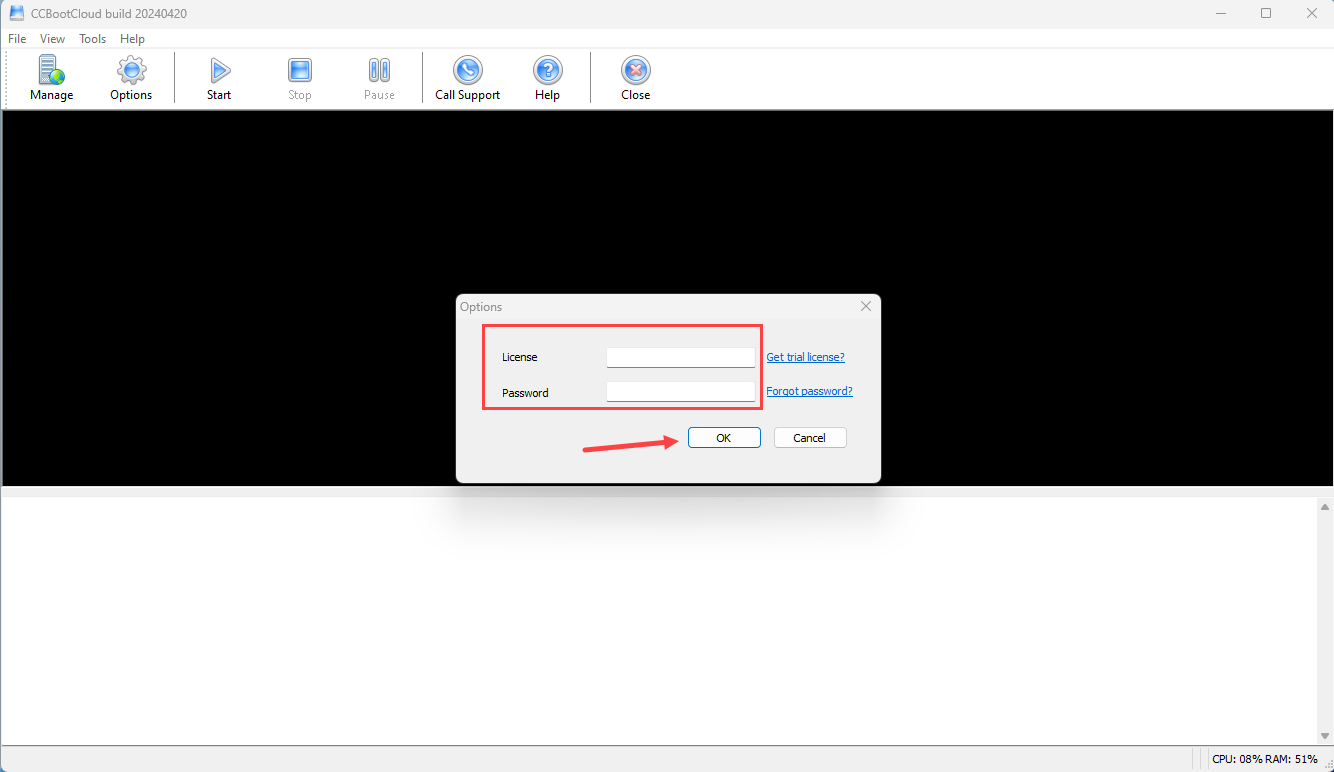
Figure 8
Install Client
- Please ensure that each client PC has a unique static IP address and a distinct PC name. Otherwise, the CCBoot server will not recognize it. Do not change from a static IP to an automatic IP always keep it set to static.
- Once you have downloaded the CCBootCloud file, double-click on it to start the setup. This action will open the setup window for CCBootClient. From there, select the “CCBoot Client installation” and click next to begin the installation process.(Figure 9)
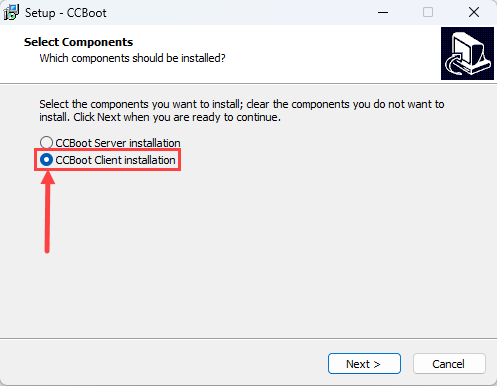
Figure 9
- Continue with the installation steps. Once you reach the "Complete the installation" window, select "Launch CCBootCloud" and then click "Finish".(Figure 10)
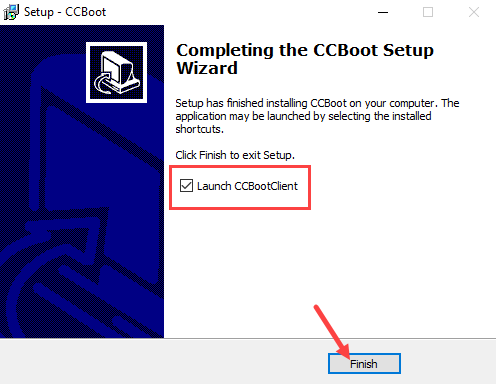
Figure 10
- The next step is to disable UAC and set a static IP. Once that's done, you will be prompted to "Start Install Client." Click "Yes" to proceed. (Figure 11)
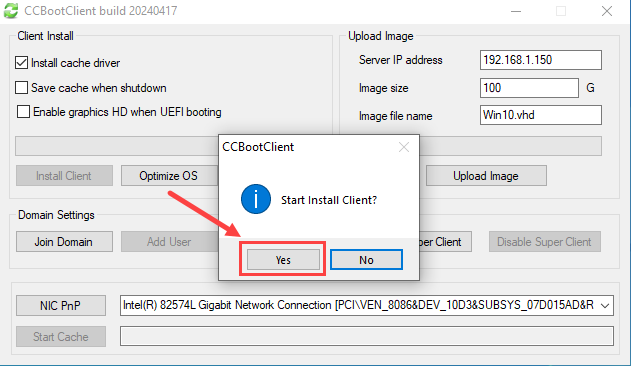
Figure 11
- You can skip the "Please reboot this PC and then upload image" step by selecting "No" as CCBootCloud boots locally from the disk and doesn’t require an image. (Figure 13)
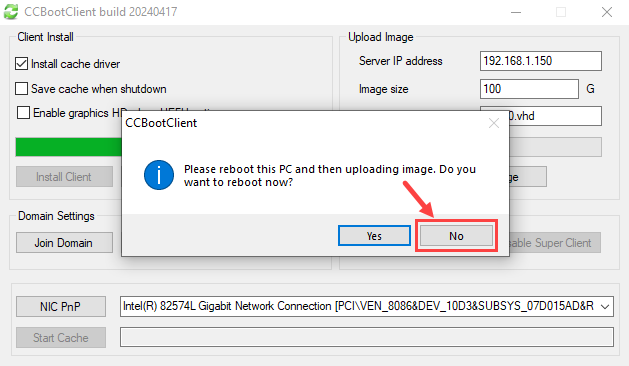
Figure 13
- And now the installation is complete.
- When the client virtual disk is ready, ccbootclient.exe will execute C:\CCBootClient\DiskIsReady.bat. You can manually create the batch file and rename it to DiskIsReady.bat to add your own scripts for execution.
Install iCafeCloud
- Install iCafeCloud Server on the same PC as CCBoot (in the directory C:\iCafeCloudServer), since you will need to download iCafeMenu to the game disk (E:\Apps\iCafeMenu).
- On the iCafeCloud server, click "Options", input your license code and password. (Figure 1)
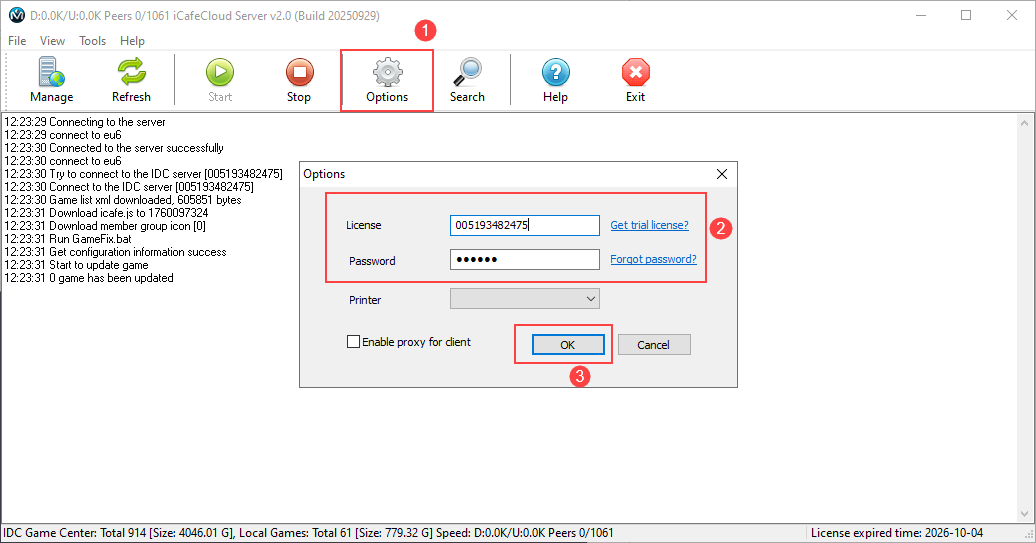
Figure 1
- iCafeCloud will complete the initialization auto.
- Click the “Manage” button or go to “https://cp.icafecloud.com” to open the web management page.
- Enter your license and username (default: admin) for license password (check your email, we are sending license pass with other license info), then you can change admin pass on settings (Figure 2).
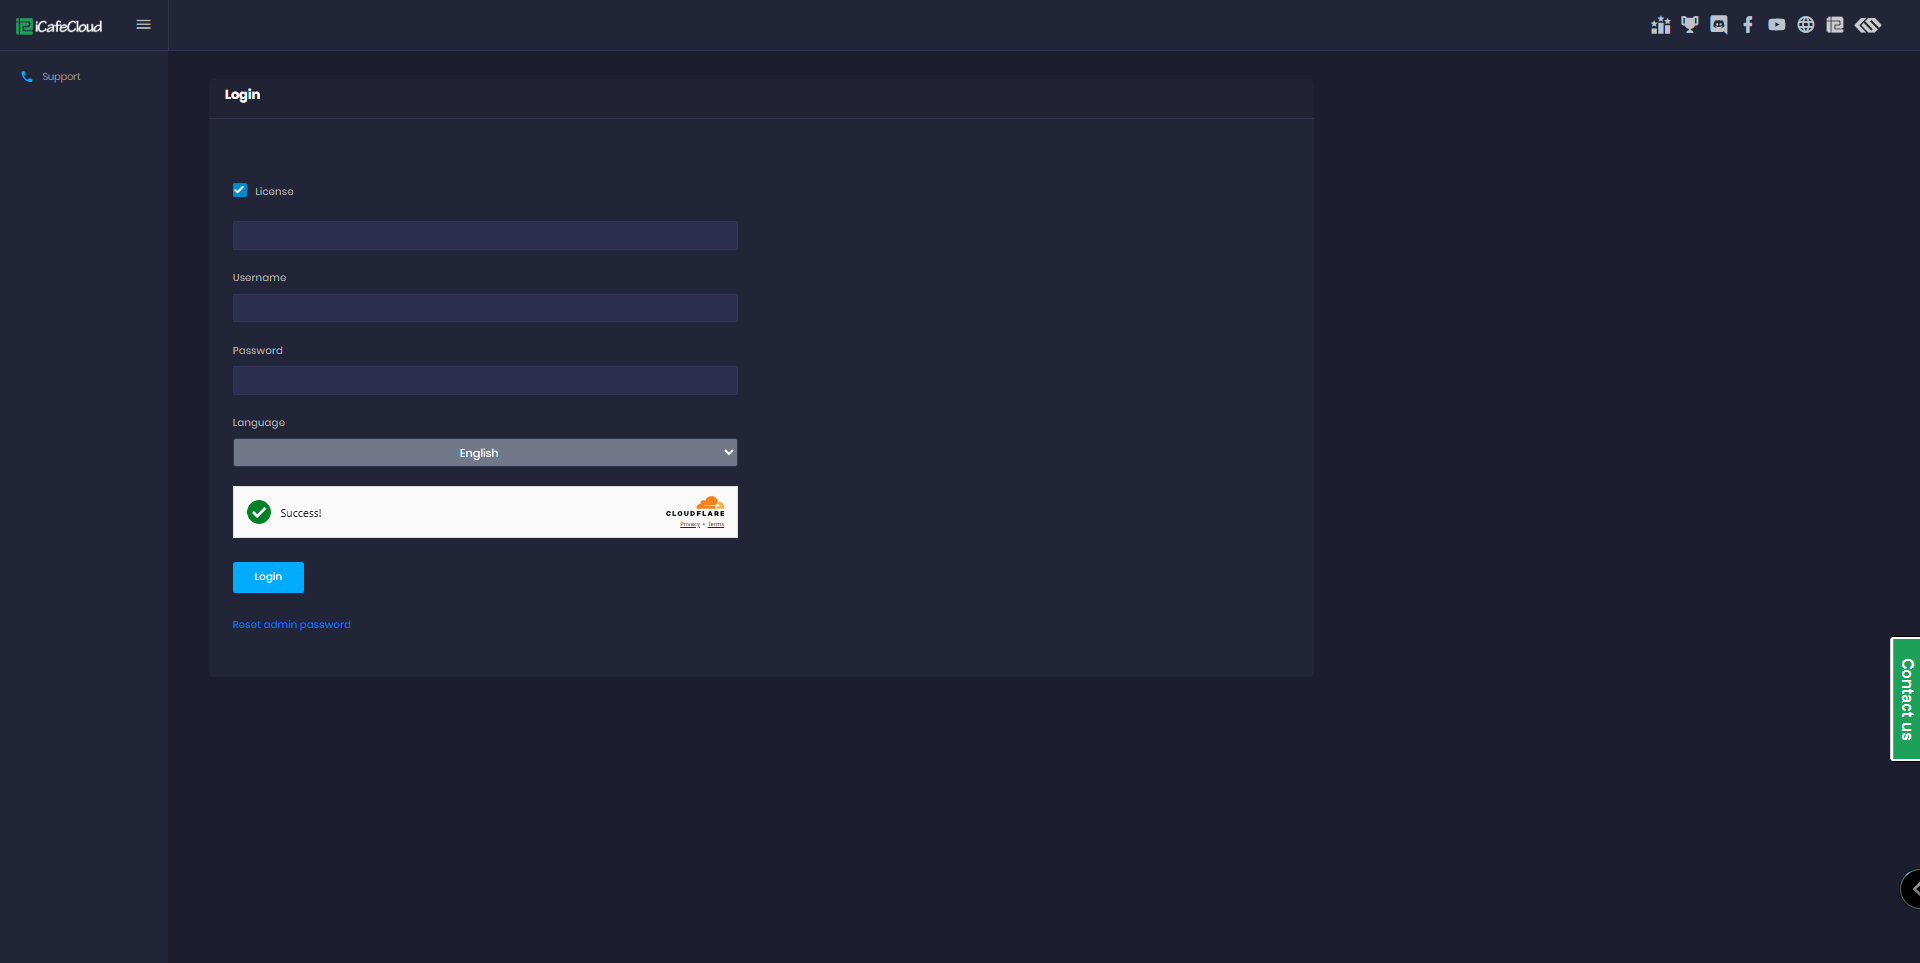
Figure 2
- Once logged in, enter your license information accurately and select your Google Maps location. (Figure 3).
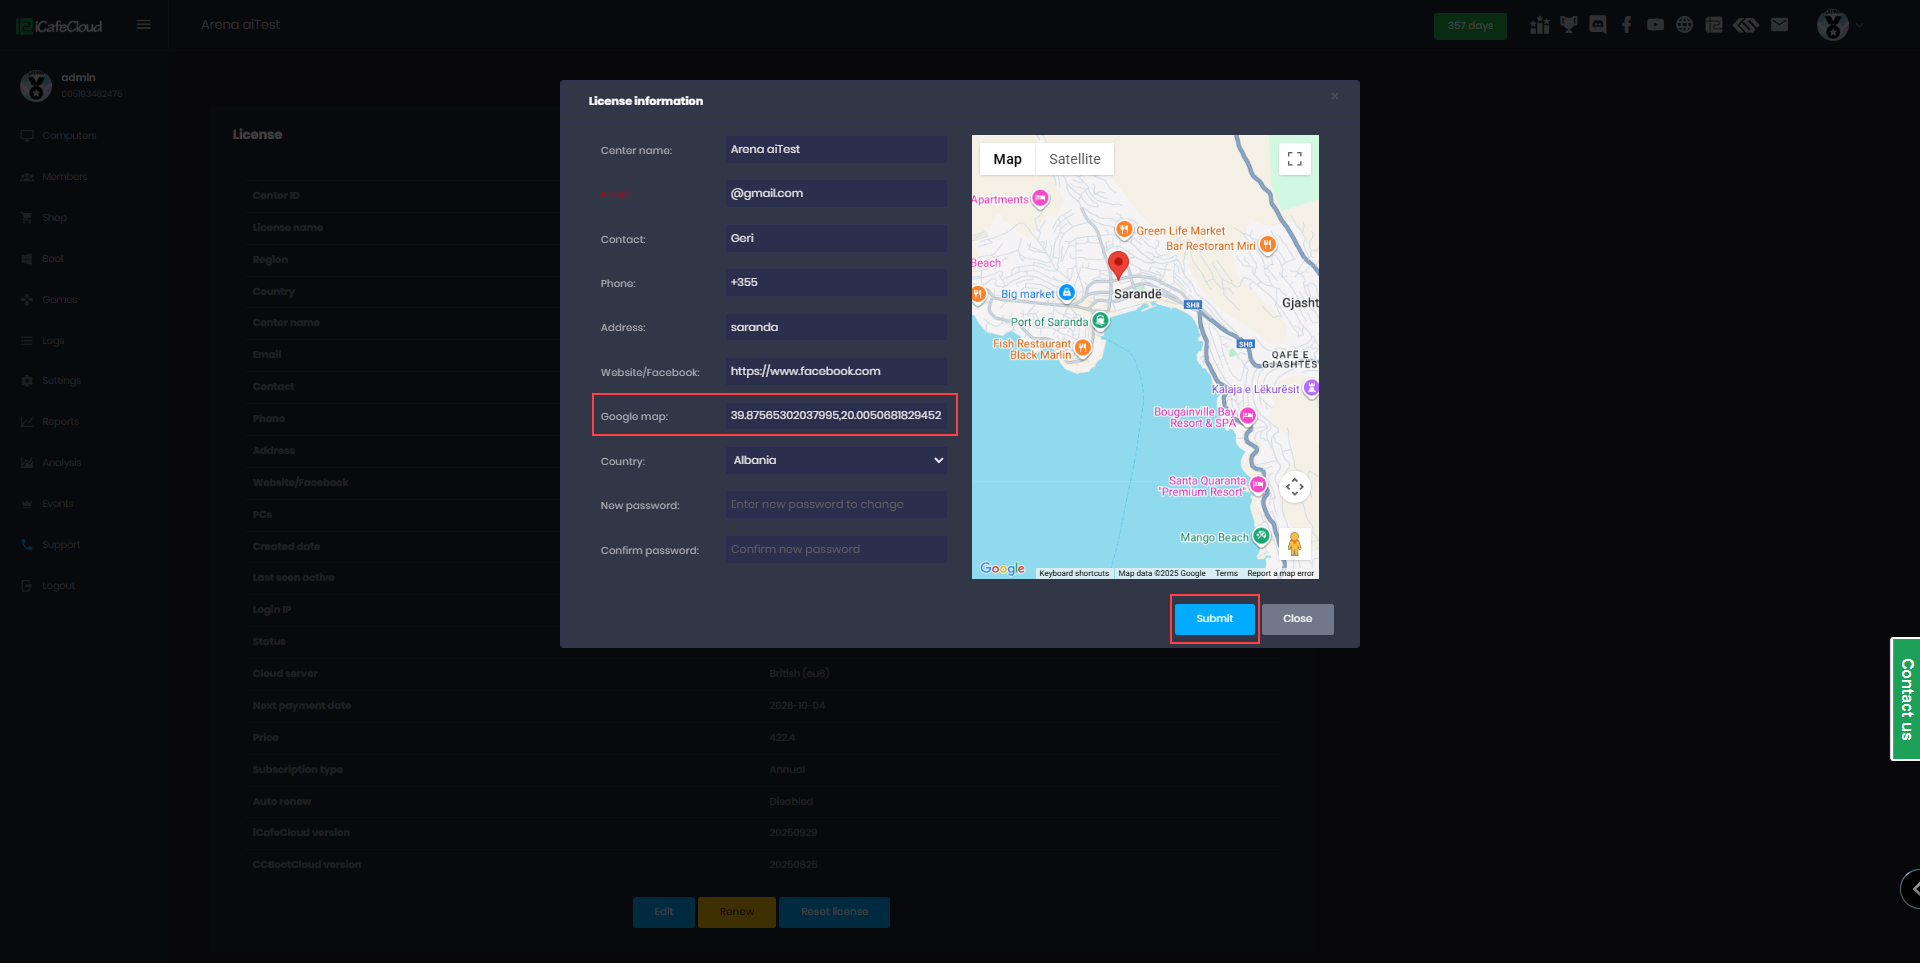
Figure 3
- In the Settings page, go to Center Settings and locate the Timezone option. Click the box next to it to open a list of available timezones, then select the one that matches your country.
- Make sure to choose the correct timezone before proceeding with any further configuration. (Figure 4).
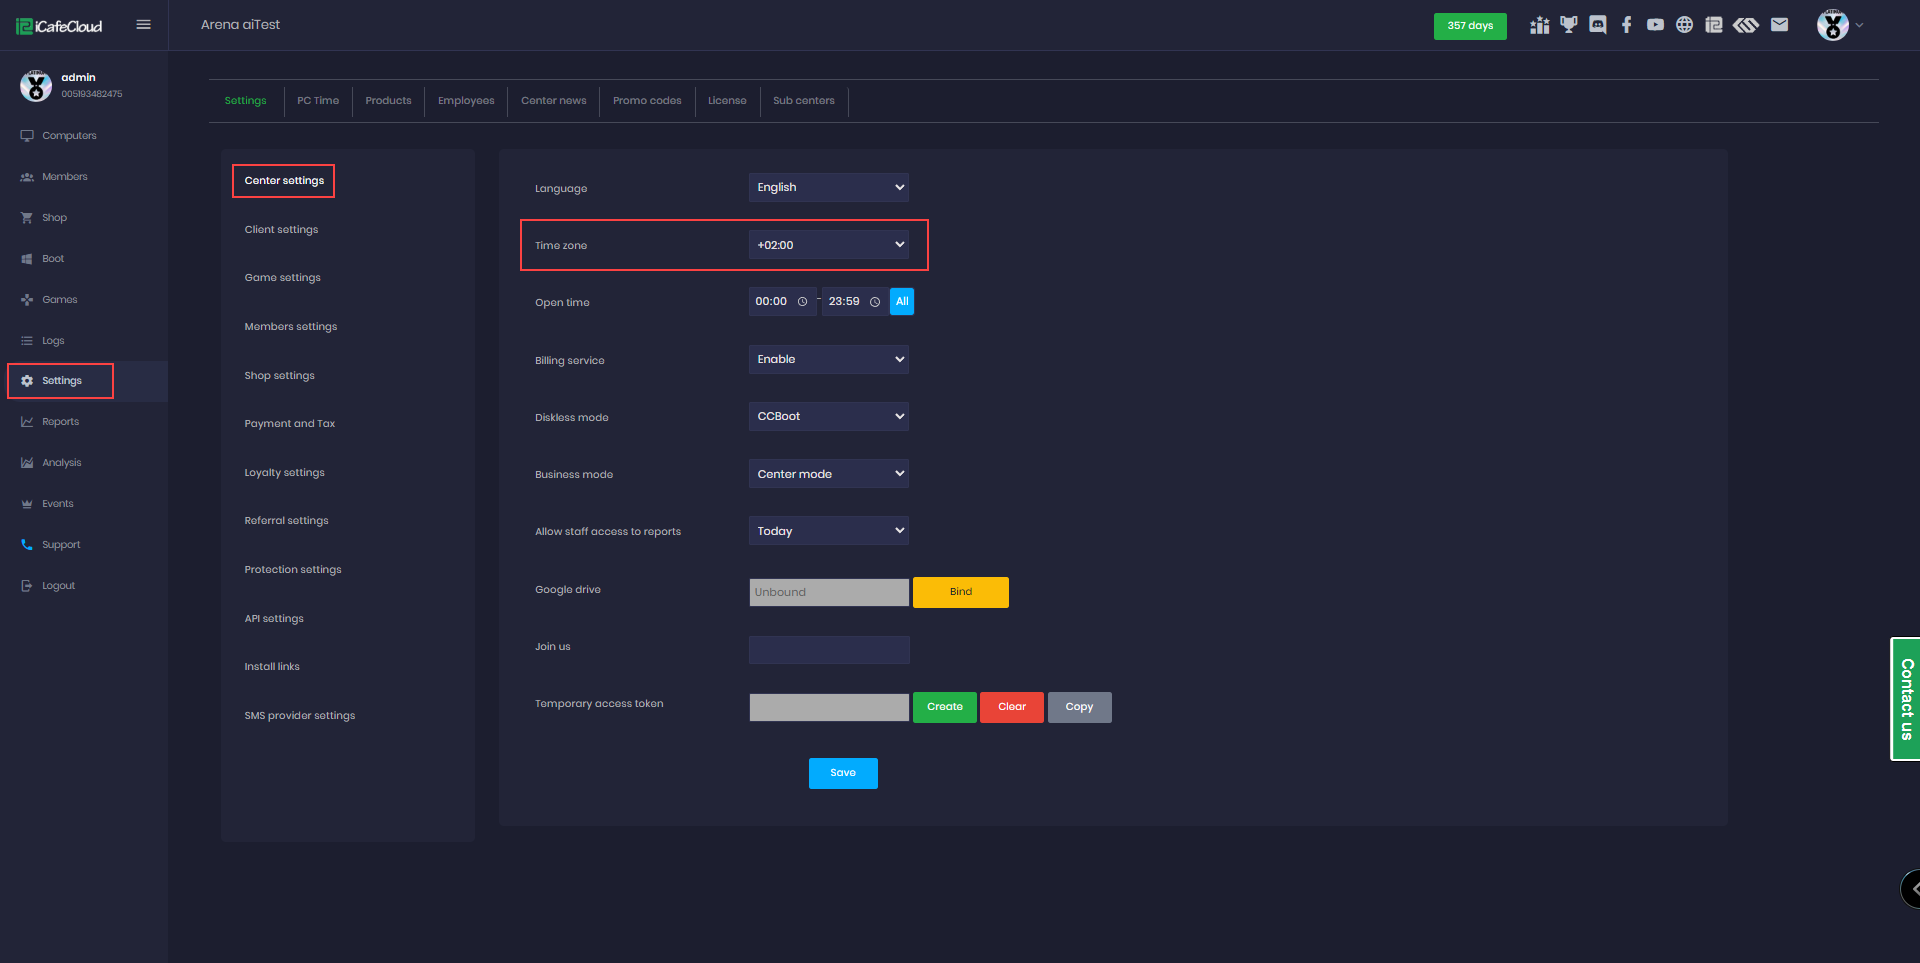
Figure 4
- In Settings → Game Settings, locate the Game Drive option.
- Select the same drive letter as your game disk, then click Save and will start an automatic download of iCafemenu onto that drive. (Figures 5).
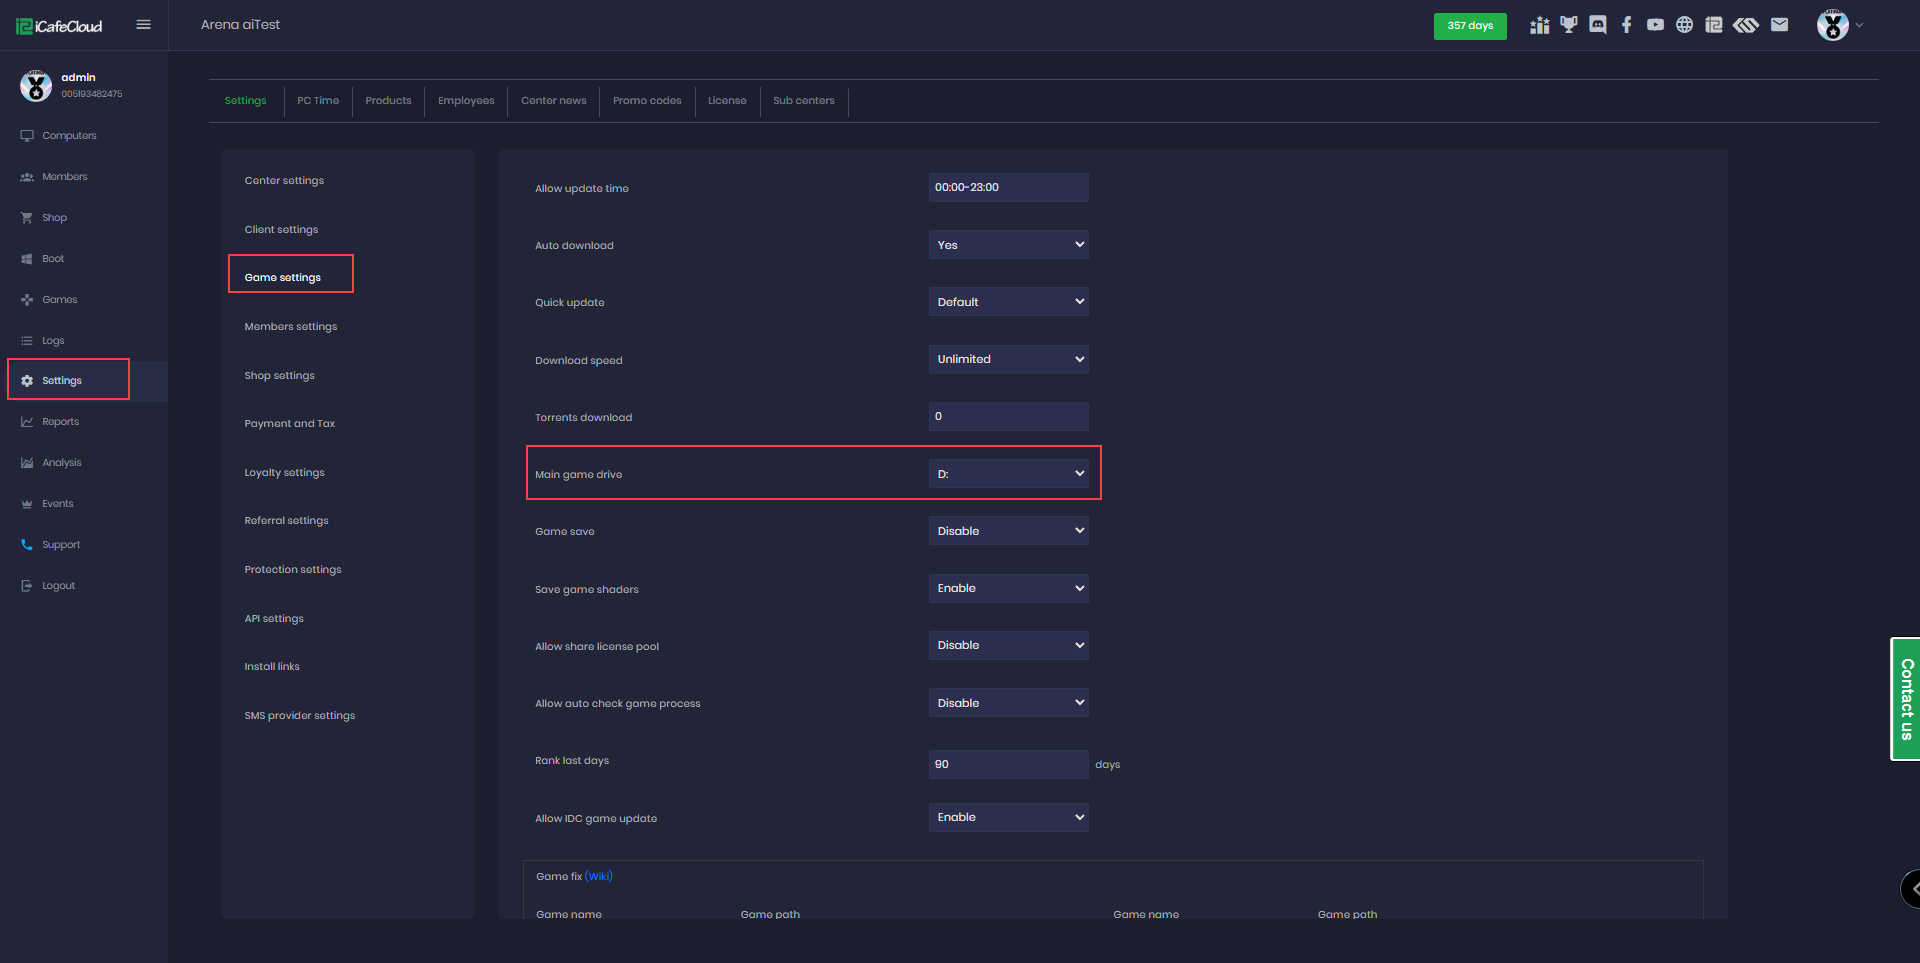
Figure 5
- When you change the main game drive, iCafemenu will also be prompted to re-download onto the new drive.
- If the download did not finish successfully, you can stop and restart the iCafeCloud service on the server.
- This will trigger a check and automatically re-download any missing or incomplete files if needed.(Figure 6)
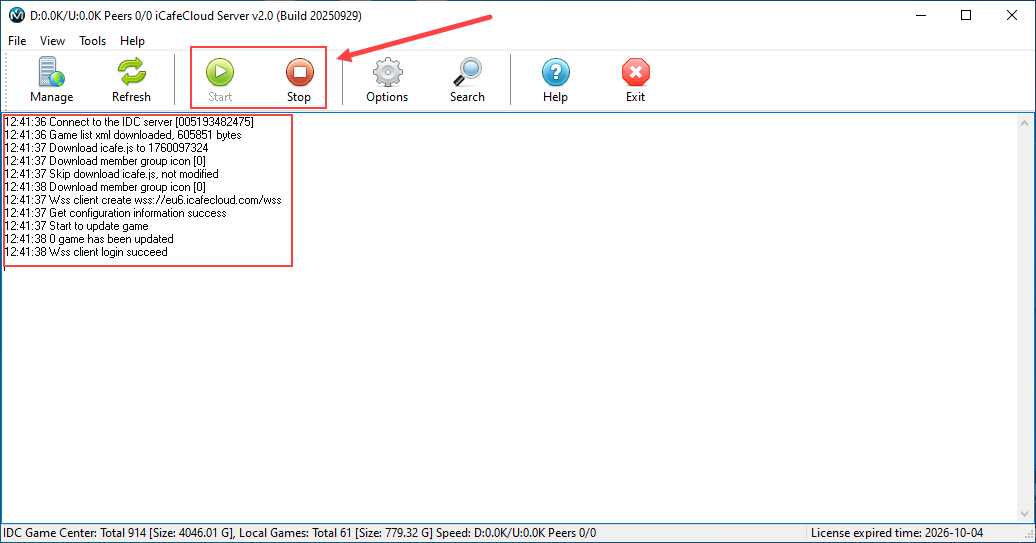
Figure 6
- On the Games page, search for iCafeMenu.When you right-click on it, you will see that iCafeMenu is automatically enabled by default.(Figure 7).
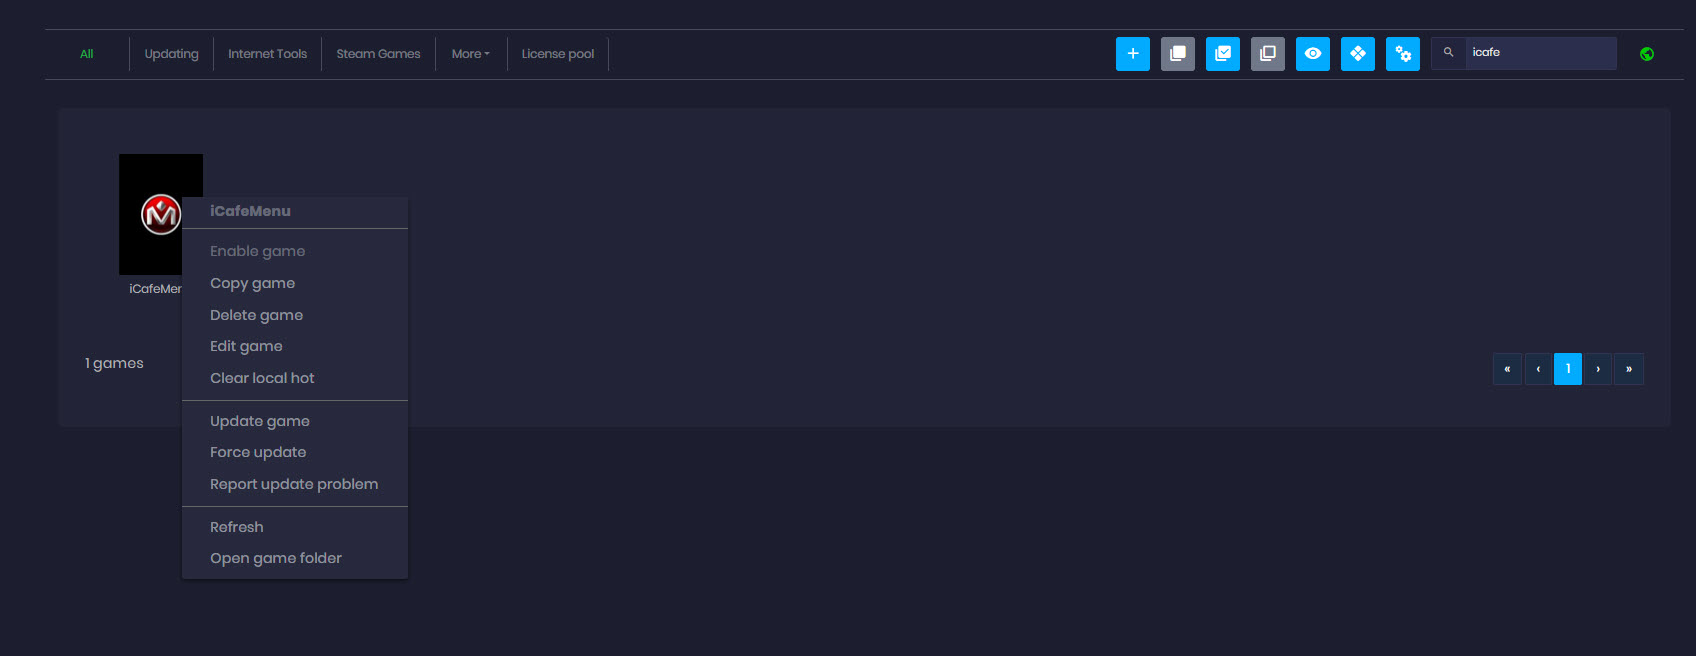
Figure 7
- Overwolf will be downloaded automatically when iCafeMenu is downloaded.
- If you are using the latest version of CCBoot on the client side, iCafeMenu will automatically launch on startup and display the login interface, where users can enter a valid username and password to log in. (Figure 8).
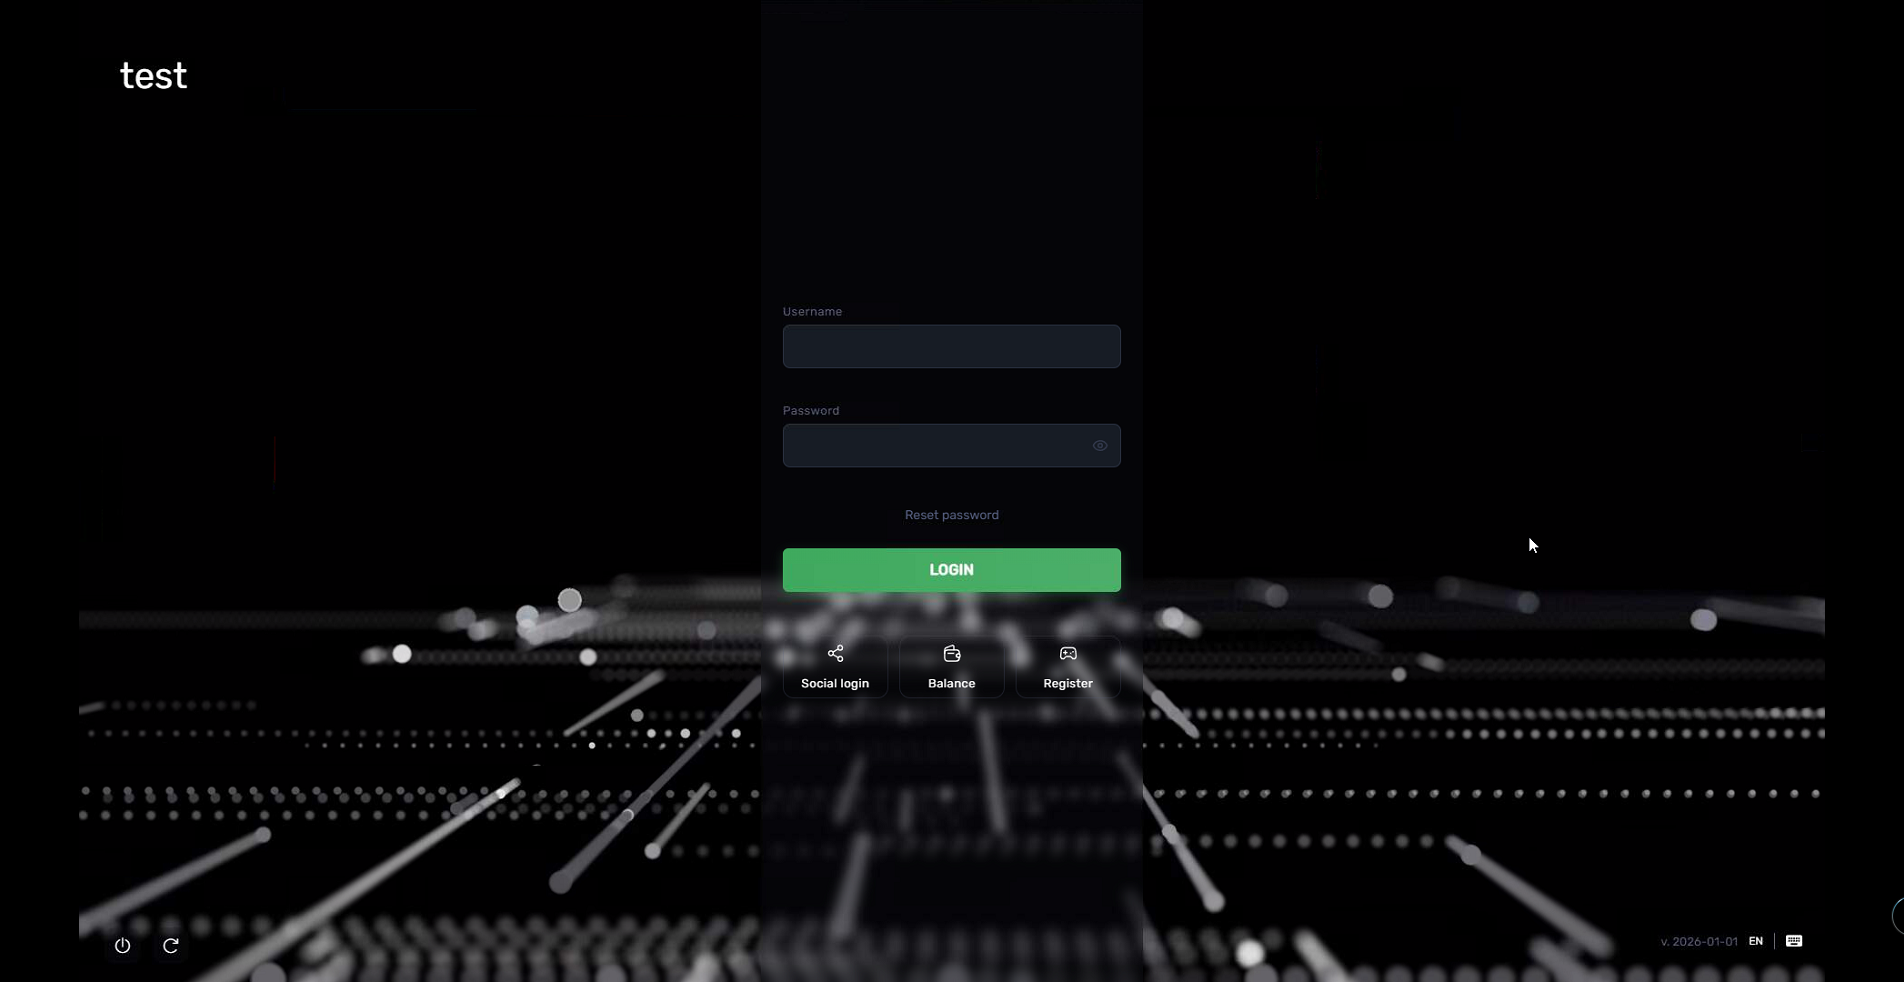
Figure 8
- After the first run, iCafeMenu will be automatically added to startup, allowing it to launch faster on the next boot.
You only need to run iCafeMenu once in Super Client mode and then save the image (if you haven’t already done so in the previous steps).
- Now the PC that has iCafeMenu running will be listed on iCafeCloud, “Computers” page (Figure 9).
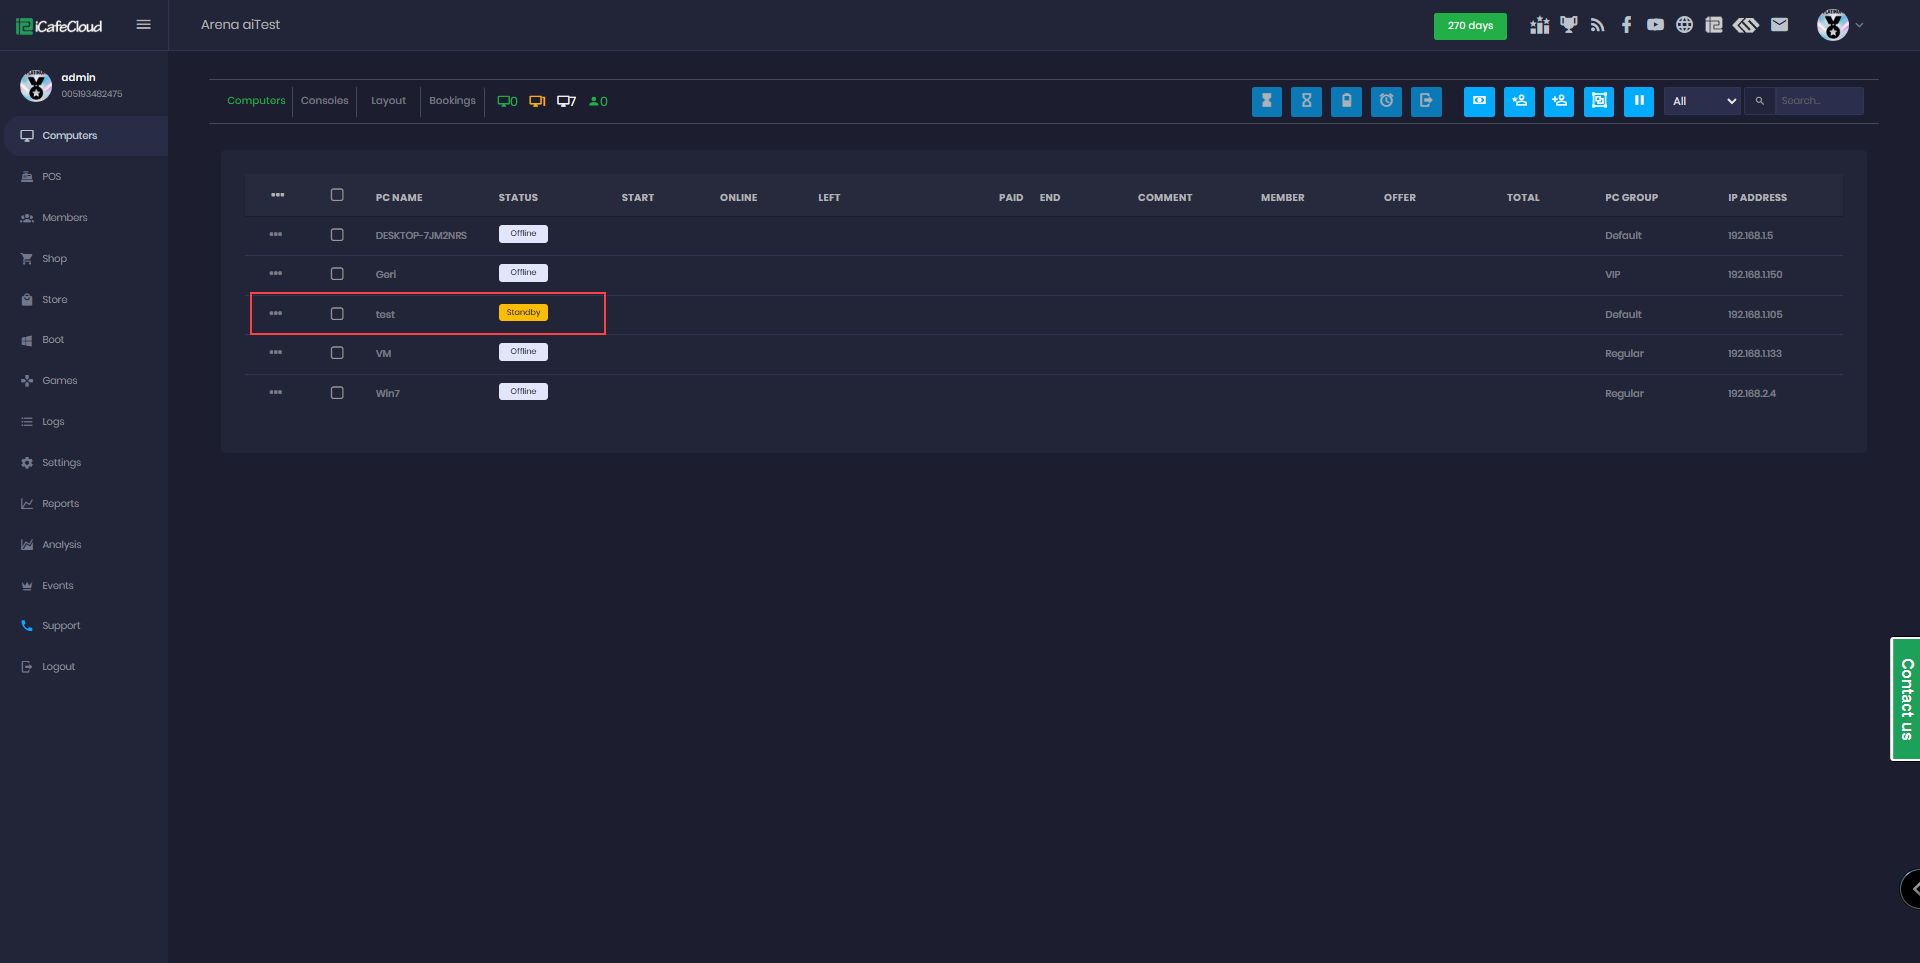
Figure 9