2026-01-24
image, update, pnp, local
The following section provides instructions on how to collect the NIC driver and update NIC drivers in CCBootCloud, transferring them from the client PC to the image on the server.
- Attach a SSD in the PC with Windows installed or install Windows OS in it.
- Make sure that you install the latest driver of NIC for the computer from their respective vendor website (Realtek or Intel) .
- Optimize the NIC Driver (Server and client network optimization)
- Run the CCBootPnP.exe file from the “CCBootClient” folder and click on the “collect Local NIC” (Figure 1).
- You can find the CCBootPnP.exe file in the “C:\CCBoot\CCBootClient\x64” directory.
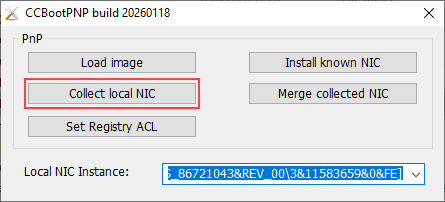
Figure 1
- It will create a “Drivers” folder in the “CCBootClient” folder and copy the “Drivers” folder to the CCBoot server installation folder.
- Then right click on the image and click on “Update image from local” (Figure 2).
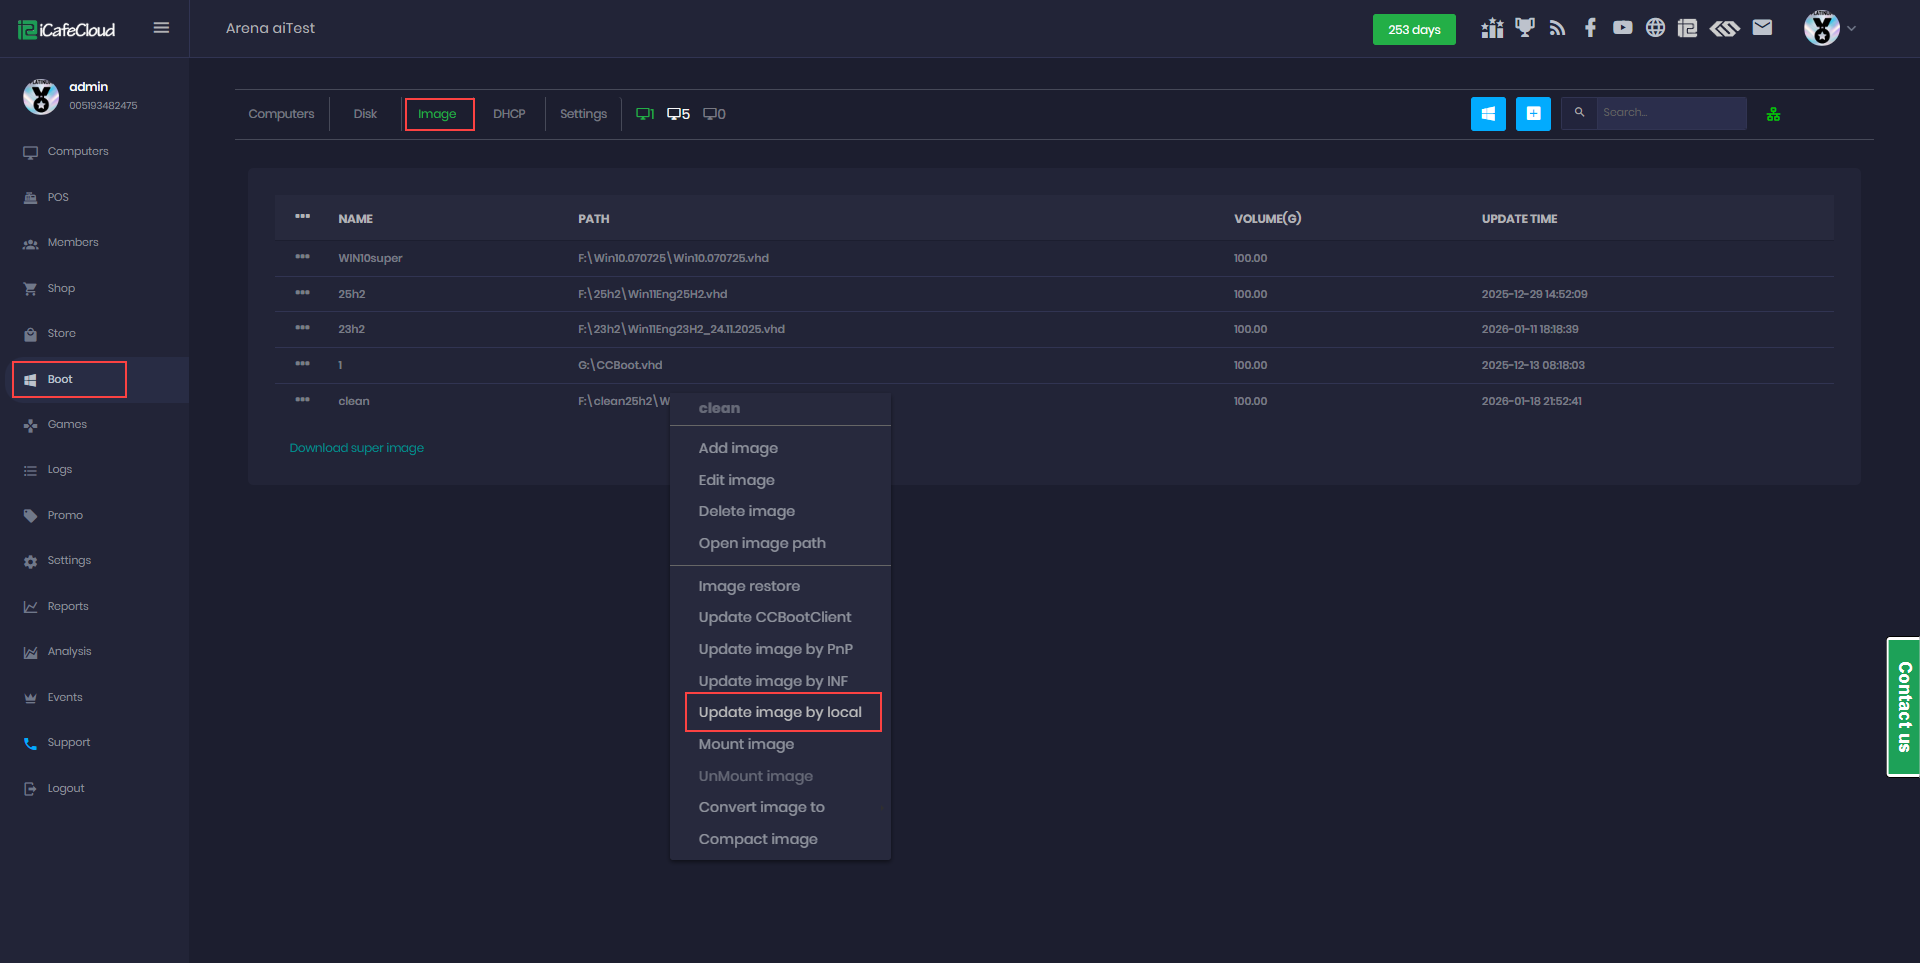
Figure 2
- Then a warning to merge the Local NIC driver will appear, continuing with the “Yes” button (Figure 3).

Figure 3
- Lastly, it will automatically add drivers from local and click on the “Ok” button to close the success message prompt.