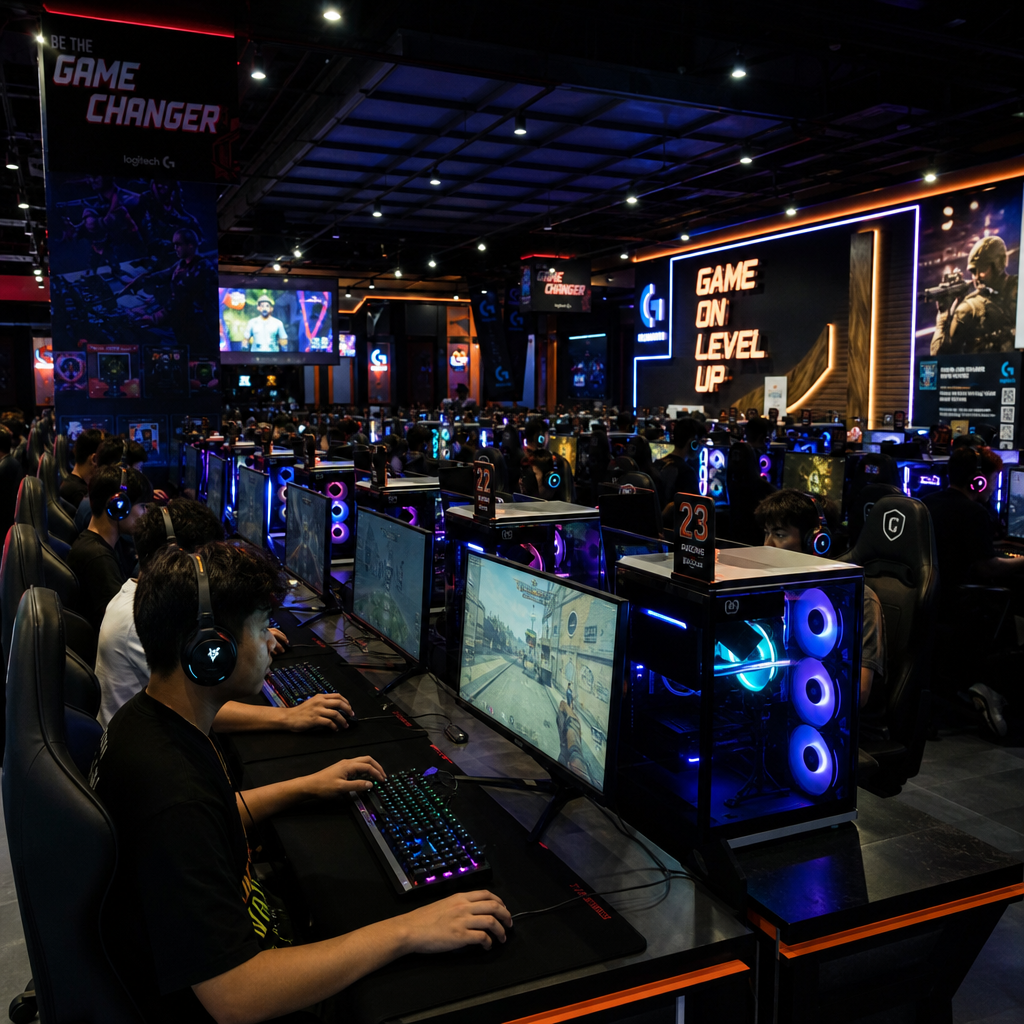
Imagine this scenario: it is Friday evening, your gaming center is packed, and suddenly, a massive 150GB update drops for the most popular battle royale game in the world. If every single PC in your venue has its own local hard drive, you are looking at a logistical nightmare. Your internet bandwidth will bottleneck, players will be forced to wait, and you will lose out on crucial revenue.
But what if you only had to download that update once?
Welcome to the ultimate solution for modern esports arenas and internet cafes: the diskless environment. By utilizing a PXE boot for gaming center infrastructure, administrators can completely eliminate local hard drives from client PCs. Instead, every computer connects to a master server to load its operating system, games, and applications instantly over the local network.
In this comprehensive guide, we will break down exactly why and how to build this architecture in 2026, from selecting the right server hardware to configuring your network protocols.
What is PXE Boot and How Does It Work?
PXE (Preboot Execution Environment) is an industry-standard protocol that allows a computer to boot from network before loading an operating system from a local disk. When a client PC is turned on, its network interface card (NIC) sends out a broadcast requesting an IP address and a boot file. The master server responds, handing the PC the files it needs to load Windows and access the shared game library.
For a gaming venue, a proper pxe boot setup means that client PCs are essentially empty shells containing only a CPU, motherboard, RAM, and a powerful GPU. All storage is handled by a central server.
Why Go Diskless? The Core Advantages
If you are on the fence about setting up diskless server for internet cafe operations, the operational benefits far outweigh the initial learning curve. Here is why the industry has shifted away from local storage.
1. Instant Global Updates
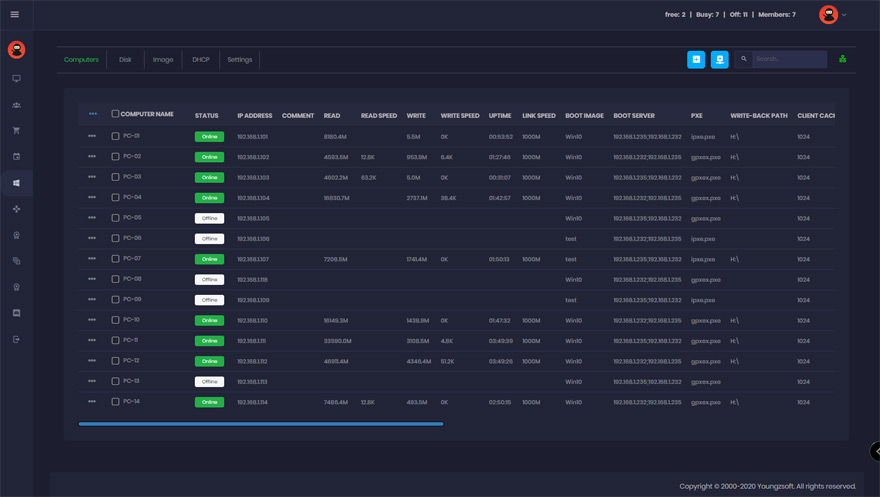
Managing patches across dozens of computers is tedious. A diskless setup provides a centralized game update management system. You turn on one single "Super Client" PC, download the game update, save the image to the server, and reboot the rest of the venue. Instantly, all 100+ PCs have the fully updated game.
2. Massive Financial Savings
When building a new venue, reducing hardware costs with diskless workstations is one of the biggest financial wins. Purchasing 100 high-capacity 2TB NVMe SSDs for individual PCs can cost tens of thousands of dollars. Reallocating a fraction of that budget into one enterprise-grade server saves money, reduces the venue's overall power consumption, and cuts down on hardware failure rates.
3. Superior Gaming Performance
A common question from skeptics is: how does diskless booting improve gaming performance? It seems counterintuitive that pulling a game over a network is faster than a local drive. However, a properly configured diskless server utilizes massive amounts of RAM (often 128GB to 256GB) as a read cache. Because RAM is exponentially faster than any SSD, frequently played games are served to client PCs at blistering speeds. When comparing diskless vs local SSD for gaming PCs, the diskless setup often results in faster map loading times and zero texture pop-ins.
4. Ideal for Pop-Up Events
If you host tournaments, the benefits of centralized network booting for LAN parties are undeniable. You can wheel in rental PCs, plug them into the network switch, and instantly have a fully configured tournament environment without spending days installing Windows and games on each temporary machine.
Essential Hardware Requirements for 2026
To achieve flawless performance, your infrastructure must be robust. A diskless network is only as strong as its weakest link.
Server Hardware
You cannot use a standard desktop PC as your master server. You need optimized server hardware for diskless gaming nodes.
- CPU: A modern multi-core processor (like an AMD EPYC or Intel Xeon) capable of handling massive amounts of simultaneous I/O requests.
- RAM: 128GB to 256GB of ECC RAM. This is crucial because the RAM will serve as your primary read cache for the operating system and top-tier games.
- Storage Arrays: You will need distinct drives for the server OS, the client OS images, the game disks, and the write-back disk. Enterprise-grade NVMe SSDs in RAID configurations are strictly required here to handle the massive read/write volumes.
Network Infrastructure
Network bottlenecks will instantly ruin a gaming experience. Understanding the network bandwidth requirements for iCafe diskless systems is paramount.
- Client Connections: Every client PC should have at least a 1Gbps, but preferably a 2.5Gbps Ethernet connection.
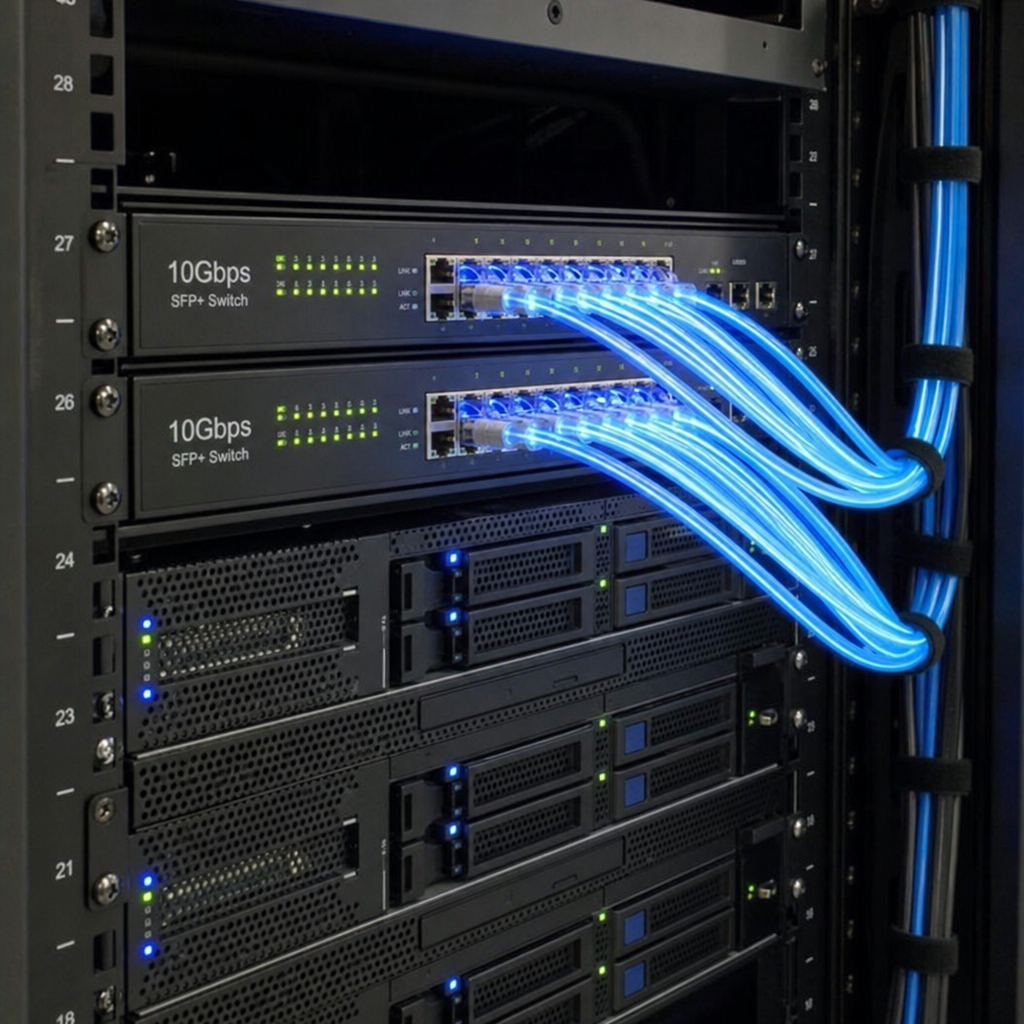
- Server Connections: The master server must be connected to the core switch using 10Gbps, 25Gbps, or even 40Gbps fiber/DAC cables depending on the size of the venue. Link Aggregation (LACP) should be used for redundancy and throughput.
- Switches: You cannot use cheap unmanaged switches. The gigabit ethernet switch requirements for diskless networks dictate the use of enterprise-level Layer 2 or Layer 3 managed switches. Features like Flow Control, IGMP Snooping, and massive backplane switching capacities are required to prevent data packet collisions during peak hours.
Choosing Your Software: The Heavyweights
To manage this environment, specialized diskless boot software is required. Let's look at the industry standards.
CCBoot and iCafeCloud
For over a decade, ccboot has been a dominant force in diskless booting. It is known for its incredible stability, deep customization, and robust cache management. Recently, however, cloud-managed solutions have entered the market.
When doing a CCBoot vs iCafeCloud comparison, the choice often comes down to management style.
- CCBoot (now often integrated into CCBootCloud): Offers phenomenal granular control. It is highly optimized for local network management, allowing administrators deep access to fine-tune RAM caching and disk utilization.
- iCafeCloud: Focuses heavily on the modern admin who wants to manage their venue remotely. It features seamless cloud-based game updates (where games update automatically in the background without admin intervention), license management, and VIP billing integration.
Ultimately, both use the same underlying PXE technologies to deliver files rapidly to the client PCs.
Step-by-Step Technical Setup Guide
Building the architecture requires precise configuration. While every software has its own specific UI, the fundamental networking principles remain the same.
Step 1: BIOS and UEFI Configuration
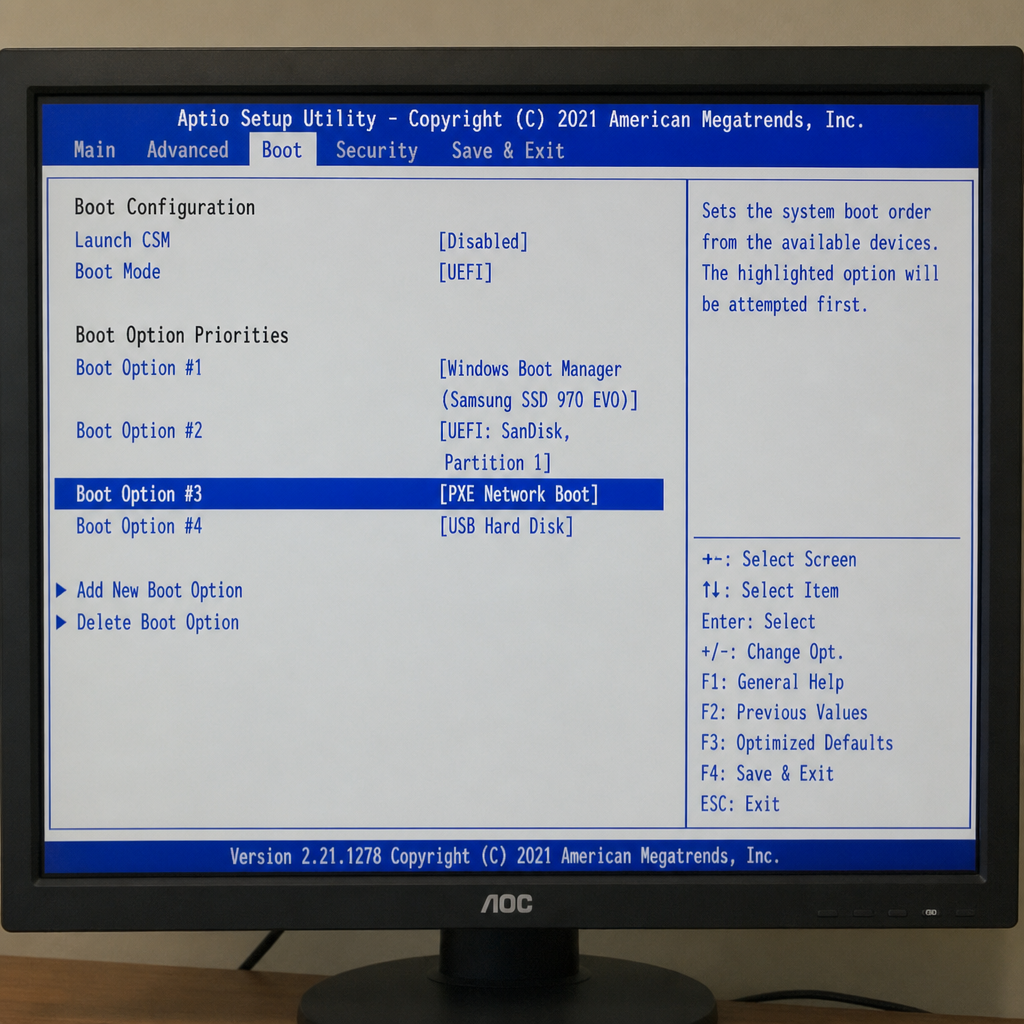
Before a client can connect, the motherboard must be prepared. Historically, administrators used Legacy BIOS setups, but today, you must understand UEFI vs Legacy BIOS for network booting.
Legacy BIOS uses an older PXE ROM that struggles with modern Windows 11 images, secure boot protocols, and large GPT partition tables. UEFI network booting is vastly superior, offering faster initialization, better security, and native support for large NVMe drives. Ensure all client motherboards have "Network Stack" and "IPv4 PXE Support" enabled in their UEFI settings, and disable "Secure Boot" during the initial imaging phase.
Step 2: Protocol Handshakes
At the heart of the setup involves configuring DHCP and TFTP for network boot.
- DHCP (Dynamic Host Configuration Protocol): When the client PC turns on, it asks the network, "Who am I?" Your diskless server's DHCP service assigns the PC an IP address and points it to the TFTP server. (Note: You must disable the DHCP server on your main internet router to prevent conflicts).
- TFTP (Trivial File Transfer Protocol): The client then contacts the TFTP server to download the initial bootloader file (usually a .efi file for UEFI systems). This tiny file gives the client just enough logic to connect to the main storage arrays.
Step 3: Presenting the Storage
Once the bootloader is active, the software utilizes an iSCSI target storage for gaming clients. iSCSI (Internet Small Computer Systems Interface) is a protocol that sends SCSI commands over a local area network.
To the client PC, the iSCSI disk doesn't look like a network share; it looks exactly like a physical hard drive plugged directly into its own motherboard. This is why Windows and anti-cheat software function perfectly without realizing they are running on a network drive.
Step 4: The Art of the Write-Back Cache
Because multiple computers are booting from a single read-only Windows image, what happens when a user saves a file, changes a setting, or downloads a temporary file?
This is where handling write-back cache in high-traffic environments becomes the most critical part of your server design. The diskless server creates a temporary "write-back" file for every active client. Any time the client tries to write data, it goes into this temporary file. When the client PC is rebooted, this file is automatically securely wiped, returning the PC to its pristine, original state.
If your write-back disk is too slow, client PCs will experience massive lag, blue screens, or system freezes. You must dedicate top-tier, high-endurance NVMe drives (like Intel Optane or enterprise Samsung drives) specifically for write-back data. Furthermore, allocating a portion of your server's RAM as a write-back buffer will drastically reduce wear-and-tear on your SSDs and absorb sudden spikes in user activity.
Step 5: Creating and Deploying Images
The final step is the rapid deployment of OS images to multiple PCs.
- You build one single PC with a local hard drive.
- Install Windows, optimize the registry, install necessary drivers (GPU, peripherals), and strip out unnecessary bloatware.
- Using your diskless software, you "upload" this local C: drive to the master server, creating a master .vhd or .img file.
- You assign this image to all client MAC addresses in your dashboard.
- Remove the physical hard drive from the master PC.
- Power on all PCs in the venue. They will all simultaneously pull the exact same customized OS image from the server.
Best Practices for Maintaining a Diskless Gaming Center
Once your pxe boot for gaming center is operational, maintenance becomes incredibly streamlined, but it still requires vigilance.
- Multiple Hardware Profiles: If your venue has different motherboard and GPU models, modern diskless software allows you to integrate multiple hardware profiles into a single OS image. The software will detect the MAC address of the booting PC and inject the correct chipset and GPU drivers on the fly, keeping your image library clean.
- Daily Reboots: Encourage staff to reboot client PCs as soon as a customer leaves. This clears the write-back cache, frees up server resources, and ensures the next player sits down to a fresh, lag-free environment.
- Server Redundancy: In a diskless environment, the master server is a single point of failure. If the server goes down, the entire venue goes dark. It is highly recommended to run a secondary, mirrored standby server. High-quality software solutions allow for automatic failover; if Server A loses power, Server B takes over client connections within seconds without dropping the active games.
- Monitor Cache Hit Rates: Keep a close eye on your server dashboard. If your RAM cache hit rate drops below 90%, it means your system is relying too heavily on your physical SSDs to serve game files. You may need to add more RAM to the server to maintain peak esports performance.
The Future of Internet Cafes
As game sizes continue to bloat—with modern AAA titles easily surpassing the 200GB mark—the traditional model of outfitting individual computers with massive hard drives is simply no longer financially or operationally viable.
Implementing a pxe boot for gaming center architecture represents the pinnacle of IT efficiency. By mastering the hardware requirements, configuring the proper network protocols, and utilizing powerful management software, venue owners can offer unparalleled gaming experiences.
You eliminate downtime, eradicate localized virus threats, slash your hardware budget, and ensure that every customer who walks through your doors is playing on the latest, fastest, and most optimized version of their favorite games. The diskless revolution isn't just an IT upgrade; it is the definitive foundation for the future of competitive gaming centers.