Wiki Home Create Boot Image Create windows bootable USB drive to create client image
Create windows bootable USB drive to create client image
2020/08/10 23:31
Notice: This wiki is for the old version CCBoot. Please click HERE to access the new version wiki
Another simple way to make client image is to use “Create VHD USB” tool. This method fast similar to using “ImageX” to create image. This has more flexibility of supporting “.esd” file which is not support with “ImageX”So, let’s see how to make image
1. Open “Create VHD USB” tool from “Tools” menu (Figure 1).

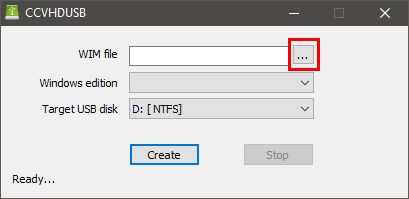
2. On the “Create VHD USB” windows, click “…” button to choose the image file for Windows “install.wim” or “install.esd” file (Figure 2).
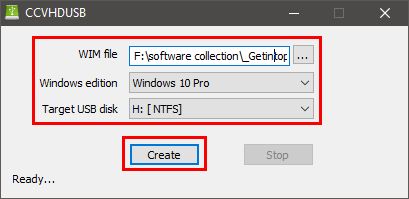
3. Once you have choose the Windows image, choose your desired windows version from the dropdown; select the USB Drive that you want to make windows bootable and click “Create” button(Figure 3).
4. Now, the tool will proceed and make the USB drive bootable with windows.
Note: We recommend using USB 3.0 USB drives as they are faster than other USB drive (USB 2.0) .
Note: This method can be used to make hard disk or external harddisk (USB 3.0) bootable as well.
5. Once the process is completed, connect the usb drive to one of your client then let it boot, once at desktop install CCBoot Client, and upload image.
Note: You can connect the USB drive to all the different hardware specification and install their drivers, and once done, upload the image.Related:
Using super image to boot clients
Create Client Image with Dual NICs