Wiki Home Quick Start Install CCBoot step by step
Install CCBoot step by step
2018/11/26 12:00
Notice: This wiki is for the old version CCBoot. Please click HERE to access the new version wiki
Prepare Server1. CPU: Quad Core Intel/AMD CPU or better CPU
2. RAM : 32 GB DDR3/DDR4 or more
3. Hard Disk: 2 x 2TB HDD or 2 x 500 GB SSD and 4 x 256G SSD disks (recommended to use Samsung Evo SSD for best performance and reliability)
a. 1 SATA HDD/ SSD split to two partitions. one for Server OS installation and one for CCBoot installation.
b. 1 SSD for boot images.
c. 2 SATA HDDs or SSD in RAID0 for game disks, refer RAID0 setup
d. 2 SSD for Writeback disk
e. 1 SSD for SSD cache
Important: Game Disk is recommended to be RAID 0 in all cases even if you have less number of PC. With RAID 0, games will load faster and you will have smoother game play. When you have RAID 0 for HDD or SSD Disk, SSD cache is still recommended for the game disk.
Note: If you have NVME SSD then use that SSD for image disk or SSD cache.
Note: M.2 SSD are also supported by CCBoot.
4. The motherboard should have at least 8 SATA ports as at least 7 disks are used at any given time.
5. Casing: Any casing big enough to accommodate your boards and hard disk. Typically and EATX casing is recommended as it has more hard disk bays and cooling option with fans.
6. Power Supply - True rated 500-650 Watts PSU for best reliability and power delivery for your system
7. You need to format all disk in 32K allocation unit NTFS, except the OS HDD.
8. Windows Server 2008 R2 or Server 2012 R2 or Server 2016 (Build 1607)
9. UPS for your system in case of power failure, to prevent the server from shutting down while in operation. - 1.2 KVA or higher rated UPS for longer backup
Sample 1
Motherboard : Asrock Z370 Extreme4
Processor : Intel Core i7-8700
Memory : 32 GB DDR4 RAM
SSD : 4 pcs 256GB Samsung EVO
SATA HDD : 1 500gb seagate HDD for Server OS/Back Up Files
SATA HDD : 2* 1 Terabyte Western Digital Caviar Black
Casing : Any Model (Full tower for much better ventilation)
Power Supply : Any Model/Brand of True rated 650 Watts
UPS : Any Brand
If you prefer to use branded servers then here are some recommendations
Dell Servers
1. Dell PowerEdge T330 Tower Servers
2. Dell PowerEdge T430 Tower Servers
Super Micro Servers
1. SuperServer 5018D8-AR12L - 1U Rack Server with up to 16 SATA3 port and up to 128 GB RAM
2. SuperServer E200-8D - Mini PC system with 6 SATA3 up to 128 GB RAM
Notes:
a. CCBoot support M.2 SSD as well. You can use it for SSD cache or image disk depending on the requirement
b. Even, if you are using SSD for game disk, using SSD Cache disk will give you better performance for loading games.
c. Its recommended to use same size SSD for writeback disk. Also, do not use combination of HDD and SSD for writeback disk. The performance will not be as good as will SSD only writeback disk.
d. DO NOT in any case use partition for disk in CCBoot. It will lower the performance as well as wear out your disks faster. Boot time will be slow for clients as well
e. CCBoot trial works for 30 Days for 5 users. There are no other limitation in functions. If you try to boot more than 5 PCs in trial then clients will not be stable and may crash. 5 PC trial is most stable, any more you want to boot, please purchase license.
Notes: Do not install any antivirus program on the CCBoot server as antivirus they scan disk while the server is idle and cause the clients to lag. So it is not recommended to install antivirus on the CCBoot server.
Refer "Server Cache Settings" to set the server disks, RAM cache and SSD cache
CCBoot installation and configuration
Download super image
1. Download and install utorrent.
2. Go to our forum for windows 7 super image or download the torrent file
3. Download Windows 7 image.
4. Once download is finished, then extract the image from the compressed file and copy it to your image disk (which you will set later).
Install CCBoot Server
Please watch the video
Configure client PC for diskless boot
For new motherboard -
1. Turn on the client PC and go in to the BIOS by pressing "F2 or Del or ESC key
2. Go to "Advanced" tab, and select the "Integrated Peripherals" option and press "Enter" (Figure 1).
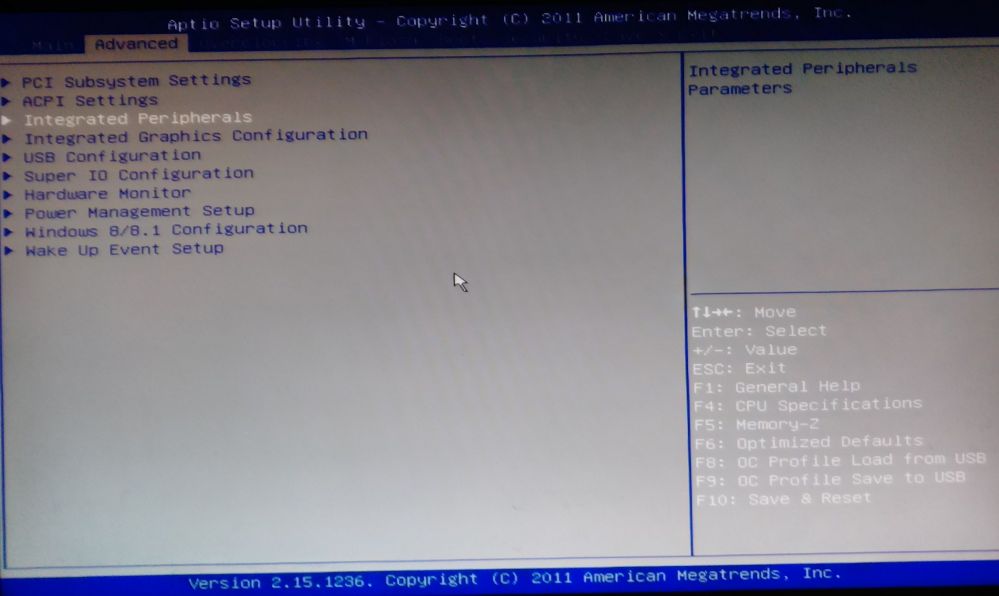
Figure 1
3. In "Integrated Peripherals", look for "Lan Option ROM" or "Boot from LAN" and then change the option to "Enabled". (Figure 2)
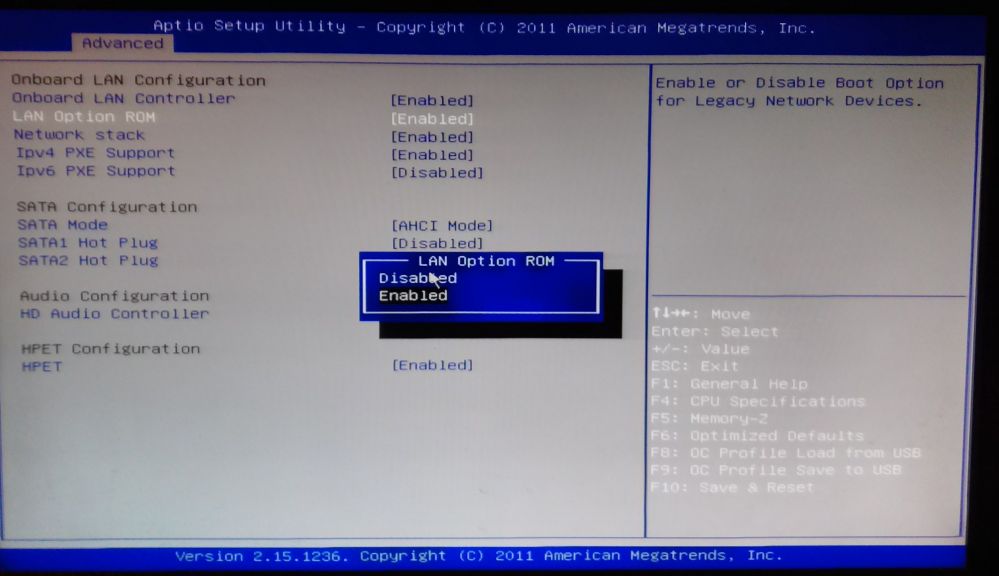
Figure 2
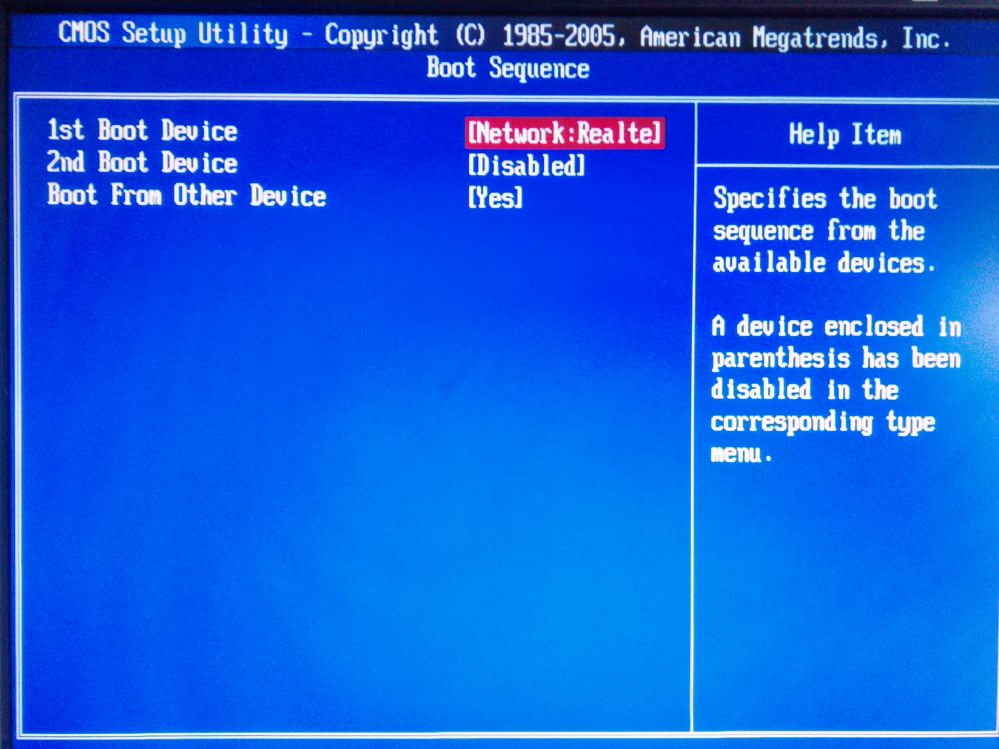
4. After that, go to "Boot" tab and then select "Boot Sequence" or "Boot Priority".
5. You need to set the "Network" to be the first priority (Figure 3).
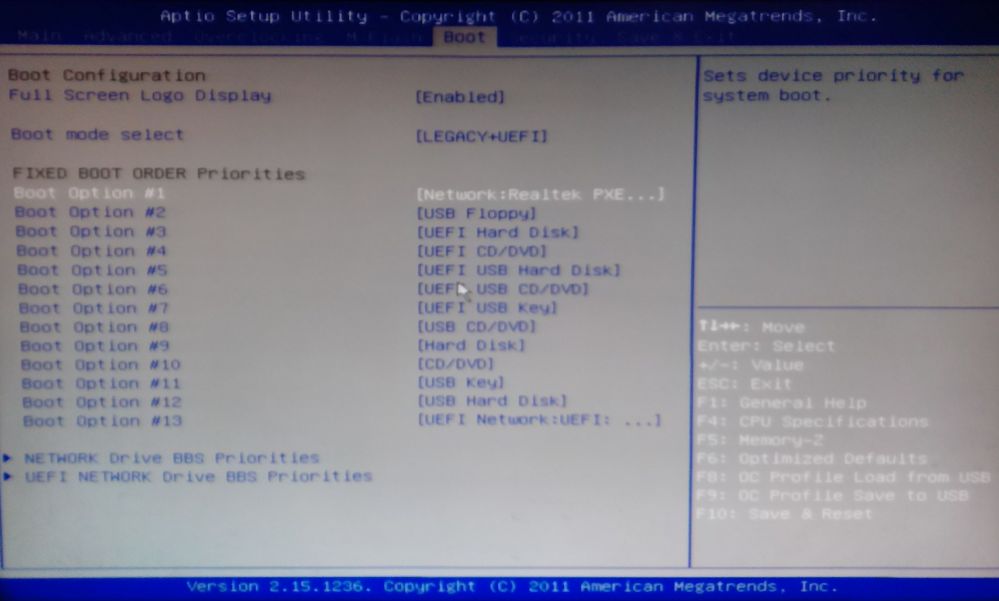
Figure 3
Important: Keep in mind that in new motherboard with UEFI BIOS, you need to set the Boot Mode to either “Legacy” or “Legacy+UEFI” in order for the boot to work
1. Turn on the client PC and go in to the BIOS by pressing "F2" or "Del" or "ESC" key
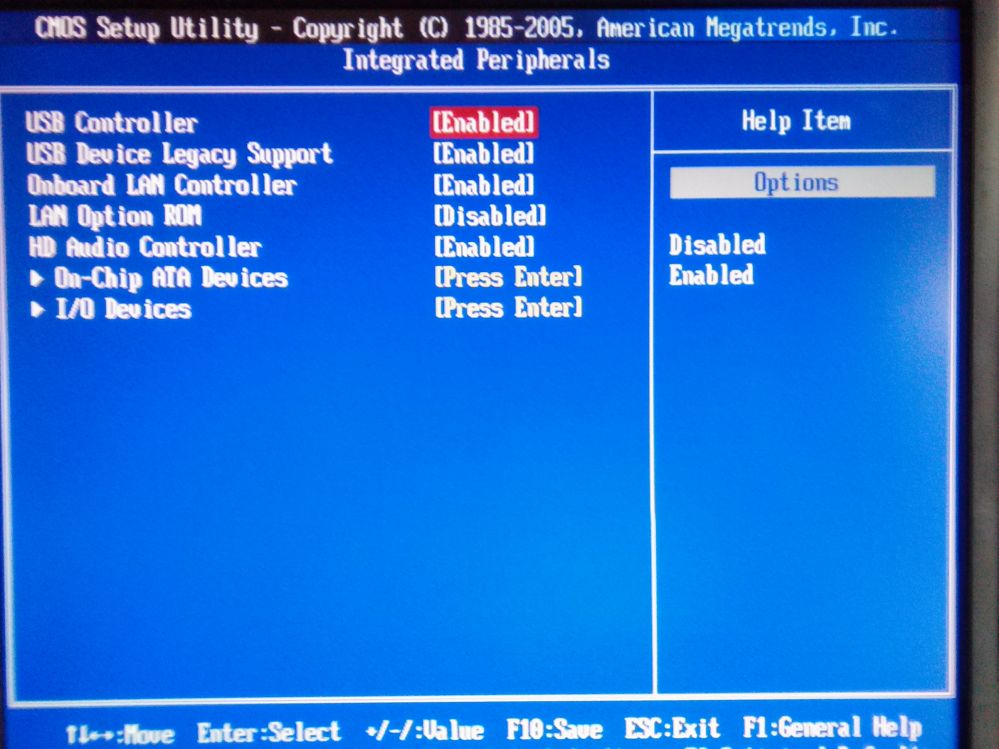
2. Select "Integrated Peripherals" and press "Enter" key (Figure 4).
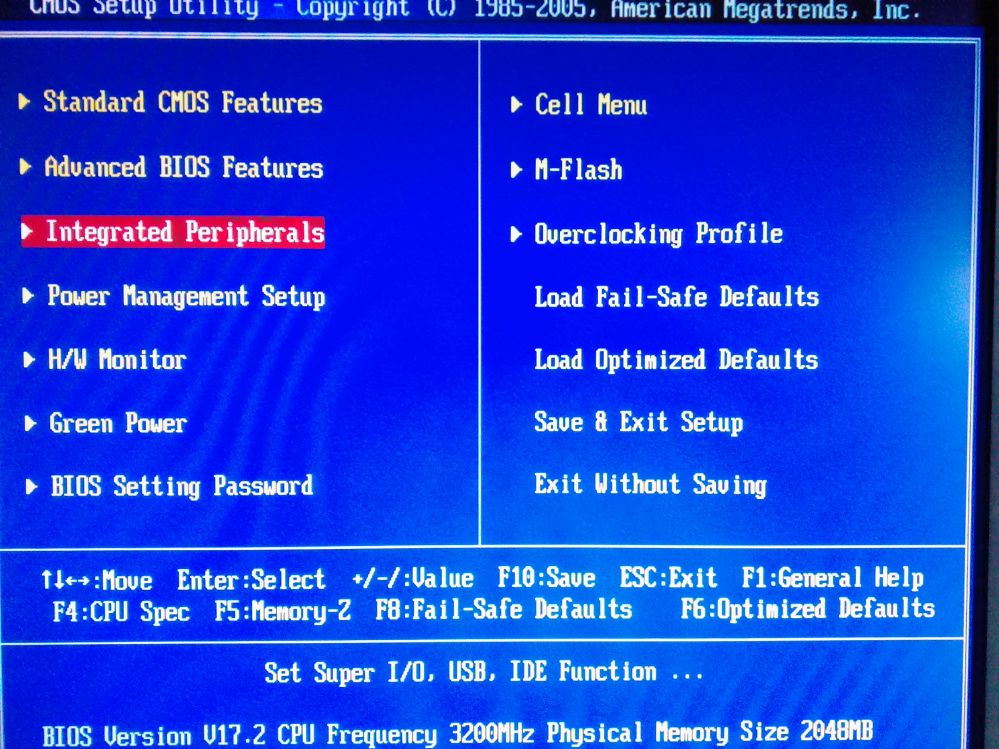
Figure 4
3. Look for “LAN Option ROM” (Figure 5)
4. Highlight the “Disabled” option beside the “LAN Option ROM” and then change it to “Enabled” (Figure 6)
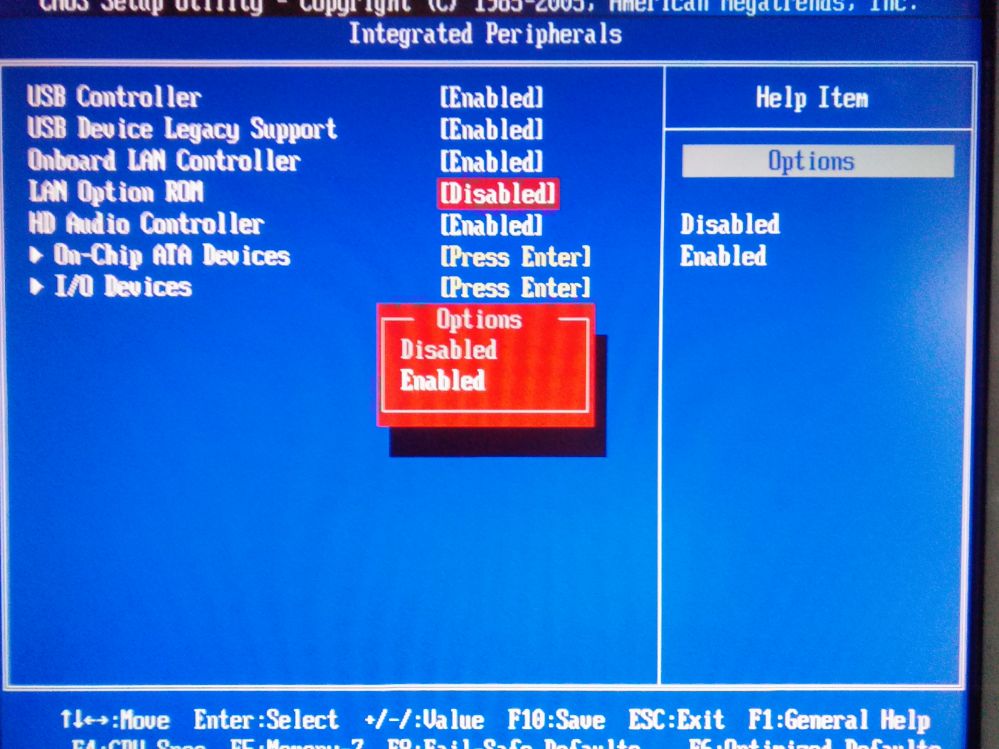
Figure 6
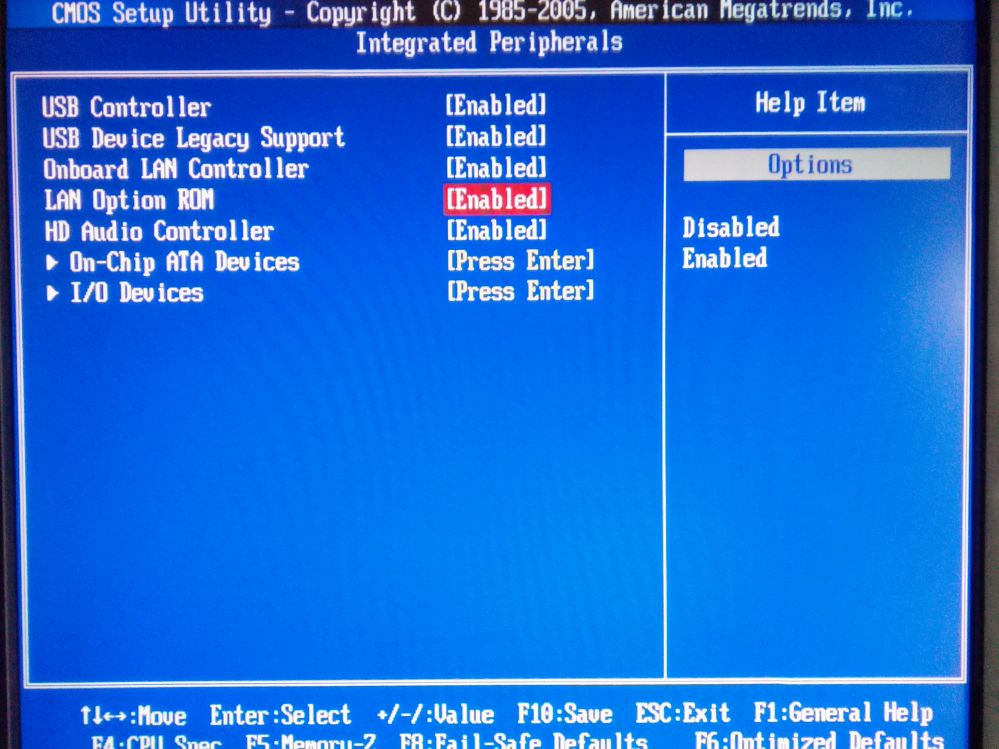
Figure 7
7. Select “Advanced BIOS Features” option and press "Enter" (Figure 8).
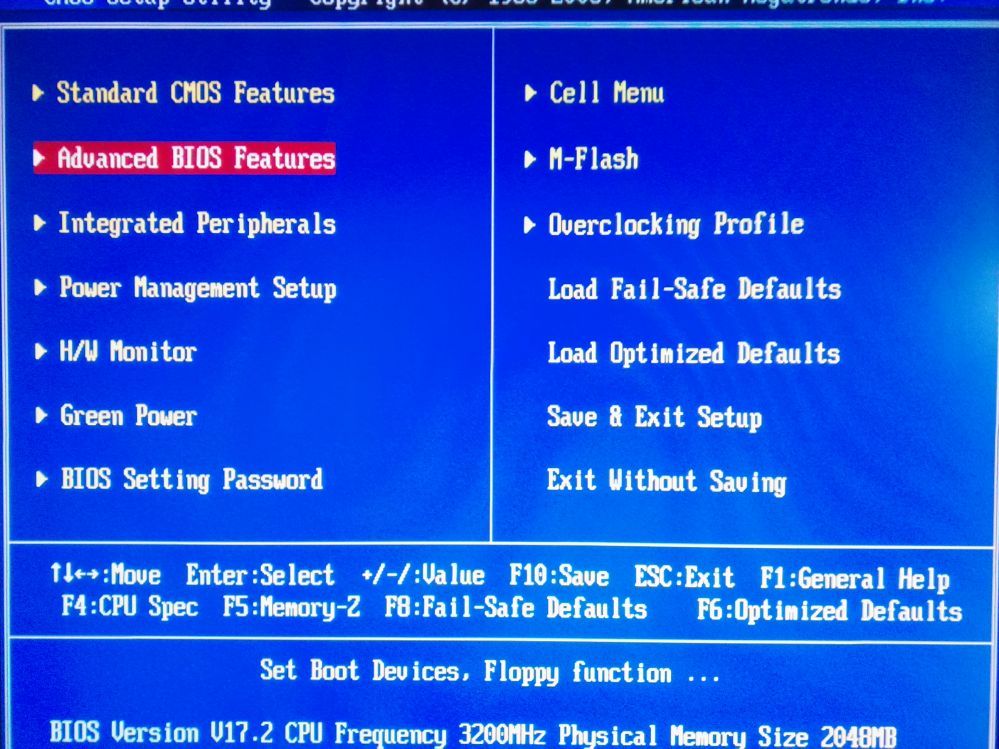
Figure 8
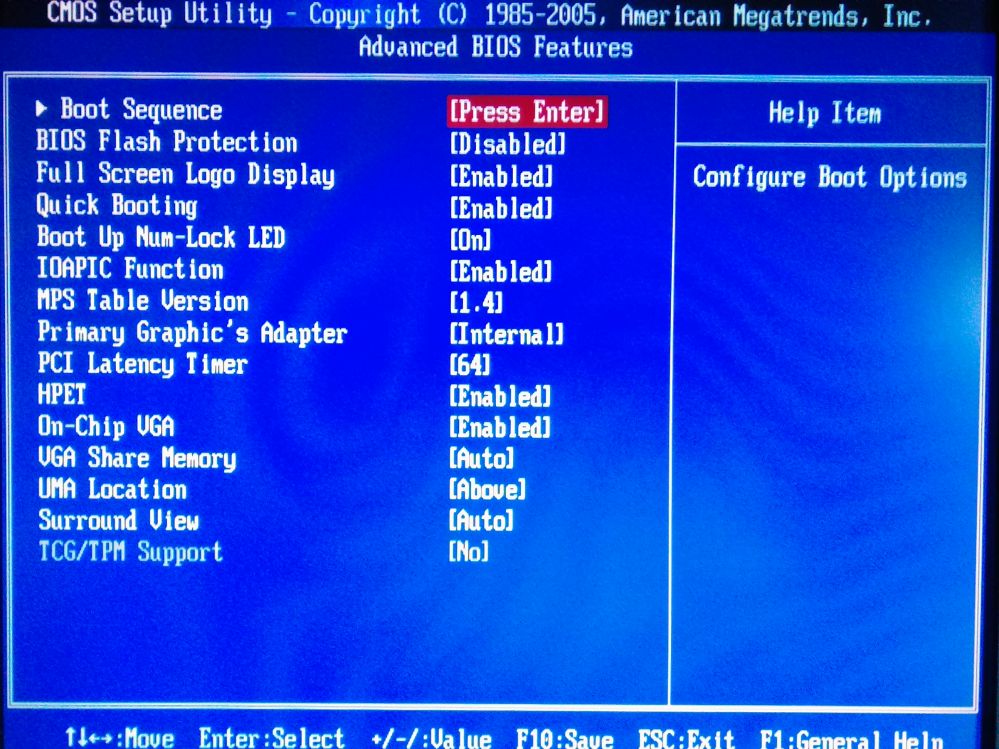
10. Once the above settings are set, save bios settings and reboot the client, it will now boot from CCBoot
Updating image and game disk using superclient
After you have successfully booted you clients, you need to install any application or update the windows. So that is performs at 100% capacity.
Refer the video below to understand how you can update the image and game disk, simple as it can be.See the video to learn how to do the same.
Update CCBoot Server and Client application
We release new version regularly and recommend that when a new version is available, you to update to latest version as they are more stable and have bug fixes and new functions
Refer the video below. The steps are simple and easy to do, even a non technical personnel can do them.