

Approve a group of gaming PCs for opening only after every seat can reach Windows and launch the game it’s assigned to run. For a gaming center using a PXE boot solution every day, acceptance starts at the power button and ends at a point in the game a player can recognize. Record the result against the seat number. The next person on shift should be able to tell where to pick up a failed check without walking the room to find out.
Gaming center PCs being checked before opening

What the PXE Boot Solution Must Deliver
Write down which seats you plan to open. A new row on the floor might use one Windows image and the same launcher at every seat. A tournament area might have a separate assignment and a shorter list of mandatory games. Give each group a name that matches the floor plan or the labels staff already use.
CCBoot diskless boot lets client PCs start Windows from an image hosted on the server. The checks below follow that daily startup path from a powered-off PC through the first usable screen in a game. Before you begin, note the expected image name or revision, the sign-in procedure, and the games each group must run. Agree on where to stop in each game. For open play, that could be the main menu with the account signed in. For a tournament, the assigned seat may need to reach a test lobby.
Use the account and connection a staff member would normally use to prepare a seat for a guest. If the venue issues test accounts, record their role or profile on the sheet. Staff can repeat the check with another account of the same type. Leave credentials out of the record.
Choose a reference seat for each image before you spread out. Walk through the complete check there with the opening lead. If the lead needs a different account or a later point in the game, settle that before two staff members start recording different versions of a pass. The reference seat also gives the technician a working example from the same PXE boot solution when a seat in that group needs a retest.
Verify Network Boot at Each Seat
Use the power button and let the PC follow its ordinary startup sequence. If you used a one-time boot menu during setup, do this pass with the normal boot order. Record the first stage that fails. A blank screen before the network boot attempt and a pause while contacting a boot service give the technician different places to start.
Checkpoint | What a pass looks like | What to record for a retest |
Network startup | The PC starts over the network on its regular boot path | Seat number and last screen shown |
Windows image | Windows starts from the image assigned to that PC | Expected and assigned image names |
Sign-in | The venue’s normal sign-in reaches a usable desktop | Sign-in stage and visible message |
Game | The assigned game reaches the agreed screen and accepts input | Game, last screen reached and symptom |
Start with the Ethernet connection. If the link is up, note whether the client appears to receive an address or has already started loading the boot program. Copy the message as displayed. “Black screen after Windows starts” is a more useful handoff than “PXE problem.” If several seats share the symptom, note which ones and whether they belong to the same row or network segment.
The CCBoot DHCP settings reference can help the technician confirm which service supplies addresses and which provides boot information in the venue’s setup. For sign-off, keep the result tied to the normal power-on path. After correcting an issue, turn the affected seat off and repeat that path before marking the first checkpoint complete.
Check the Windows Image and Sign-In
Match the physical label on the desk to the computer record. In CCBoot, check the primary image assigned to that PC against the one listed on your sheet. If two images have a similar name, record the full assignment. A seat can reach a familiar desktop while loading an image prepared for a different group.
Sign in as usual. Once Windows opens, check that it responds to the mouse and keyboard and can open the launcher the venue expects. If the deployment requires a resolution or audio output at that desk, confirm what Windows actually selected. A monitor that shows the desktop may still be on the wrong input for a two-display station. On a headset-only seat, make sure the sound reaches the headset.
When the image assignment differs from the sheet, pause there. Confirm the intended assignment with the person responsible for the build and retest the seat after the correction. Carry the expected image name into the handoff so the next shift can check the same thing. For image setup and assignment details, see the CCBoot boot image documentation.
Three checkpoints for accepting a network-booted gaming PC
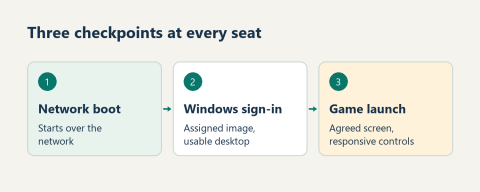
Launch the Games Players Will Use
Start with the game the seat is booked to run. Open it the way staff or guests normally would. If that means signing in to a launcher first, include the sign-in in the check. Wait until the game reaches the screen you picked for this group of seats. Move the mouse, use the keyboard and confirm that the game accepts input at that point.
Keep the finish line specific to the game. A list that says “opens” leaves room for one person to stop at the launcher and somebody else to wait for the lobby. Write “training range loads and movement works” if staff need to prove a player can take control there. If the venue expects guests to hear game audio through a headset, listen for a sound the game produces after the selected screen loads. The task is easier to repeat when staff know which sound they are listening for.
A launcher that starts an update is still in progress. Wait for the update if your operating schedule allows, then open the game again and verify the agreed finish point. If a title stops at a sign-in or initialization message, copy the text into the seat record with the name of the game. When the account can open the same game at another seat, note that result too. It gives the person investigating a useful comparison.
Check each title specifically promised for the group. An esports venue preparing a reserved row for a single tournament can keep the required list short. A section that takes walk-in bookings for several titles may need a different list. Use the titles the venue has agreed to make available at opening and mark each individual result. A pass on one game tells the floor lead exactly which game was checked.
For a reserved event, ask the organizer whether the test account needs access to a private lobby or a specific game mode. Arrange the account and the test time before the room is due to open. A game can present its main menu while the event’s intended mode still needs a separate sign-in or invitation. Put that last step on the booking sheet where the floor team can see it.
Use the same procedure when a Windows image revision changes the startup experience for these seats. Record the image revision alongside the game result. If staff retest after a correction, repeat the steps from the usual sign-in through the same game screen. That leaves a result the opening lead can compare with the earlier record.
Repeat the Check With the Group Online
A group of gaming PCs ready for a simultaneous boot check
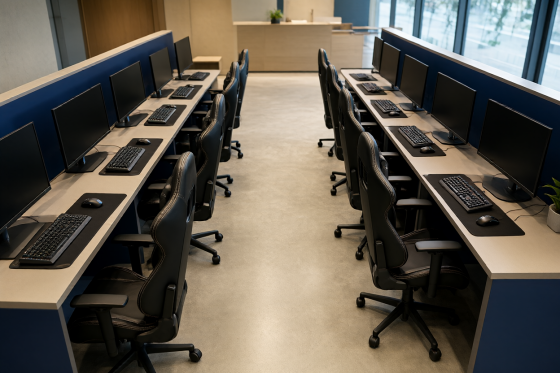
Plan this pass around the batch staff will actually start together. If the opening routine brings up one zone at a time, use one zone. If a tournament handover calls for a whole reserved row to come up together, include every PC in that row. Use an agreed start signal and follow the usual startup sequence at each desk. Staff can divide the row and use the same checkpoints so no seat gets skipped.
Write down which PCs reach Windows, which reach the game checkpoint, and where the rest stop. A seat that passes when powered on alone but stalls in the group needs a note describing both results. If the rest of the row reaches Windows while two seats remain at network startup, those two seat numbers are the place to begin. A whole row stopping at the same screen is a different observation and is worth recording as one group result with the member seats listed.
Choose any time allowance before the test, based on the room’s opening schedule. One venue might turn seats on before doors open. Another may need them ready between consecutive events. Record whether the batch was ready by your own deadline. That gives staff a clear outcome to repeat the next time the group changes.
If you download CCBoot for an acceptance test, use the same group list after each change you want to verify. Keep the image and game requirements on the sheet. Staff can then run the same checks on the same seats and see which result changed. Mark the completed batch on the floor plan or the record that the opening shift already uses.
If staff open several zones in succession, record which zone was already running when the next one started. That detail helps the closing shift recreate the same conditions on the PXE boot solution if it has to repeat the check. Keep the observation in the batch record, where it applies to every seat in the test.
Record Seats That Need a Retest
Give each seat in the PXE boot solution its own line. Record the expected image, the stage reached, and who owns the next check. A pending game check should specify the game and the point where it stopped. If someone else takes over, they can start by confirming that point and then repeat the full path for sign-off.
Seat | Expected image | Results or first failure | Retest owner and outcome |
B-07 (example) | Main Floor | Boot pass / Windows pass / game pending at sign-in | Opening technician / pending |
______ | ______ | Boot ___ / Windows ___ / game ___ | ______ |
______ | ______ | Boot ___ / Windows ___ / game ___ | ______ |
Keep the original observation beside the retest result. “Lobby reached after retest” makes sense alongside the earlier message, the game name and whatever was changed on that PC. If the change applies to an entire group, list the seats affected. Add a name or initials and the retest date so the person assigning seats knows which entry is current.
The final list can show either a group approved for opening or a smaller set of approved seats with the others marked pending. When a group is reserved for a tournament, confirm how many approved seats the booking requires. Leave the roster with the person assigning seats. If the project adds PCs to the floor, check the current CCBoot per-PC licensing when you confirm the seat count.
Opening Sign-Off
Check the opening sheet before assigning seats.
· Confirm the group and the seat numbers on the sheet.
· Verify that each approved PC booted over the network and reached Windows on the assigned image.
· Confirm that each approved PC reached the agreed checkpoint in its required games.
· Record the result with the group started together.
· Mark pending seats on the floor plan and name the person handling retests.
· Record who approved the group and when.
File the sheet with the image revision and group name. At the next opening, staff will have a record of what the PXE boot solution delivered at each seat and where to resume if a check is still pending.