Wiki Home Update Image and Game Reduce Image File Size
Reduce Image File Size
2016/07/14 00:42
Notice: This wiki is for the old version CCBoot. Please click HERE to access the new version wiki
When the image package is updated and merged for many times, the image files are becoming bigger and bigger. So what to do when it gets big.
1. The first method is to upload the image again.
1) Diskless boot one of the PC, Example "PC101".
2) In PC101, run the CCBootClient.exe program.
3) It will pop up the "CCBoot Client" dialogue box, enter the CCBoot server IP address in the "Server IP Address" edition box, and enter a new image file name in the "Image File Name" edition box, and enter the new image size. For now 100GB, and then click the "Upload Image" button (Figure 1).

Figure 1
4) It will ask you to enter password, just enter the password you set in the CCBoot Server UI.
5) Once the upload is complete the new image file is a smaller than your previous image file.
2. The second method is to use GHOST software, to copy over the image again.
The following operations are needed in the Win2008 operating system. The specific steps are as follows:
1) Firstly you need to take the "Merge Image" operation for the image which needs slimming. For details, please refer to "How to Merge Image".
2) Assume the name of the image file which needs slimming as XP.VHD
3) Copy the XP.VHD, named OLD.VHD.
4) Open the "Server Manager" window, expand the "Storage" node, right-click the "Disk Manager", click the "Attach VHD" (Figure 1‑5).
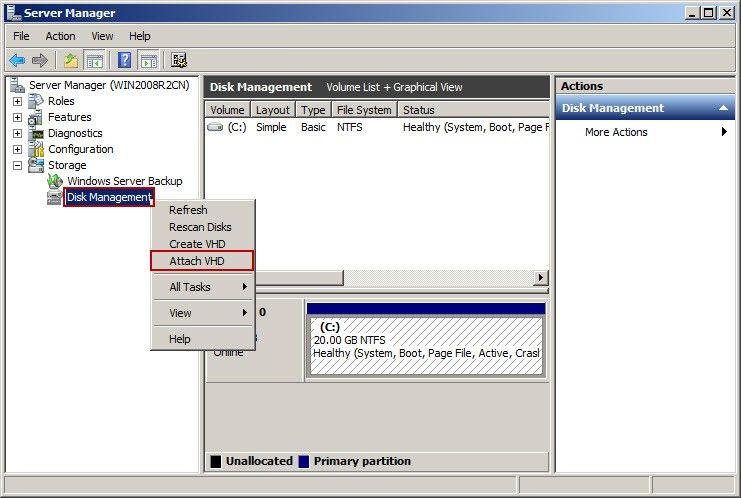
Figure 1‑5
5) In the pop-up "Attach Virtual Hard Disk" dialogue box, click the "Browse" button, select the OLD.VHD file (Figure 1‑6).
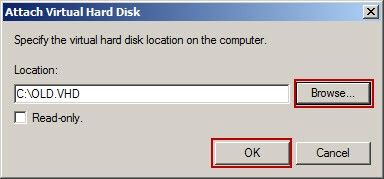
Figure 1‑6
6) Open the "Server Manager" window, expand the "Storage" node, right-click the "Disk Manager", and click to select the "Create VHD" (Figure 1‑7).
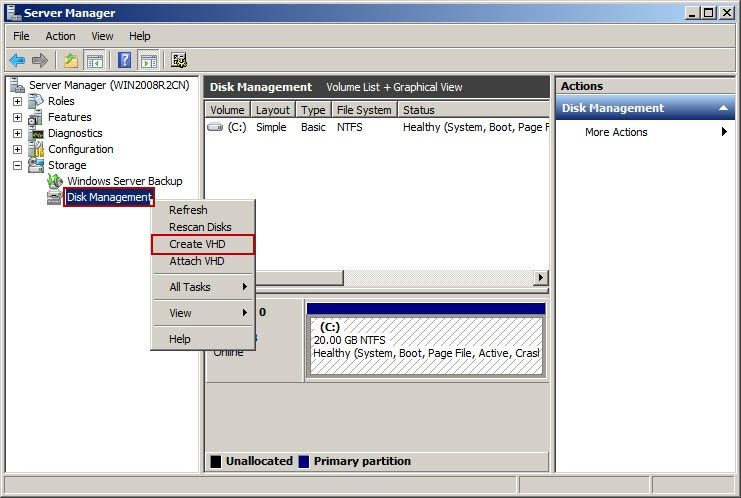
Figure 1‑7
7) In the pop-up "Create and Attach Virtual Hard Disk" dialogue box, create a virtual disk which has the same size of the original image disk, named NEW.VHD; select "Dynamically expanding" and click the button, and then click "OK" button (Figure 1‑8).

Figure 1‑8
8) Right-click the "NEW.VHD" and then click the "Initialize Disk" to activate the disk (Figure 1‑9).
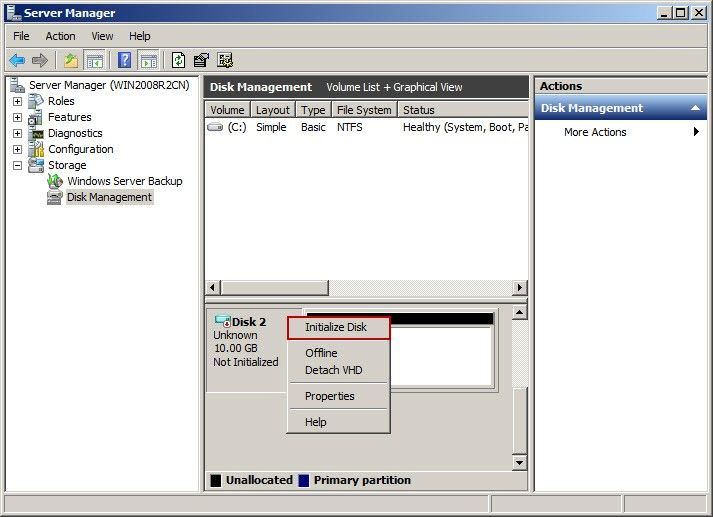
Figure 1‑9
9) In the disk manager, there are two disks with blue icons. The first disk is OLD.VHD, and the second disk is NEW.VHD (Figure 1‑10).
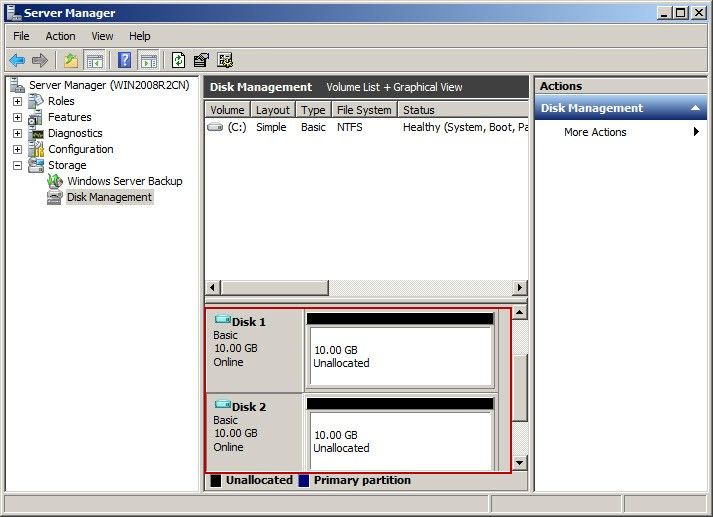
Figure 1‑10
10) Run the GHOST32.EXE program.
11) Local>Disk>To Disk, make the OLD.VHD corresponding to the disk copy to the NEW.VHD corresponding to the disk. After the copy is completed, does not restart the machine, Please select the "Continue", and the GHOST program withdraw from the normal procedures (Figure 1‑11).
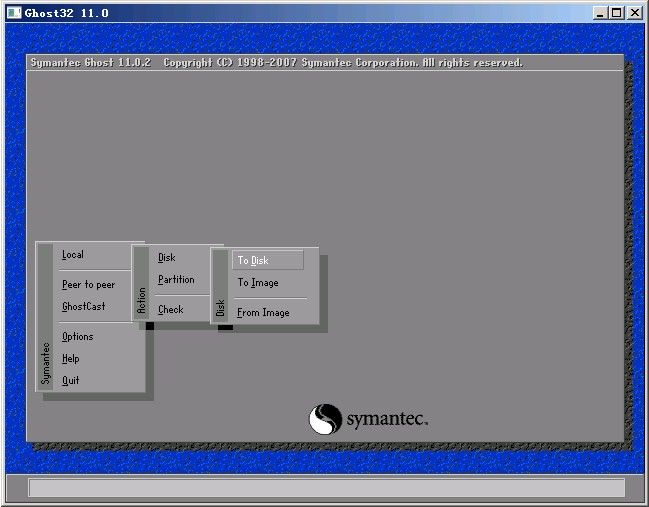
Figure 1‑11
12) In the "Server Manager" window, expand the "Storage" node, click the "Disk Manager", and then right-click the NEW.VHD, select the "Mark Partition as Active", to mark NEW.VHD as the active partition (Figure 1‑12).
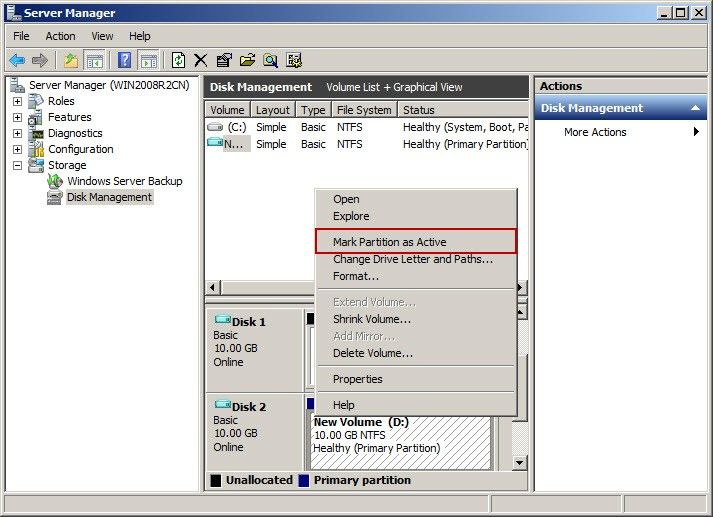
Figure 1‑12
13) Right-click the NEW.VHD disk, select the "Detach VHD." (Figure 1‑13).
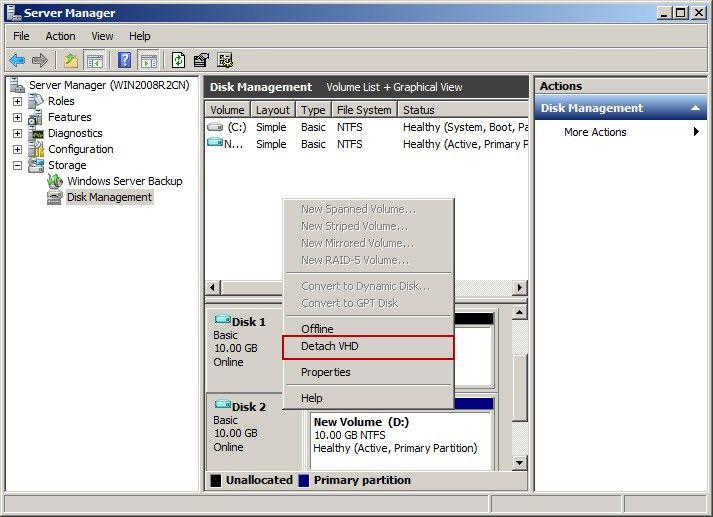
Figure 1‑13
14) In the pop-up "Detach Virtual Hard Disk" dialogue box, do not select the "Delete the virtual hard disk file after removing the disk", then click "OK" button (Figure 1‑14).
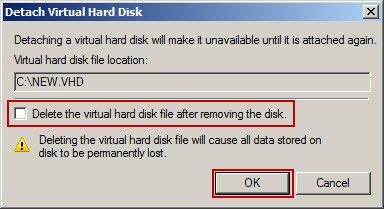
Figure 1‑14
15) Thus, NEW.VHD is a slimmed-down VHD file.