Wiki Home Create Boot Image Install Windows 7/10 in single partition
Install Windows 7/10 in single partition
2020/08/15 00:23
Notice: This wiki is for the old version CCBoot. Please click HERE to access the new version wiki
1. Boot your client PC with a bootable USB drive or DVD.
2. Let it load and get this the install screen (Figure 1).
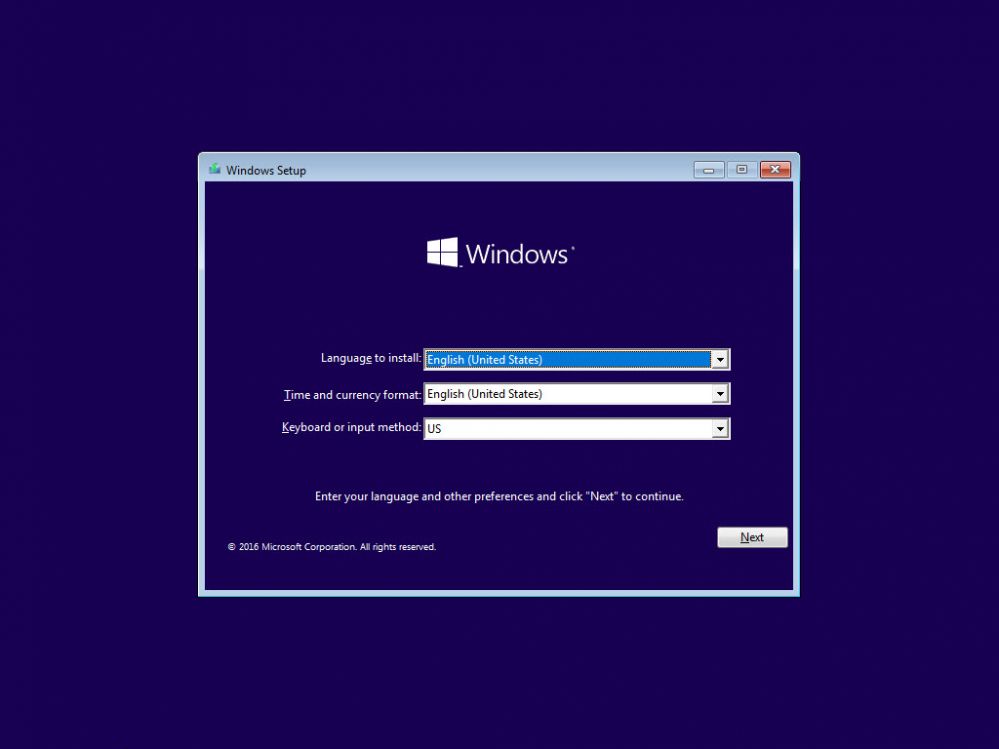
Figure 1
3. Press "Shift + F10" to open command prompt (Figure 2).
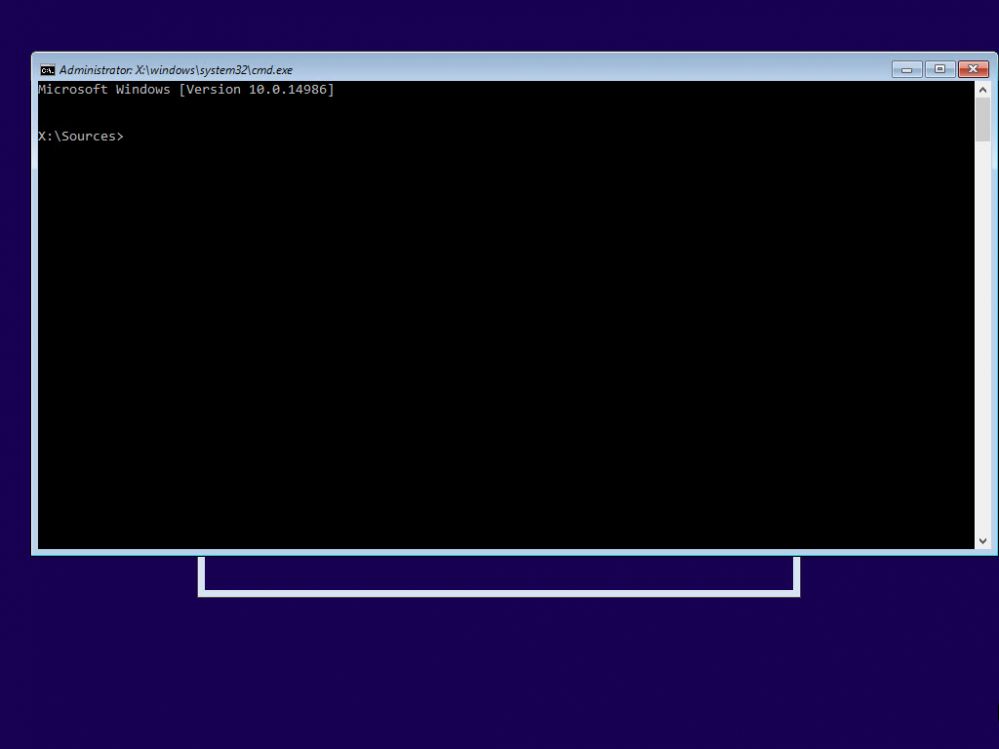
Figure 2
4. Now, open disk part by typing "diskpart" and press enter (Figure 3).
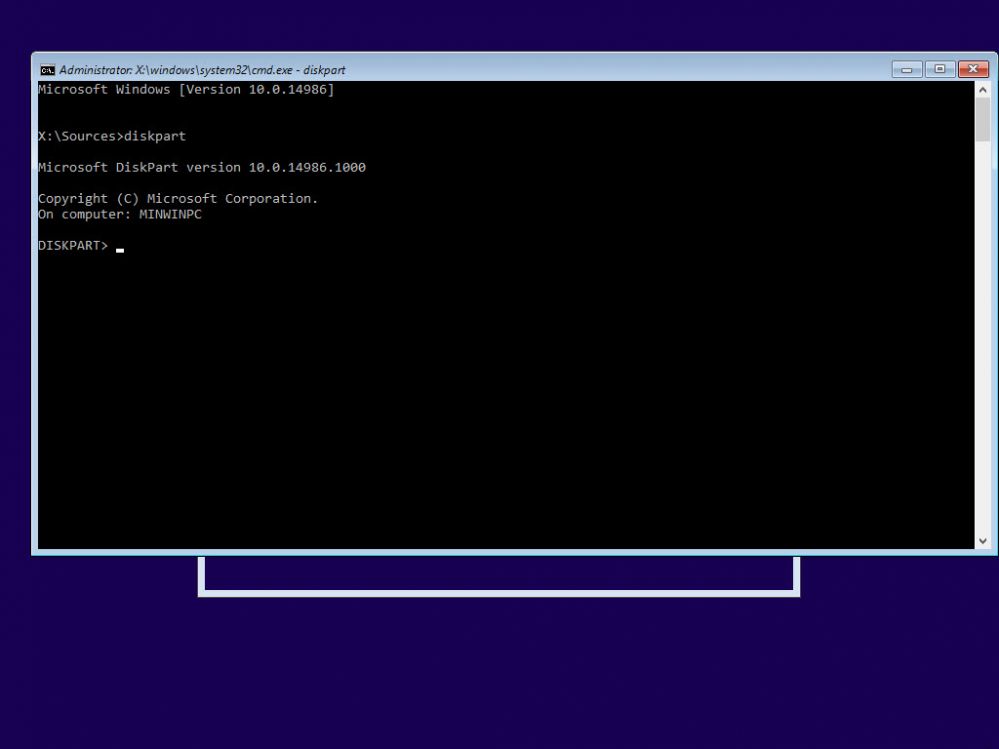
Figure 3
5. Now, type "list disk" to show the harddisk connected to the client PC (Figure 4).
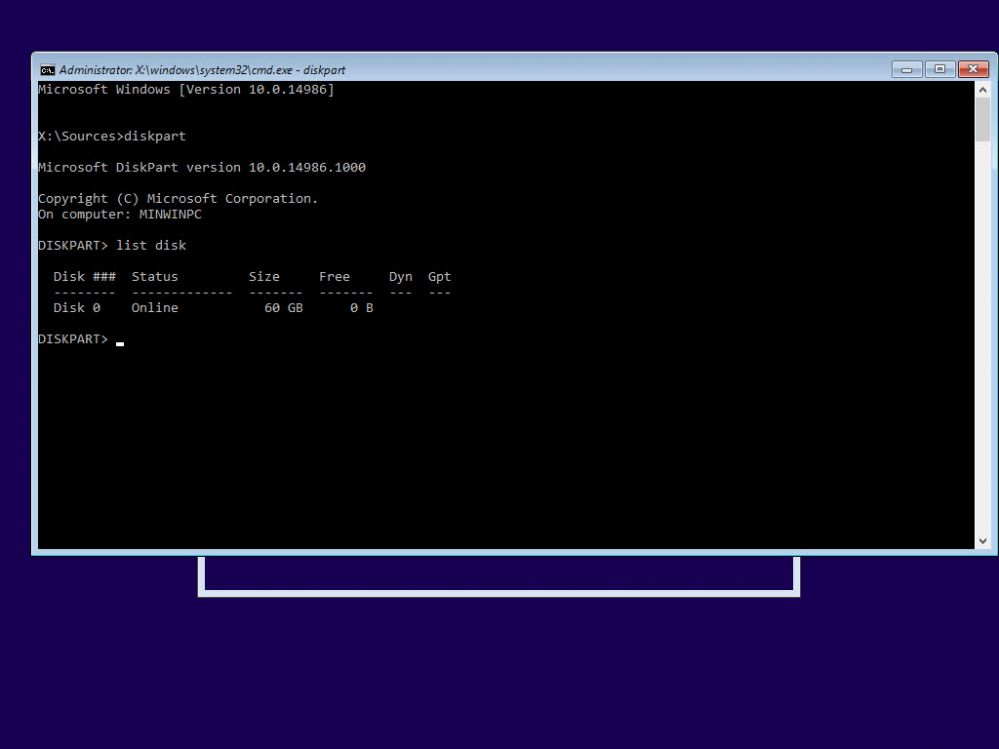
Figure 4
6. Here, you can see we only have 1 disk connected, so lets choose it using "select disk 0" (Figure 5).
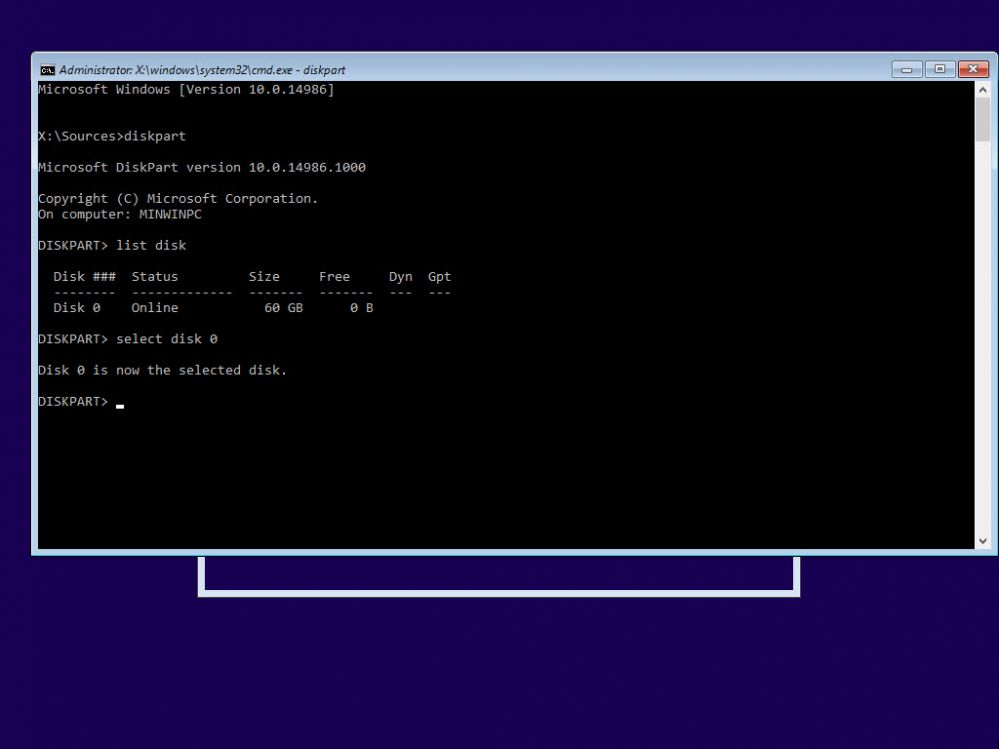
Figure 5
7. As you saw in the image above. the disk already has a partition, if you had other OS before, then you can remove it with "clean" command and convert to MBR if its GPT (Figure 6).
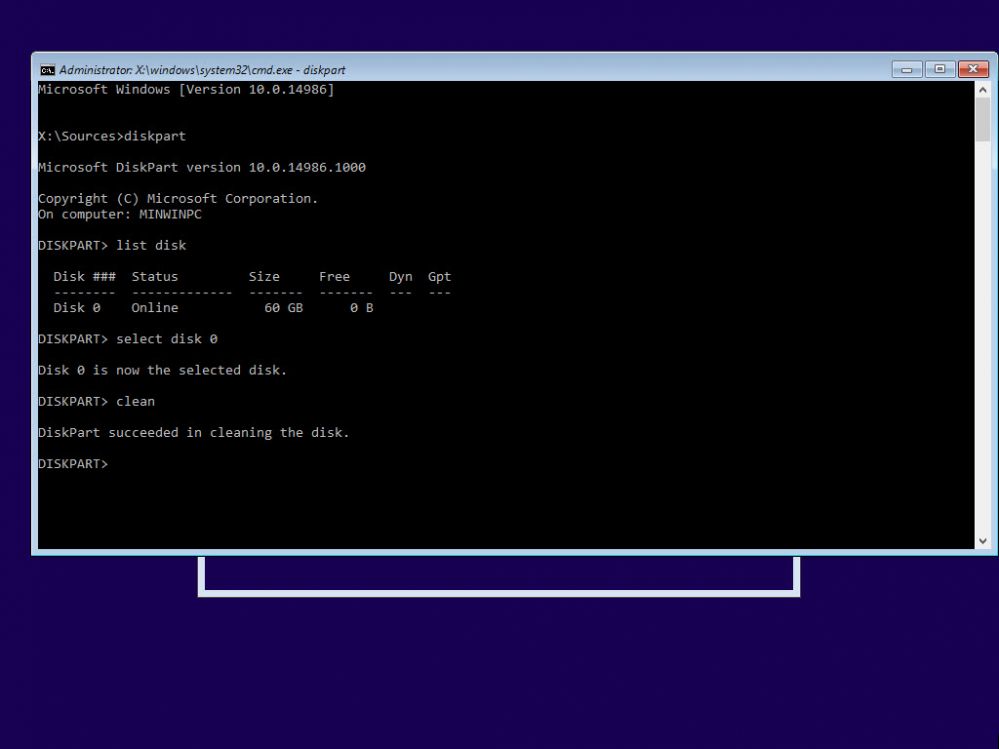
Figure 6
8. Now, lets create a primary partition to install windows in. Type "create part primary" and press enter (Figure 7)
Note: "create part primary" will use all the space of the disk to create a partition.
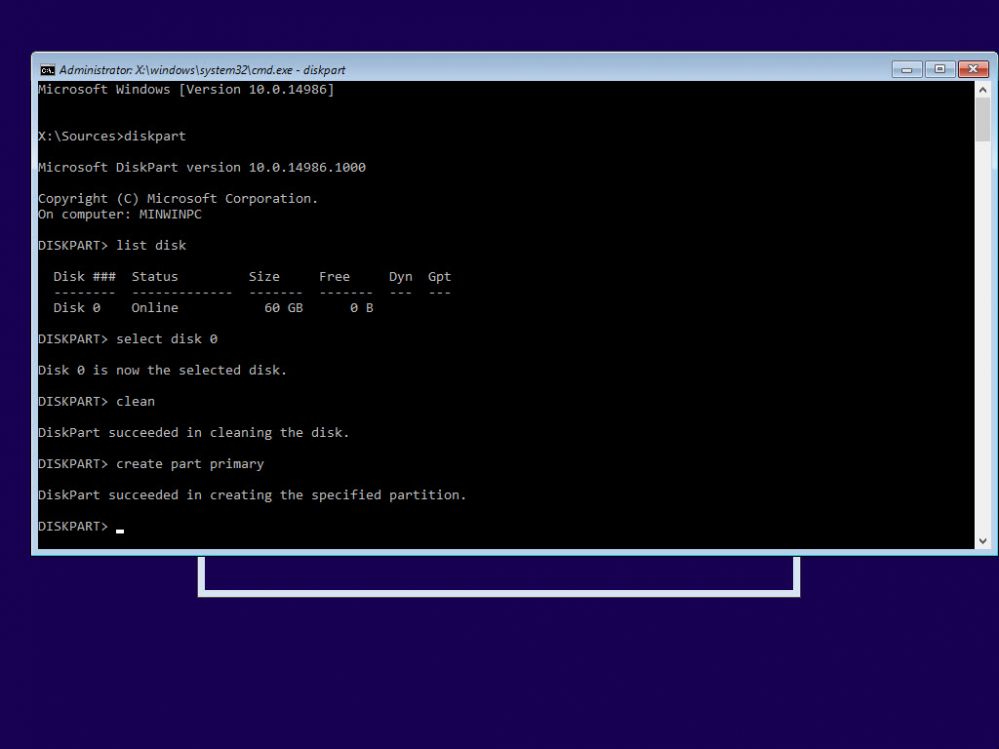
Figure 7
9. Let's check the partition is created or not using "list vol" command (Figure 8)
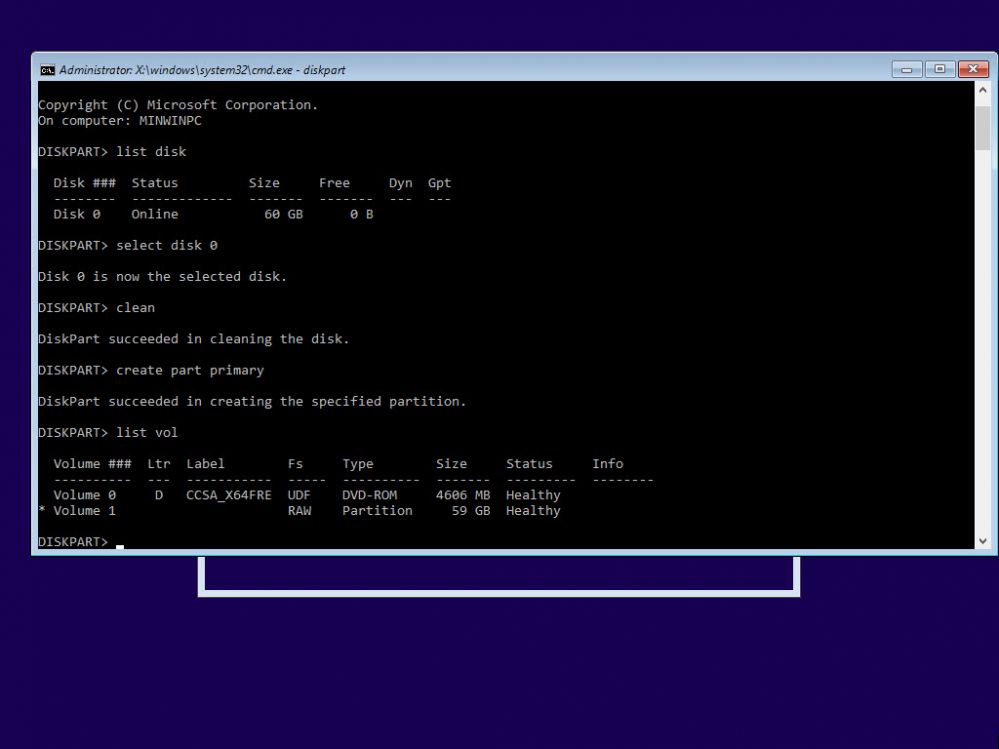
Figure 8
10. To format the newly created partition, type "format fs=ntfs quick" and press enter (Figure 9)
Note: fs means file system, and quick makes the format process instant.
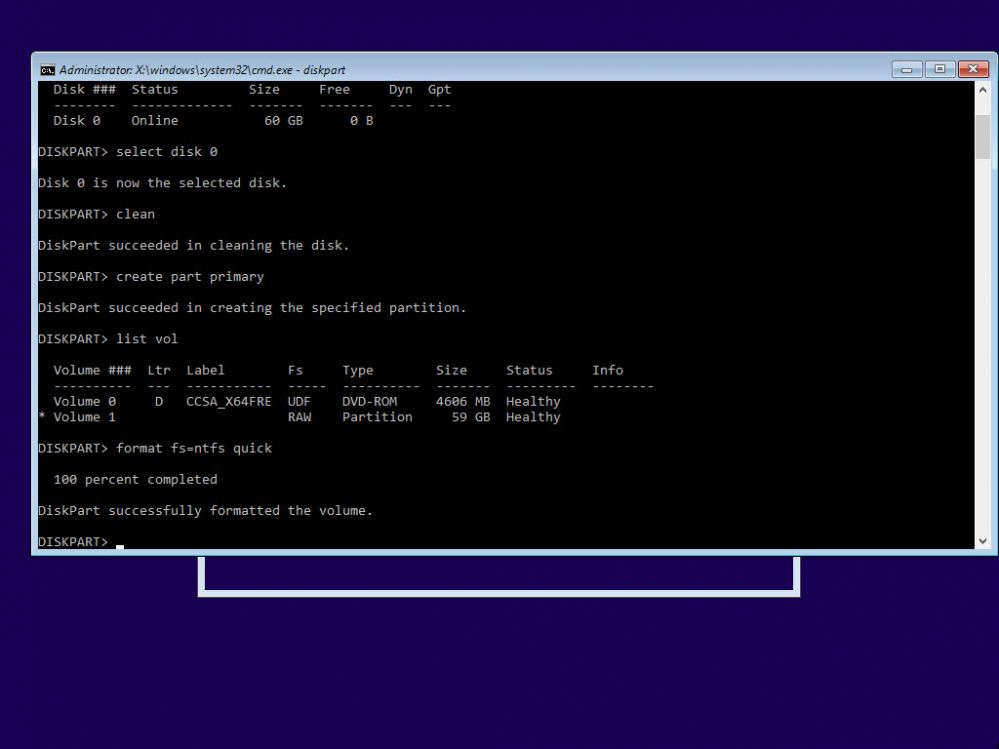
Figure 9
11. Now, exit the Disk part mode by typing "exit", then close the command prompt (Figure 10).
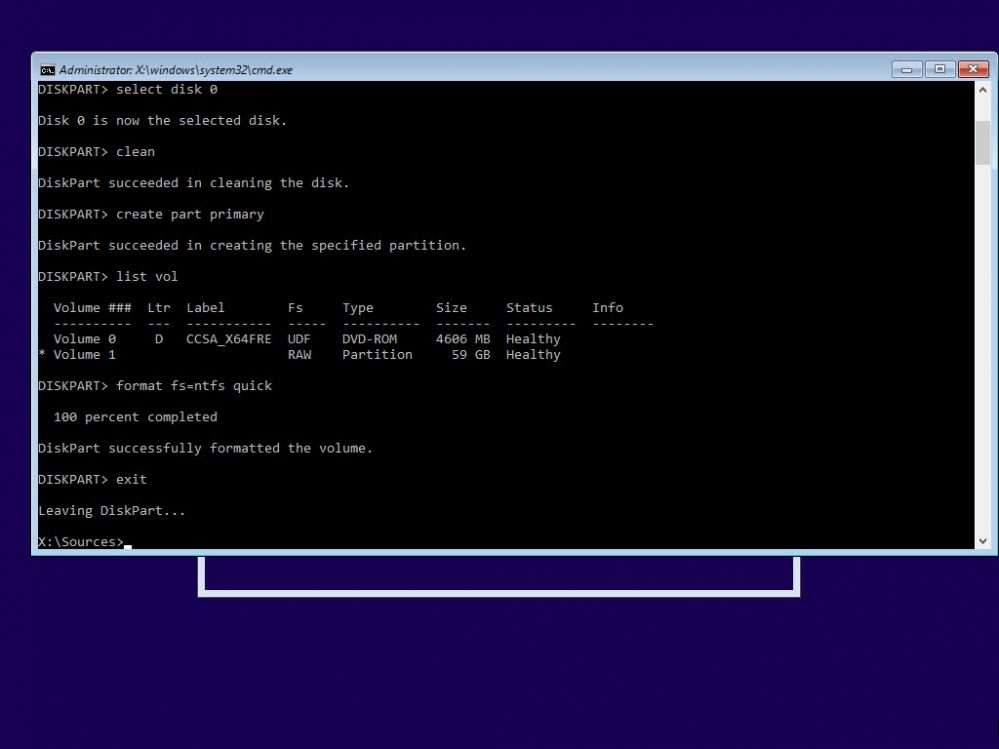
Figure 10
12. Continue the install process and once you are at "Where do you want to install Windows?" step, choose the newly created, formatted partition and click "Next" (Figure 11).
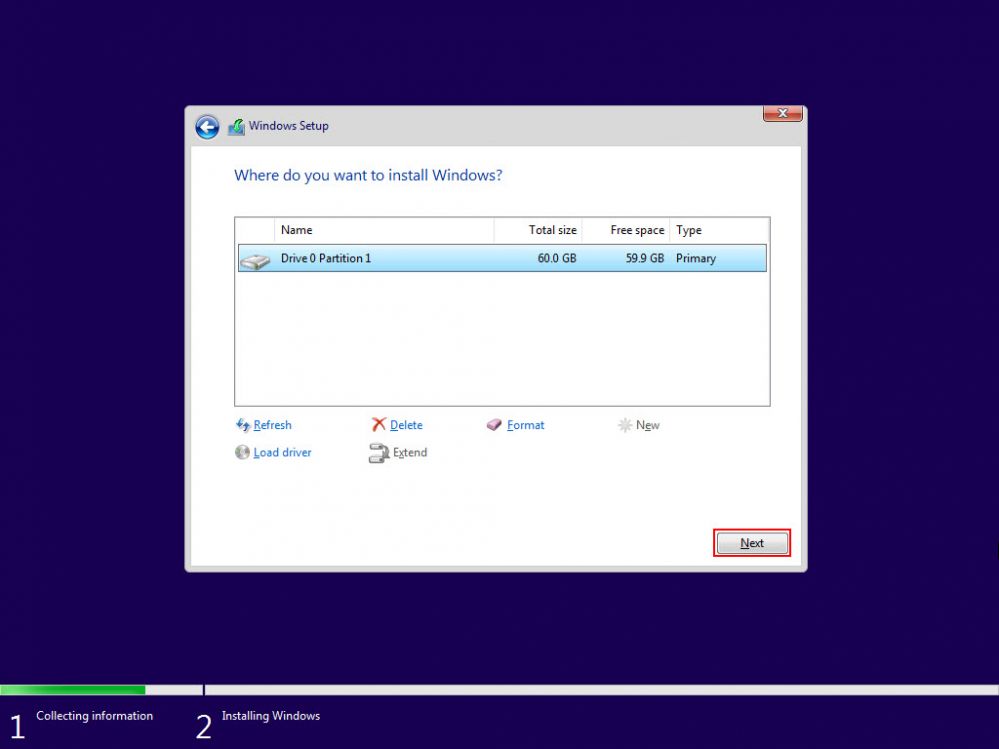
Figure 11