Wiki Home Client Manager Client Group Management
Client Group Management
2016/07/01 11:03
Notice: This wiki is for the old version CCBoot. Please click HERE to access the new version wiki
CCBoot client group is used to make it easy to distinguish when you have many different specification clients. There are no group properties yet. For example, you have AM1 and Normal PCs on your iCafe, and you want to check the clients easily.
You can define additional group - Ex. AM1.
After you have created "Client Group" you can assign the clients to it. By default, all clients are in the "Default" group.
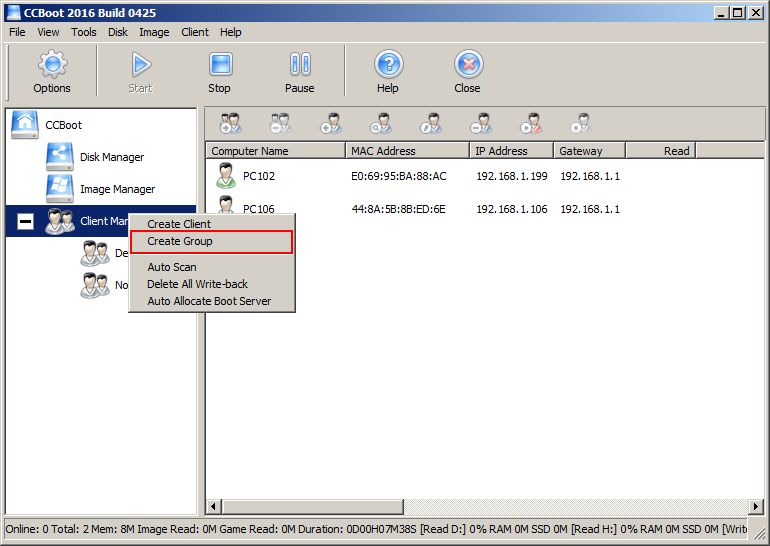
1. On the CCBoot main interface, right click the "Client Manager" and choose "Create Group" to create a new client group.
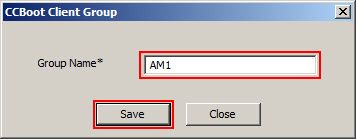
2. Type in the name of the group, here ‘AM1’ popup dialog box, click "Save" button.
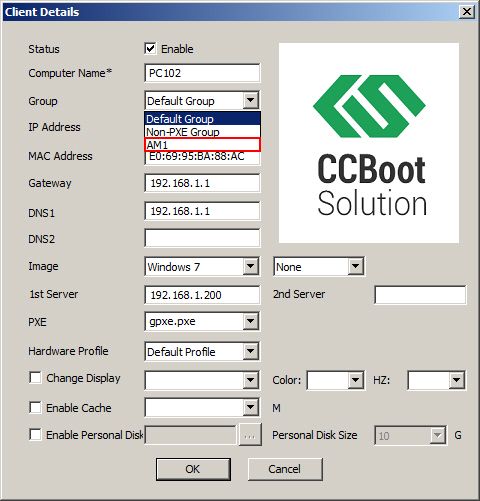
4. Once the group is selected, click "OK: to save the settings. Note. A client can only be in on group at any time.
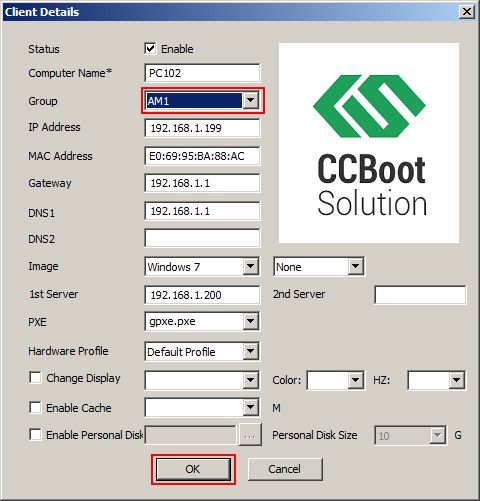
5. Now, if you click of the “AM1” group, you will see the client you just assigned to this group.
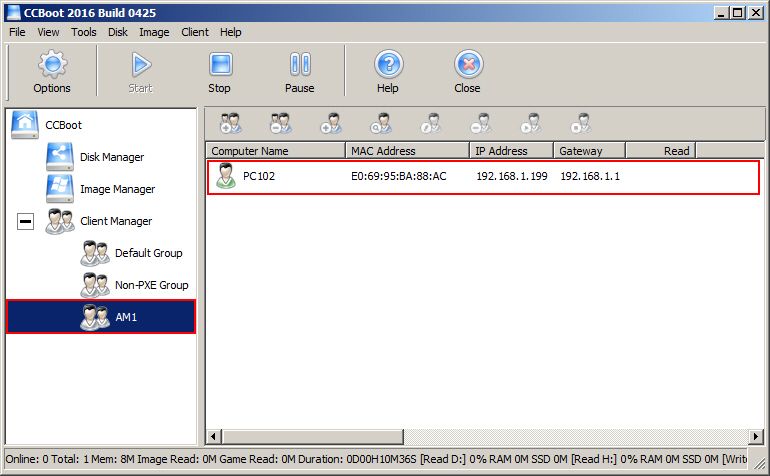
Figure 1-5
6. If you want to remove the clients from one group, then open “Client Details” dialog box of the client and the change the group to “Default”, it will be removed from other group now. Click “OK” to save the settings.

Figure 1-6
Related:
Using super image to boot clients
Create Client Image with Dual NICs
Fix RTX Graphics card shows black screen on client