Wiki Home Performance Optimization Super Cache Installation
Super Cache Installation
2018/06/02 04:33
Notice: This wiki is for the old version CCBoot. Please click HERE to access the new version wiki
In some cases, you have to use super cache. For details, please refer to the article "Why You Need to Use Super Cache".
1) Download SuperCache, and install it.
2) Click the "Start" button, and enter "cmd" in the "Run" edit box. Right click "cmd", and click the "Run as administrator" (Figure 1‑1).

Figure 1‑1
3) In the pop-up "Command Line" window, enter "bcdedit /set testsigning on", and then press the "Enter" button (Figure 1‑2).

Figure 1‑2
4) Double click "SuperSpeed SuperCacheServer X64 5.1.885.exe" file, and then it will pop up "SuperCache 5 for Servers - Installed Wizard" dialog box (Figure 1‑3).

Figure 1-3
5) Click the "Next" button (Figure 1-4).

Figure 1-4
6) In the pop up pop up "License Agreement" dialog box, click the "I accept the terms in the license agreement" radio button, and then click the "Next" button (Figure 1-5).

Figure 1-5
7) In the pop up "Destination Folder" dialog box, click the "Next" button (Figure 1-6).

Figure 1-6
8) In the pop up "Ready to Install the Program" dialog box, click the "Install" button (Figure 1-7).

Figure 1-7
9) Installing SuperCache 5 for servers (Figure 1-8).
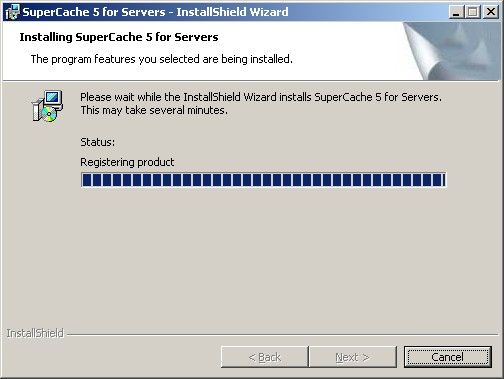
Figure 1-8
10) In the pop up the "InstallShield Wizard Completed" dialog box, click the "Finish" button (Figure 1-9).

Figure 1-9
11) In the pop up "SuperCache 5 for Servers Installer Information" dialog box, click the "Yes" button to restart the computer (Figure 1-10).

Figure 1-10
12) Double click the "Keygen.exe" file (Figure 1-11).

Figure 1-11
13) It will pop up "SuperSpeed LLC Products' Patch&Keygen" dialog box. Click the "Products" combo box, and select "SuperCache". Click the "Patch" combo box, and select "64 Bit". And then click the "Patch" button (Figure 1-12).
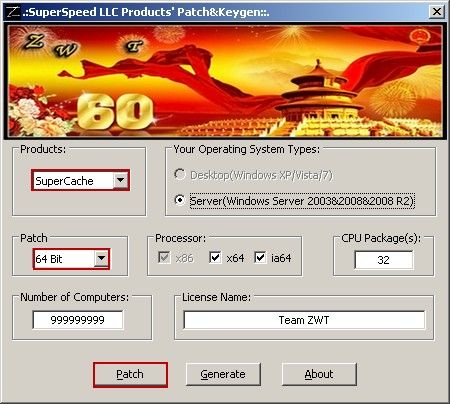
Figure 1-12
14) In the pop up "Patch Succeed!" dialog box, click the "OK" button (Figure 1-13).

Figure 1-13
15) Click the "Generate" button to generate a license key file (Figure 1-14).

Figure 1-14
16) In the pop up "Success!" dialog box, click the "OK" button (Figure 1-15).

Figure 1-15
17) The license key file was generated (Figure 1-16).
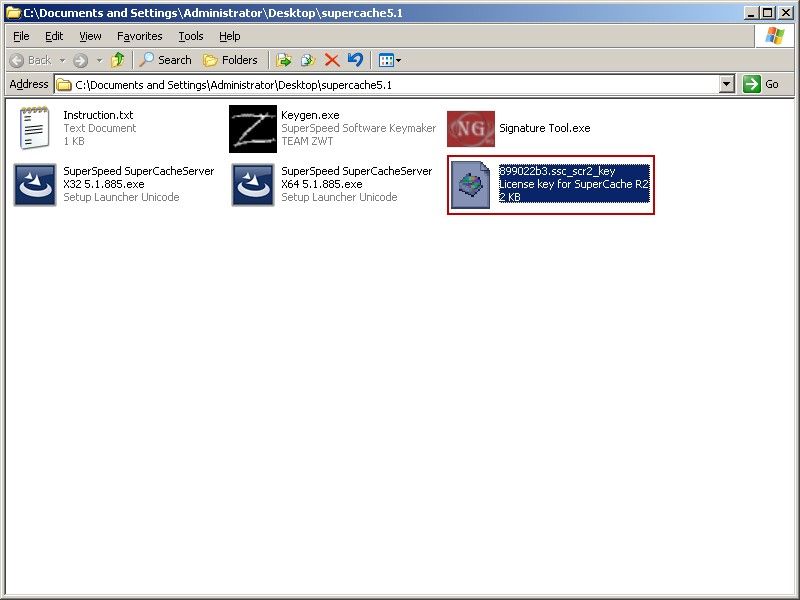
Figure 1-16
18) Double click the "Signature Tool.exe" file. In the pop up "Driver Signature Enforcement Overrider" dialog box, click the "Next" button (Figure 1-17).
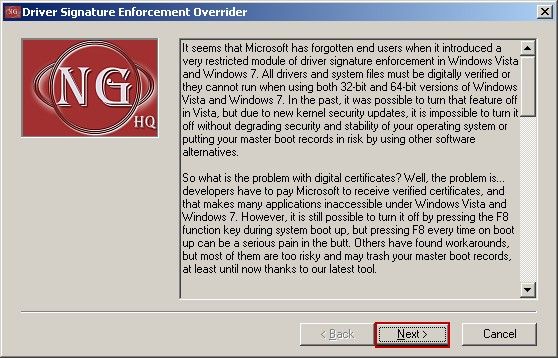
Figure 1-17
19) In the pop up "Software License Agreement" dialog box, click the "Yes" button (Figure 1-18).

Figure 1-18
20) In the pop up "Driver Signature Enforcement Overrider" dialog box, click the "Sign a System File" radio button, and then click the "Next" button (Figure 1-19).

Figure 1-19
21) In the pop up "Insert filename" dialog box, type "C:\Windows\System32\Drivers\sscvf.sys" into the edit box, and then click the "OK" button (Figure 1-20).

Figure 1-20
22) In the pop up "Done" dialog box, click the "OK" button to restart the computer (Figure 1-21).

Figure 1-21
23) Double click the "899022b3.ssc_scr2_key" file. It will pop up the "Update License for SuperCache" dialog box. Click the "OK" button (Figure 1-22).

Figure 1-22
24) In the pop up "Update License" dialog box, click the "OK" button (Figure 1-23).

Figure 1-23
25) Right click "Local Disk (C:)" button to select "Properties" (Figure 1-24).

Figure 1-24
26) In the pop up "Local Disk (C:) Properties" dialogue box, click the "Super Cache" tab, and then click the "Cache" button (Figure 1‑25).

Figure 1-25
27) In the pop up "SuperCache on" dialogue box, click the "Start" button.
28) In the pop up "Start SuperCache on" dialogue box, select the "Deferred-Write Mode" check box, and then set the "Cache granularity (page size)" as 32KB. Use the down arrow of the keyboard to adjust "Main Memory Allocation" to its minimum value (When it pops up the "vfvfgDlgs" dialog box, click the "No" button, then you can get the minimum value) (Figure 1-26).

Figure 1-26
29) After completing the adjustment of the parameters, click the "OK" button. And you can use the same way to set other write-back disk.
Note: If there is old version, you have to delete it first, and delete the configuration file at the same time.