2024-06-22
payment, add, pcs
The following explains how to add or remove PCs from your existing license and complete the purchase on the official website linked to your subscription plan.
Steps for adding PCs
- Select "Renew: Choose the "renew" option on the website.
- Enter Current License: Find the "License" field and enter your current license details.
- Click Update: After entering your license information, click the "Update" button.
- Adjust PC Numbers:
- Look for the "PC numbers" field, which shows the current number of PCs covered by your license.
- Next to this field, click on the blue "Change PCs" icon to unlock and modify the number of PCs.
- Add or Remove PCs:
- Increase or decrease the number of PCs as needed.
- Click the "Update" button again to save your changes. The system will automatically recalculate the new pricing.
- Expiration Date Adjustment: The system will also adjust the expiration date based on the new number of PCs.
- Once the license is paid, auto-renewal will be canceled automatically.
Payment Details
- Adding PCs:
- If you add more PCs, you will pay for the total number of PCs .For example, if you add 2 more PCs to a 20 PC license, you will pay for 22 PCs for a month.
- Annual Subscription Mode:
- If you have an annual subscription and want to avoid paying the annual price for additional PCs, choose the monthly plan. This way, you can pay for the total number of PCs for just one month.
- The system will automatically calculate the remaining days of your license based on the new number of PCs.
Examples
- Adding PCs:
- Current License: 10 PCs, valid for 1 month.
- If you increase to 20 PCs, the expiration time will extend by an additional 0.5 months.
- Removing PCs:
- Current License: 20 PCs, valid for 1 month.
- If you decrease to 10 PCs, the expiration time will extend by an additional 2 months.
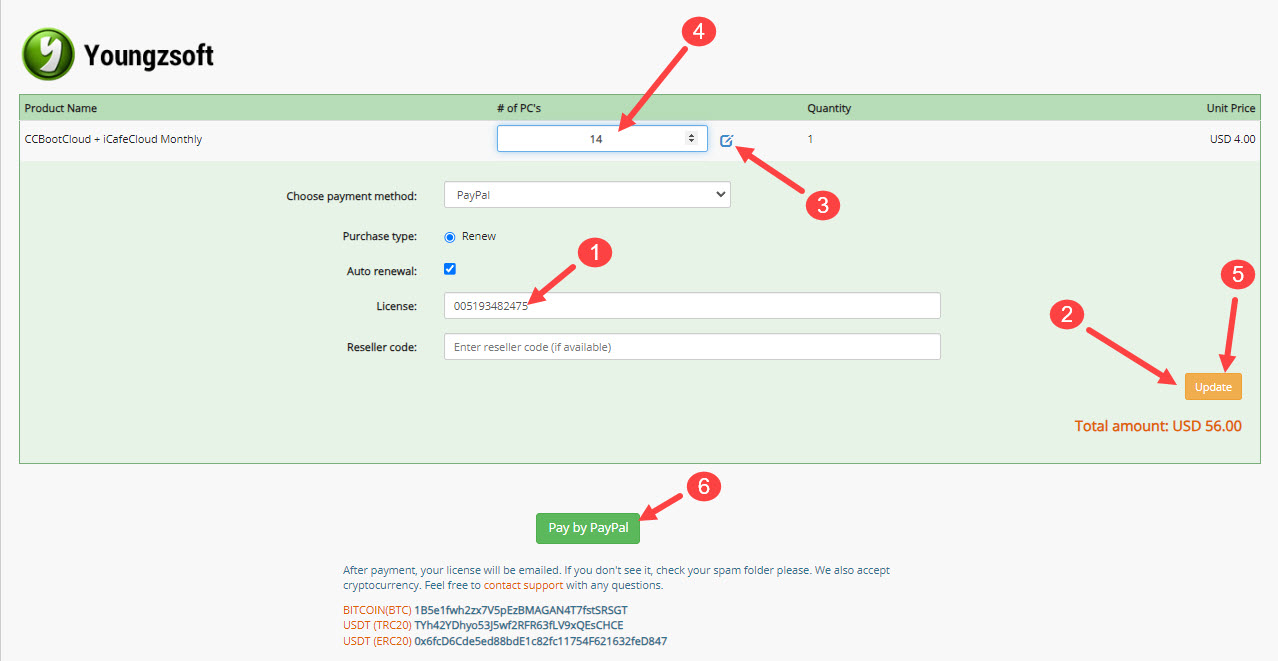
Figure 1
Update new PCs
- To apply the new license number after adding PCs to the system.
- Click Options and OK (Figure 1)
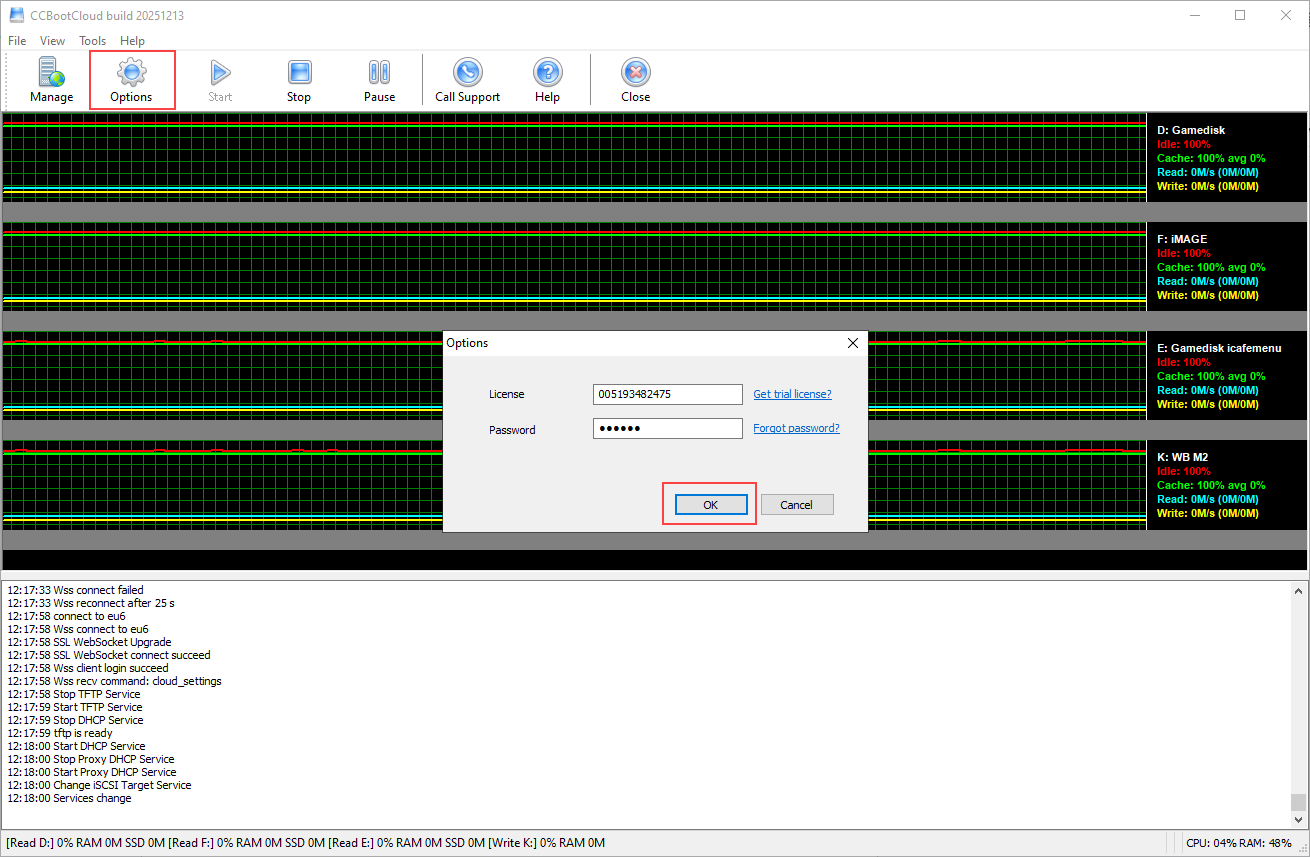
Figure 1
- If it still shows an incorrect PC number notification and you cannot boot the extra PCs.
- Go to the CCBootCloud Server.
- Click "Stop" and then "Start" to activate the new license number.
- Do not perform this process while client PCs are online, as it may cause service interruptions for those machines.