Wiki Home Update Image and Game Update Boot Image/Game Disk using Super Client
Update Boot Image/Game Disk using Super Client
2018/09/19 16:18
Notice: This wiki is for the old version CCBoot. Please click HERE to access the new version wiki
Important: Before you enable super client for any computer, please make sure that you have enough space free in the "Image Disk". To be safe, have atleast 10-20 GB free.
Important 2: When you disable super client but your changes are not saving, then you need to unmount any virtual harddisk attached on the server.
The issue is caused when you accidentally mounted the image file on server but didnot unmount it from the disk management.
Important 3: Some games require graphics drivers to be installed before you are able to run the game installer. So make sure the graphics drivers are installed first
Taking the client PC190 as an example, the operation steps are as follows:
Before updating, please backup image files. (For methods of backup image files, please refer to "Backup Image")
Watch the video : How to Update image and games in CCBoot
Note: When you have placed the client in super client mode - the client cache will be disabled and will not be enabled until you have disabled super client and saved the image and booted the client in normal mode.
1. On the main interface of the CCBoot, click the "Client Manager", and in the detailed pane on the right side, right click a client “PC 190”and choose “Enable Super Client”.
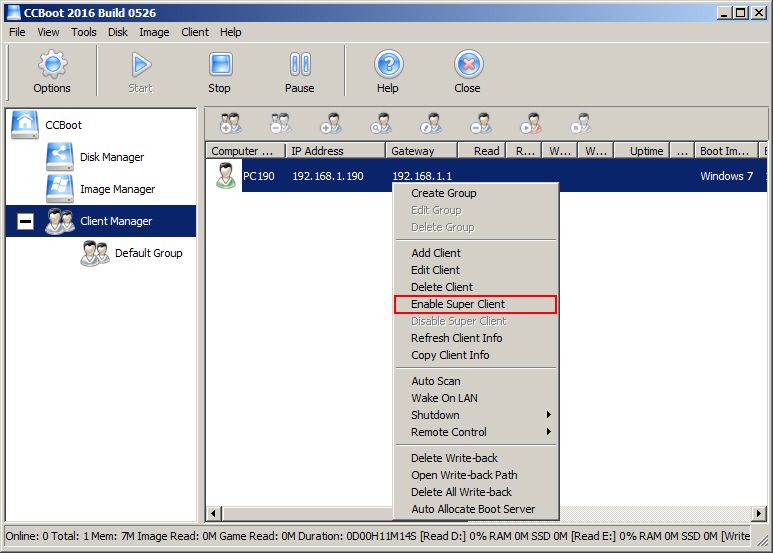
Figure 1-1
2. In the pop-up "CCBoot Select Disk" dialogue box, tick the disks you want to update and then click OK.
Note: Only check image disk if you want to make changes to the boot image. And tick game disk as well if you want to install/update games from client PC.
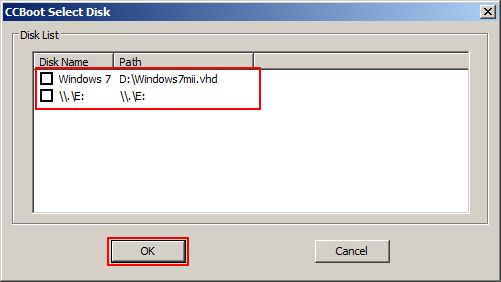
Figure 1-2
3. After you have selected the disks and clicked ok the client icon will change from green to Red . This mean the client is not “SuperClient”.
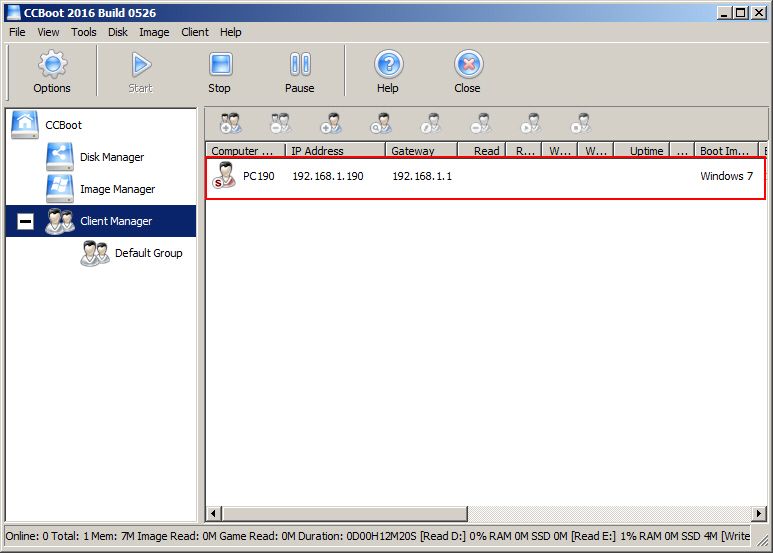
Figure 1-3
4. After you have selected the disks, boot the client and install/update it. After you are finished shutdown the client.
5. On the server right click the client “PC190” and choose ”Disable Super Client” Option.
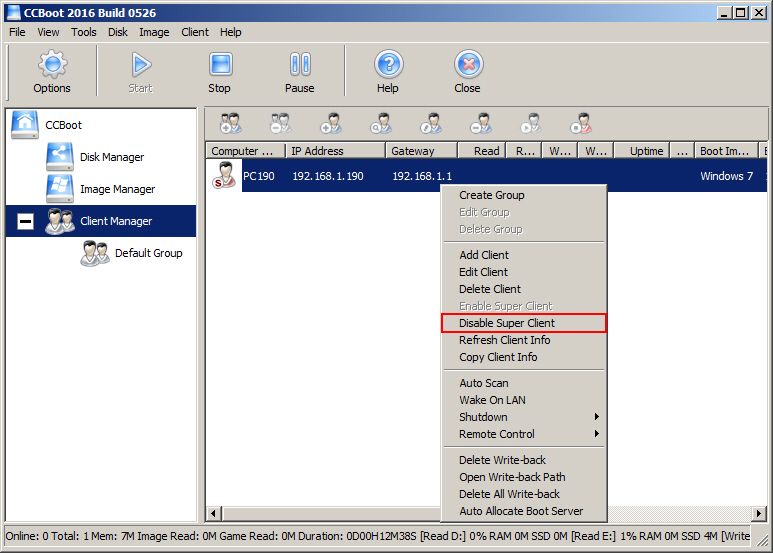
Figure 1-4
6. It will pop open another dialog box prompting you to update the image.
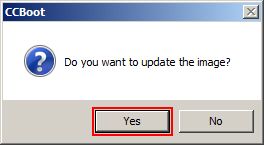
Figure 1-5
7. Choose “Yes” if you want to save the changes and “No” if you want to cancel the changes.If you chose “Yes” then another prompt will open asking you to make “Recovery point”.
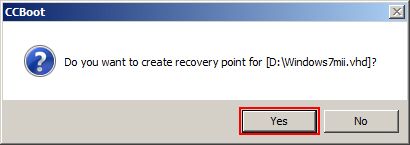
Figure 1-6
8. If you choose “No’ then no recovery points will be created. But if you chose “Yes:” then you will be prompted to enter recovery points description.
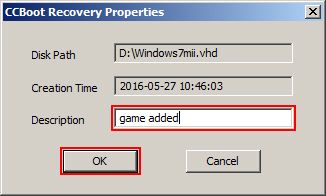
Figure 1-7
9. Once you click “OK” the update will start and show you the window below.
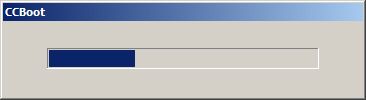
Figure 1-8
10. After update is complete it will show you a prompt with text “OK!”, just click the OK button to close it.
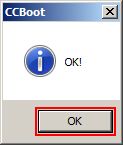
Figure 1-9
Note:
Enabling always the Super Client on Game Disk in the client PCs is not recommended, this is prone to affect with the virus. Since some of the customers are inserting a USB flash drive on the client PC, hence you have to avoid it.
But if you still wanted to Super Client the Game Disk always,
We recommend preparing separate PC just for the game update purposes and then follow this method CCBoot Used As Virtual Disk Game Server
Note: If the game icons are not showing up properly then please re configure the server and re set the SSD cache once to make the icons.
Note: If you have placed any client PC in superclient, then other clients may experience slow loading of games as well as boot time increased. To fix it, finish superclient and disabled it as soon.
Note: Please note that when you have put game disk in superclient mode, it will be locked in server to prevent the content from being changed. Which may lead to game file getting corrupted. Once you are done with superclient and have disabled it, the game disk will be accessible on server once again.