Wiki Home Disk Manager Add Game Disk
Add Game Disk
2016/05/09 12:26
Notice: This wiki is for the old version CCBoot. Please click HERE to access the new version wiki
1. Add Game Disk
Sometimes, in order to make it more conveniently for centralized management of games, we can share the game disk from CCBoot server to the clients. When you install games into the server game disk, you can get this disk and run games directly on the clients just like it is a local disk. In fact, the game disk on the client is a virtual disk, and it is a physical hard disk or a partition of CCBoot server.
1) Click "Add Disk" button and input the Disk Name and Description. (Note: Do not check "Bootable".)
2) Select "Volume" and choose a partition as the source of the virtual drive. (Note: We recommend to choose "Volume" other than "Physical". Because "Volume" is more stable than "Physical".) Click the "OK" button to save (Figure 1‑1).
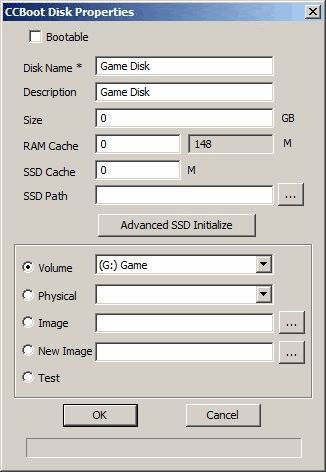
Figure 1‑1
2. Add Game Disk Group
1) On CCBoot tools bar, click the "Add Disk Group" button.
2) In the pop up "CCBoot Disk Group" dialog box, input the Disk Group Name and Disk Group Description, and then click the "OK" button (Figure 1‑2).
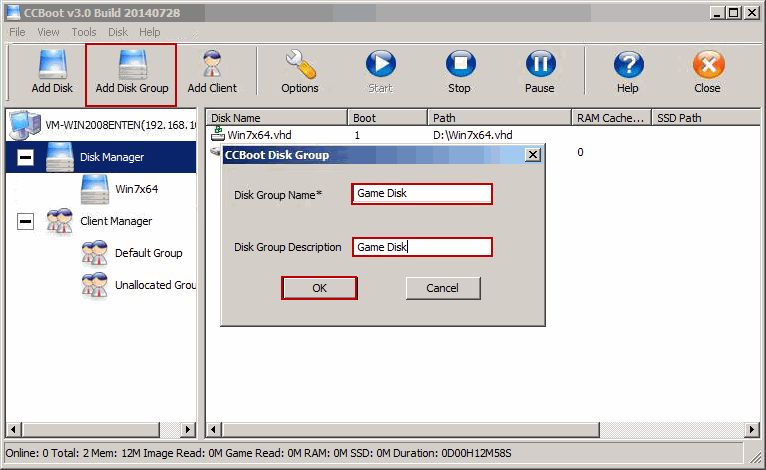
Figure 1‑2
3) In the pop up "Do you want to add disk to the disk group?" dialog box, click the "OK" button (Figure 1-3).
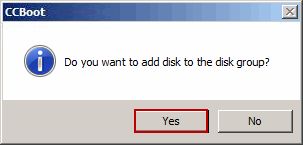
Figure 1-3
4) In the pop up "CCBoot Disk List" dialog box, select both of the Image Disk and Game Disk, and then click the "OK" button (Figure 1-4).
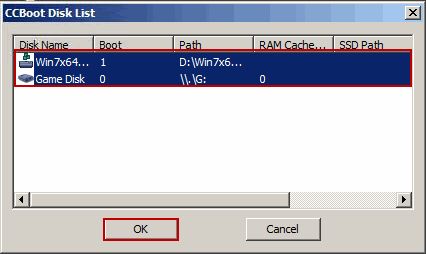
Figure 1-4
3. Game Disk Mapping
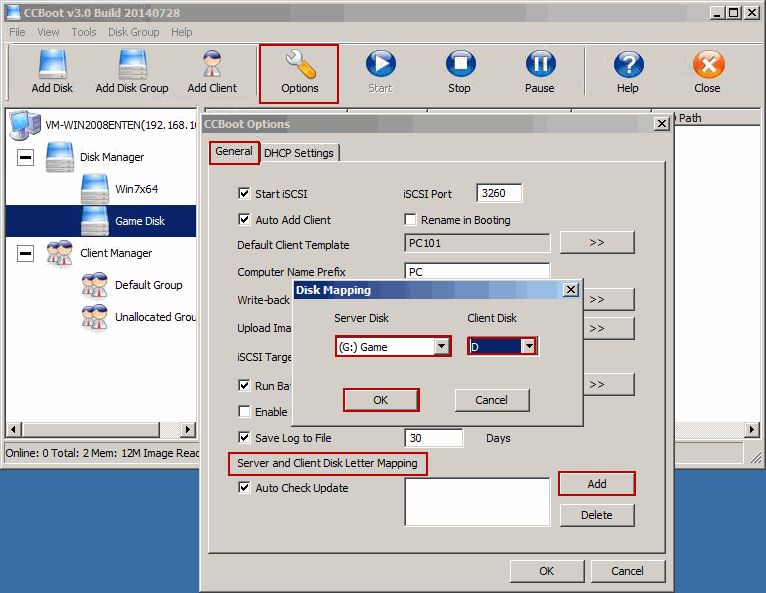
Figure 1-5
You can see the server and client disk letter mapped here (Figure 1-6).
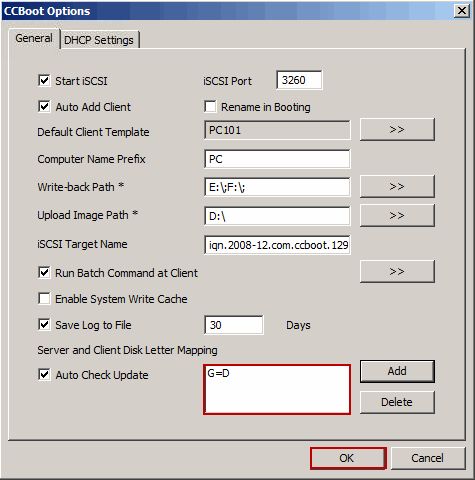
Figure 1-6
Related:
CCBoot Used As Virtual Disk Game Server