Wiki Home Update Image and Game Update Image by Save to Private
Update Image by Save to Private
2017/04/27 17:19
Notice: This wiki is for the old version CCBoot. Please click HERE to access the new version wiki
Note:
This feature is applicable only for CCBoot build 2012 to CCBoot build 20160201 only
If you are looking a “Save to Private” function in the latest build of CCBoot 2017, it was removed already and we change it to CCBoot Child Disk function, this function is much easier and stable to use.
Sometimes, we hope the image updating is valid only for a certain client. Taking the client PC101 as an example, the operation steps are as follows:
1) On the main interface of the CCBoot, click the "Client Manager", and then in the detailed pane on the right side, double-click the "PC101" (Figure 1‑1).

Figure 1‑1
2) In the pop-up "CCBoot Client" dialogue box, select the "Keep Write-back" check box, click the "Save" button (Figure 1‑2).

Figure 1‑2
3) In the pop-up "Do you want to delete write-back?" dialogue box, click the "Yes" button, then you can delete the "write-back" file (Figure 1‑3).

Figure 1‑3
4) Diskless boot the client PC101, and take the updating operations on the PC101. After the operation is completed, closes PC101.
5) On the main interface of the CCBoot, again double-click "PC101".
6) In the pop-up "CCBoot Client" dialogue box, click the "Save to Private" button (Figure 1‑4).

Figure 1‑4
7) In the pop-up "Do you want to save private?" dialogue box, click the "Yes" button (Figure 1‑5).
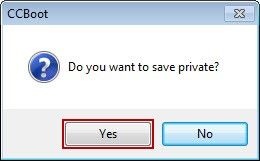
Figure 1‑5
8) Uncheck the "Keep write-back" check box, click the "Save" button.
9) This update is valid only for PC101.
Notes:
1) In "Do you want to save private" dialogue box, if you click "No" button, then the operation is not valid.
2) After the execution of storing packet operation, if you update the image, then the stored private packet will not be valid. Then you need to click the "Delete Private" button on the "CCBoot Client" dialogue box. After deleting the packet, then you can take the operation steps above again.