Wiki Home 3rd Party DHCP and TFTP CCBoot with pfsense 3rd Party DHCP
CCBoot with pfsense 3rd Party DHCP
2018/01/07 00:29
Notice: This wiki is for the old version CCBoot. Please click HERE to access the new version wiki
1. Open a browser and enter the IP address of your pfSense server. (Figure 1)

2. Login to pfSense using your credentials (Figure 2)

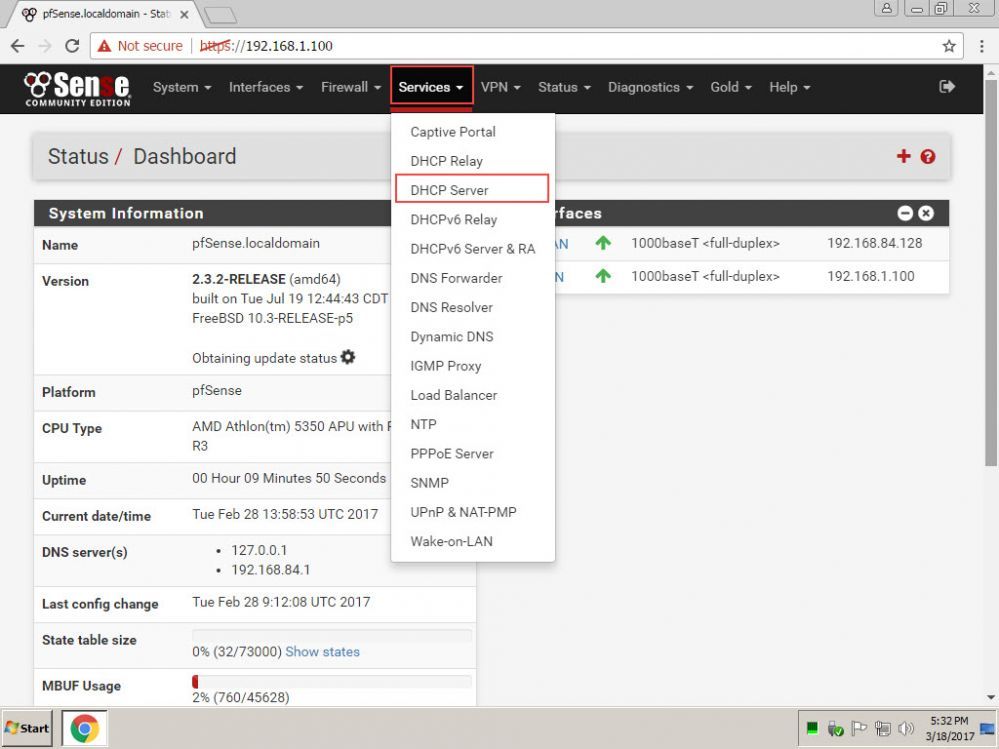
3. Click "Services" and choose "DHCP Server" (Figure 3)
4. Set the DHCP range, DNS servers and the Gateway for your clients and click the "Save" button at the bottom. (Figure 4)

5. On your CCBoot Server, open "Options", "DHCP Settings", select "Using 3rd Party DHCP" then click the "OK" button to save your settings. (Figure 5)

6. Boot up your clients, your clients will acquire their IP address from your pfSense server and will be listed in your CCBoot "Client Manager" (Figure 6)

7. You can also check the assigned IP of your clients in your pfSense server in "Status" - "DHCP Leases" (Figure 7)

Related:
Use Net Limiter on CCBoot client
Fix Windows 10 activation issue on CCBoot client
Update CCBoot older version to new