Wiki Home 3rd Party DHCP and TFTP Set the DHCP Client
Set the DHCP Client
2014/11/06 16:46
Notice: This wiki is for the old version CCBoot. Please click HERE to access the new version wiki
When the client is uploading images, if the value of "DHCP Enable" in the dialog box of "Network Connection Details" is "Yes", then you do not need to do the following settings (Figure 1‑1).
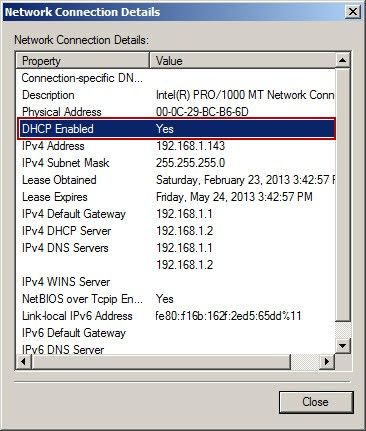
Figure 1‑1
If the value of "DHCP Enable" in the "Network Connection Details" dialog box is "NO", you need to do the following adjustments:
1) Use "super client" to diskless boot a client.
2) Confirm if the client DHCP service is on.
3) Click the "Start", type "services.msc" in the "Run" edit box, and then press enter.
4) In the "Services" window, double-click the "DHCP Client" (Figure 1‑2).
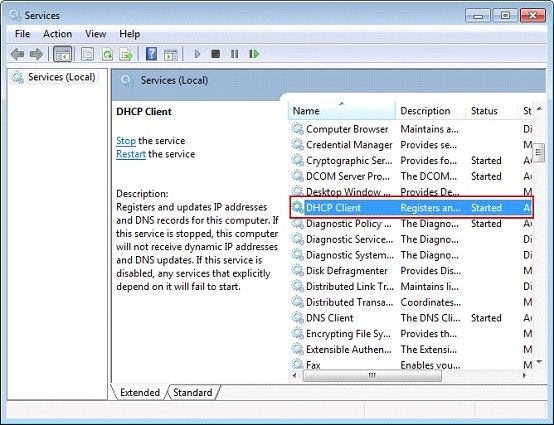
Figure 1‑2
5) In the "DHCP Client Properties" dialog box, check the value of "Startup type" is "Automatic" or not, and the status of "Service started" is "started" or not (Figure 1‑3).
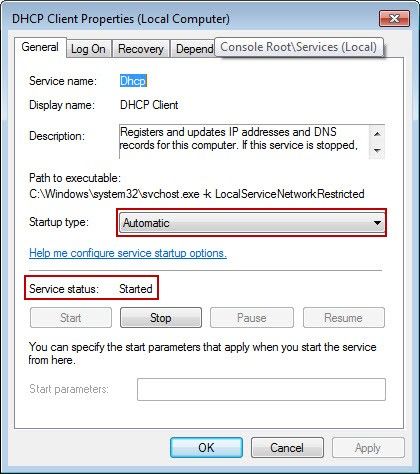
Figure 1‑3
6) Click the "Start" button, type "regedit" in the "Run" edit box, and then press enter.
7) In the popup "Registry Editor" window, fix position to:
\HKEY_LOCAL_MACHINE\SYSTEM\CurrentControlSet\Services\Tcpip\Parameters\Interfaces, there are a lot of branches below, expand one by one, find the value of "IPAddress" is a branch of "local IP address", then double-click "EnableDHCP" (Figure 1‑4).
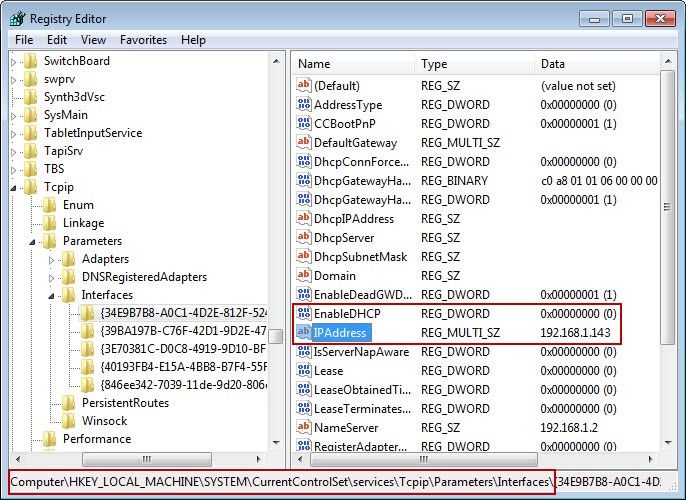
Figure 1‑4
8) It will pop up "Edit DWORD (32-bit) Value" dialog box, type the number "1" in the "Value data" edit box, and then click "Ok" button (Figure 1‑5).
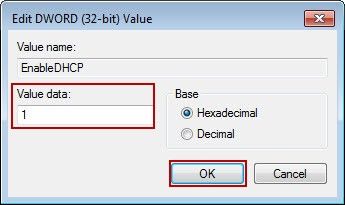
Figure 1‑5
9) Close the registry editor window.
10) Close the client PC.
11) In the CCBoot server, disable "super client".