25.2 Server Bios SATA Configuration
Press the "Delete" or "F2"key during the boot process to enter the "BIOS", and find the SATA Configuration, then change the interface from "IDE" mode to "AHCI" mode, press "F10" to save and exit.
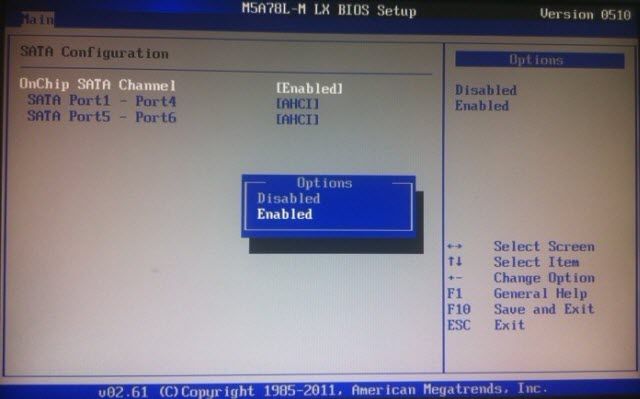
Note:
Due to the different BIOS version SATA interface to set the location and the specific expressions, it is recommended that access to the motherboard manufacturer's official website, as well as for instructions. Refer to the diagram.
Related links:
25.2 Server Bios SATA Configuration
25.4 Server Hard Disk Allocation
25.5 SuperCache method of installation
25.6 Server Network Optimization
25.7.1 Server read cache settings
25.7.2 Write-back disk SuperCache cache settings
25.8 Server’s Virtual Memory Management
25.9 The client's local cache settings
25.10 Clients Virtual Memory Management
25.11 System Restore Point Management
25.13 Client network optimization
25.14 System Patches Installation
25.15 Clear Windows 7 64bit Water Mark