Wiki Home 3rd Party DHCP and TFTP Use pfsense as 3rd party DHCP
Use pfsense as 3rd party DHCP
2018/01/24 20:21
Notice: This wiki is for the old version CCBoot. Please click HERE to access the new version wiki
1. Install pfsense on one of you computer or on a VMware. Once installed, configure it so you can access it from your LAN computer (Figure 1).
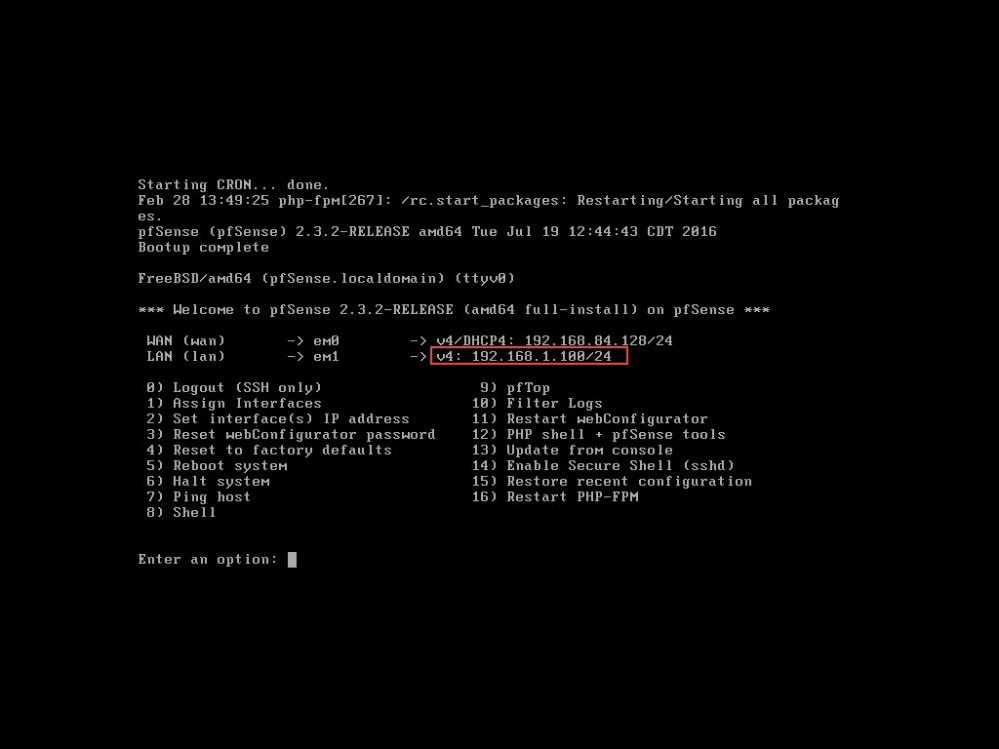
Figure 1
2. On your server computer, open a browser and enter the IP address for pfsense and press enter (Figure 2).
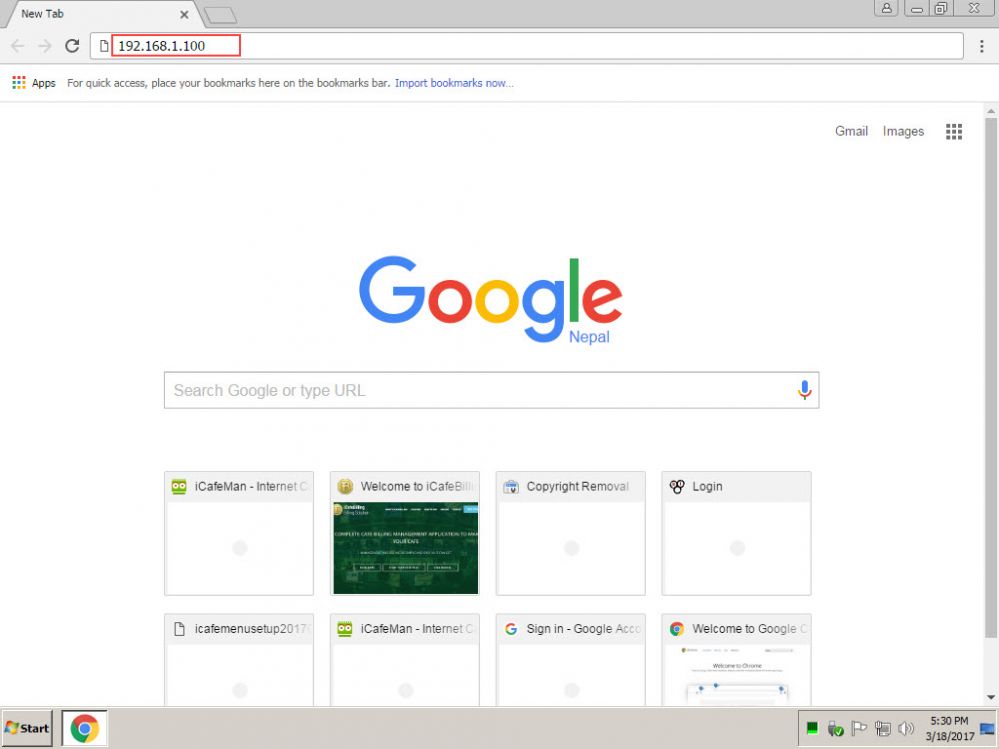
Figure 2
3. Once you get the pfsense web management interface, login to pfsense using your credentials (Figure 3)
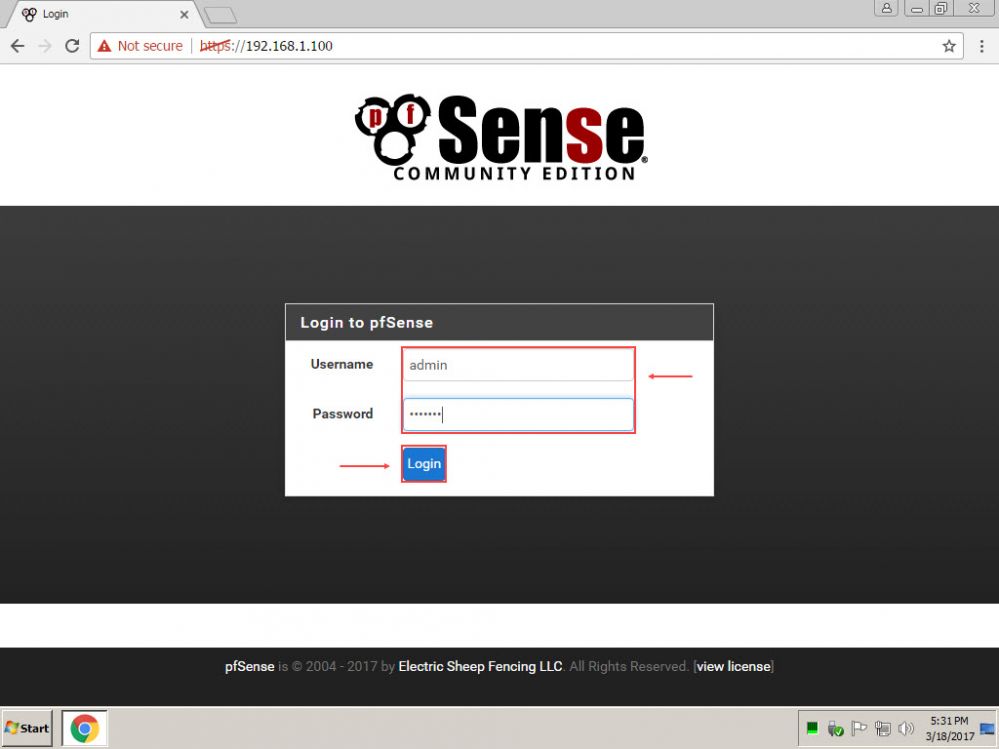
Figure 3
4. Click the "Services" dropdown and click it, choose "DHCP server" (Figure 4).
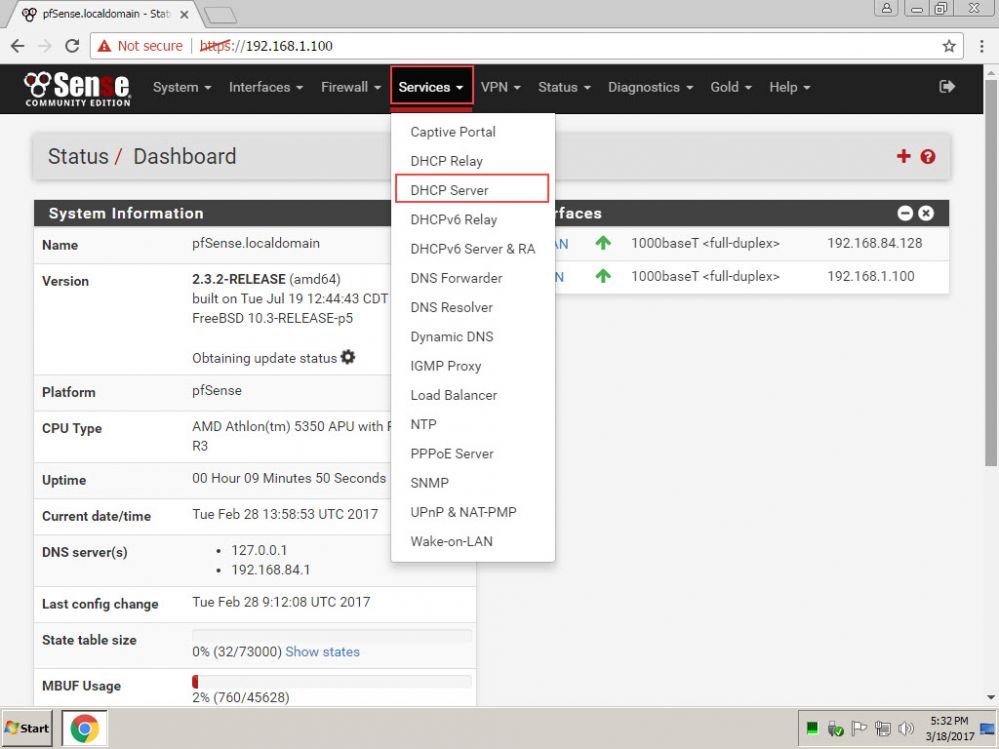
Figure 4
5. Now, set the DHCP range, DNS servers and the Gateway for your clients and then click "Save" button at the bottom (Figure 5).
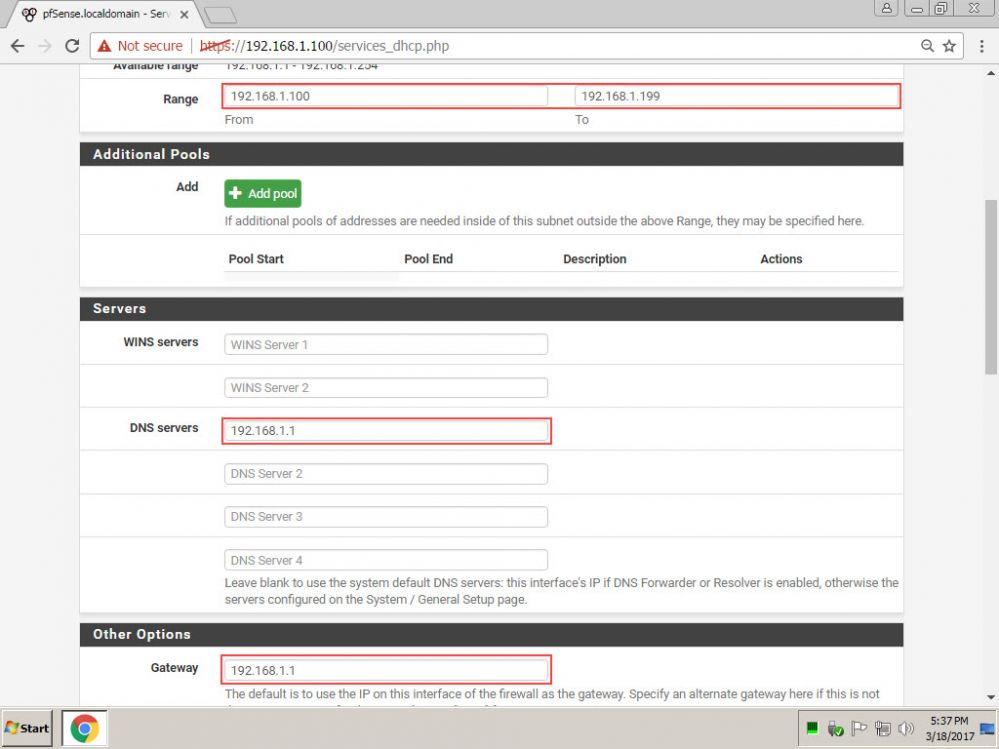
Figure 5
6. Go to CCBoot, open "Option" windows, then on "DHCP", click "Using 3rd Party DHCP" option then click "OK" button (Figure 6).
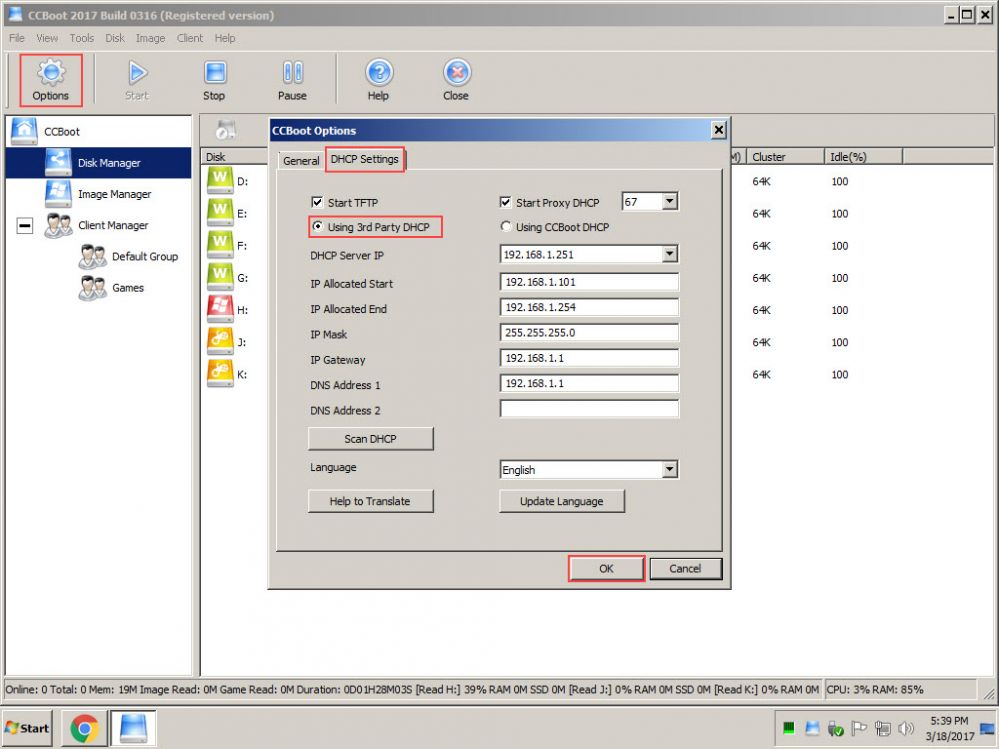
Figure 6
7. Now, boot your clients t,hey will take DHCP IP from pfsense and be listed in CCBoot "Client Manager" (Figure 7).
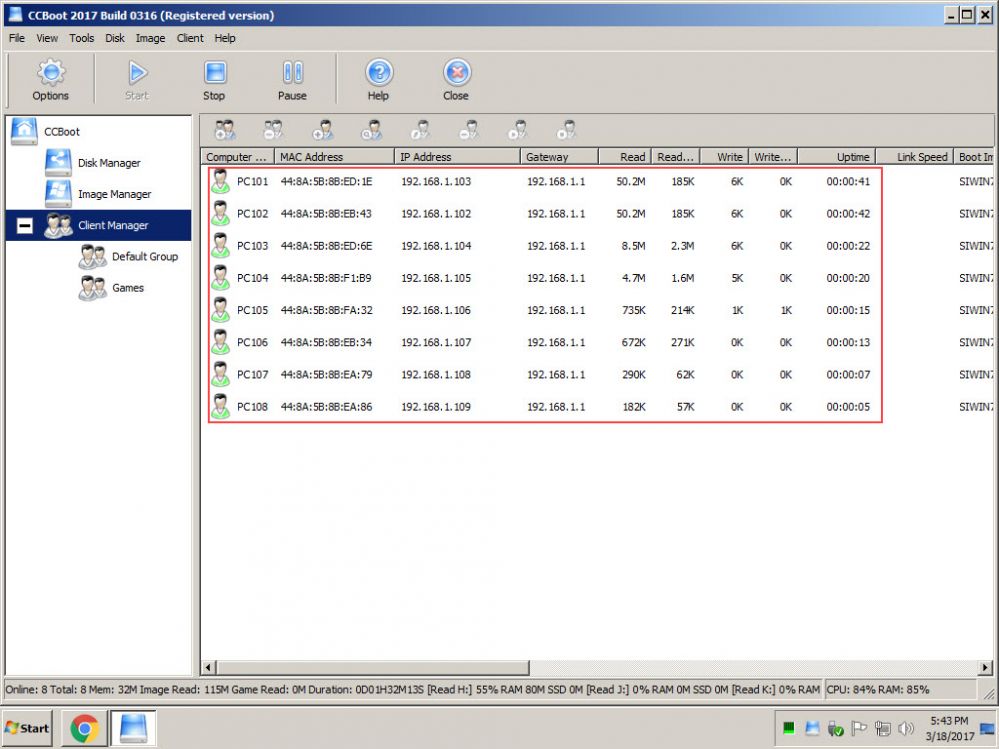
Figure 7
8. Check the assigned IP from pfsense in the DHCP leases (Figure 8).
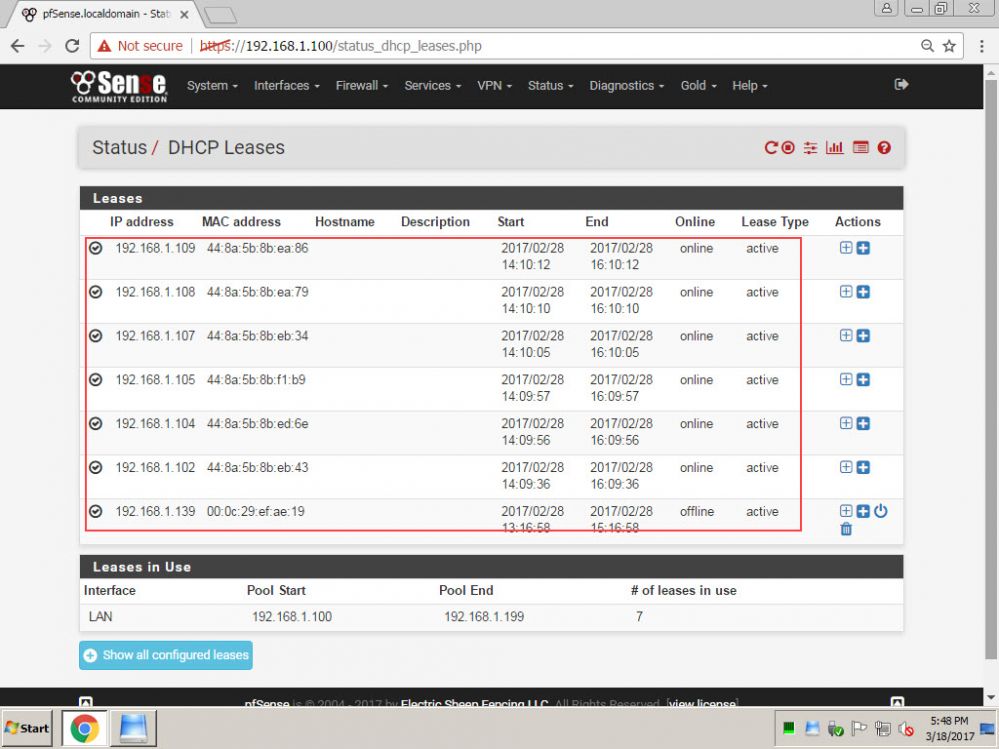
Figure 8
Note: If pfSense stops working after updating to new version CCBoot from previous version 3.0, then downgrade CCBoot to older version or use newer version of pfSense.
Related:
CCBoot with pfsense 3rd Party DHCP