The PXE (shot for Preboot eXecution Environment) environment makes it possible to boot on LAN. This is a good choice for network administrators, not only reduce their daily workload but also bring them enhanced disaster recovery solution.
Just imagine, if you need to implement some operations for all computers in the network, maybe hundreds of them in different locations, so terrible to do it one by one! Fortunately, the boot on LAN program will save you, just once operation will be OK. Because all computers boot from LAN load the same system image from the boot on LAN server.
Furthermore, every time boot on LAN, the client will get into a clean operating system. It's a very usefull feature especially when the client has been infected with viruses or crashed unexpectedly.
This is the process for boot on LAN solution:
Power on,
Load BIOS,
PXE stack built-in the NIC (Network Information Center),
Download NBP (Network Boot Program) from server to client's RAM by TFTP,
NBP's responsibility to perform the next step (a.k.a. 2nd stage boot).
Using CCBoot to Build Boot on LAN Server
Install Boot on LAN Server with CCBoot - An All-in-one Boot on LAN Software Download boot on LAN software - CCBoot server installation package from - http://www.ccboot.com/download.htm. Launch ccbootsetup.exe on the boot on LAN server and keep press the next button to the end.
Figure 1
CCBoot will use the following ports - 67 (DHCP), 69 (TFTP), 3260 (iSCSI), 1000 (Image Upload), 8001 (Service Control). You need to open these ports in the firewall of the boot on LAN server. Since CCBoot v2.1, you also need to open port 66. V2.1 uses port 66 as DHCP backup.
Note: Please shut down the other DHCP services on the LAN especially the DHCP service in the router.
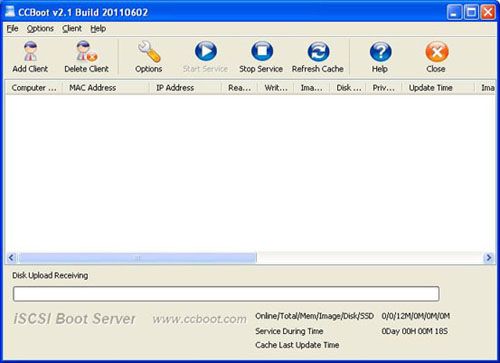
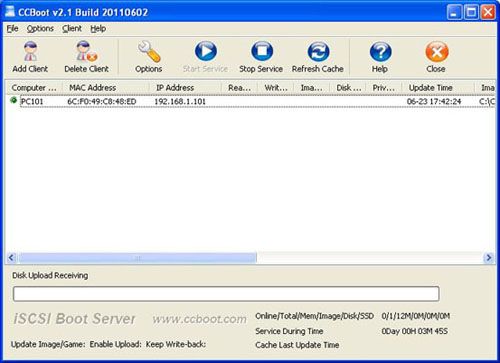
Launch CCBoot and you will get the main interface as bellow:
Figure 2
Initialize the Boot on LAN Server Demo Environment Server IP: 192.168.1.10 Gateway: 192.168.1.1 DNS Address: 192.168.1.1 IP Mask: 255.255.255.0 DHCP Range: 192.168.1.101-192.168.1.254
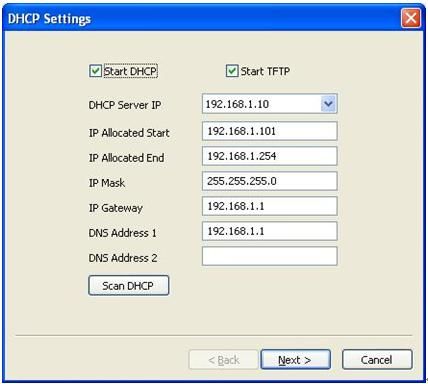
Launch the boot on LAN software - CCBoot, menu "Options" -> "Options Wizard" and configure step by step as bellow:
Figure 3
You need to select the correct local IP address as "DHCP Server IP". Press "Scan DHCP" to check if there are other DHCP services on the LAN. You need to stop other DHCP services on the LAN.
Figure 4
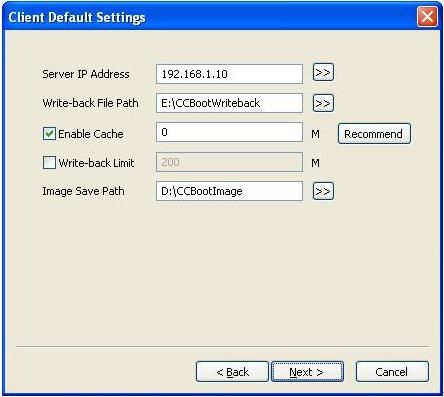
Set "Server IP Address". Normally, it’s the same as "DHCP Server IP". Set "Write-back File Path" and "Image Save Path" as you want.
"Write-back File Path" is used to store the write-back data of clients which have boot on LAN. You’d better use a big volume hard disk as "Write-back File Path". This disk should be formatted as NTFS and 64K bytes per cluster.
"Image Save Path" is used to store the boot images. This disk should be also formatted as NTFS and 64K bytes per cluster. You’d better use a fast speed hard disk as "Image Save Path". For example, use an SAS hard disk.
Figure 5
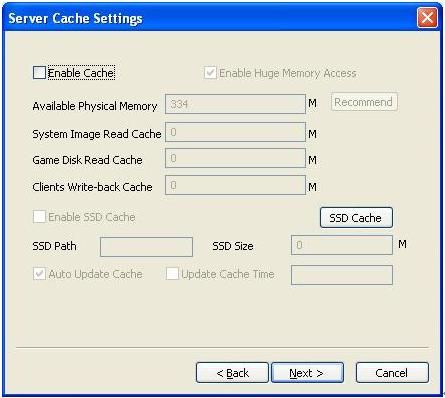
Keep default values in "Server Cache Settings".
Figure 6
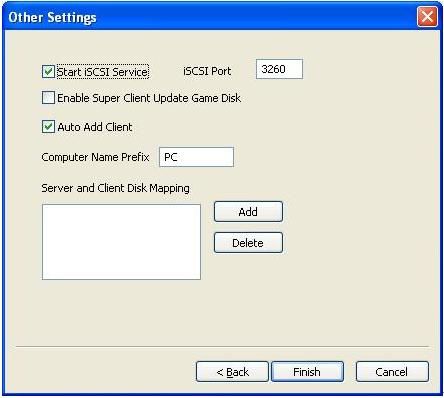
Keep default values in "Other Settings". Press the "Finish" button and confirm the popup dialog box.
Create Image to Boot Windows XP on LAN To boot Windows XP on LAN with the boot on LAN software - CCBoot, we first of all need to create a system image and here're the steps -
Choose one client PC as master PC used to create image for boot on LAN. Attach a hard disk on the PC.
Delete all partitions first. Allocate a small MBR partition about 40G size and leave the rest unallocated. Format the 40G partition with NTFS. Install Windows XP and the latest SP into this partition.
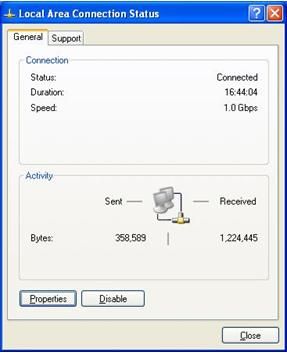
After complete Windows installation, open the local area connection network properties and configure as bellow:
Figure 7
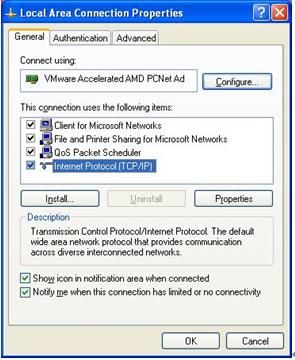
Click "Properties".
Figure 8
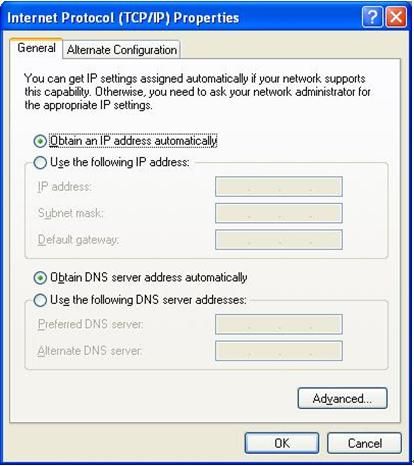
Select "Internet Protocol (TCP/IP)" and click "Properties".
Figure 9
Select "Obtain an IP address automatically" and "Obtain DNS server address automatically", then click "OK" to save.
On the CCBoot boot on LAN server, you will find a client in the client list (Figure 10) that was added by CCBoot automatically when the client PC got IP address from the CCBoot DHCP service.
Figure 10
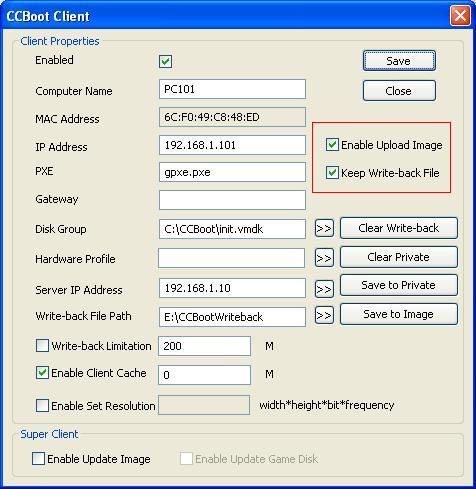
Double click the client to edit and check both "Enable Upload Image" and "Keep Write-back File" (Figure 11), when press "save" button it will ask you "Are you sure to delete write-back file?" Just press "No".
Figure 11
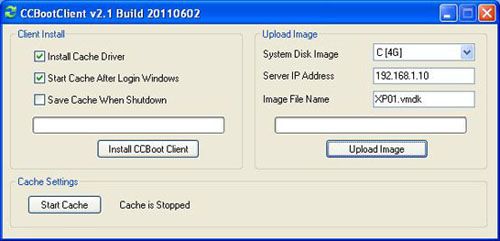
Download CCBoot client installation package from: http://www.ccboot.com/download.htm. Launch ccbootsetupclient.exe and keep press the next button to the end. Then launch CCBoot client and you will see the main interface as bellow (Figure 12).
Figure 12
Press the "Install CCBoot Client" button. After finished, it will require reboot system. Reboot the client PC.
After reboot, launch CCBootClient again, input the correct "Server IP address", it should be the IP address of the PC on which CCBoot server has been located. Input the image file name as you want in the "Image File Name". Press the "Upload Image" button to upload the image to the CCBoot server. Then CCBoot will create an image in the server "Image Save Path".
Note: CCBoot supports two types image file format. It supports VMDK if you are using Windows 2003 as CCBoot server system. It will support both VMDK and VHD if you are using Windows 7 or Windows 2008. As you can see in Figure 12, the file format depends on what you have set for "Image File Name". For example, "XP01.vmdk" and "XP01.vhd".
Boot Windows XP on LAN
On CCBoot boot on LAN server, double click PC101 (Figure 10) to open the master PC’s properties dialog box, uncheck "Enable Upload Image" and "Keep Write-back File".
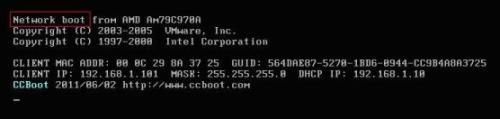
Remove the HDD from the master PC, set it firstly boot from LAN (or network, PXE rom, or some similar settings) in BIOS settings so that it will start network boot to boot Windows XP on LAN.(Figure 13).
Figure 13
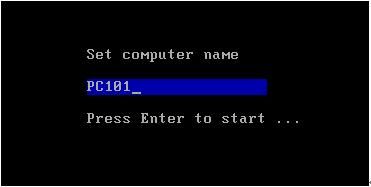
The first time boot Windows XP on LAN for the master PC, you can modify its computer name (Figure 14).
Figure 14
Set the computer name as you wish then press enter key to boot it (Figure 15).
Figure 15
On CCBoot server, "Options" -> "Settings" -> "Default Client Settings" -> "Disk Group" -> press the ">>" button, select "XP01.vmdk" as the default boot image in "System Image Selection" section.
Do the same as Step 2 and Step 3 for other client PCs with the same specifications as the master PC to boot Windows XP on LAN for them.