Wiki Home Quick Start Create Boot Image
Create Boot Image
2017/11/09 12:28
1. Preparing Client
1) Choose one client PC as master PC used for uploading boot image.
2) Attach a hard disk on the PC.
3) Delete all partitions firstly. Then allocate a small MBR partition about 40G size and leave the rest unallocated. Format the 40G partition with NTFS.
Note: If you want to use Windows 7 or Windows 8 as client OS, when installing OS, you need to connect the boot disk to the SATA 0 interface of the mother board. If you are not sure which is the SATA 0 interface, you can remove other hard disks on the client, just leave one HDD for installing OS. The reason is that, on Windows 7 and Windows 8, the boot data will always be written to the hard disk which is connected to the SATA0 interface. If the HDD on the SATA 0 interface is not the boot disk, the client will be failed to boot from that image. Because CCBoot only uploads the boot disk data.
4) Install Windows XP or Windows 7 on this partition. Install only NIC driver, main board chips driver and other low level drivers on this master PC.
5) Install the latest patches of Windows even the service patches are installed. (DO NOT skip this step)
6) Open the local area connection network properties and configure as bellow (Figure 1-1).

Figure 1-1
Click "Properties". Please uninstall "QoS Packet Scheduler" (Figure 1-2).
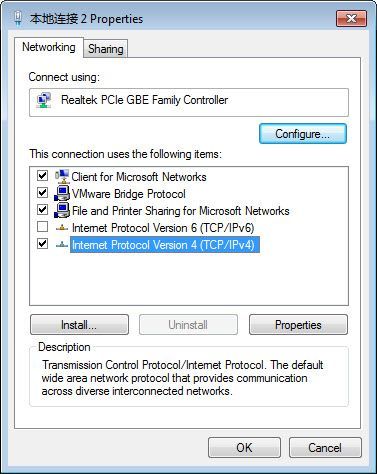
Figure 1-2
Select "Internet Protocol (TCP/IP)" and click "Properties" (Figure 1-3).
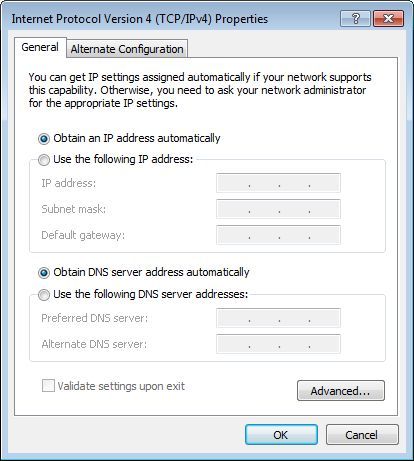
Figure 1-3
Select "Obtain an IP address automatically" and "Obtain DNS server address automatically", then click "OK" to save.
Note: After setting up client you need to install application and game pre requisites, you can download them from this link.
2. Client Application Installation
Please refer to Client Optimization before proceeding with Client installation.
Image upload has also be modified to make it simpler. Notice in the “General” tab in the “Option” dialog box, there is no “Image upload”path. This is because in the version since 20160401, the default image upload path is the “Image” disk and if you have not set “Image” disk then it will be defaulted to “C:\”.
1) Copy and Run the CCBoot Setup Package on the client PC whose image you want to upload, click “Next” (see ).
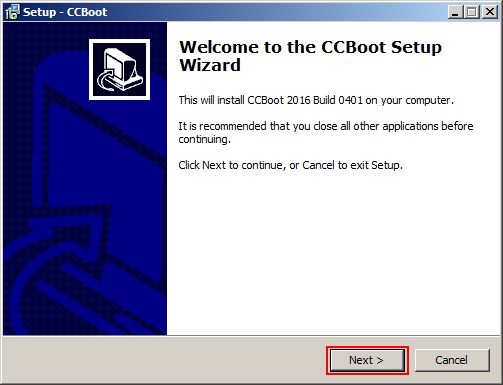
Figure 2‑1
2) Choose “CCBoot Client Application” on the second screen and proceed with the installation.
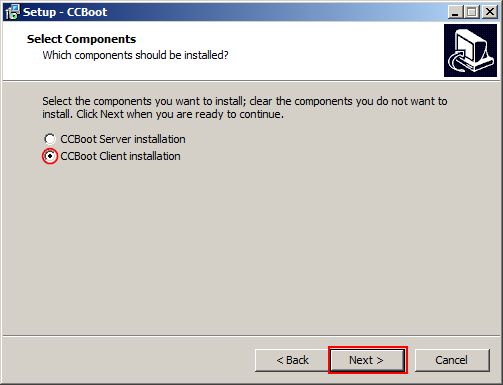
Figure 2‑2
3) On the last screen of setup, tick the “Launch CCBoot Client” check box and click “Finish” button (as).
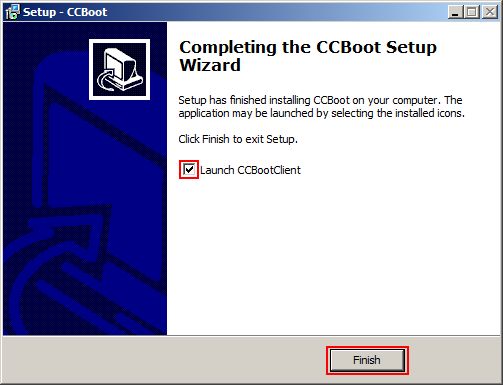
Figure 2‑3
4) CCBoot Client application will open and will prompt you to start installation.
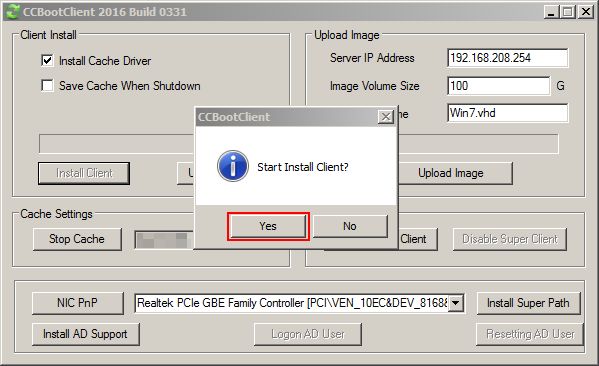
Figure 2‑4
5) Once the installation is done, “NIC Drivers”dialog box will open, you can tick “Select All” check box to install all PNP drivers. click “OK”, it will install PNP drivers if any are selected (see )
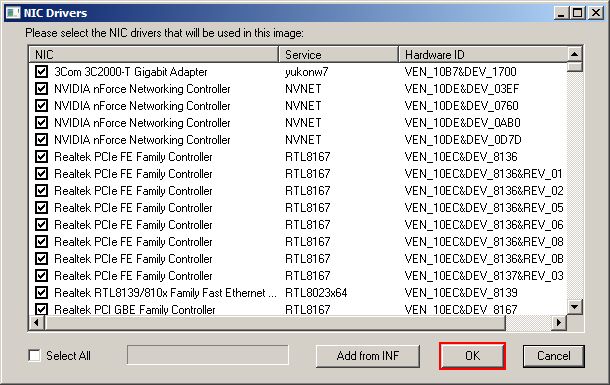
Figure 2‑5
6) After the PNP drivers are installed, click “OK”to finish “CCBoot Client” installation (see ).
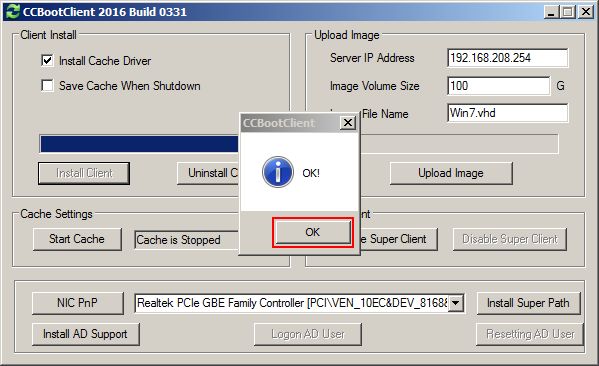
Figure 2‑6
3 Upload Client Image
Windows 10 image upload has been optimized in the new version. The image upload process is same as before.
1) Set the Server IP, image file size and name of the image then click “Upload image” (as ).
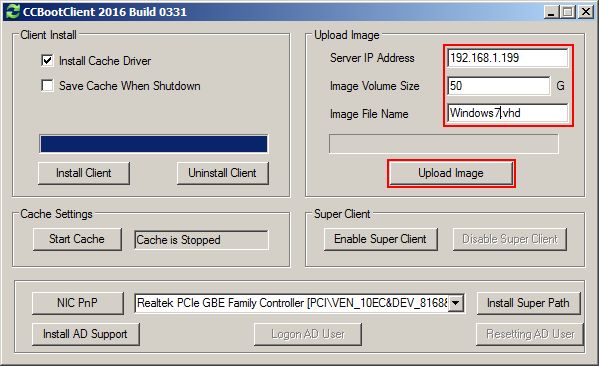
Figure 2‑7
2) In the server the client will create the image in the “Image” disk or in C:\ if “Image” disk is not assigned.
Note: CCBoot supports two types of image file format. It supports VHDX, VMDK and VHD image file format. The image file format depends on the file extension you have set for the "Image File Name". For example, if you set"XP01.vmdk" as the "Image File Name", it means you will use"VMDK" image file format, while if you set "XP01.vhd", it means you will use "VHD" image file format. We recommend you to use VHD format.
Note: If the uploaded image doesnot boot good or has long boot time then try our super image instead.
Related:
Create Client Image with Dual NICs
Standard Method to Create Boot Image for Legacy PCs