Wiki Home Quick Start Update CCBoot older version to new
Update CCBoot older version to new
2020/07/29 19:52
The installation of new version over older one is straight forward. Just need to keep few things in check. Here is an example of updating from version 20160201.
Here are the settings that is in version 20160201 (see Figure 1‑1).
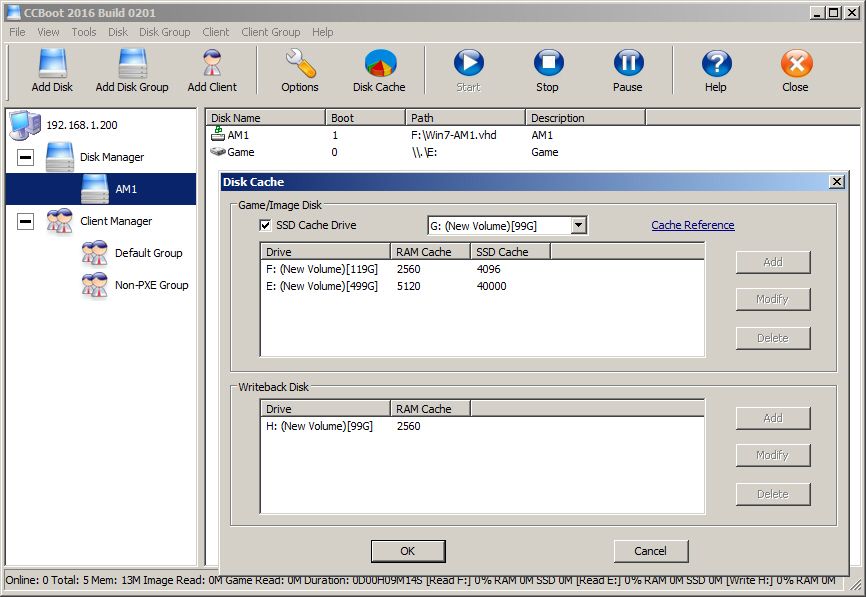
Figure 1‑1
1. Installation.
Download the latest version of CCBoot installation package from our website.
1) Execute the installation package, you will be asked if you want to uninstall old version or not (see Figure 1‑2).
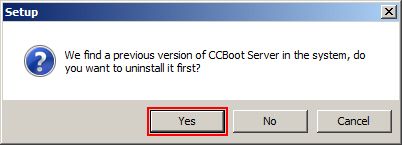
Figure 1‑2
1) Click “Yes”. The program will uninstall the old version in the background. Once done, the setup wizard will open (see Figure 1‑3).
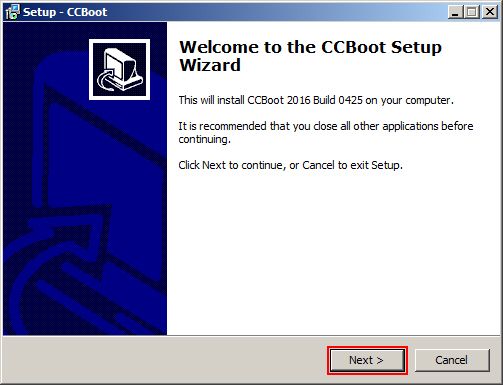
Figure 1‑3
2) Continue with the installation till you are prompt that the folder exists. Click “Yes” button to continue (see Figure 1‑4).
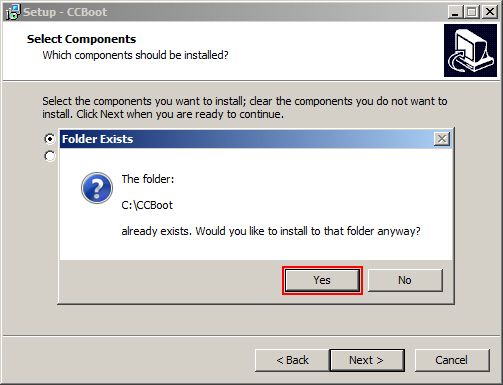
Figure 1‑4
3) Continue with the installation till you reach the last dialog, tick the “Launch CCBoot” checkbox and click “Finish” button (see Figure 1‑5).
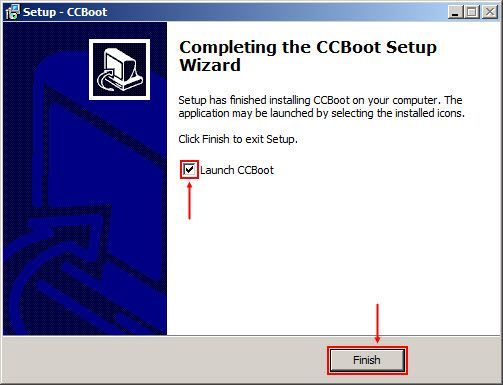
Figure 1‑5
2. Adding images and settings up disks.
1) Options and DHCP will be retained from old version and does not need to be changed. But, disks need to be configured.Click on the “Disk Manager” from the sidebar, all the disk are in unused state(see Figure 1‑6).
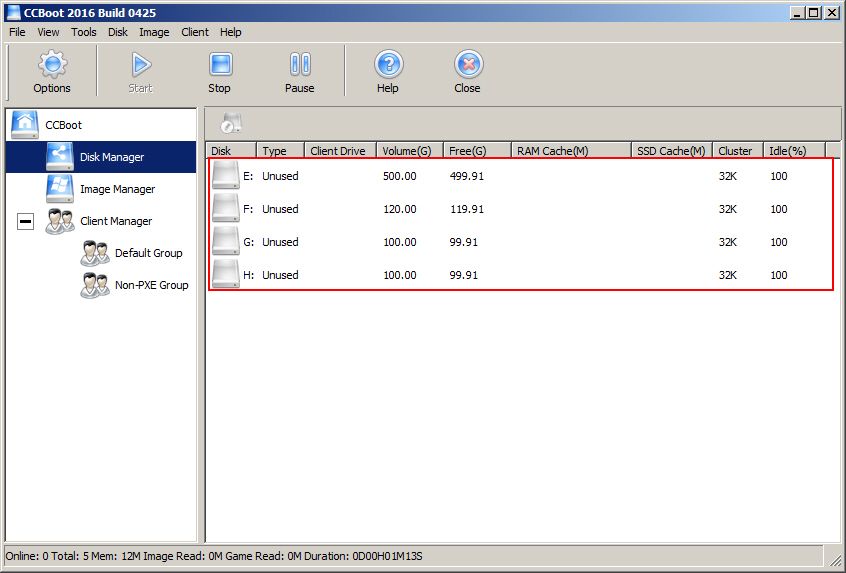
Figure 1‑6
3) Double click on the disk to open its settings, specify the ‘Disk type’, ‘RAM cache’ and click "OK" button. (Refer to Disk Management and Server Cache Settings) Setup image, writeback and game disk.
After complete setup (Figure 1‑7) .
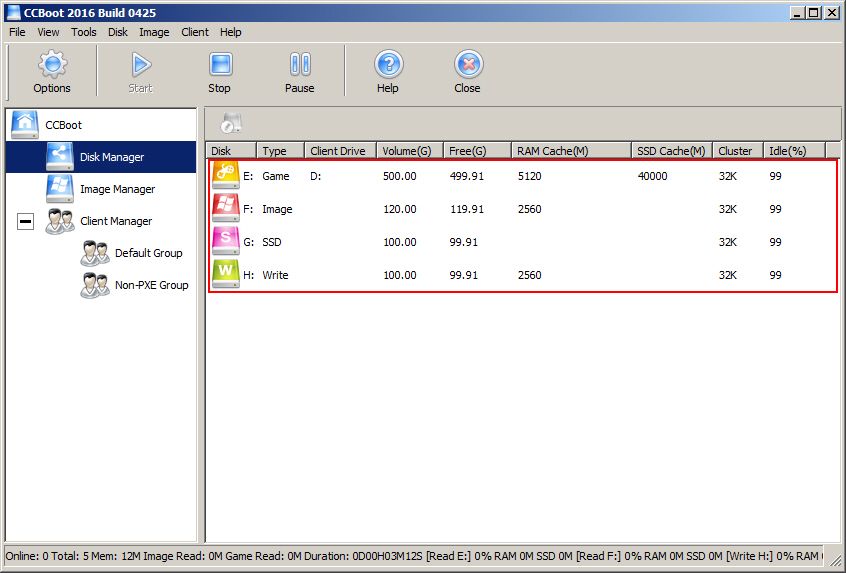
Figure 1-7
4) Now, let’s setup image file for clients to boot from. Click on the “Image Manager”, the click “Add image” icon, it will open “Image” dialog, type the image name and click the ‘Browse’ button (as Figure 1‑8).
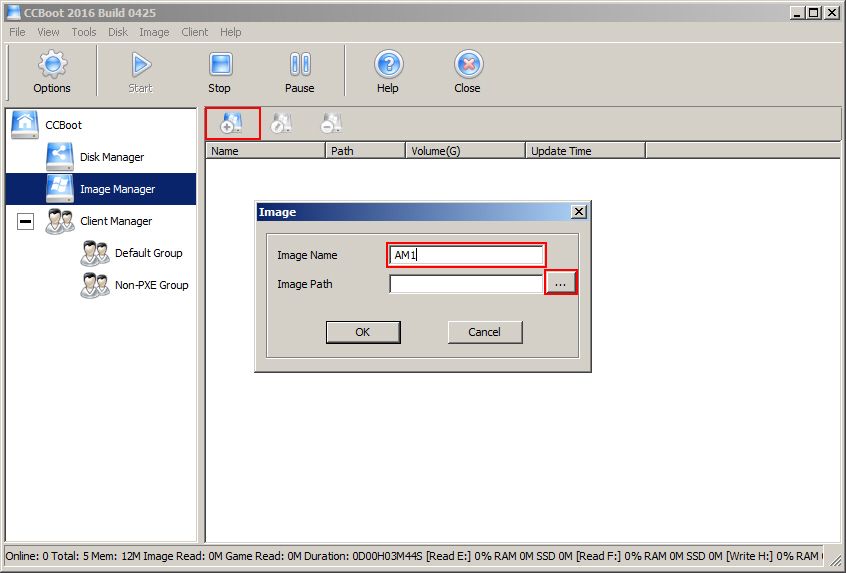
Figure 1‑8
5) Once image is chosen, click the “OK” button to add the image to CCBoot (see Figure 1‑9).
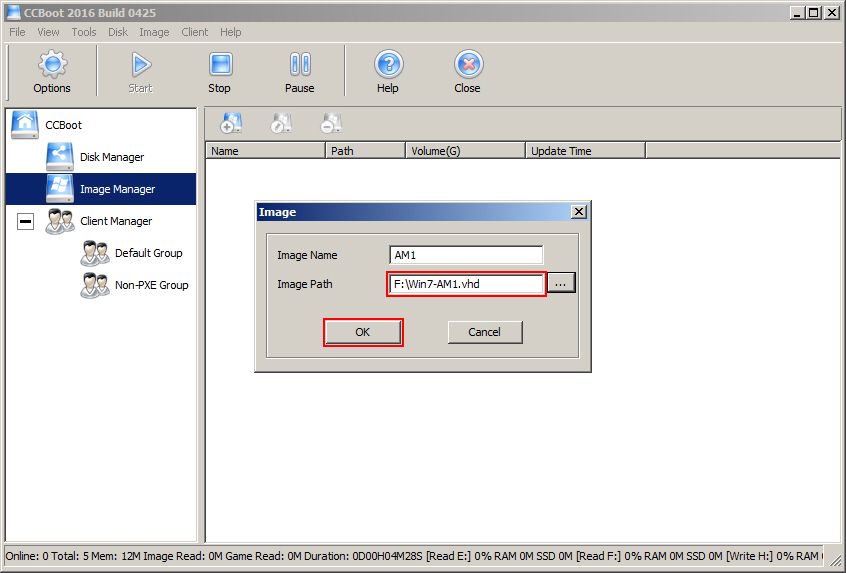
Figure 1‑9
3. Client Settings.
One the client we have to set two things, Image and Cache.
1) Select all the client and open the “Client Details” dialog box, there click on image drop down menu and select the previously created image (see Figure 1‑10).
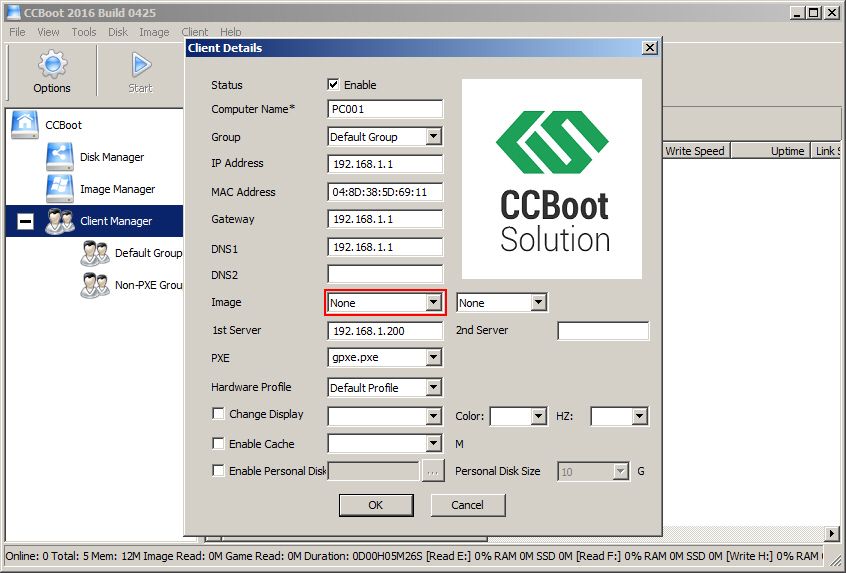
Figure 1‑10
2) Once image is selected, check the enable Cache checkbox and set client RAM cache, once done click “OK” button to save the settings (see Figure 1‑11).
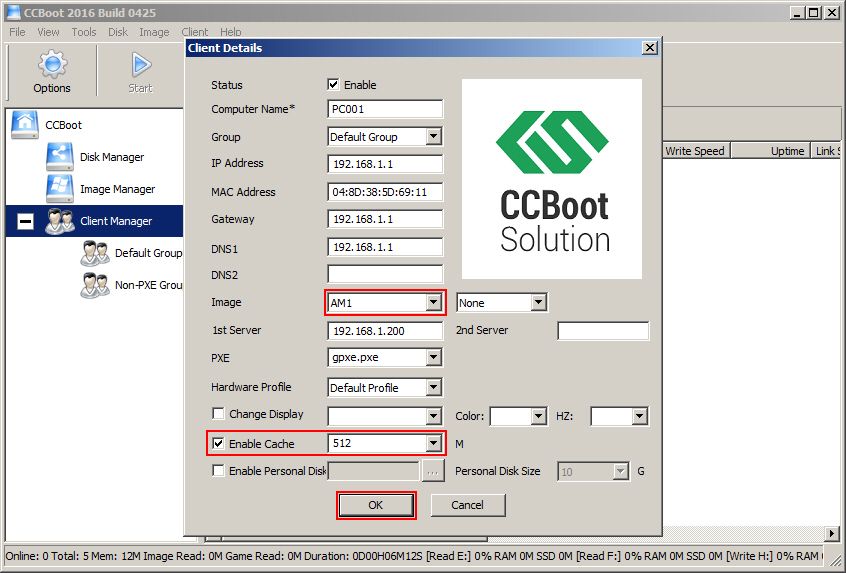
Figure 1‑11
3) Congratulations, you have updated to latest version. We are always improving our software so stay tuned for future releases.
Related:
Use Net Limiter on CCBoot client
Fix Windows 10 activation issue on CCBoot client
Prevent from spreading ransomware virus