Wiki Home Troubleshoots Assign game disk to clients based on user group
Assign game disk to clients based on user group
2017/01/26 01:54
In version 20170120 we have added a function to allow one or more game disk to be assigned to client based on the user groups they belong to, providing you freedom of choice to which group get which game disk or no game disk at all.
Before you proceed, you need to have created user groups and assigned the clients to respective groups.
1. Now that you have your user groups. Open the "Game disk" properties by double clicking the game disk (Figure 1).
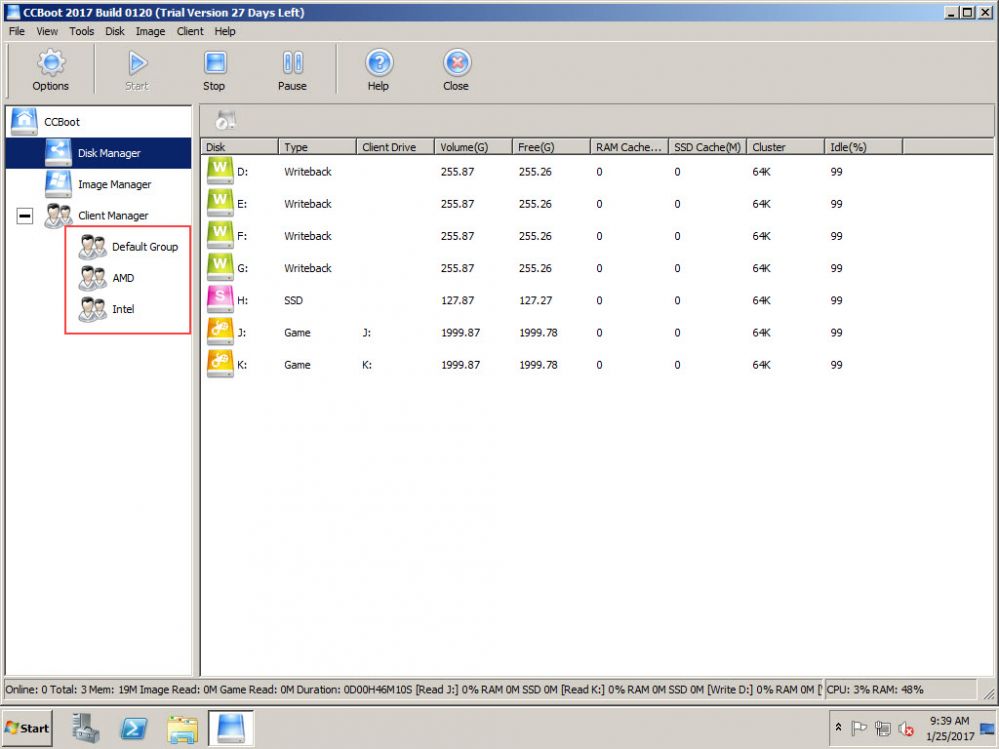
Figure 1
2. By default the game disk will will be assigned to All user groups, meaning the game disk is available for all user groups and clients (Figure 2)
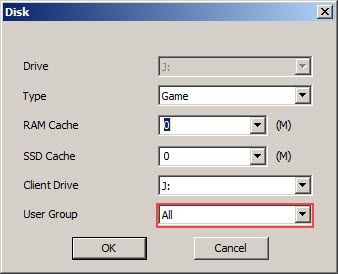
Figure 2
3. Click the User Group drop down, and choose the User Group you want to assign the Game Disk to (Figure 3)
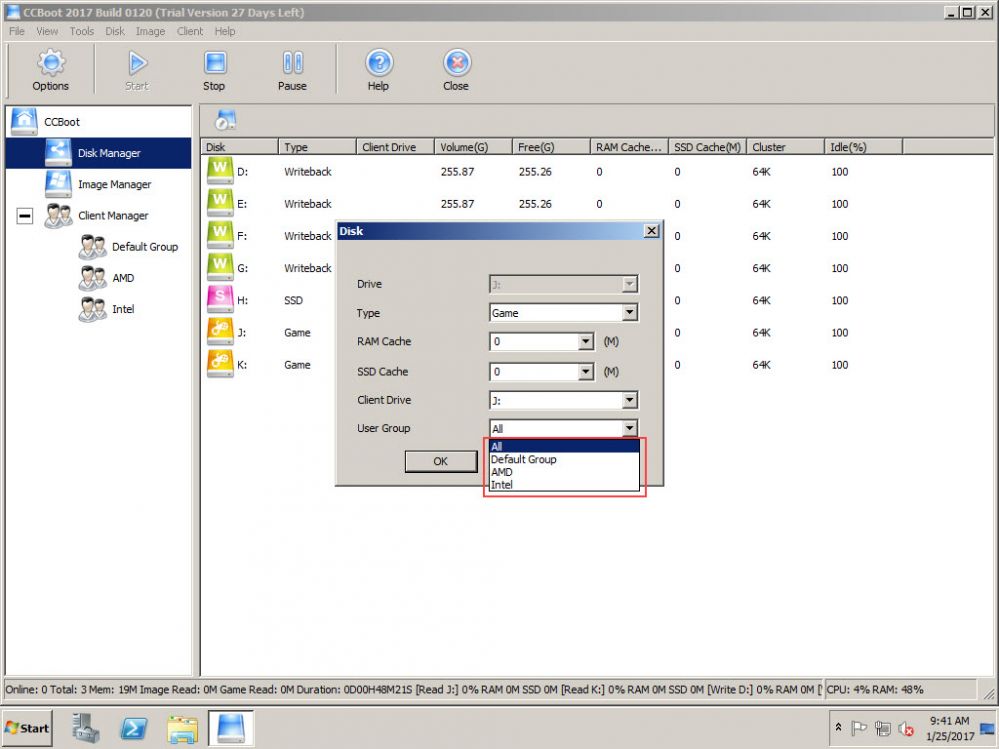
Figure 3
4. Once the group is choose, click OK to save the changes (Figure 4).
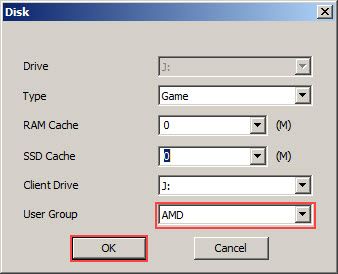
Figure 4
5. If you have game disk that you want to be assigned to another user group then repeat 2 - 4 steps and choose the user group (Figure 4).
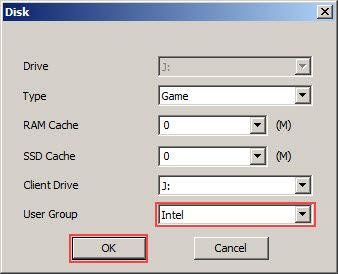
Figure 5
6. In doing this, now the game disk will only appear on the clients that are in user groups to which the game disk is assigned to.
Notes: If you want game disk to be available for all clients(user groups) then leave the default "All" selected in User Group option.
If you do not want one of the game disk to be assigned to some users, then create a User group for them and assign the image to default group in which the rest of the clients are in.
This is useful, when you have mixed PC which variable gaming capabilities or no gaming capabilities. Assign game disk to gaming PCs and no game disk to non gaming PC, etc.
Related:
Update Game Disk on the Server
Update Boot Image/Game Disk using Super Client