Wiki Home Disk Manager Disk Management
Disk Management
2016/12/09 21:21
1) Now, we will setup disk. Since version 20160401 “Disk Group” is removed for “Disk Manager” and “Image Manager” to make disk and image management easier.
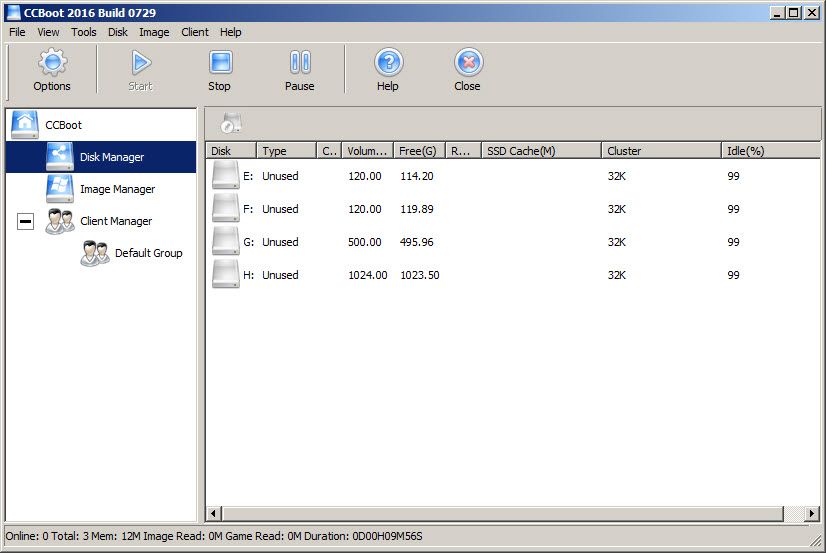
Figure 1
2) Setting up the disk for Image, Write back, Game and SSD has never been easier. Right click on one of the disk and choose “Edit Disk”.
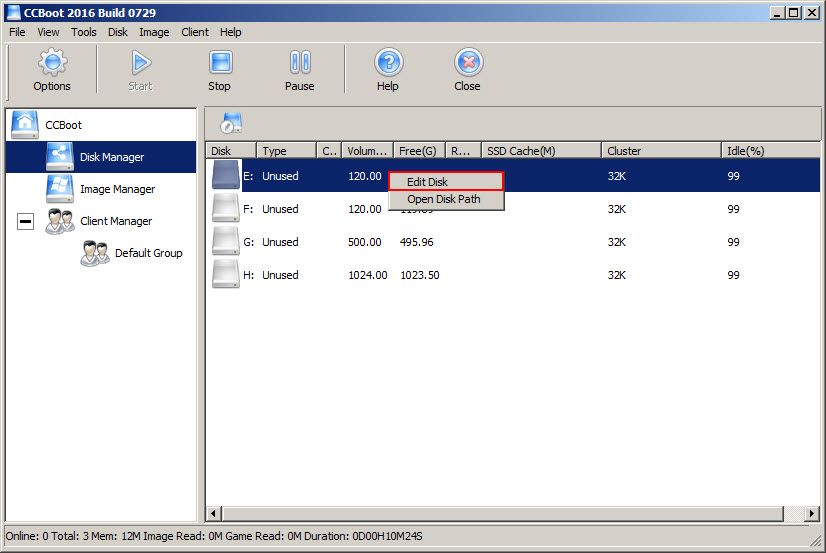
Figure 2
3) It will open the “Disk” dialog box. Now, we can specify, what type of disk this will be. There are four options: Unused, Game, Image, Write back, and SSD. Here, we choose D: as Write back disk.
Note, when you change the disk type, the corresponding disk’s name will be changed to reflect the disk type.

Figure 3
4) Now the disk is set as Writeback disk. Now let’s setup disk cache. One the RAM Cache field, enter desired RAM cache value for the disk. Press “OK” to apply the settings. Refer "Server Cache Settings" for cache amount.
Note, only Game disk have SSD Cache option available.
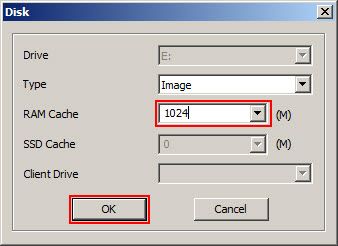
Figure 1‑4
5) You can see the settings in the “Disk Manager” (as Figure 1-5).
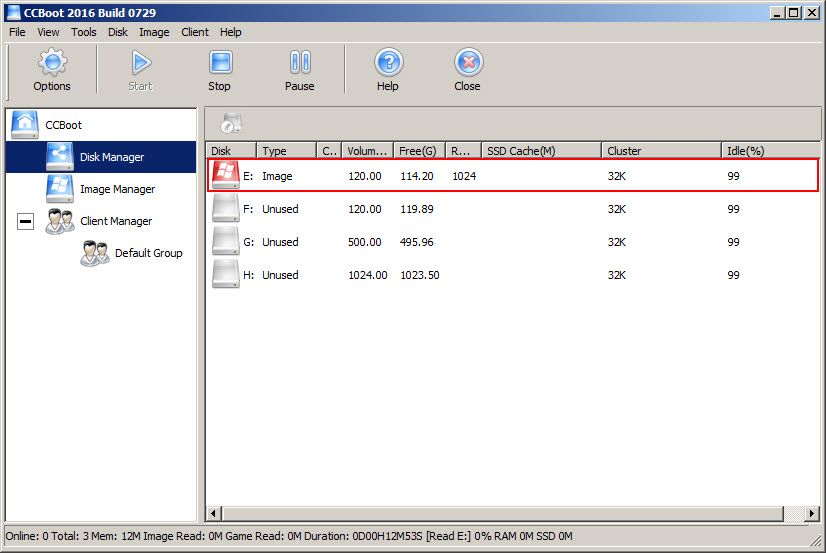
Figure 1‑5
6) Similarly, set Game disk, Image disk and its cache (see Figure 1-6).
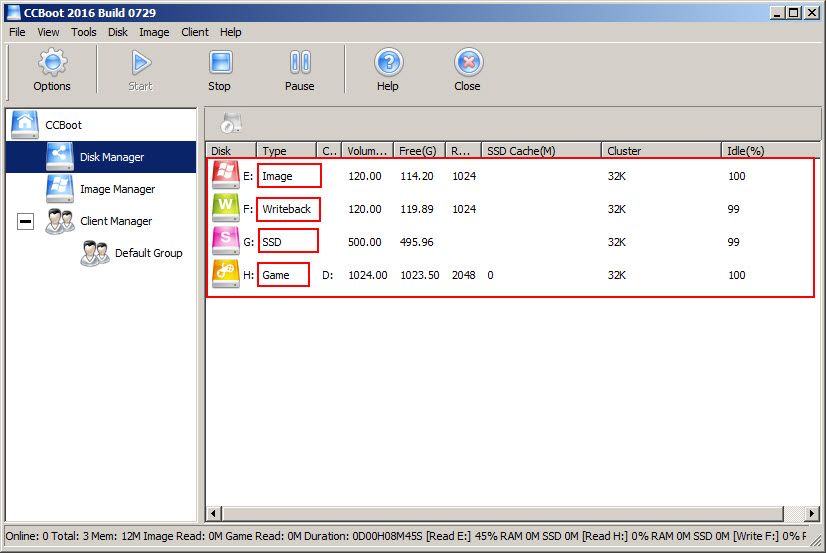
Figure 1‑6
7) If you have SSD you can set it, like other disk. For SSD, there is no need for RAM Cache so it is not available (see Figure 1-7)
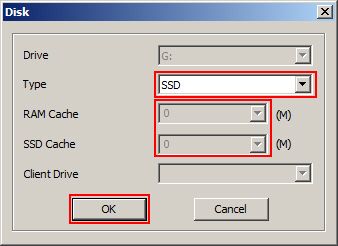
Figure 1‑7
Note: If you forget to set either writeback disk and/or image disk then by default it will use C: as image disk during upload and writeback disk for clients.