Wiki Home Performance Optimization Steps to disable Windows 10 applications running in the background
Steps to disable Windows 10 applications running in the background
2018/06/10 22:55
In this steps we will show you how to optimize the Windows 10 client to avoid the unexpected Write issue after 20min in the first boot of Windows 10 even without doing nothing. This steps could help you to save Write-back disk space and improves client performance as well.Here are the Steps below:
1. Choose any of your Windows 10 client PC and enable the Superclient.
2. Boot the client and go to "Computer Management Task Scheduler" and click the "Task Scheduler Library".
3. Select all the task that are set on scheduled to run and then click disable (Figure 1-1)
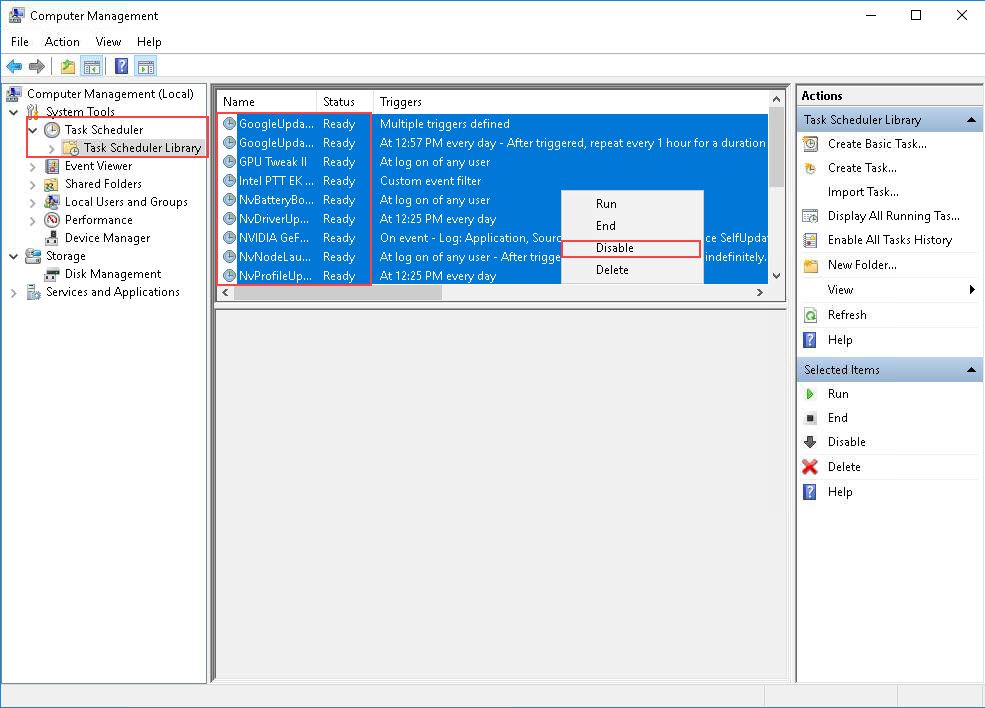
Figure 1-1
4. Next is go to "Start Menu" button and click the "Settings" and it will open the Settings window (Figure 1-2)
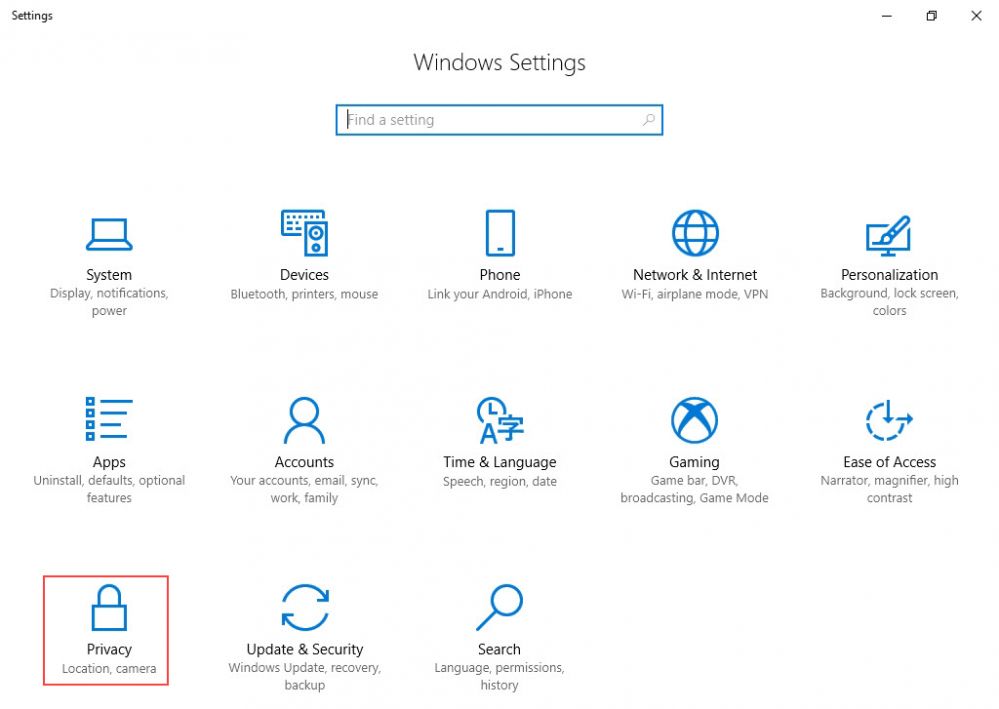
Figure 1-2
5. After that click the "Privacy", and scroll down and then click the "Background apps" (Figure 1-3)
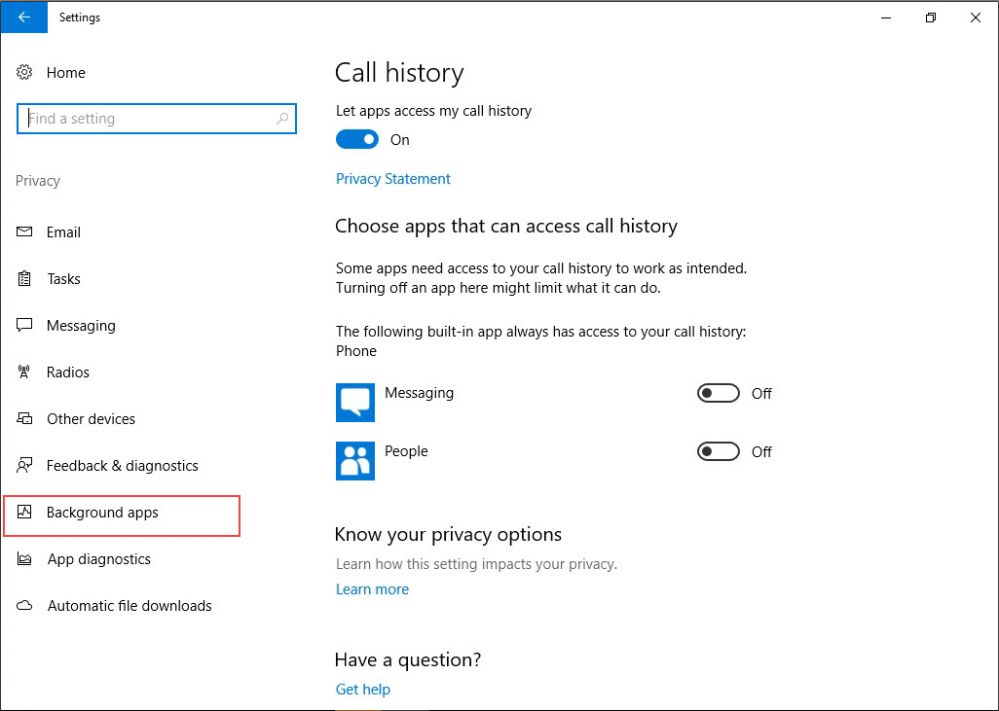
Figure 1-3
6. In the background window you will see all the apps running in the background of your Windows 10.
7. Click the button (Let the apps run in the background) to turn off all the apps running in the background (Figure 1-4)
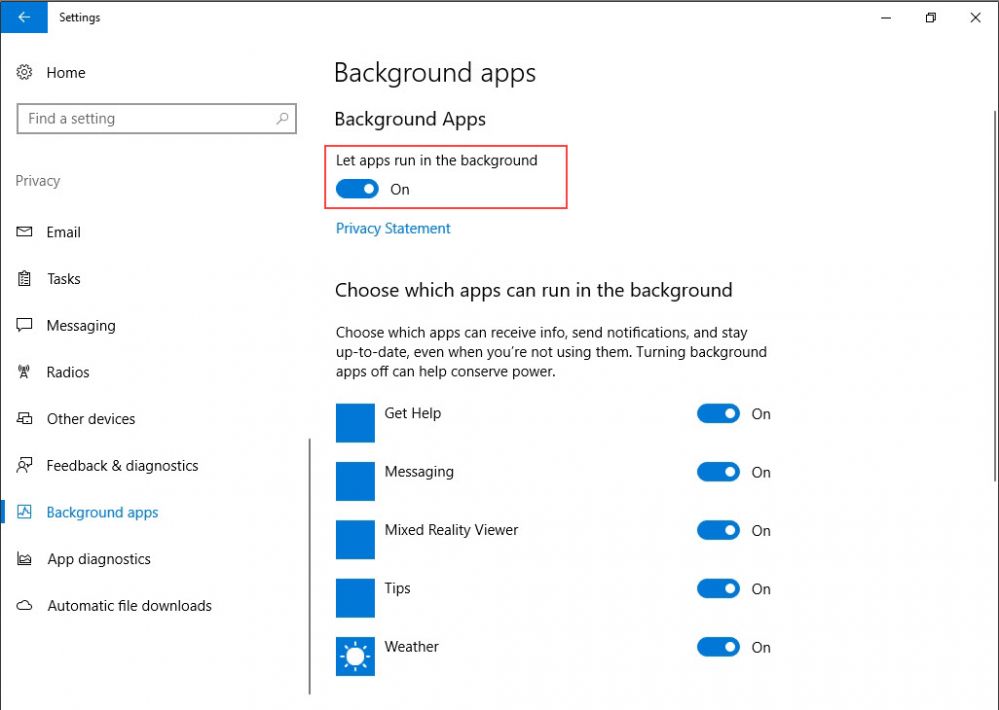
Figure 1-4
8. Shutdown the client and disable Superclient to save
Note: After you did the steps above you would notice improvement on boot time and avoid unexpected apps running in the background.
Related:
Improving CCBoot Server Performance